
A loft bed fit for a king
In an effort to make the best use of my fairly small master bedroom, I designed and built a king size loft bed. It was a few months in the making and took far longer to build and puzzle together than I expected, but I’m glad I did it. The original need was to accommodate two dog crates underneath, and while I was at it I wanted to make space for a small couch to allow for a few more people to watch a movie if the opportunity arises. Maybe some day there will be space for media viewing in the living room, but right now it is full of plants!
Inspiration
The gears of this project started turning last June when we welcomed Ruffie home, and we immediately had two problems: making space in the bedroom for two dog beds or crates, and keeping the dogs off the bed. Previously Remi slept on the bed with us at night, but there was definitely not going to be space for both dogs, as Ruffie is a svelte 80 pounds.
I threw together a quick frame using 2x4s screwed together to raise up our existing metal queen bed frame about 2 feet. Ruffie was still able to jump up into the bed, but he learned to stay off. That worked out well enough that I didn’t feel an urgent need to come up with the permanent solution, and we kept it as it was for a few months. Sadly Remi passed away in August, and it took me some months more to regain the will to invest energy in home improvements.
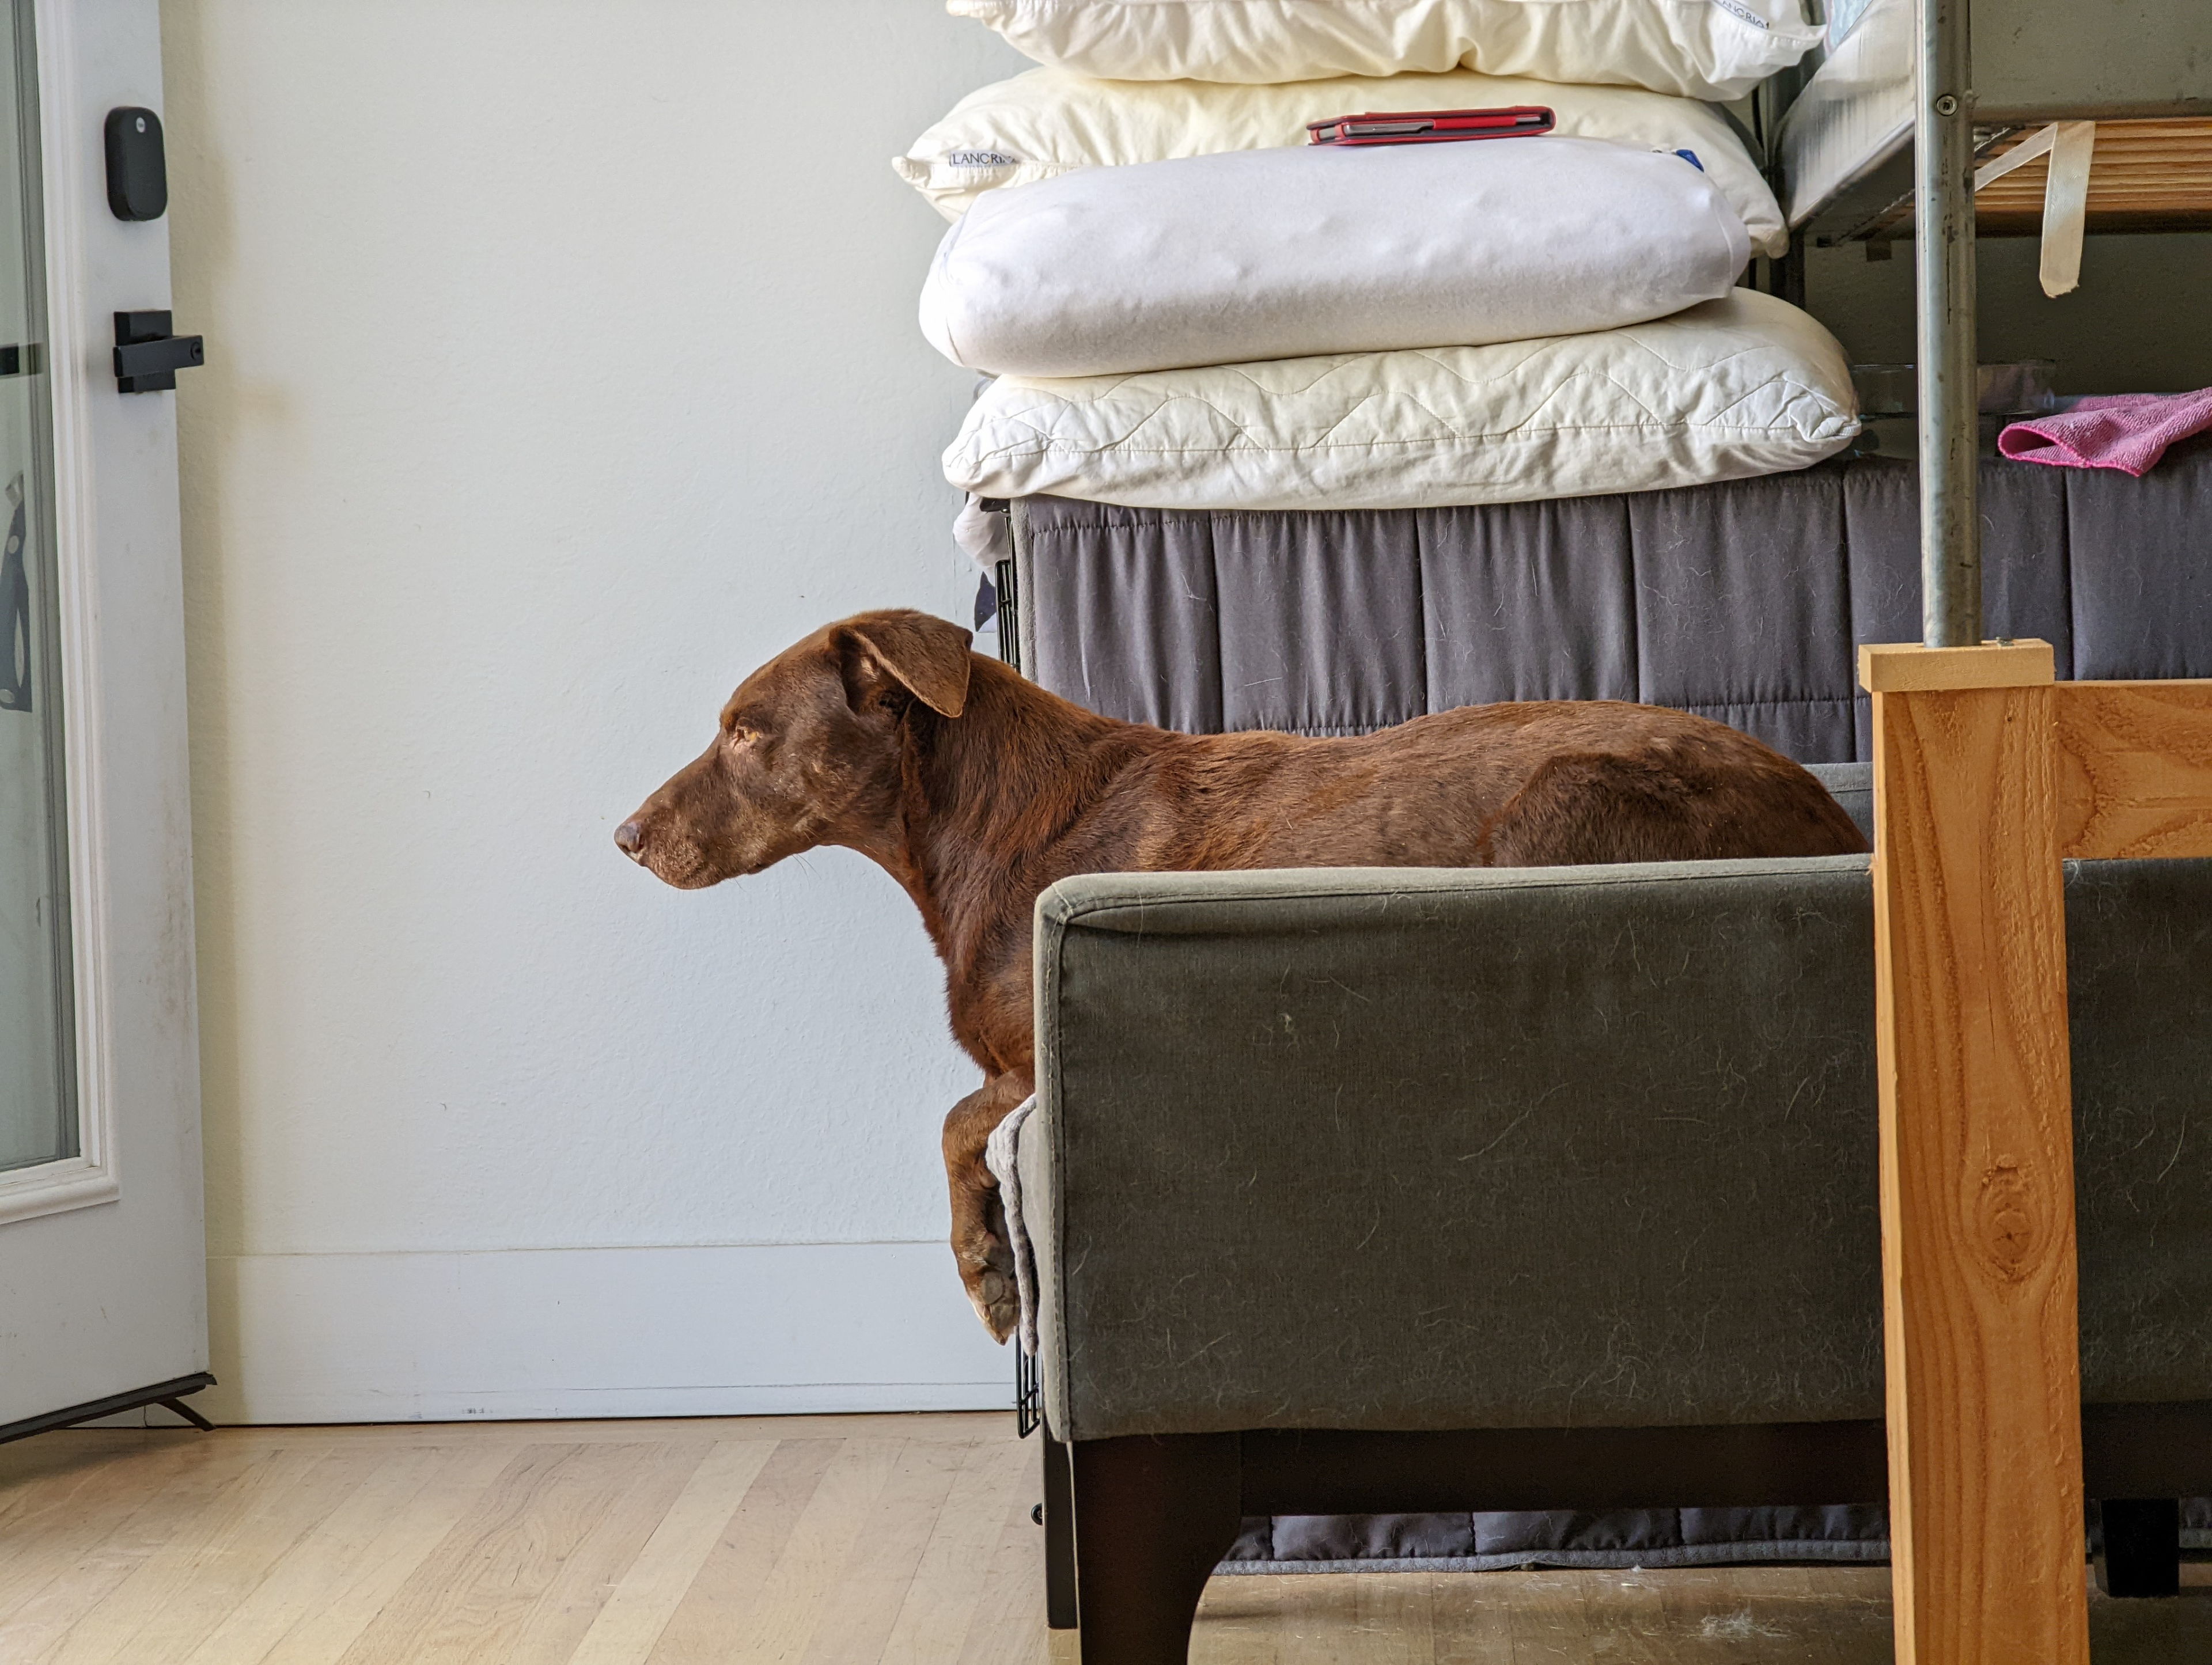
You can see part of the temporary loft frame I built to raise up our metal queen bed frame to allow the dog chair and crate to slide underneath a bit.
The temporary loft frame that served us well for almost six months.
Things you intend to be temporary often become permanent. It happens with a lot of what I build, be it software or something tangible. It felt less and less silly seeing that rough 2x4 frame in my bedroom; part of me didn’t mind leaving it that way. But I also had that nagging feeling that, by the time I finally invested in improving it, less time would remain to enjoy the fruits of the labor. I wanted to act.
Initially I started looking at “off the shelf” solutions. I got the idea that, while I was lofting the bed, I could make space for a couch underneath to allow more seats to view the display in the room. At the same time we could upsize from the queen mattress my old roommate Yida left me. But there is not a lot in the “king size loft bed” space, or even queen. I found a few examples of custom wood frames on Etsy in the $5K range, as well as some metal ones such as at Francis Lofts & Bunks, where I could get something with free delivery in 8 weeks, and the price would have been $3,693.51.

A $3,700 prefab metal king loft bed
None of those quite fit my space, though, considering that I wanted the bed to be low enough to view the TV on the wall, the same one I hoped the couch people underneath could also view. None of the beds I found had both access from the sides for the dogs, open space for the couch, and no railing on the wide side so as not to block the TV. I then decided it couldn’t be that hard to build something myself. Of course.
Thus began my latest woodworking journey, which involved buying and learning a ton, including relearning how I can justify spending money in an effort to save money!
Design
I first mocked up some designs in SketchUp, which I had to relearn. I last used it to design my aquarium stand in 2016, where I used a locally running version of it. This time I tried the free web version, which had its own limitations, but saved me some hassle since I don’t use Mac or Windows anymore. I went through an initial period of frustration as I resisted reading the documentation in depth, but when I realized how much time I was going to be spending in this tool, I relented. According to my YouTube history, in 2016 I learned via Rob Cameron‘s two videos, Sketchup for Woodworkers - Getting Started, Part 1 and Part 2. This time I found very helpful a similar set from Foureyes Furniture, Modeling a Complete Project in Sketchup for Beginners Pt.1 and Pt.2. I got up to speed quickly, and started modeling my bed.
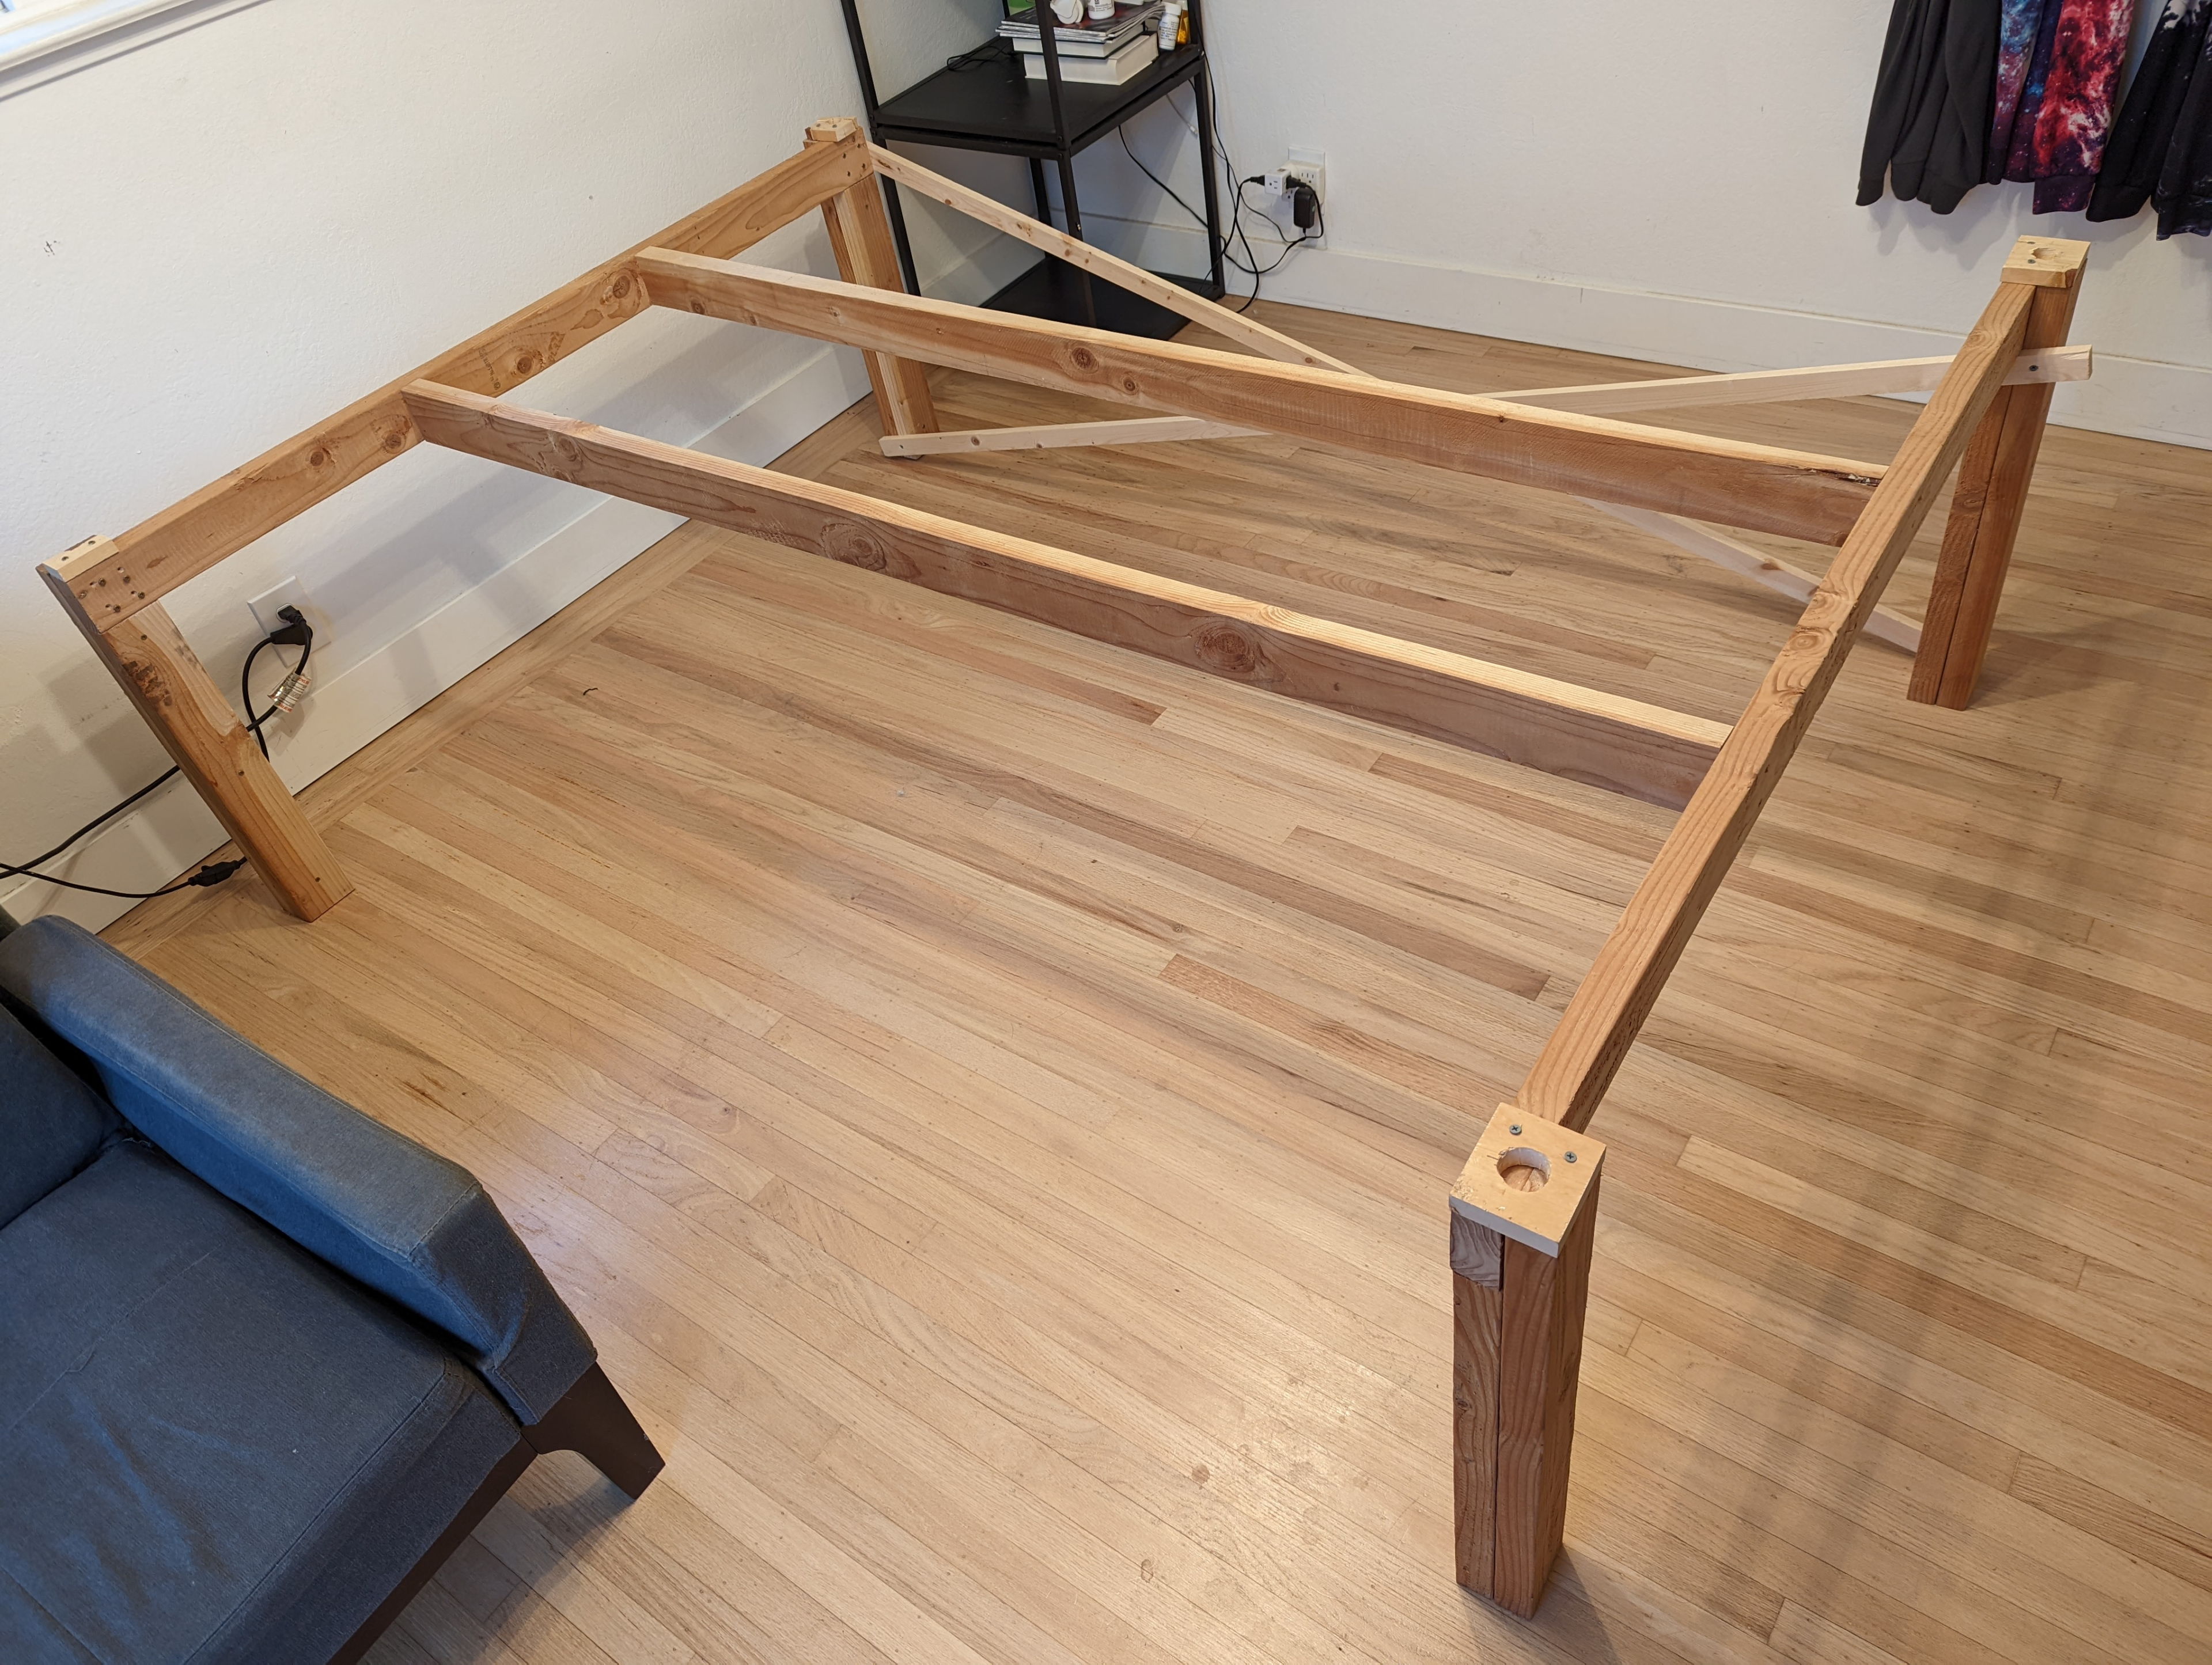
The next trouble I ran into was I really had no idea how much structural support I would need to prevent the bed rocking or racking. I observed in my temporary 2x4 frame that it was extremely wiggly until I added a single X shaped cross brace with two 1x2 boards, after which it became rigid. I spent a lot of time looking at examples of decking structures, as there was not much in the way of large loft bed frames I found.
To minimize the thickness that would be blocking the view of the TV from the couch below, I decided to definitely use hardwood instead of Pine. I ran some beam deflection calculations using an online “Sagulator” to check my assumptions as well.
I also could not decide how I wanted to climb up into the bed. I figured I would be building either ladders or stair cases, but I also wanted to avoid cluttering the floor. I am still not decided on that, but I moved ahead with planning the bed itself first. My first draft was a little silly. I hoped the legs could look sort of like trees and also provide a place to climb up onto the bed.
My original design was a little silly, but I hoped the legs could look sort of like trees and also provide a place to climb up onto the bed. In the end I simplified it though and removed all the pointy bits.
Wood
Next I needed to actually buy the wood. I started looking at pricing on Home Depot’s website for Oak. It seemed like I might be able to get what I needed there, but it was a good opportunity to try going to a real hardwood lumber yard. I had seen a few videos about them and was definitely intimidated, but reading some reviews online of the one closest to me changed my mind. Moore Newton‘s website let me easily ask for a quote. I should have done more research beforehand, though. My initial query to them was in terms of the number of 2x4s and 4x4s I believed I needed, and the quote I got back included different options for red and white oak and a bunch of terminology I didn’t understand for designating the number of sides that are surfaced. It was at least enough for me to get an idea of how much I should expect to pay, once I learned a bit more.
After reading some Woodworking magazine articles on red versus white oak, I decided it would not be worth paying almost double to get white oak, which would mostly be beneficial for an outdoor project on account of its closed pores. I would probably like the lighter color I might get with white oak, but it’s also not guaranteed. I also convinced myself to buy a DeWalt DW735X surface planer in addition to a table saw so I could process rough lumber, saving some money compared to buying lumber already surfaced on three sides. Then I went to Moore Newton with Alan after work on January 4.
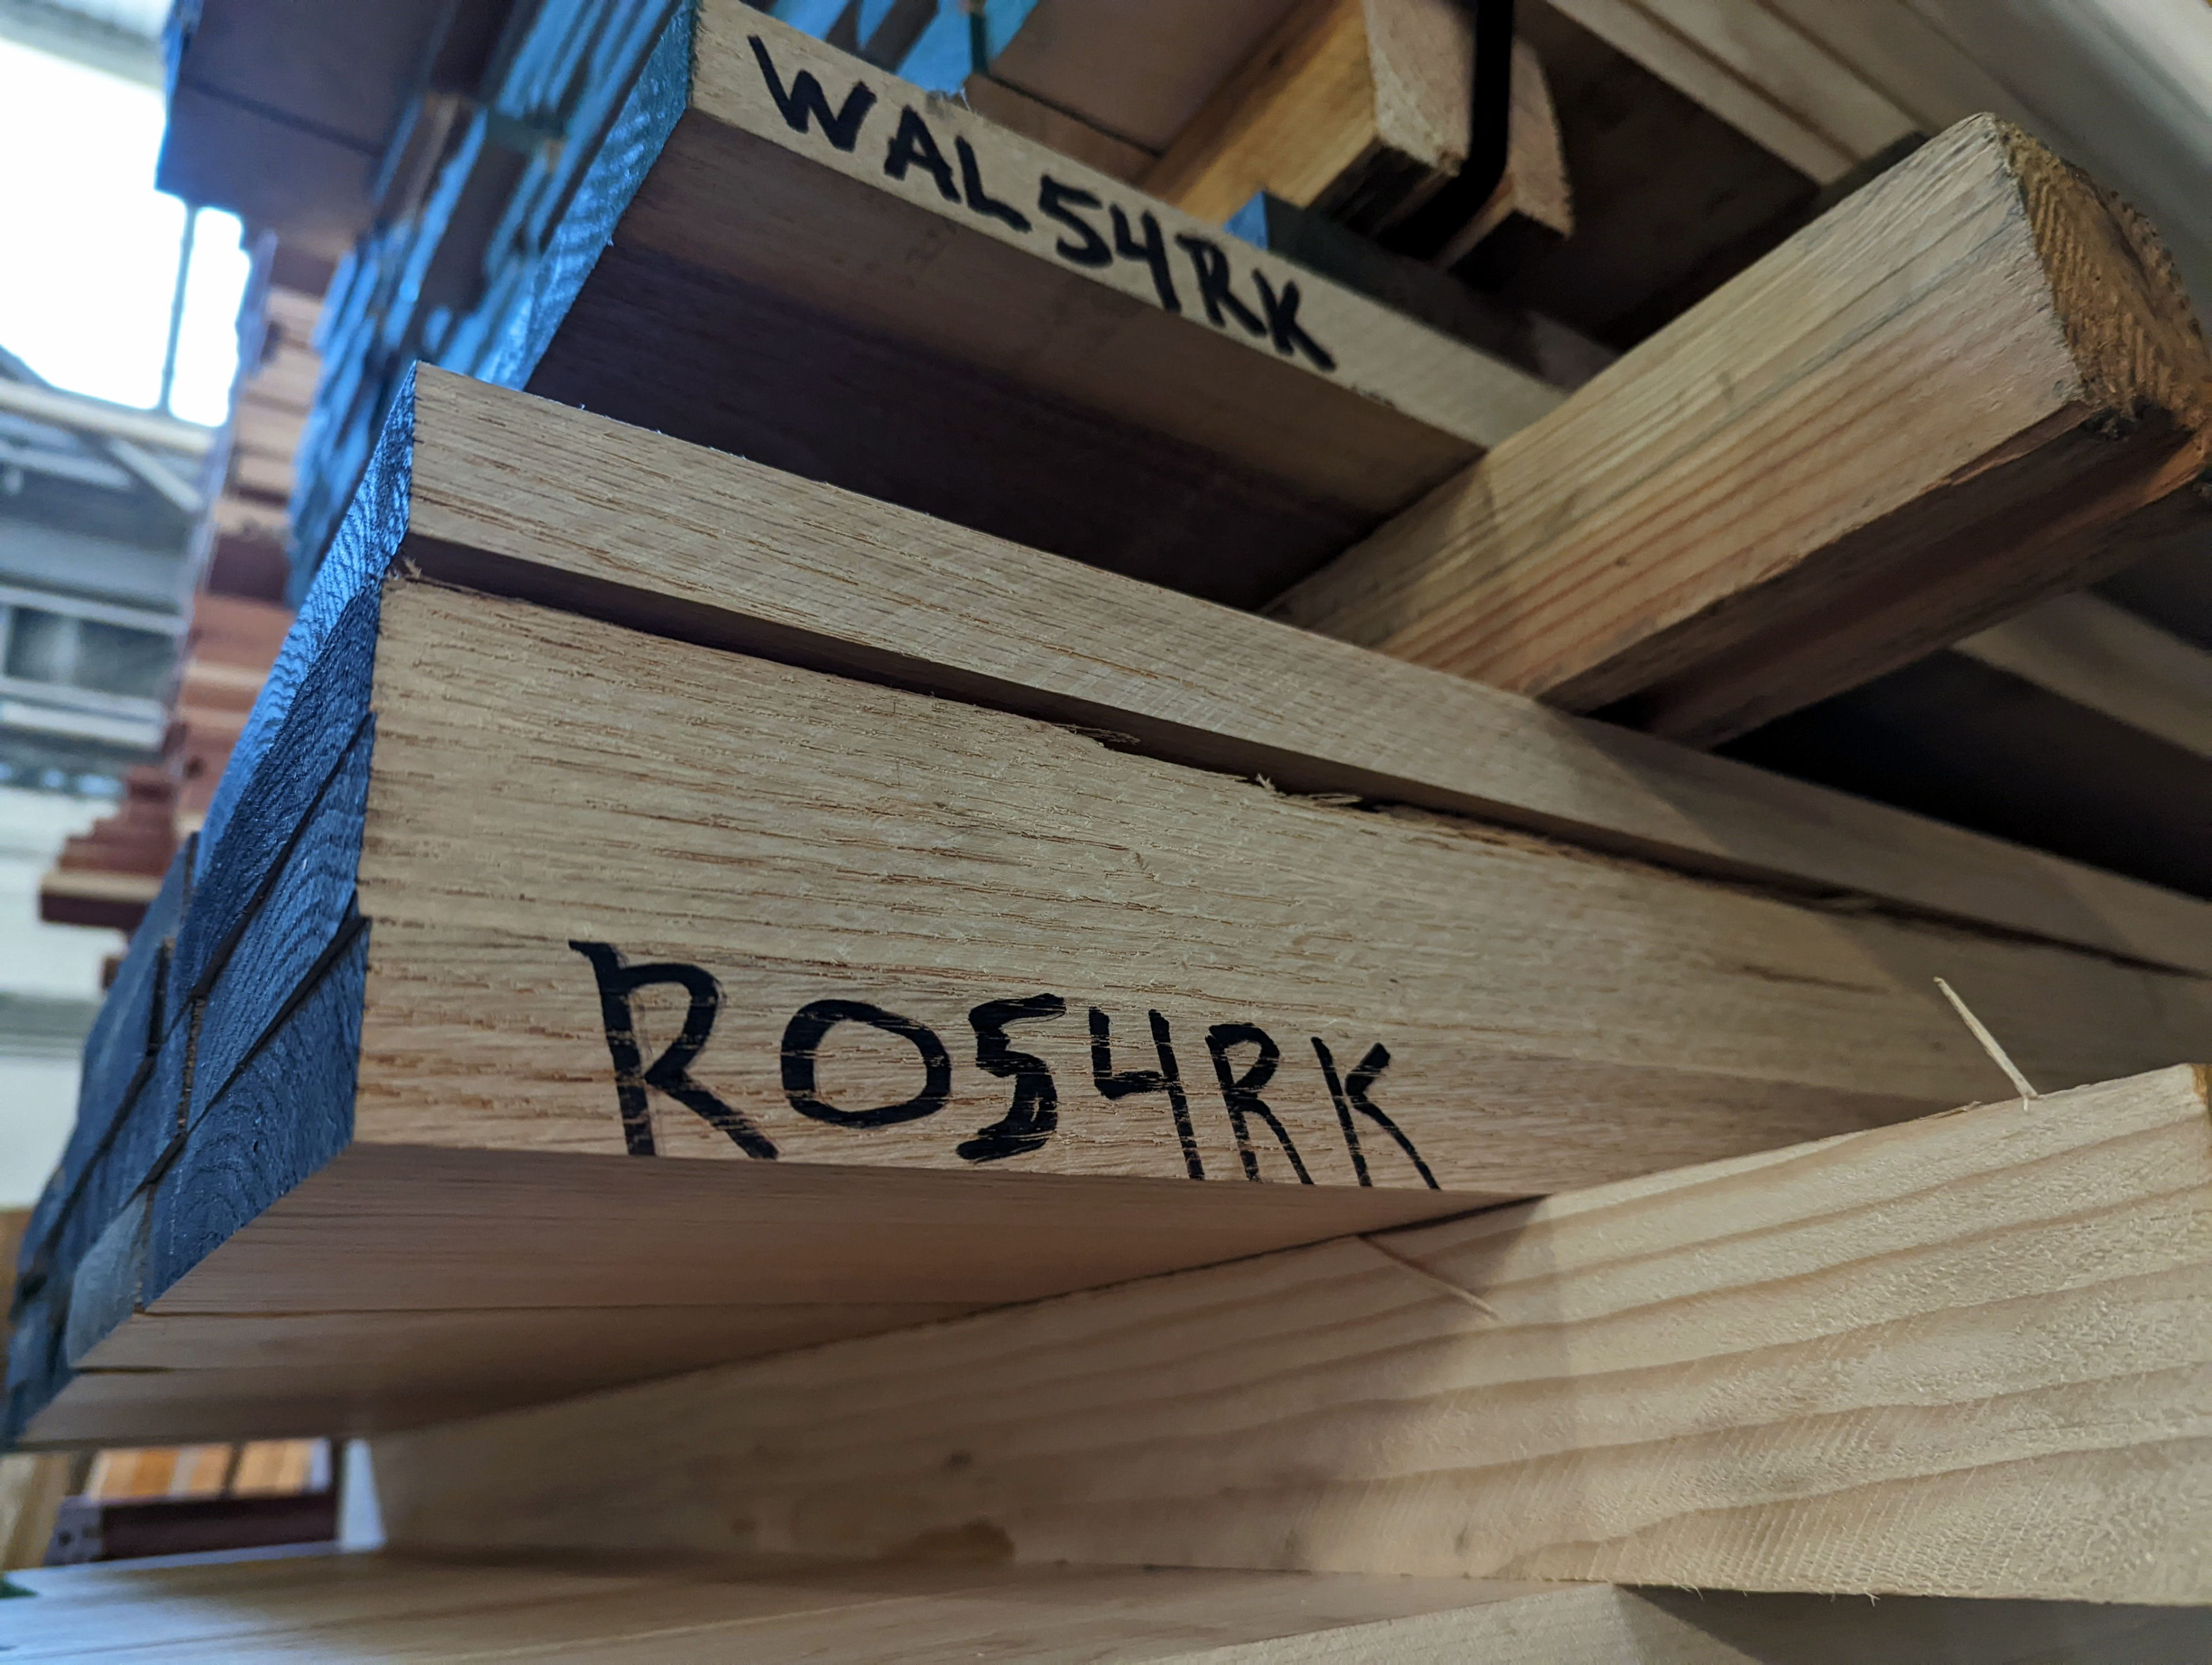
Once I got to the lumber yard, I was again intimidated, as they don’t have the wood organized by species or type. It felt more random, but you could ask any of the staff running around to point you at the thing you were seeking.
First we looked at the “8/4 rough red oak”. There were only a few boards of this, up on the second floor, and they were heavy. I quickly realized I would need to reformulate my plans, as I would not be able to carry the lengths of 2 inch thick oak boards I thought I needed down the stairs, even if they had enough in stock.
I made my first ever journey to a hardwood lumber yard, to the nearby and highly reviewed Moore Newton. It was quite an experience.
I talked to the staff about what options I had for different oak thicknesses, and I was guided toward the presurfaced on three sides stock, which they had plenty of in 4/4 and 5/4. Apparently that’s what most people buy, and it was also not that much more expensive than the rough sawn stock. I guess I didn’t need to have bought a planer after all!
I made my first ever journey to a hardwood lumber yard, to the nearby and highly reviewed Moore Newton. It was quite an experience.
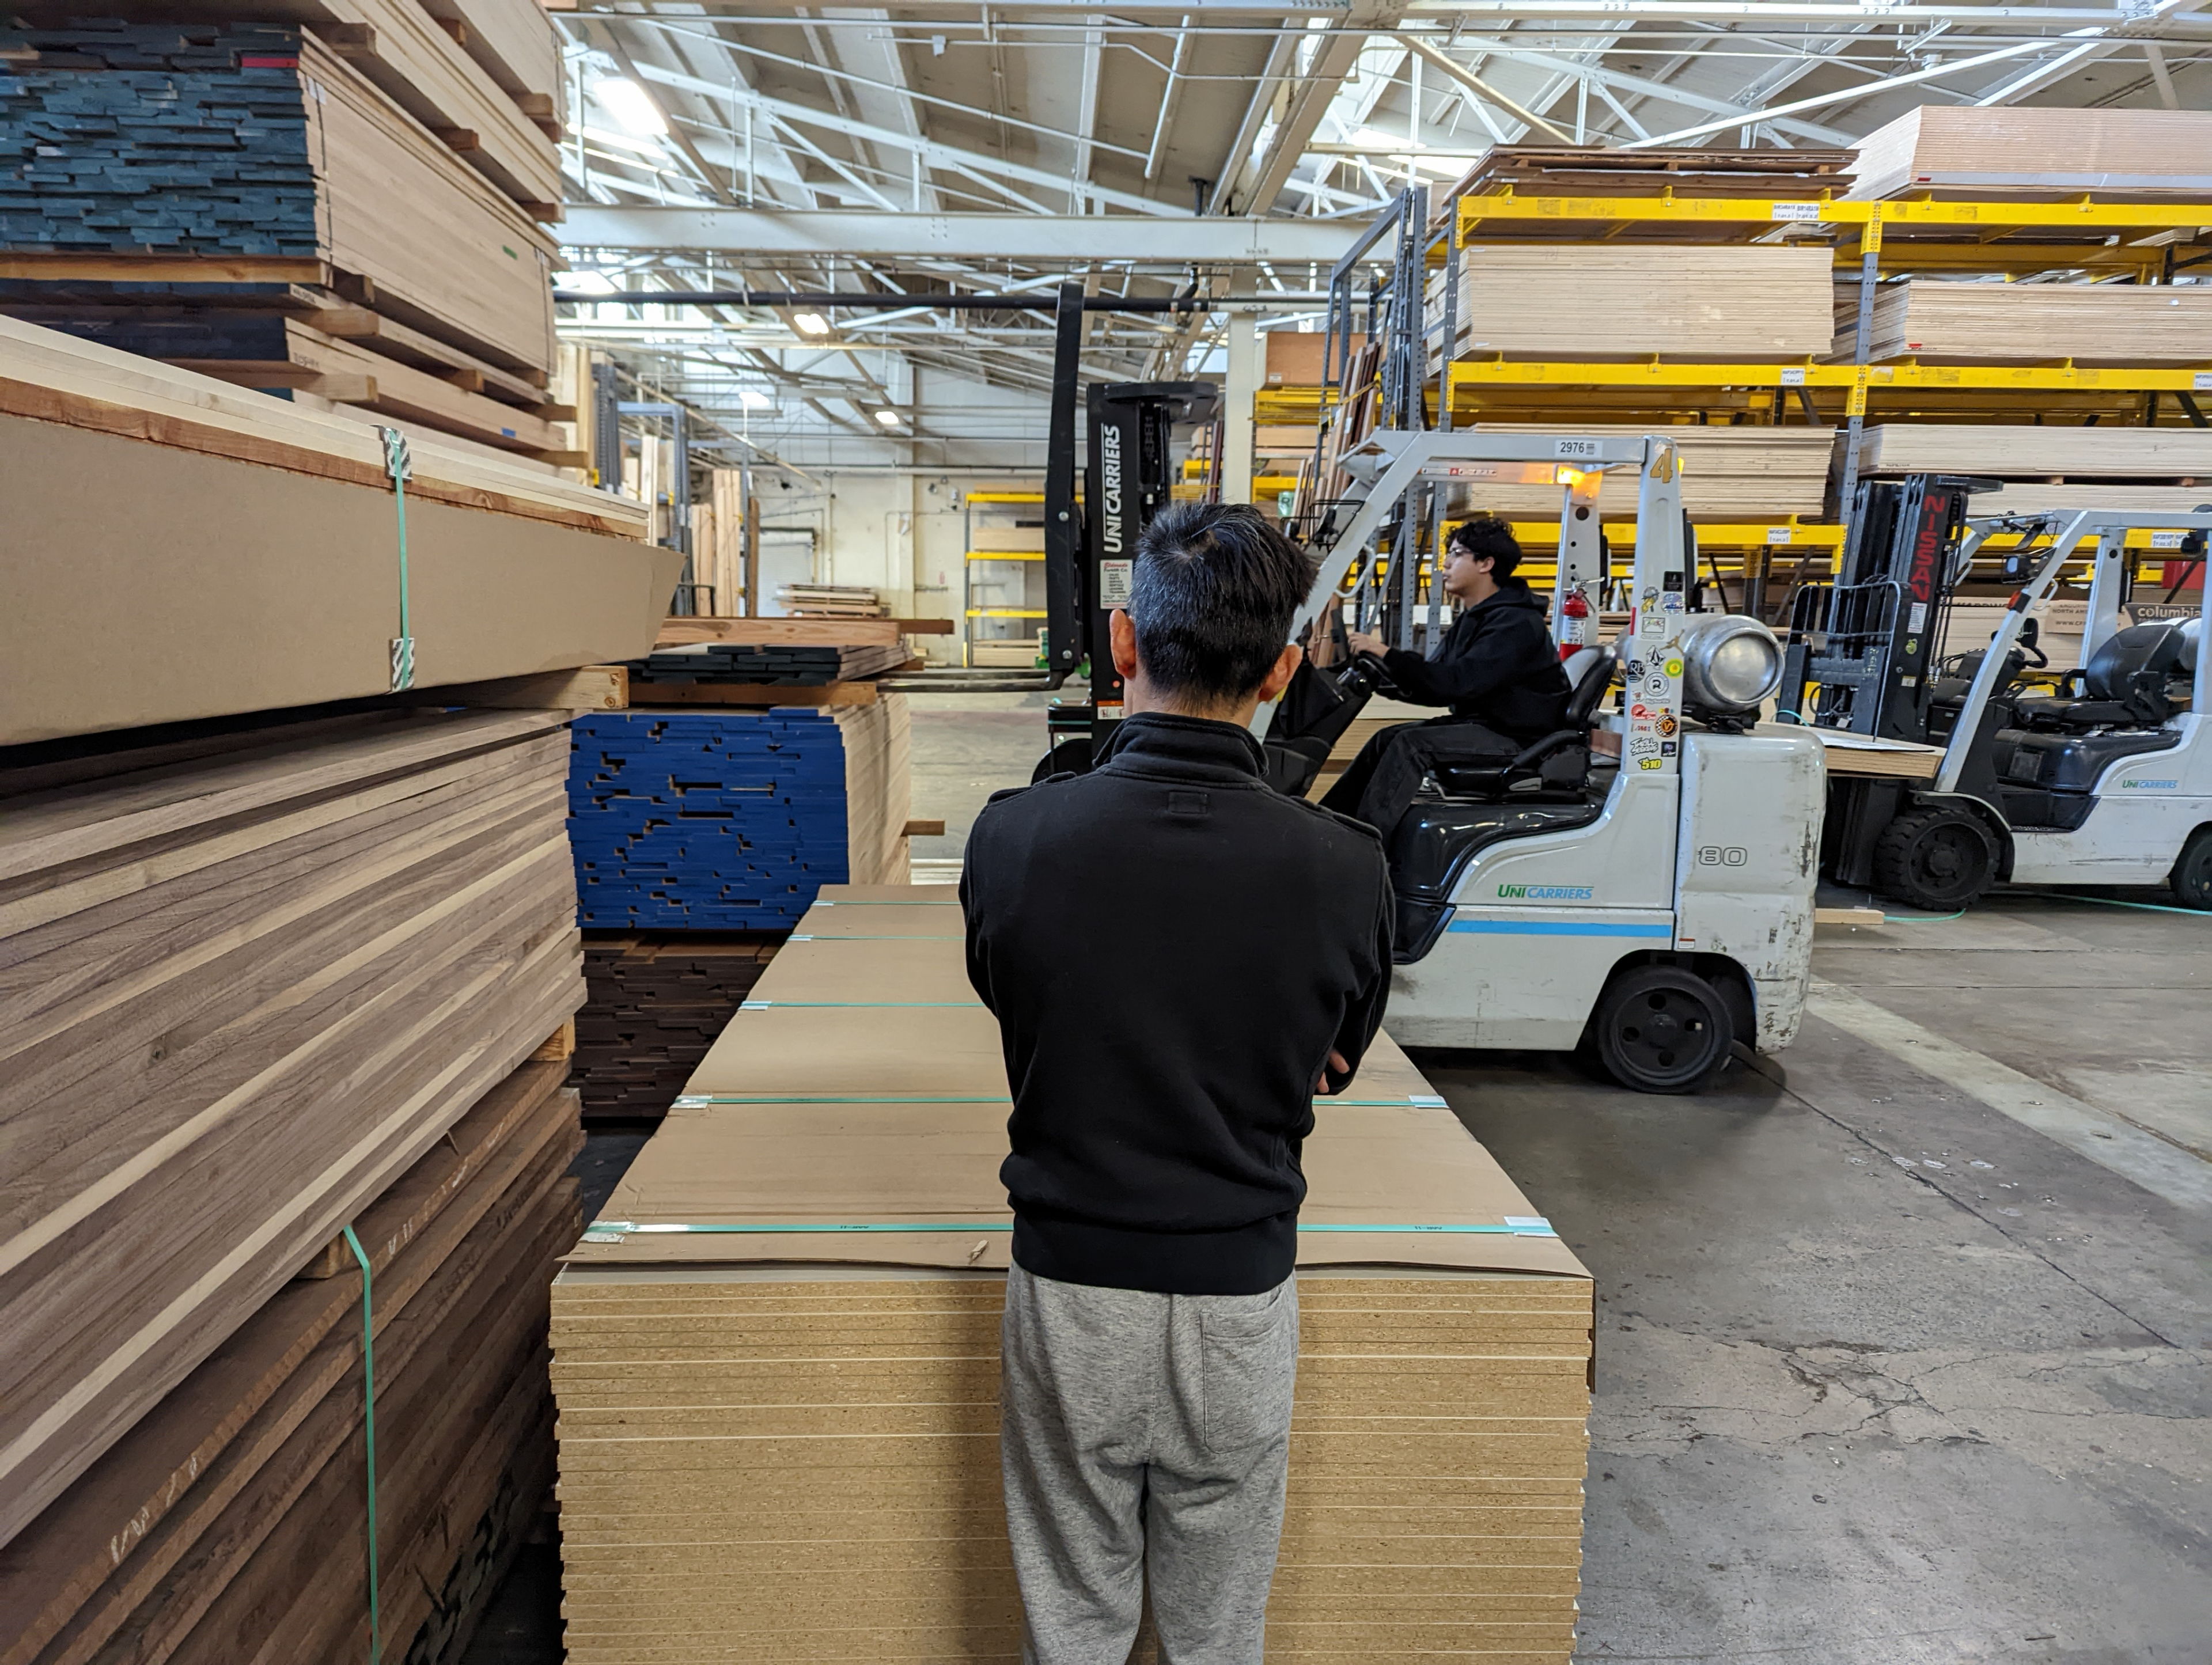
But anyway, even the 5/4 boards were thinner than I was hoping to use for most of the frame. 5/4 means 5 quarters of an inch, and after surfacing it was about 1.13 inches, whereas a 2x4 is 1.5 inches thick. I could tell by the stiffness of the boards they would probably work fine for my purposes, but I did need to reimagine the design of the legs and how the long supports would join to the legs, on the fly. I did my best to adapt my plans to boards of 5/4 and 4/4 thickness. Alan helped me select suitable ones from two giant pallets of boards the helpful staff fetched for me after rearranging stacks of wood with a forklift.
I made my first ever journey to a hardwood lumber yard, to the nearby and highly reviewed Moore Newton. It was quite an experience.
In all, I purchased:
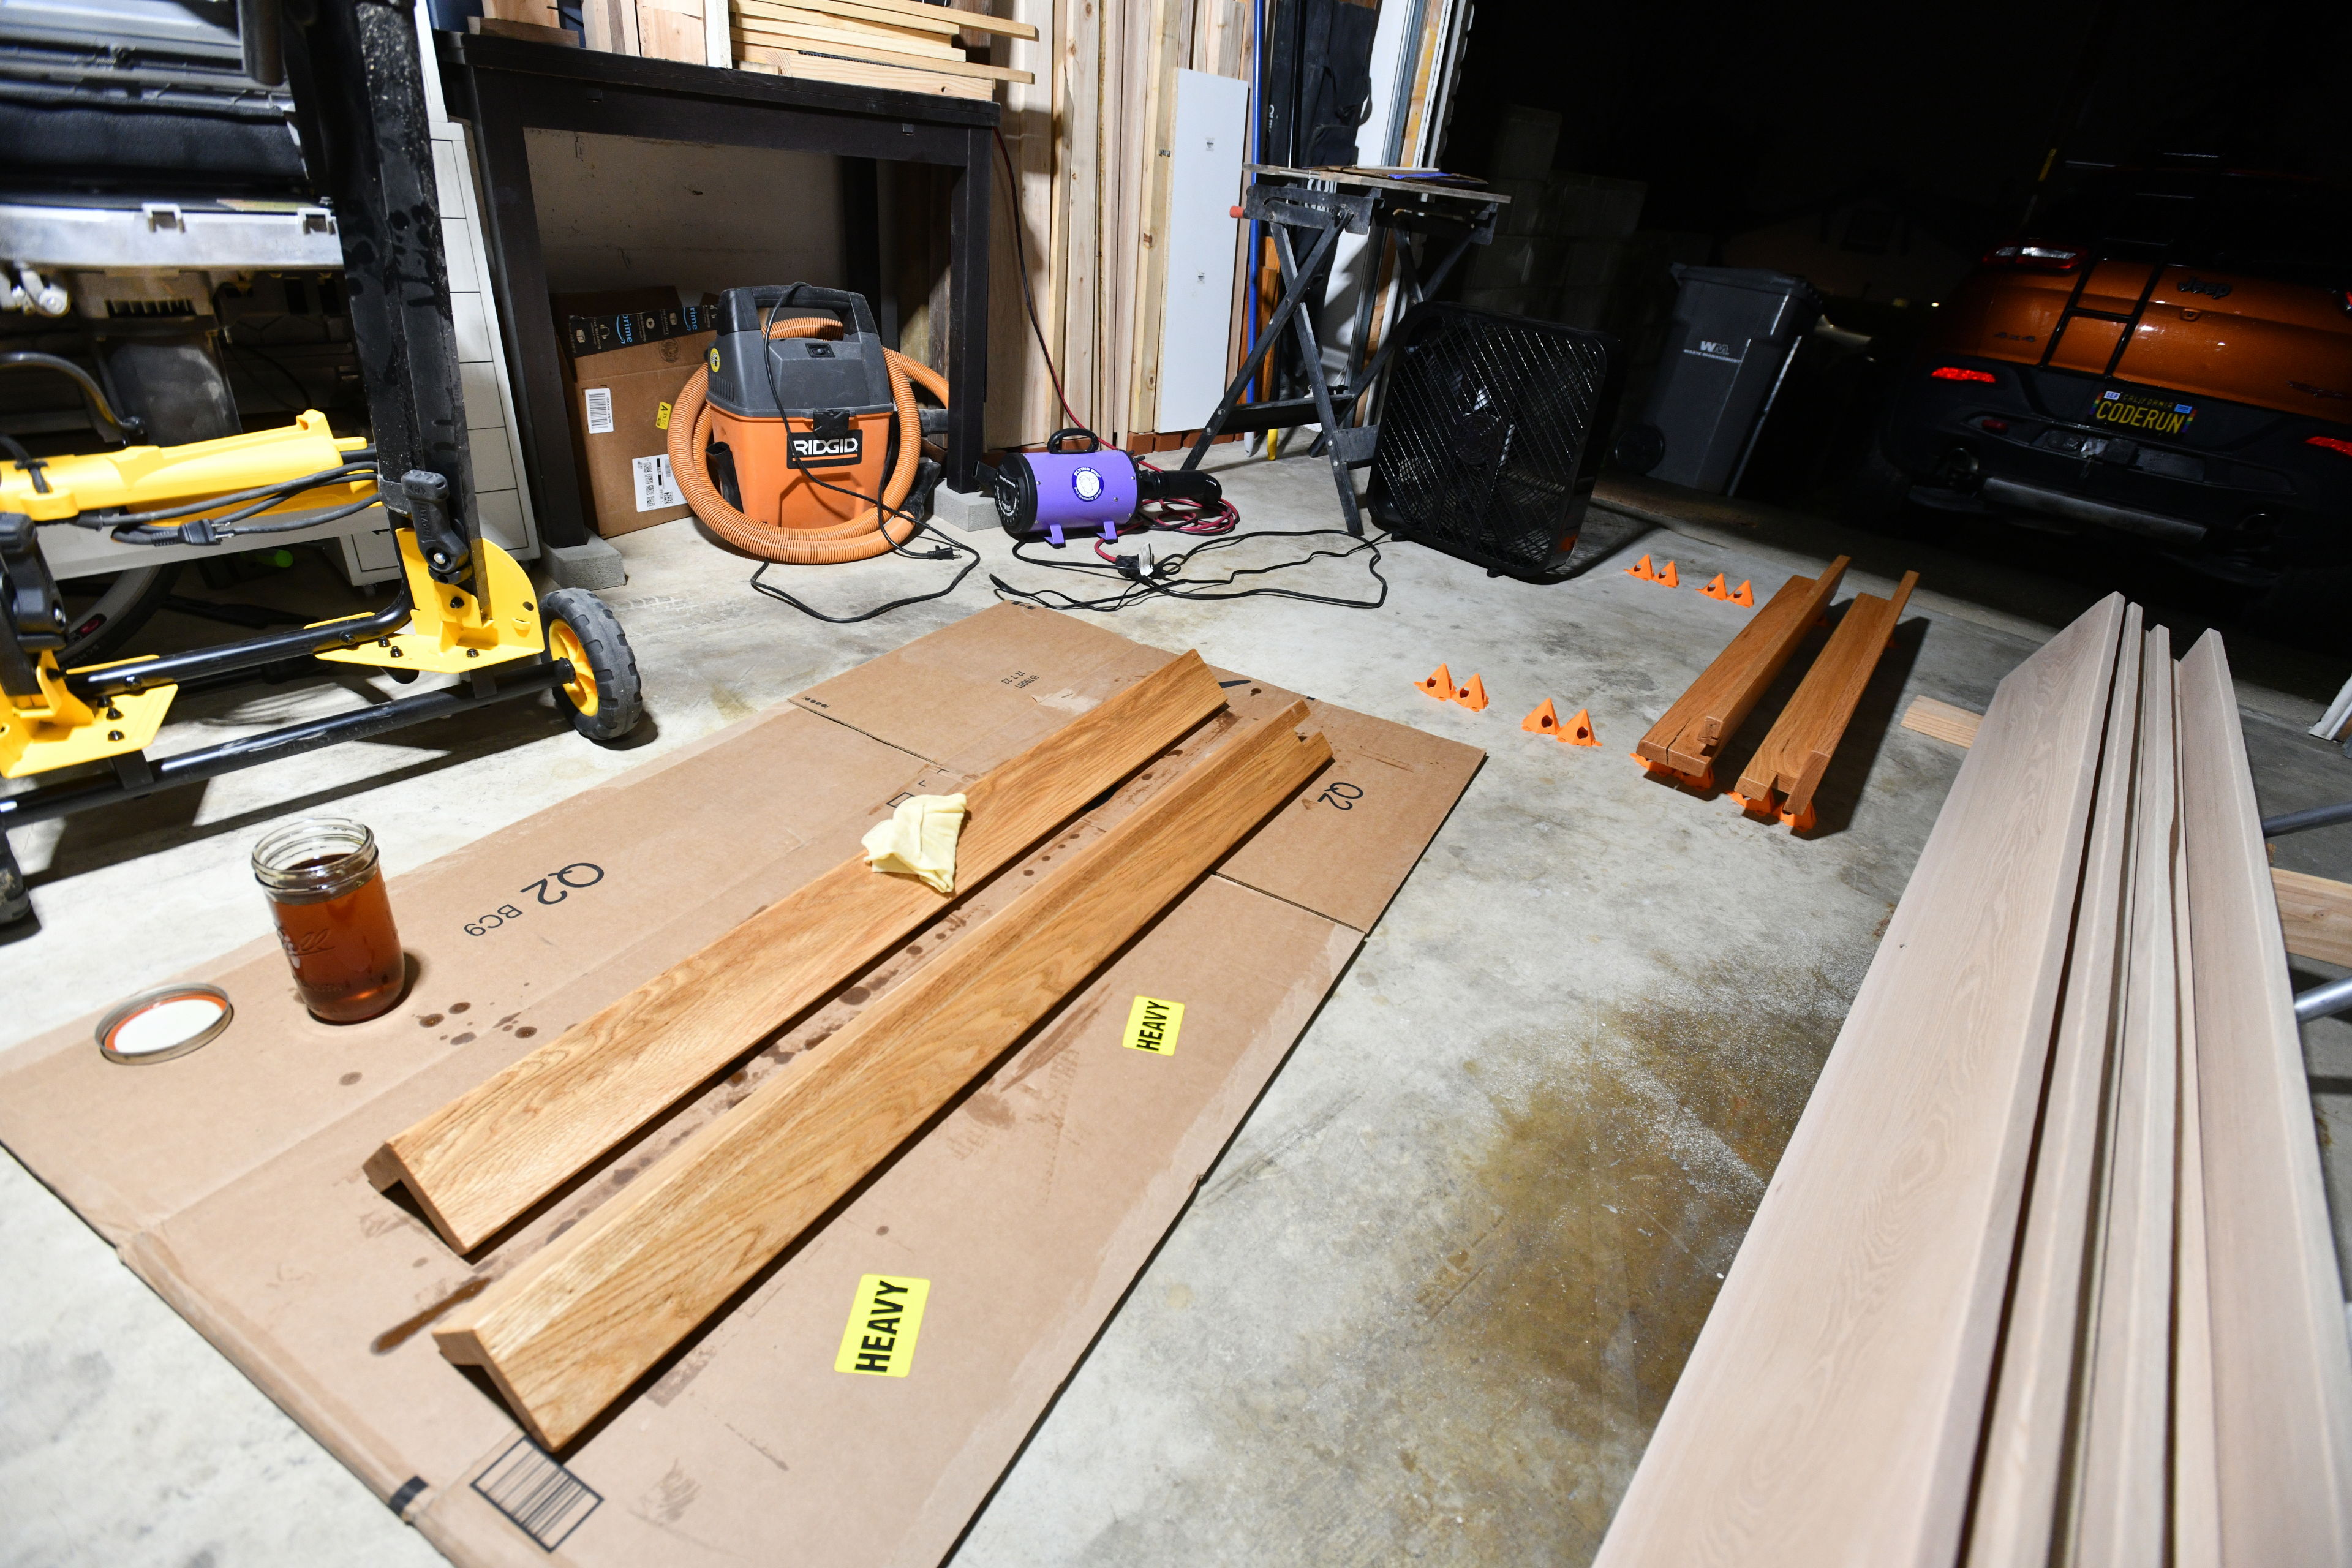
- 66 board feet of 5/4 S3S red oak at $5.65 per board foot, $372.90
- 60 board feet of 4/4 S3S red oak at $4.23 per board foot, $253.80
- 5 board feet of 4/4 S3S walnut at $12.85 per board foot, $64.25
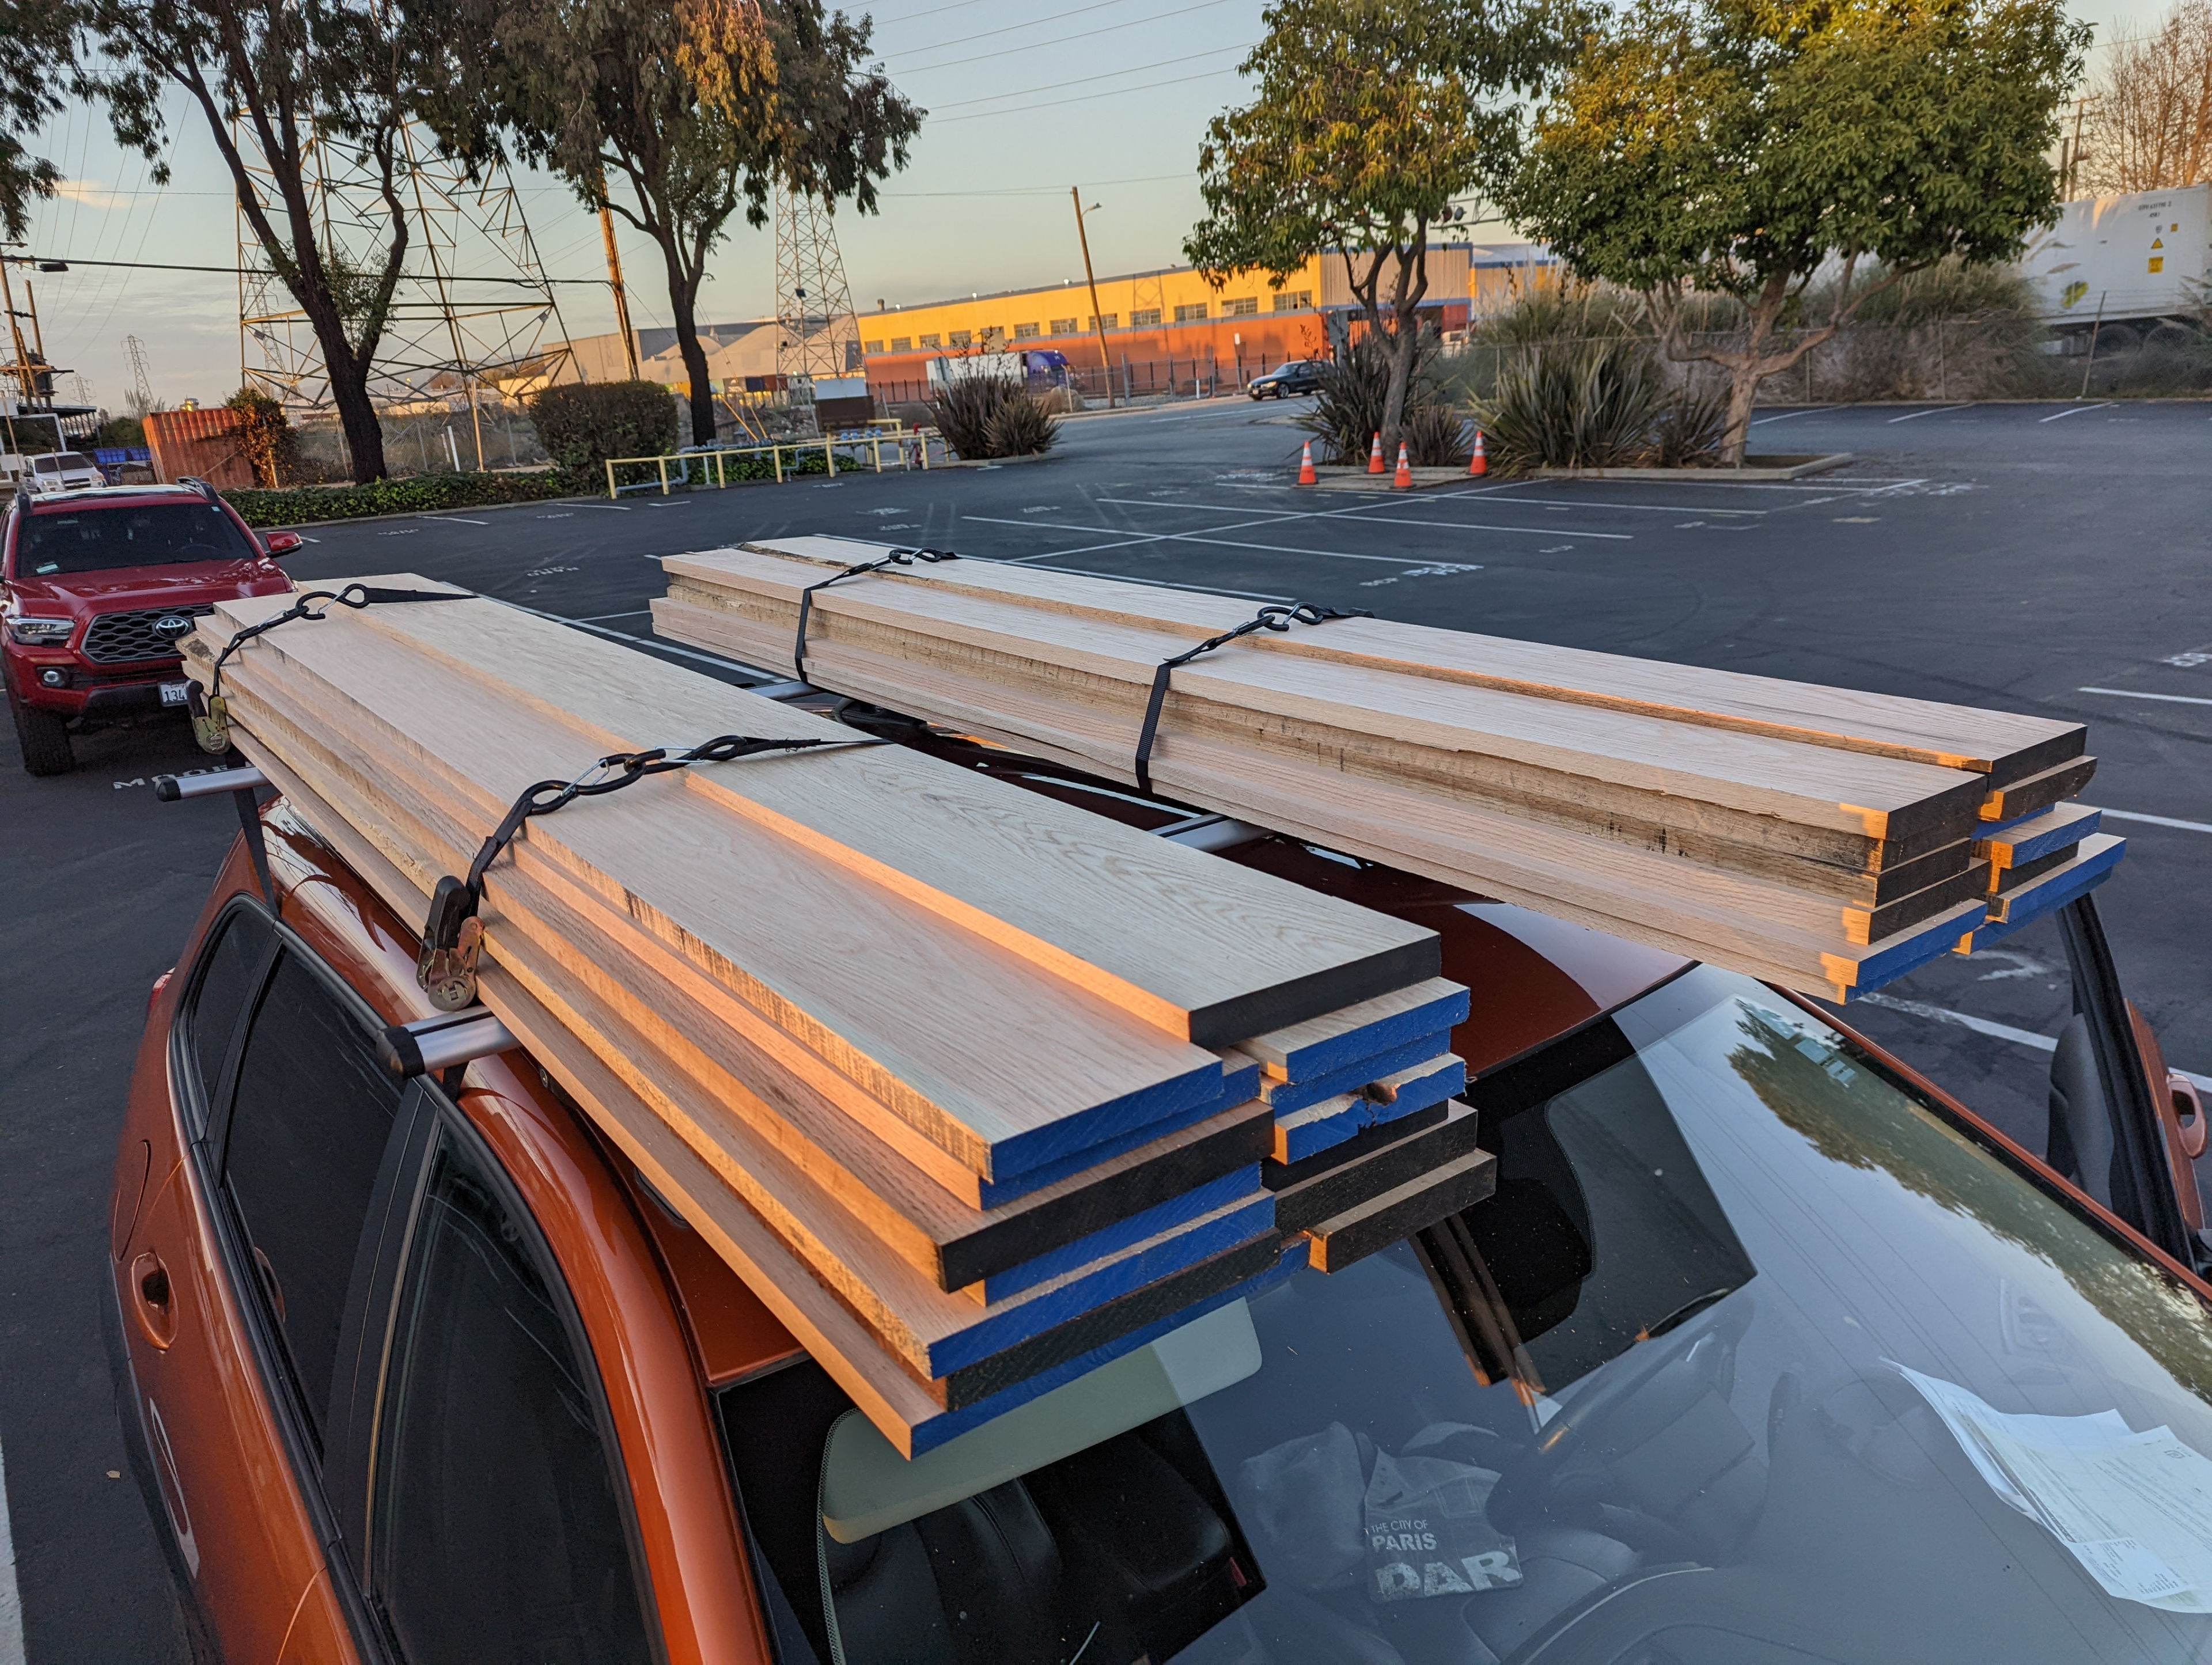
Getting it onto the car was interesting. The staff drove the forklift carrying my purchase right out to my car. We attempted to just set the whole stack on my roof, but couldn’t quite line up the lift with my roof rack. It almost worked, but I ended up manually transferring the boards. It worked out OK though.
I made my first ever journey to a hardwood lumber yard, to the nearby and highly reviewed Moore Newton. It was quite an experience.
Design again
It took me a few days to get the time to redo my 3D model and make sure I could build what I hoped with the wood I purchased. In the end I simplified it and removed all the pointy bits, ending up with something that looks a little more normal.
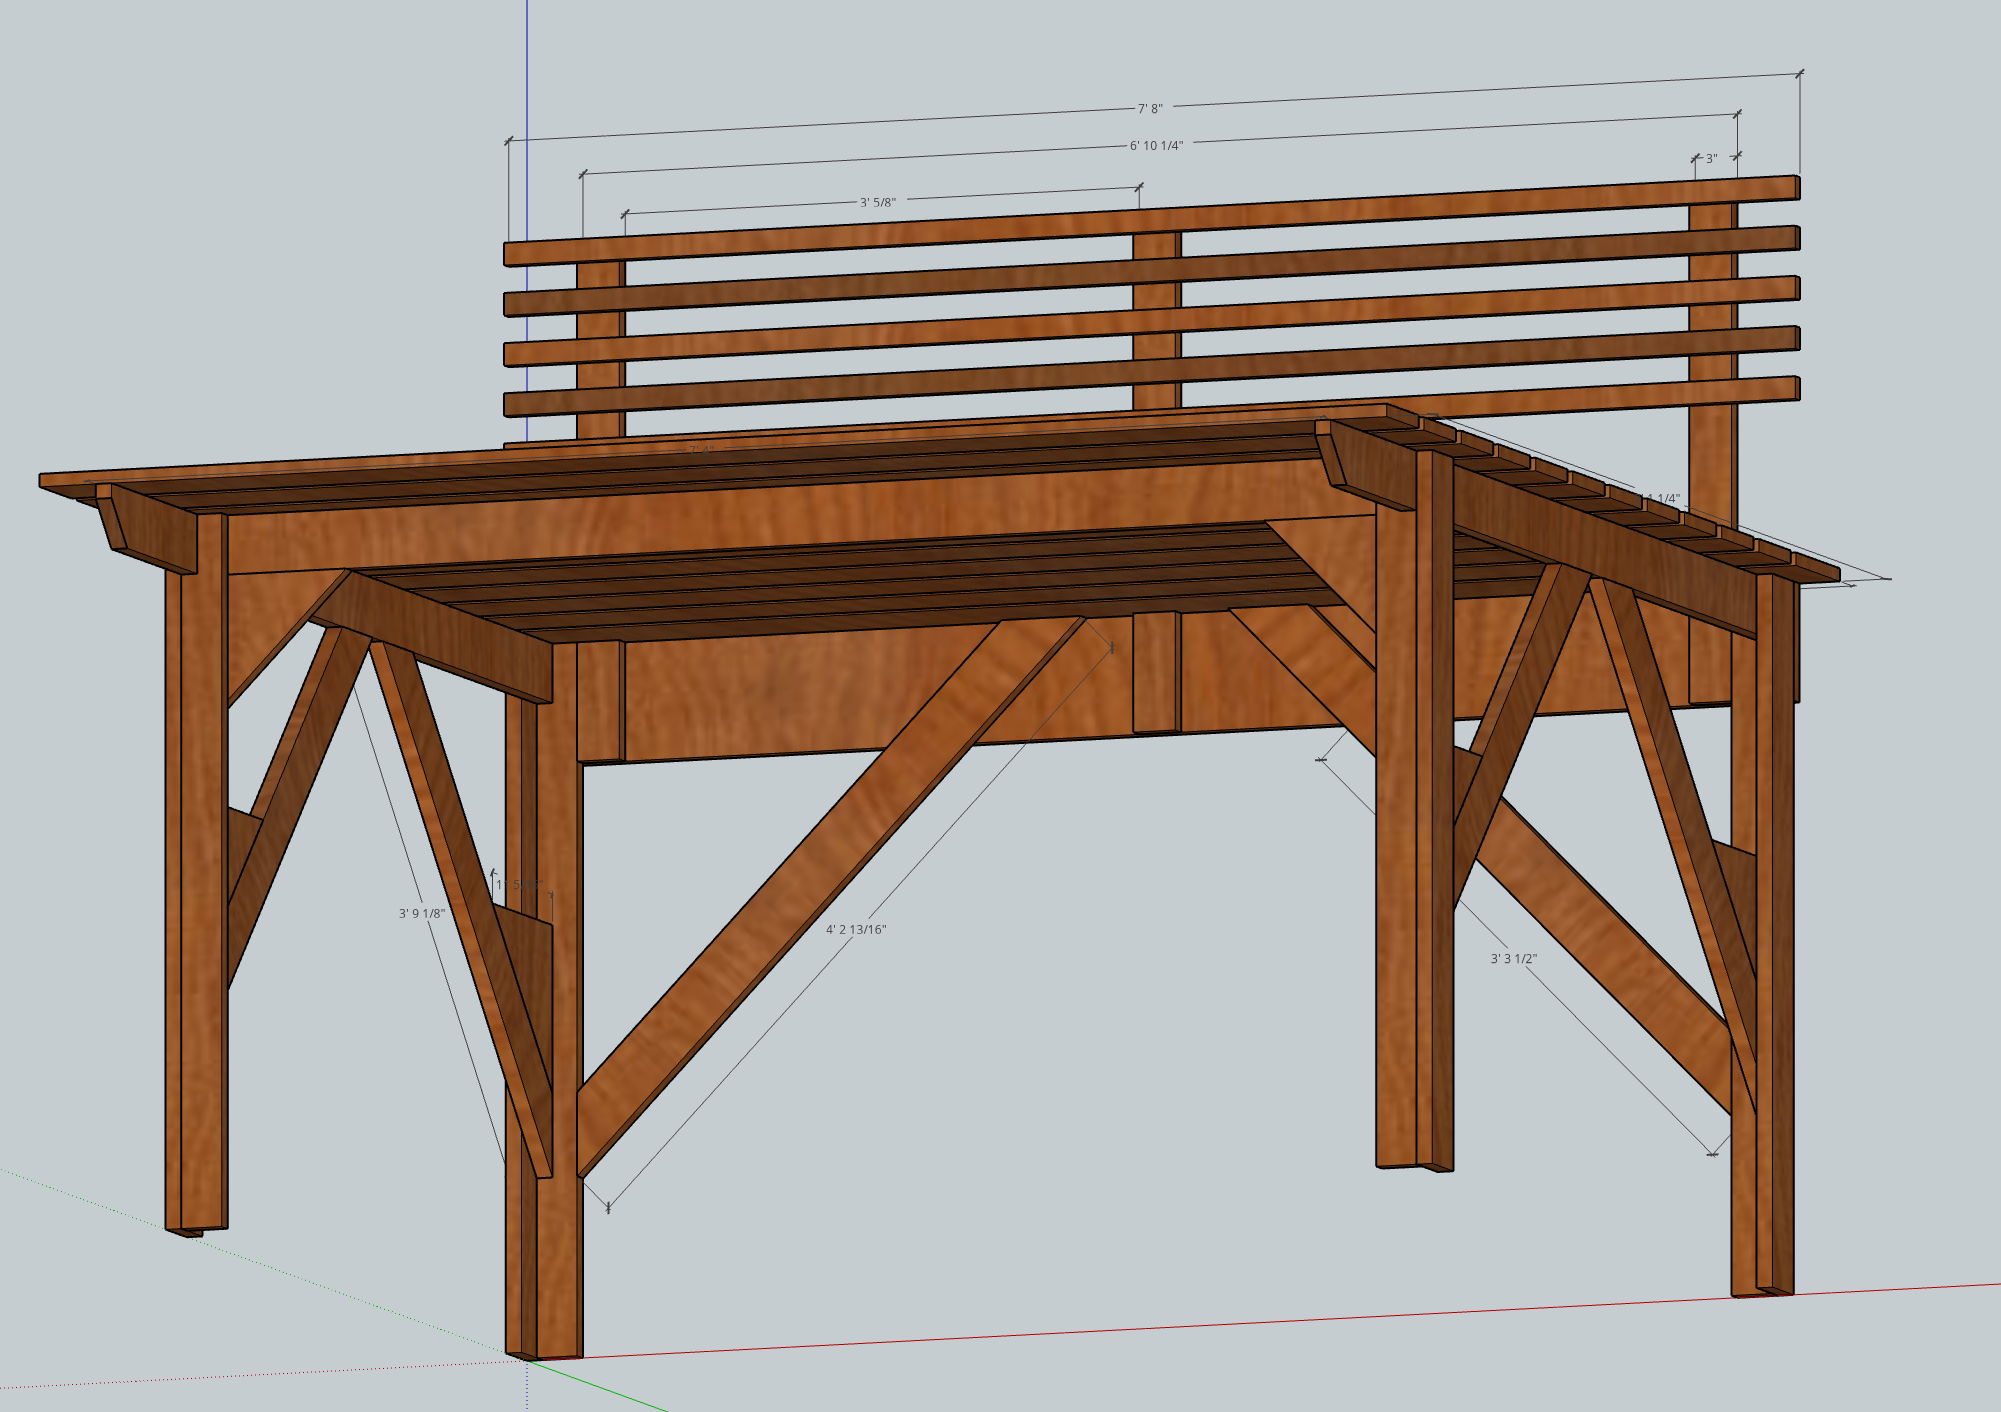
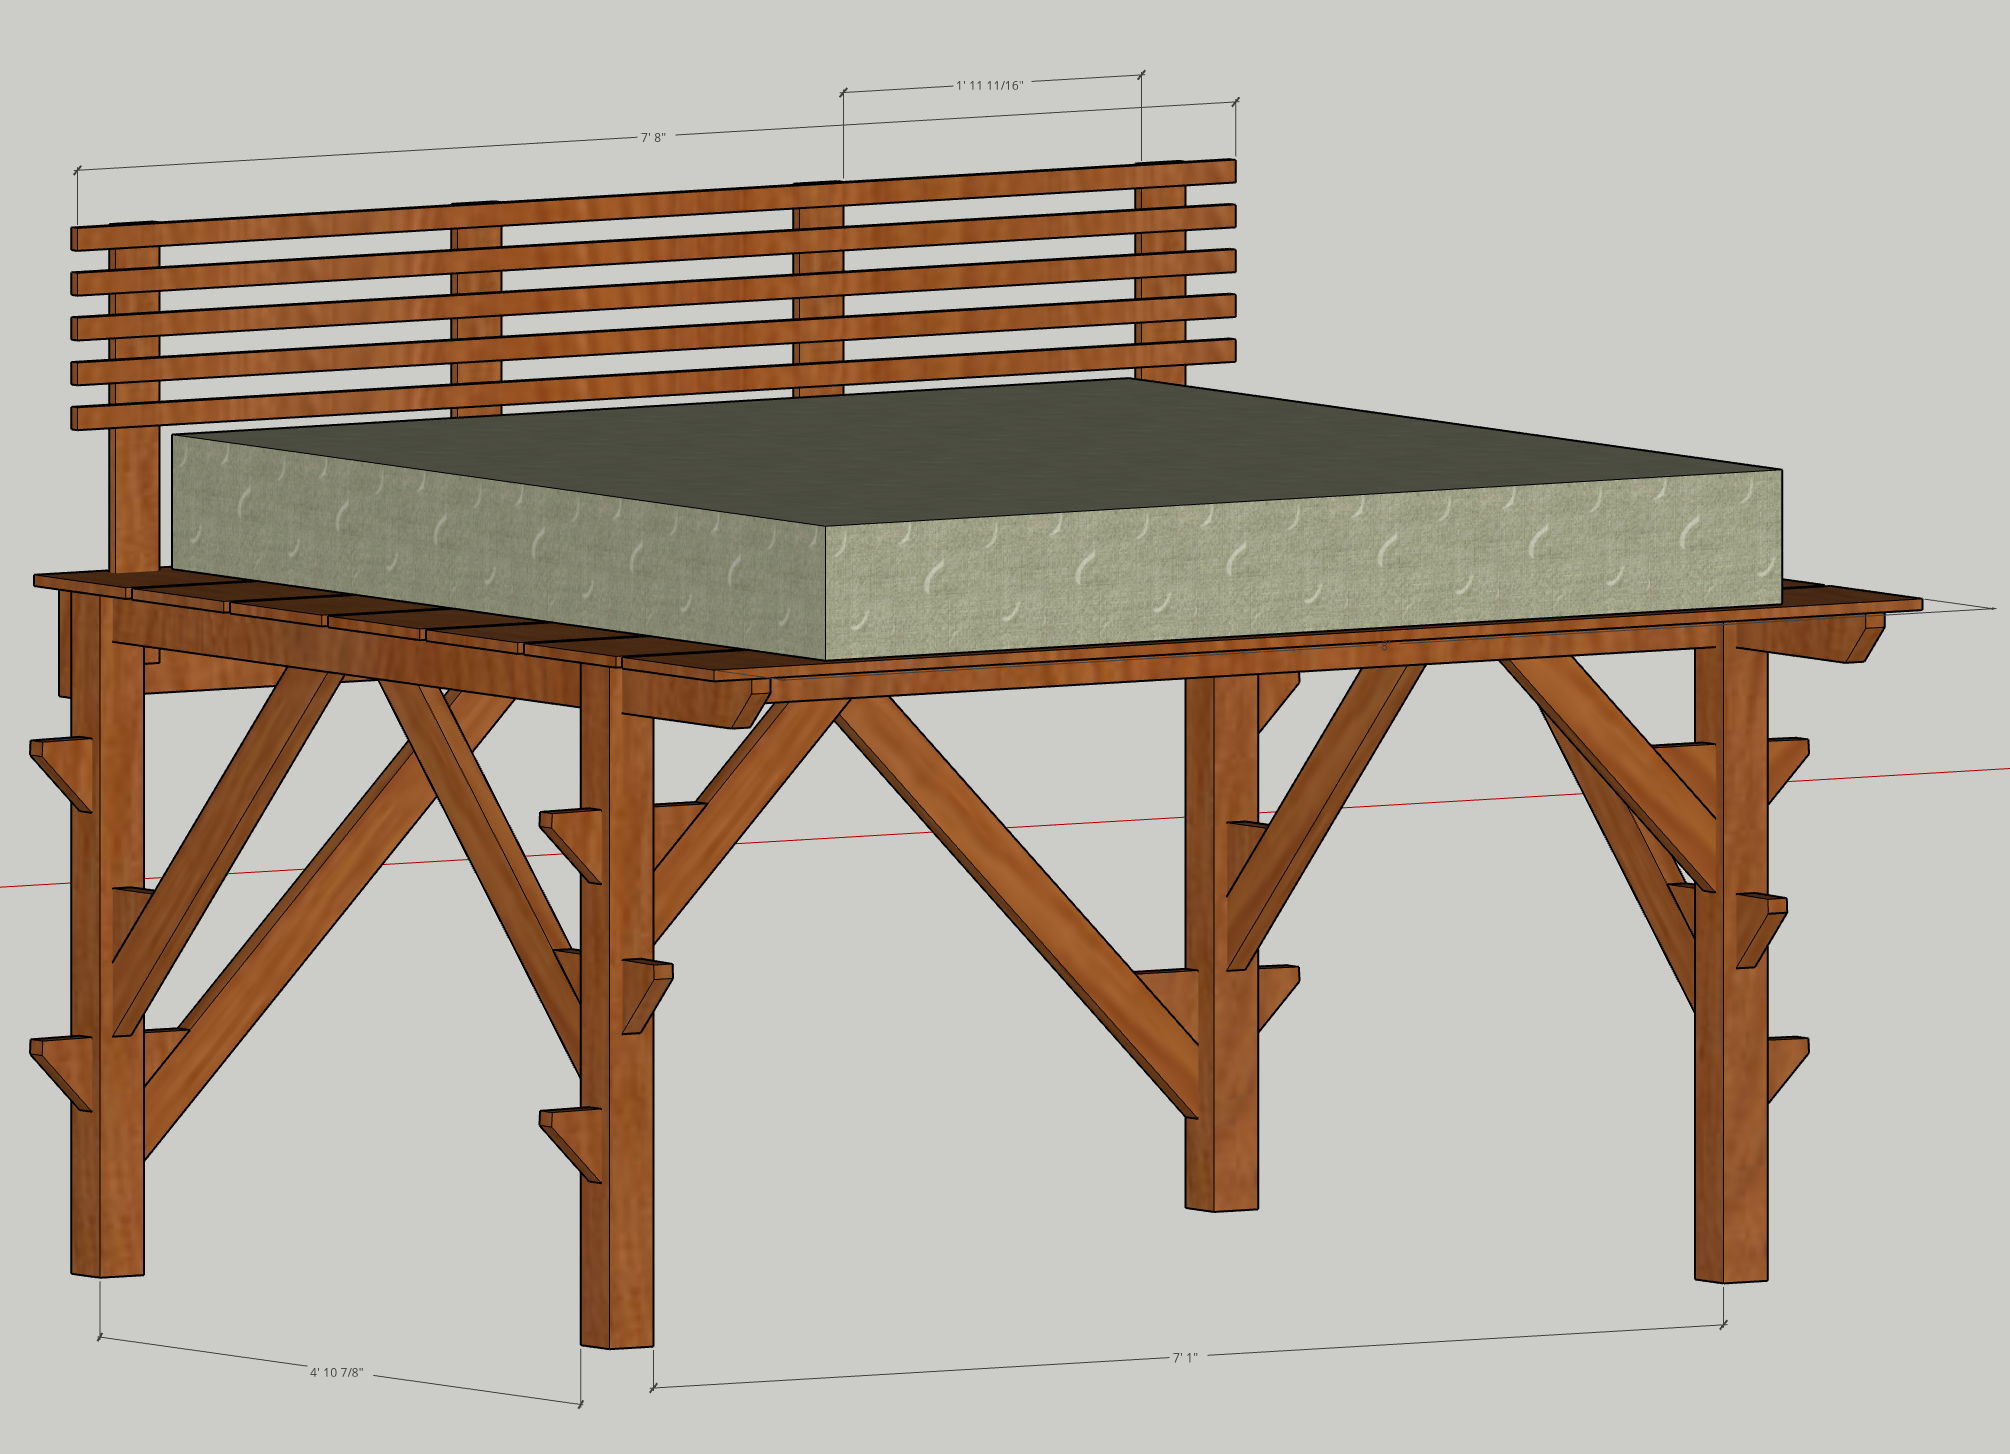
My second draft design, which is bascially what I built other than I added two center support beams.
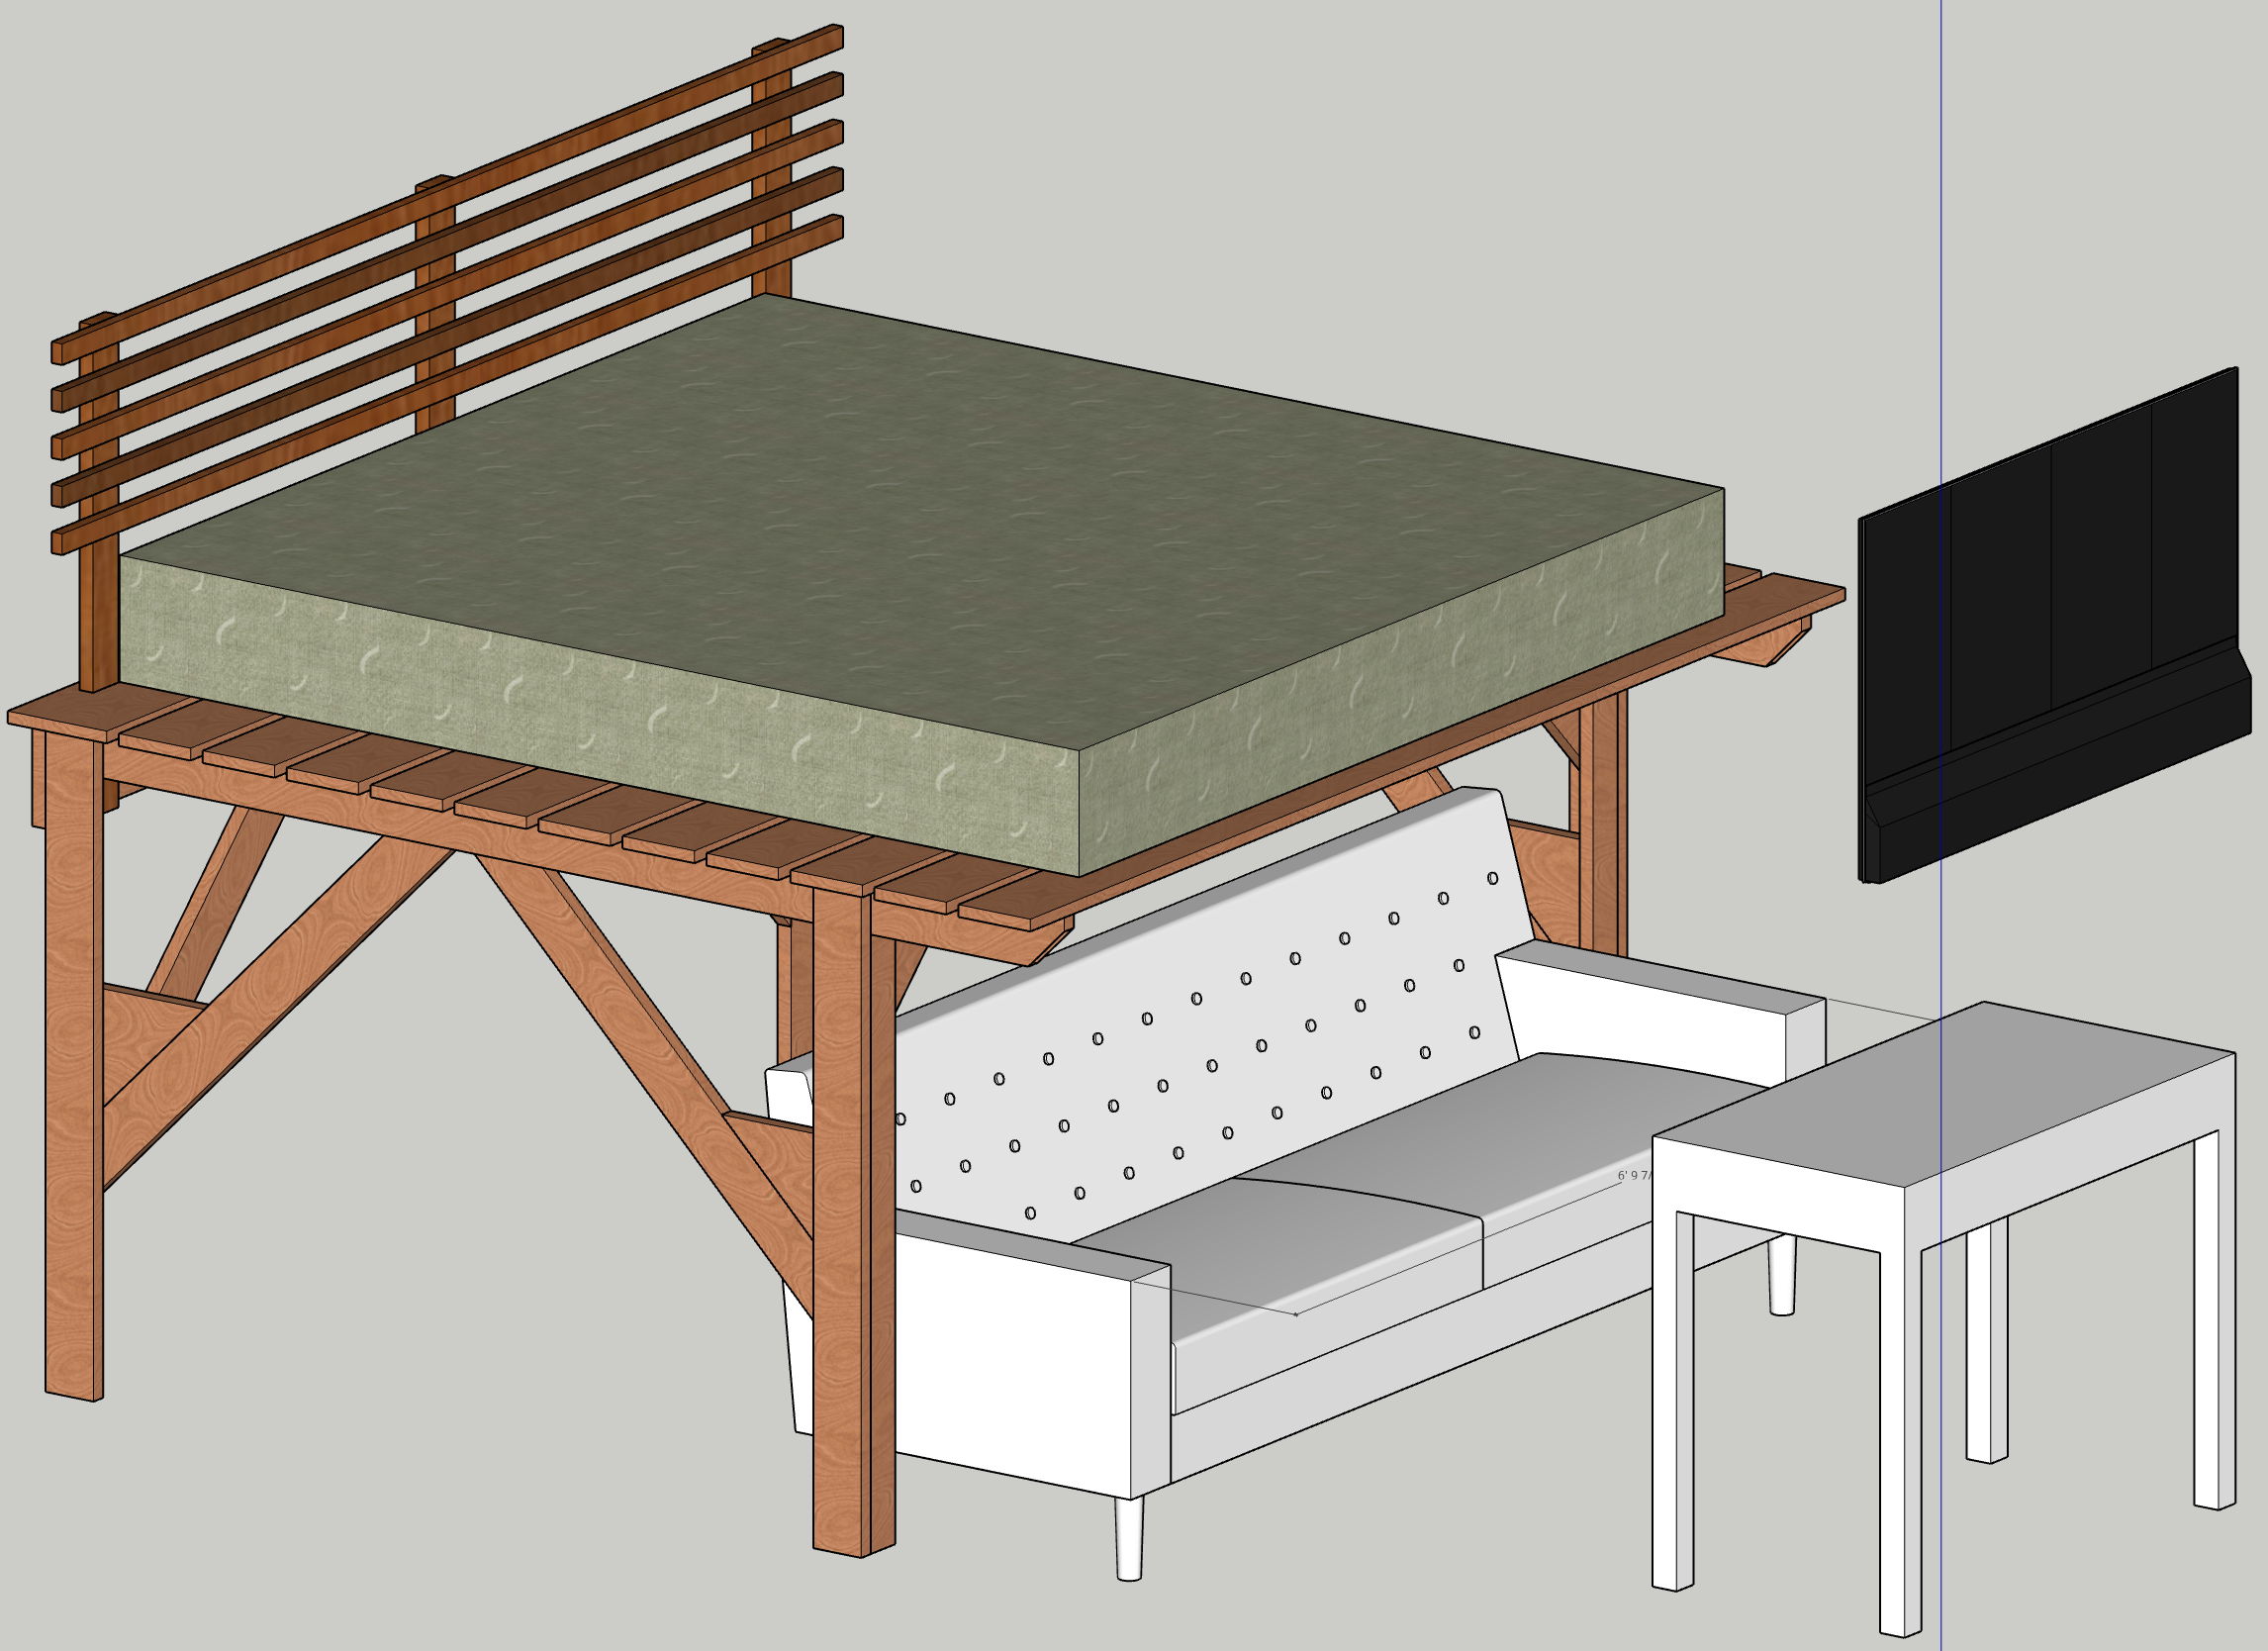
I also modeled my entire room, shown here without the walls, as that is hard to show in a single 2D frame. You can at least see what I was going for with the couch and bed dual TV viewing positions.
My second draft design, which is bascially what I built other than I added two center support beams.
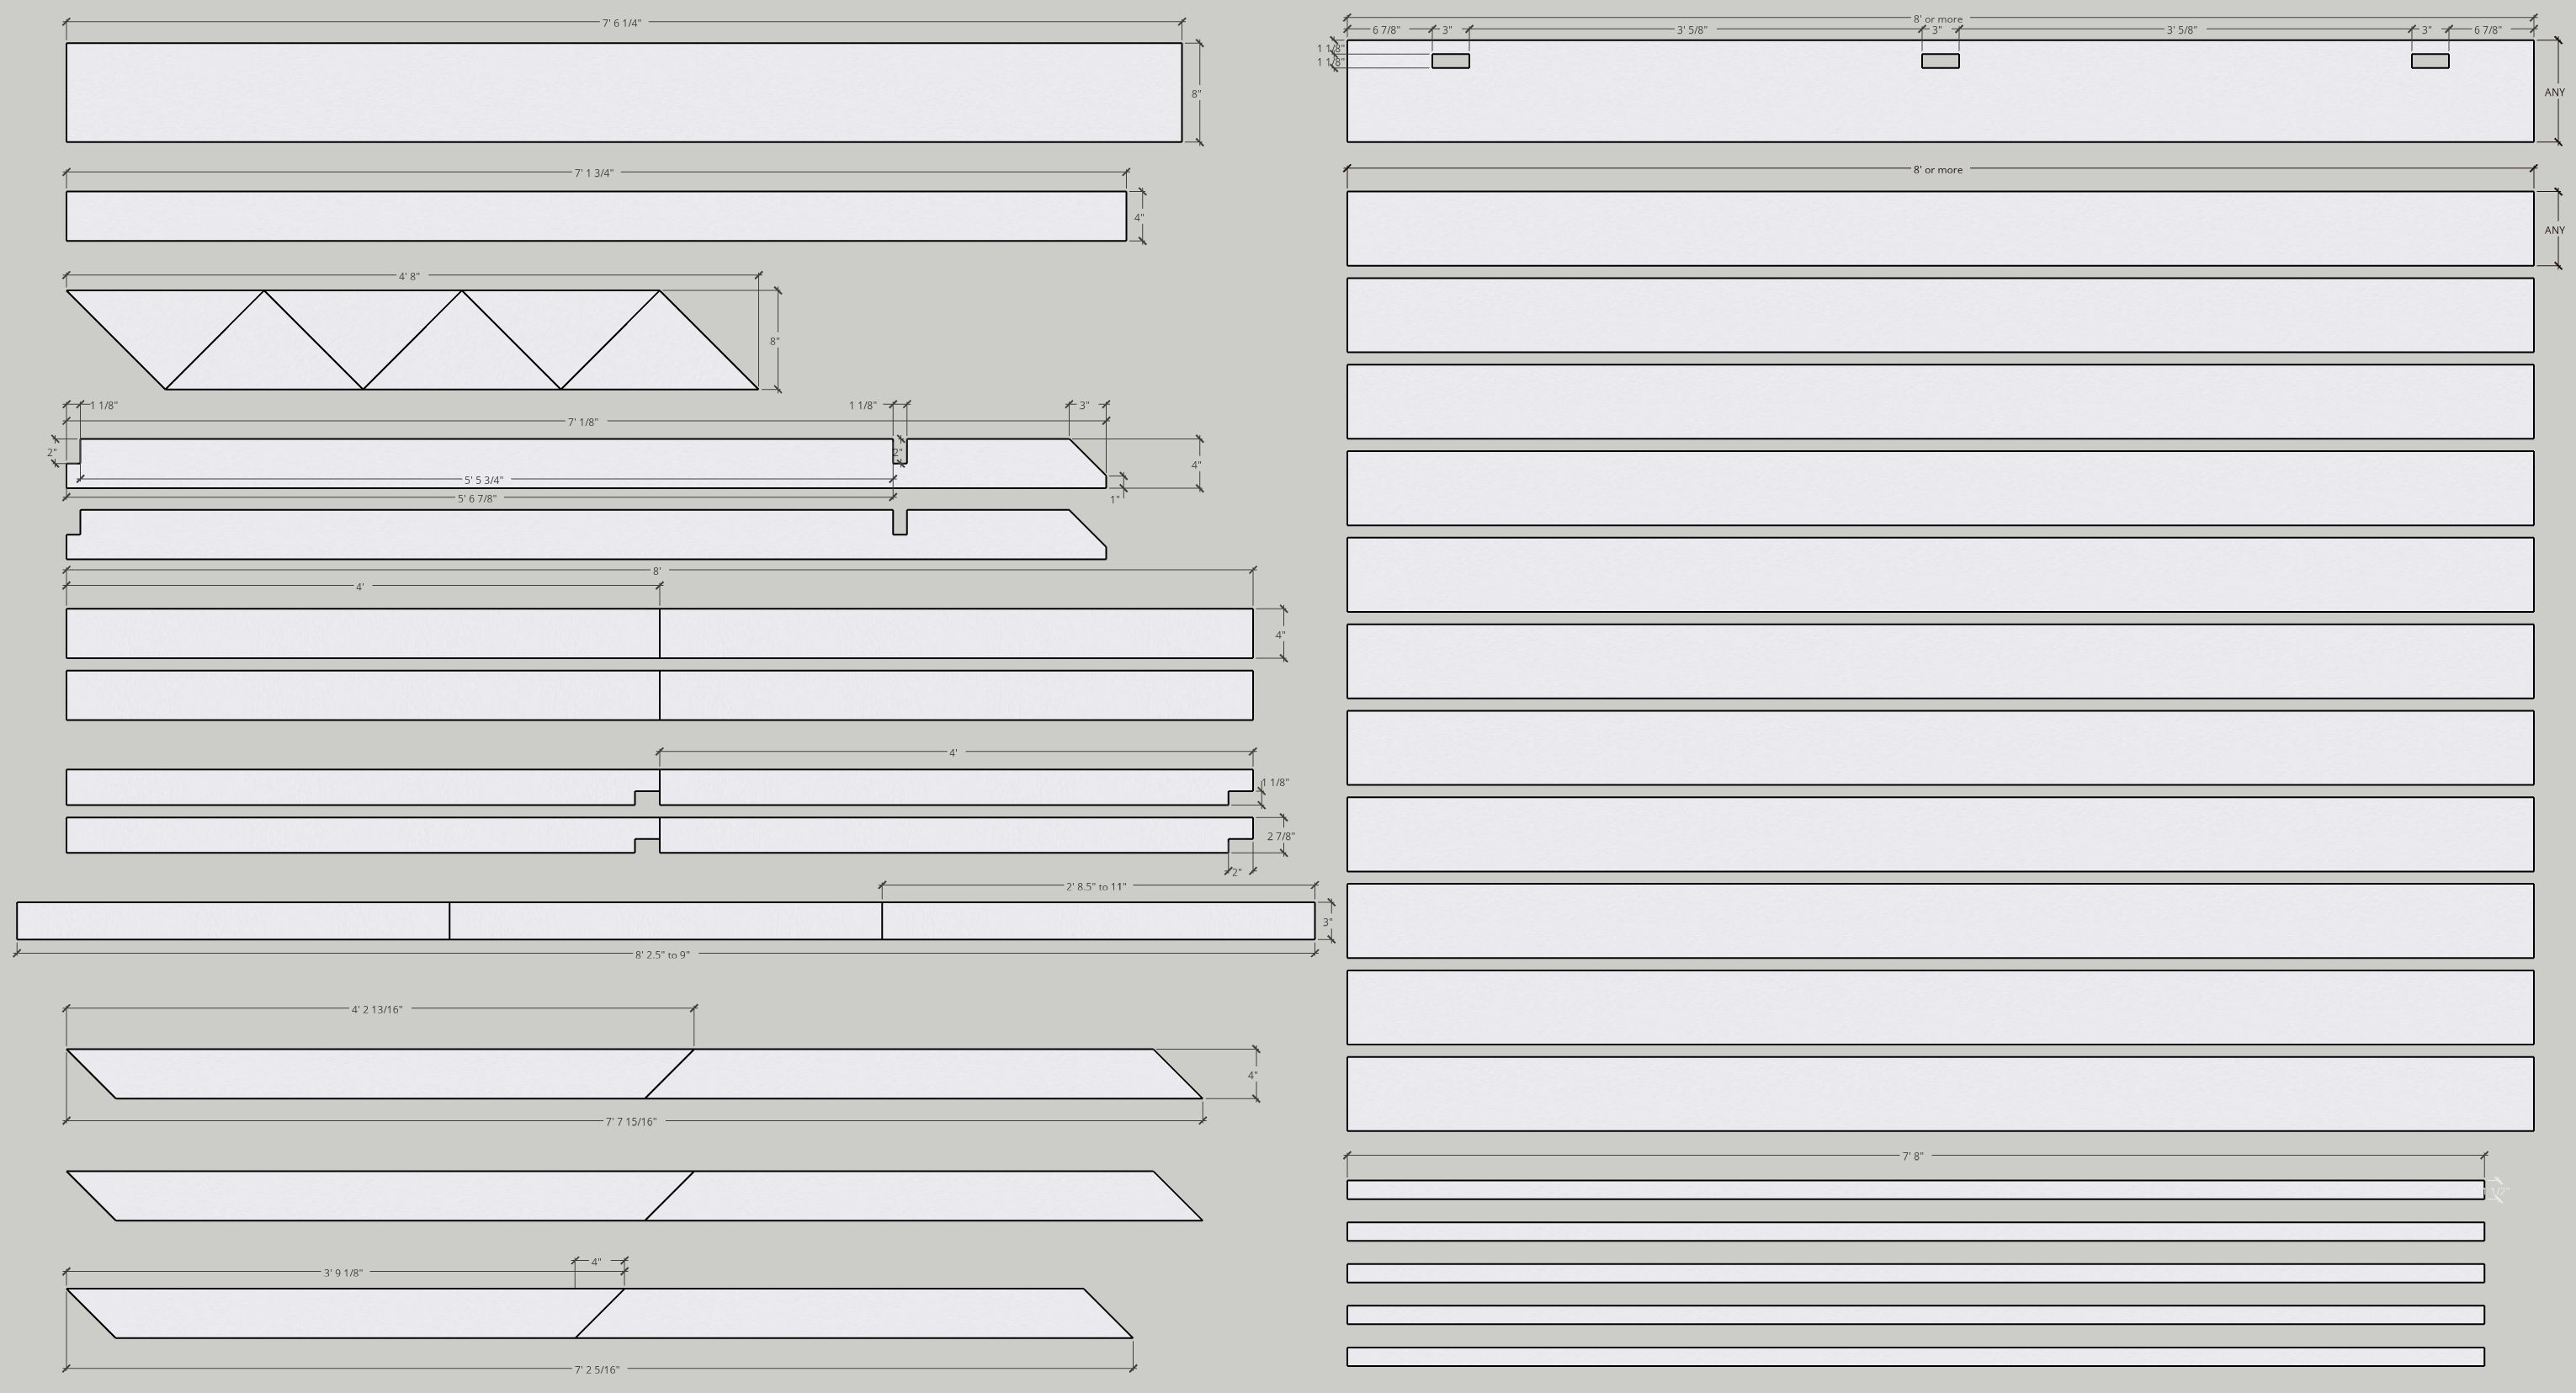
I took the inspiration from Foureyes Furniture to produce a sort of cut list by decomposing a copy of my 3D model and arranging it in 2D space to ensure nothing was missed. In the end I still missed something, as I forgot to add the center support beams to the model. I initially thought I was going to use thick enough boards to not need it, but alas, it was easy enough to add on the fly.
My second draft design, which is bascially what I built other than I added two center support beams.
I’m not sure how long this link will work, but if interested, you can check out my SketchUp project directly.
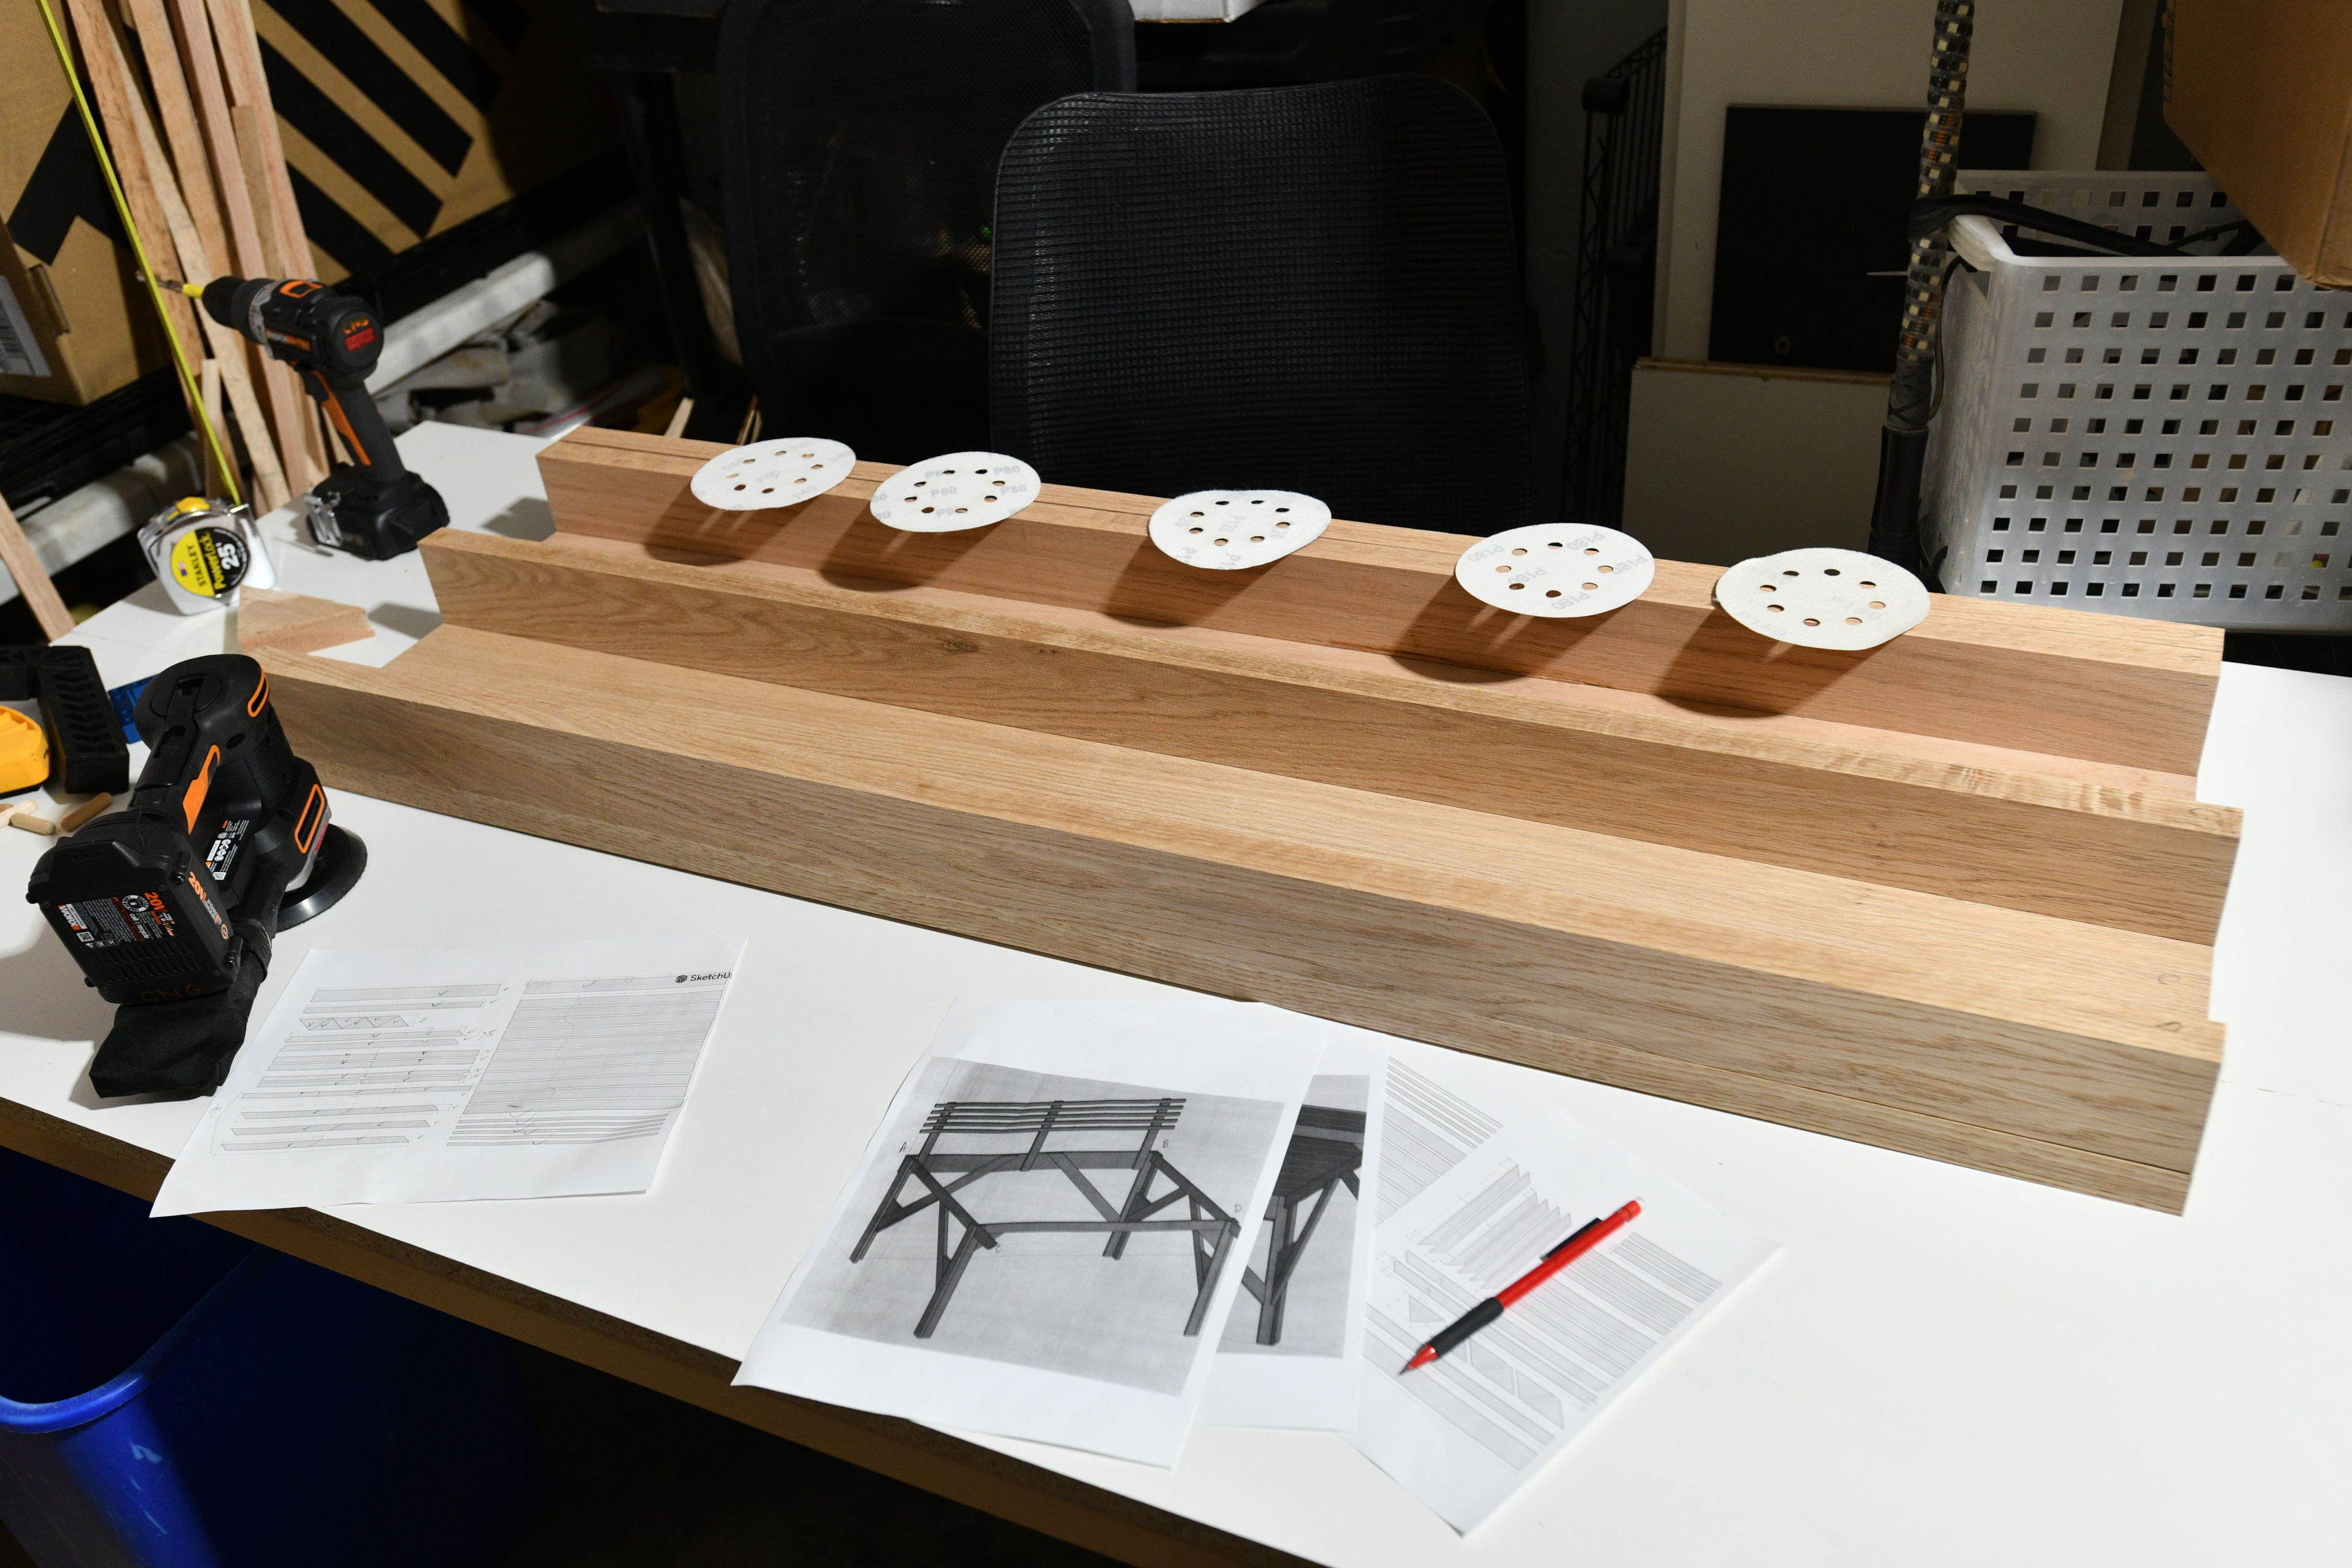
Cutting
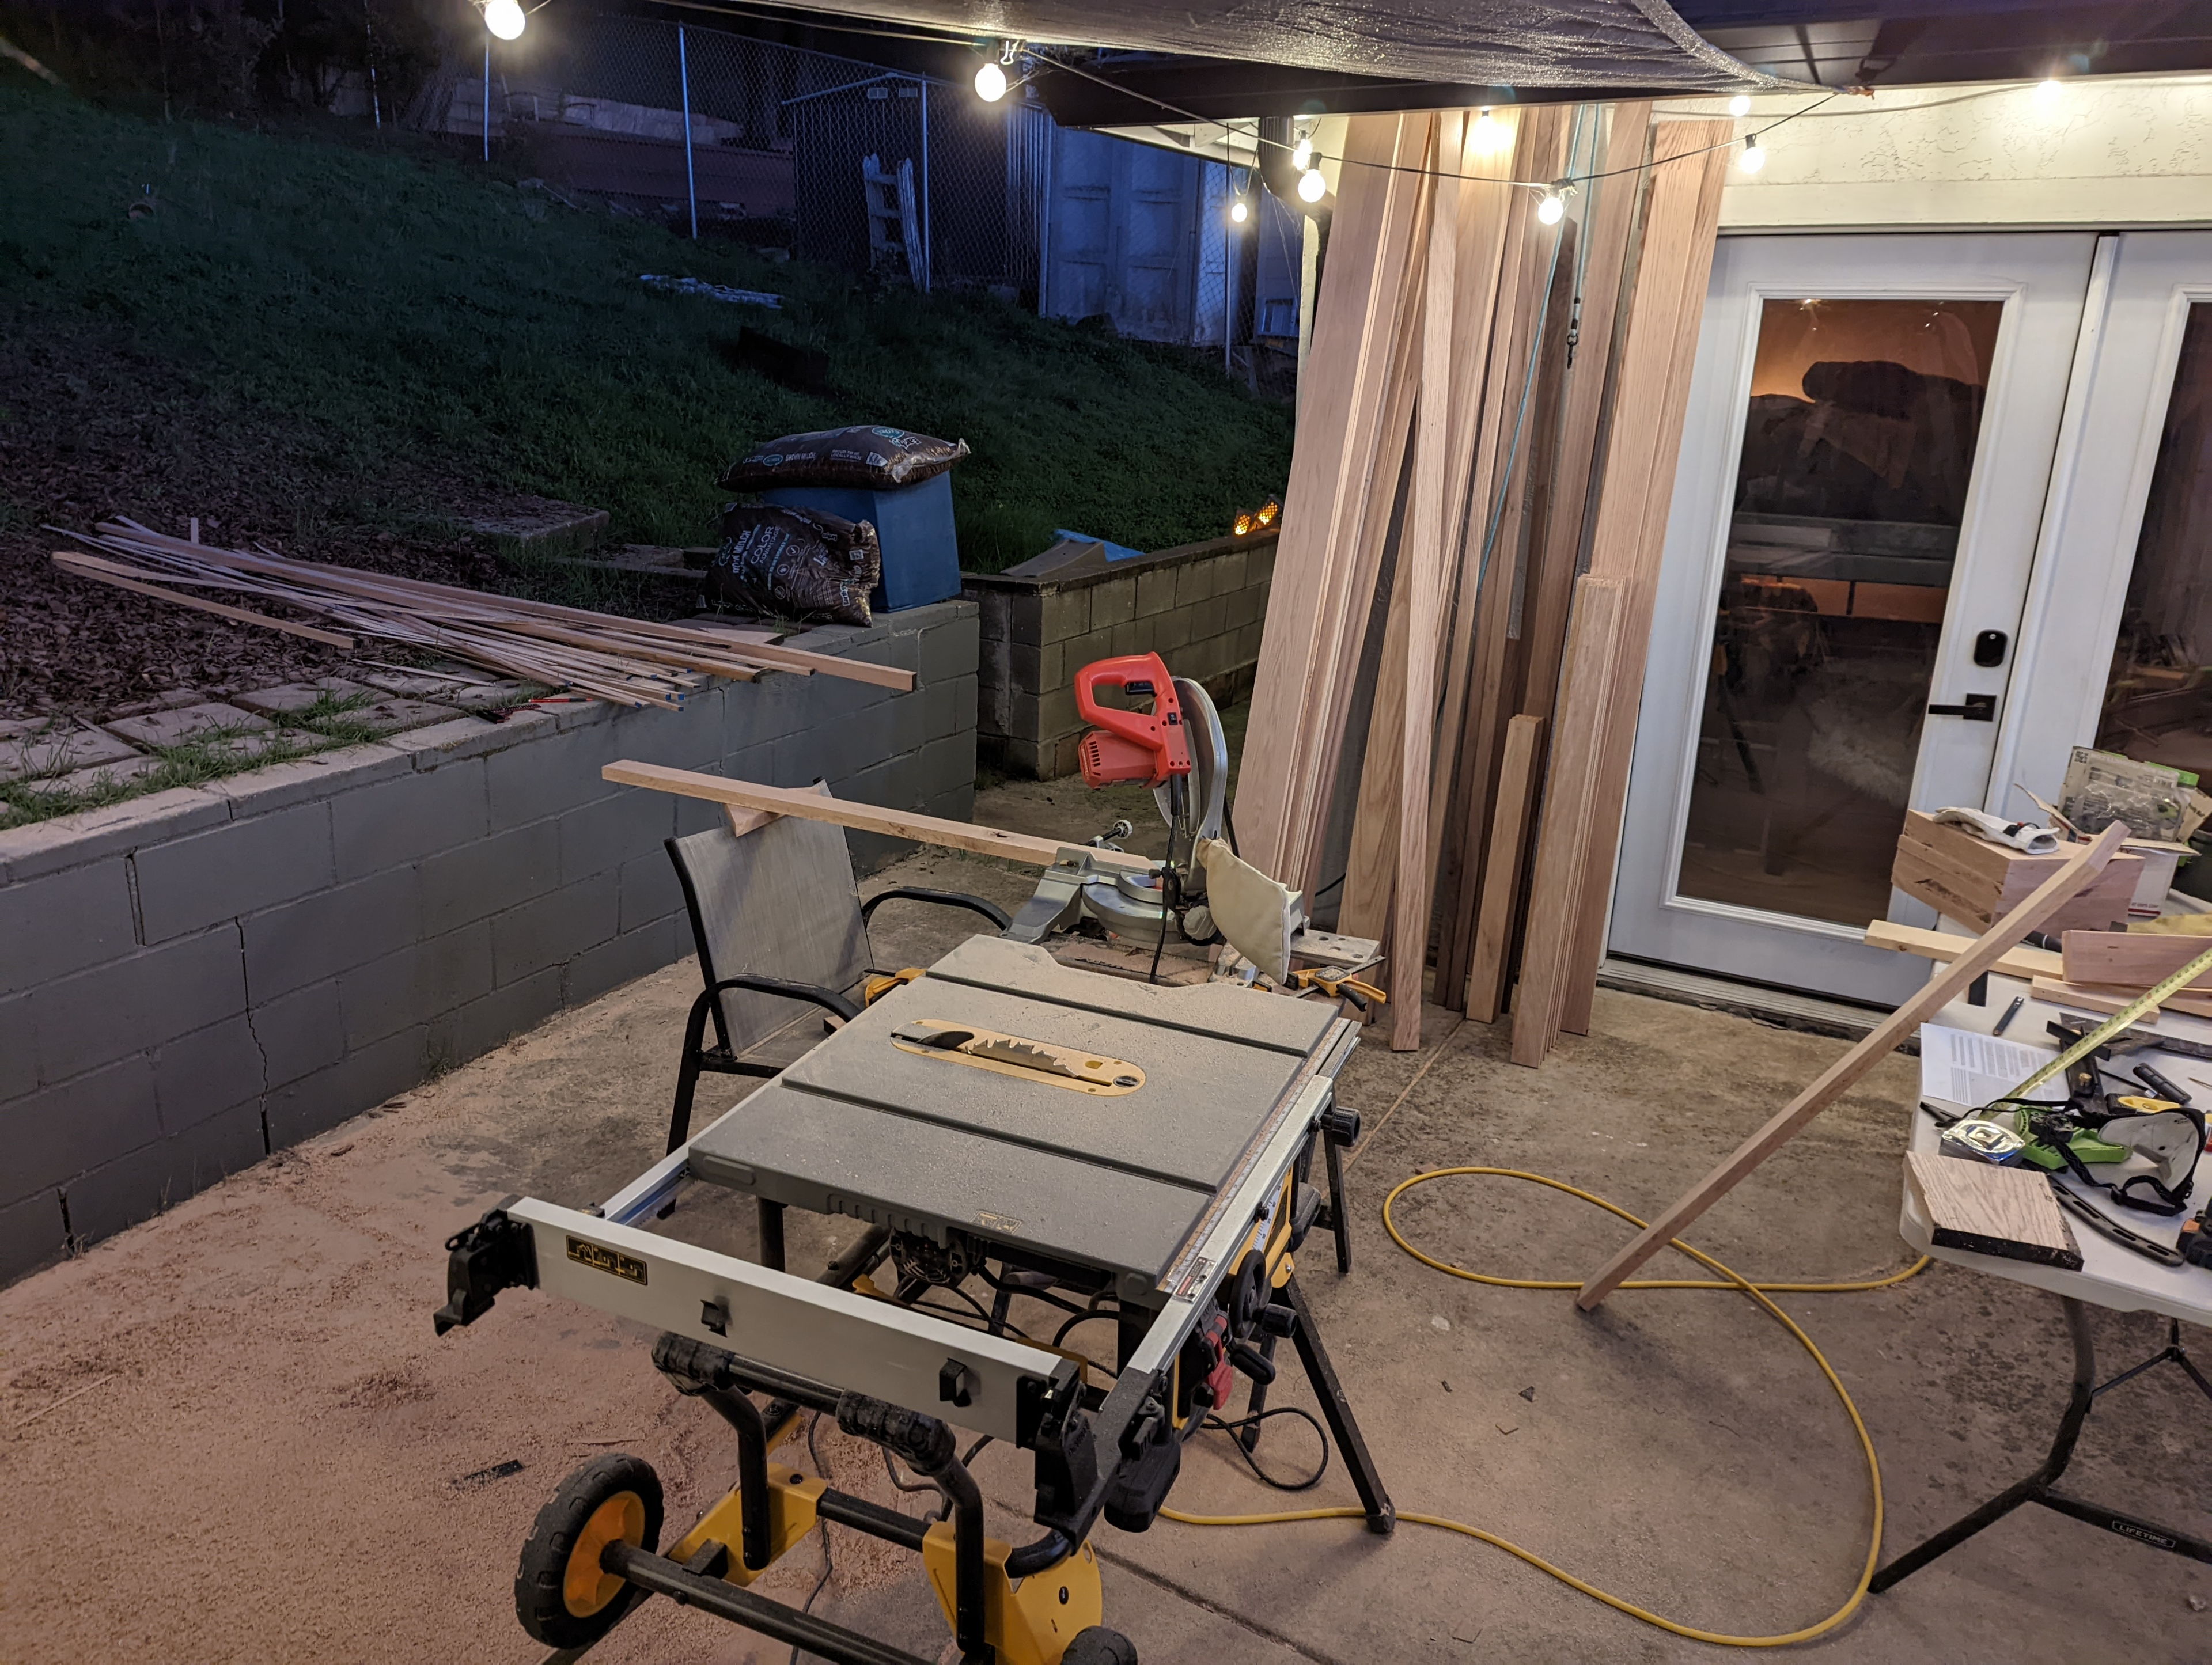
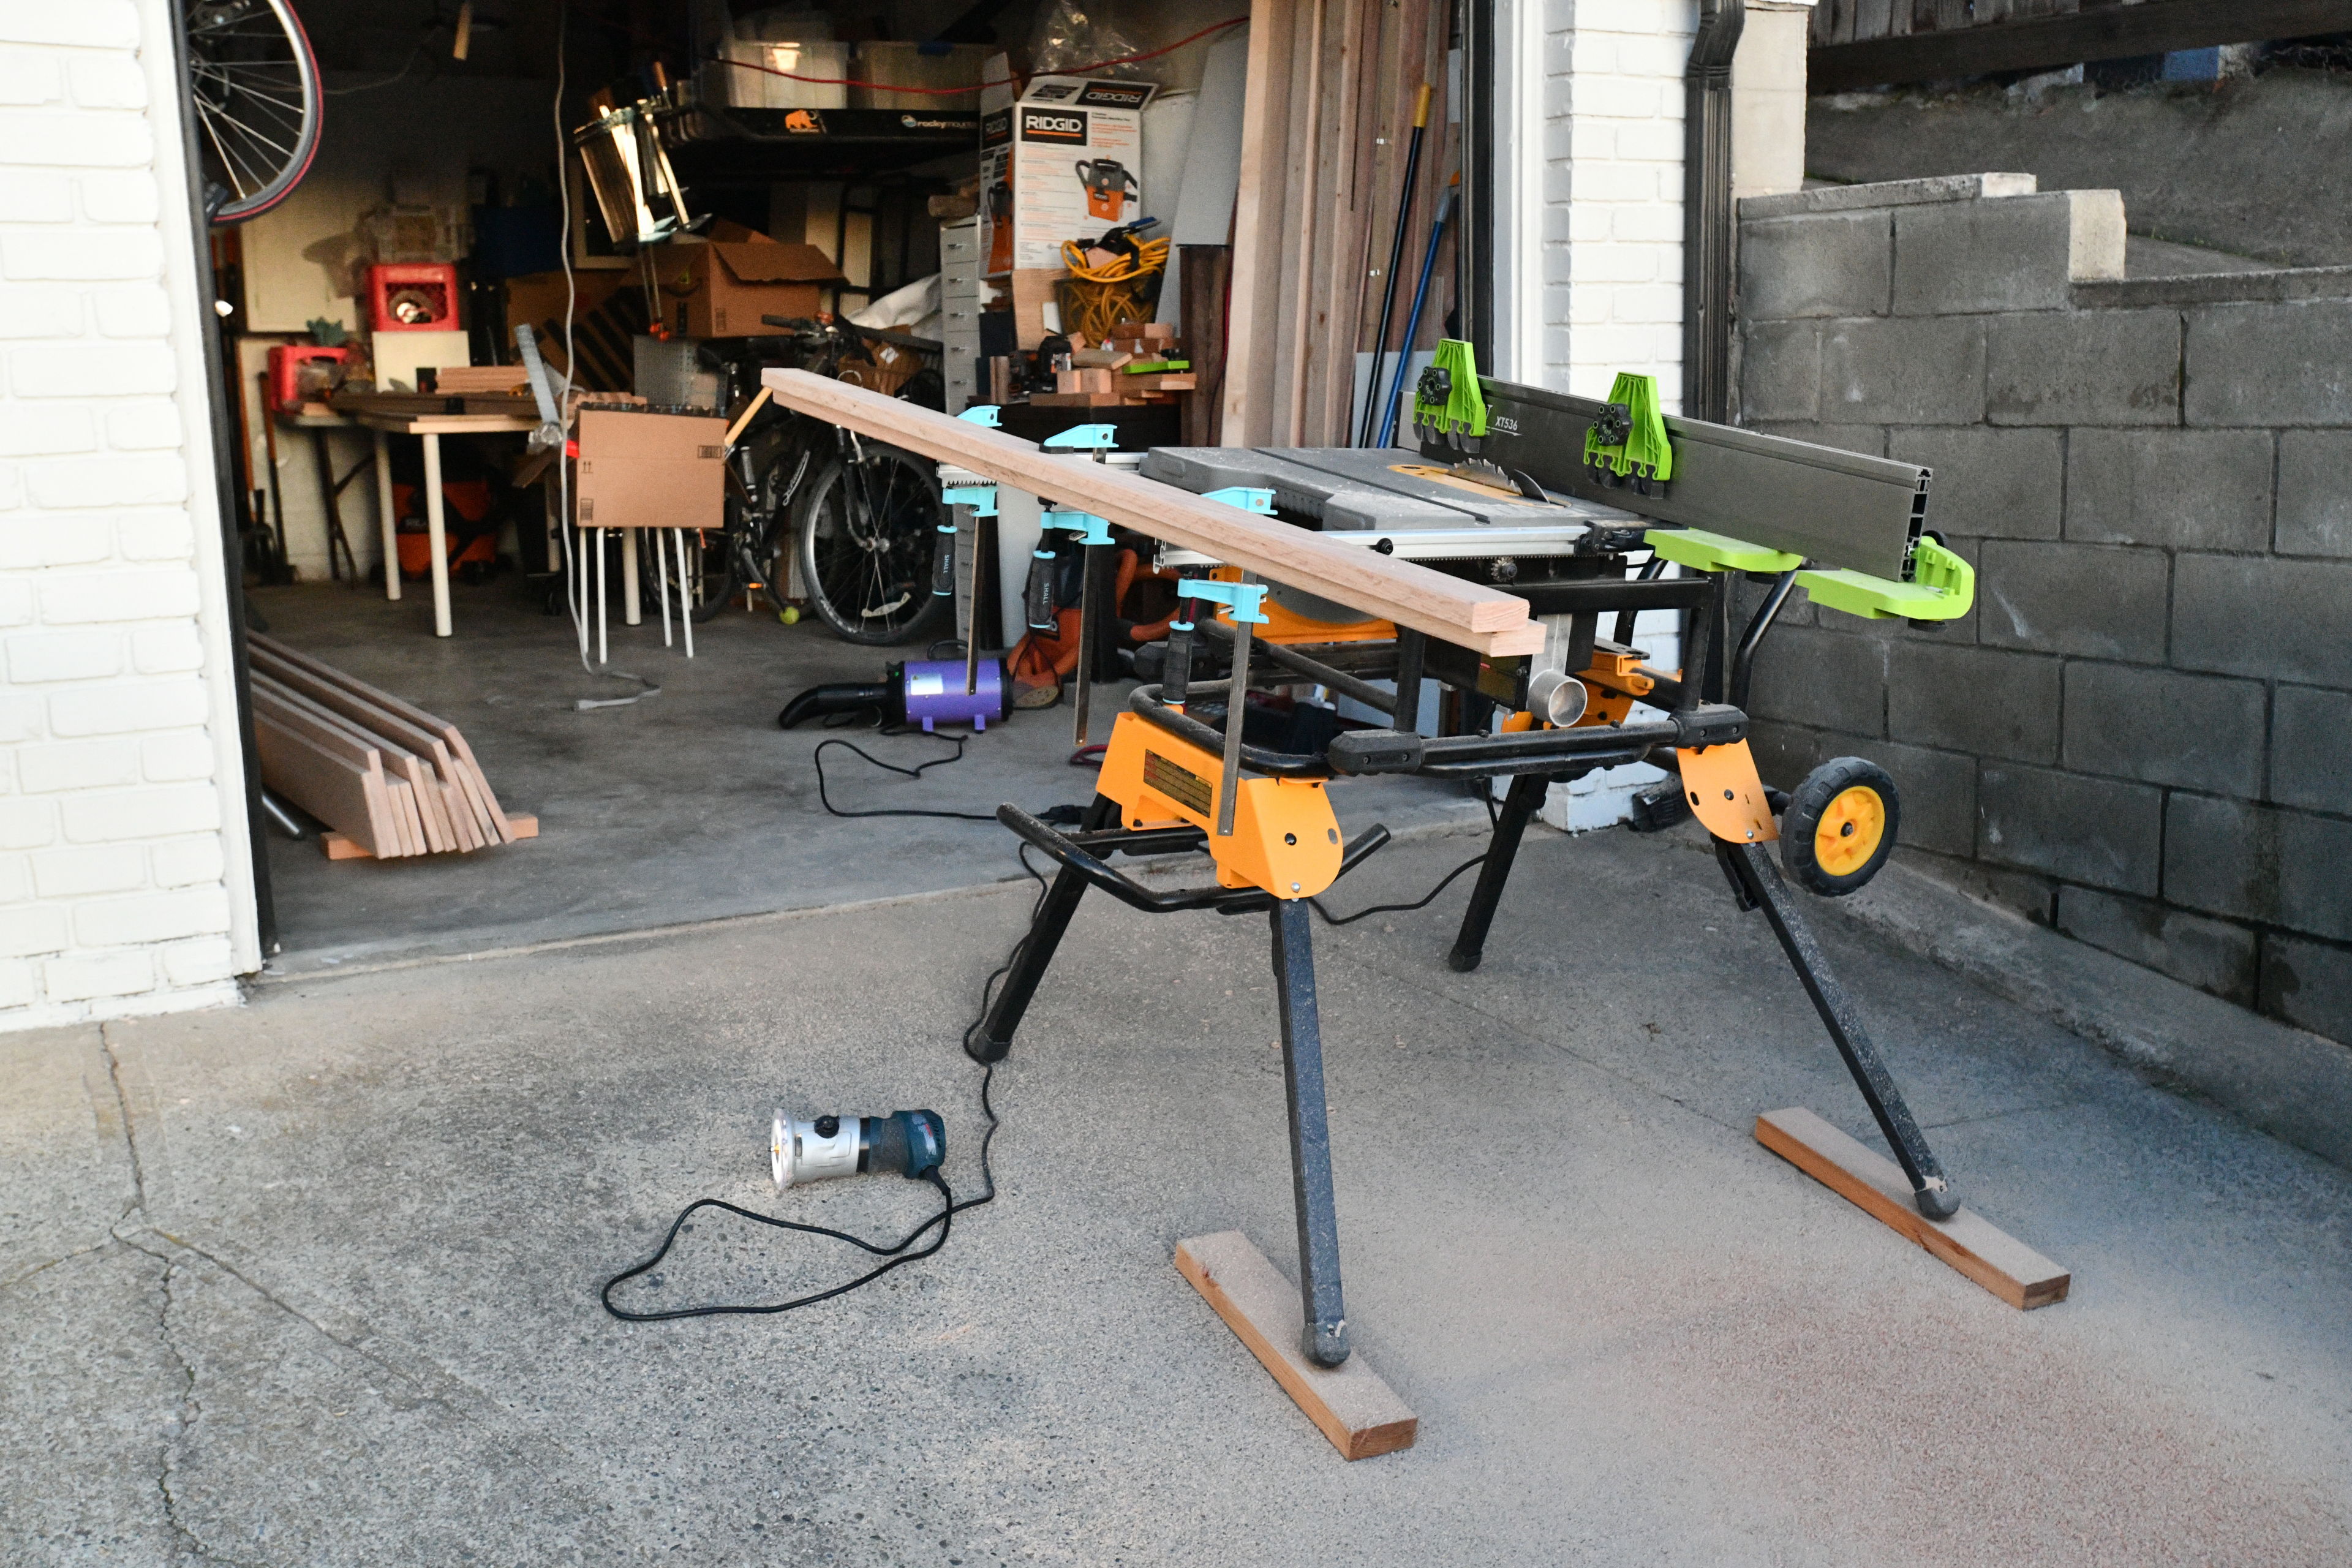
When I first used my DeWalt DWE7491RS table saw in my garage on another small project a couple of weeks ago, I learned it creates an insane amount of dust. So I decided to make most of the cuts for this project outside in the back. This required me to haul the table saw and much of my equipment up to the backyard, but it was worth it.
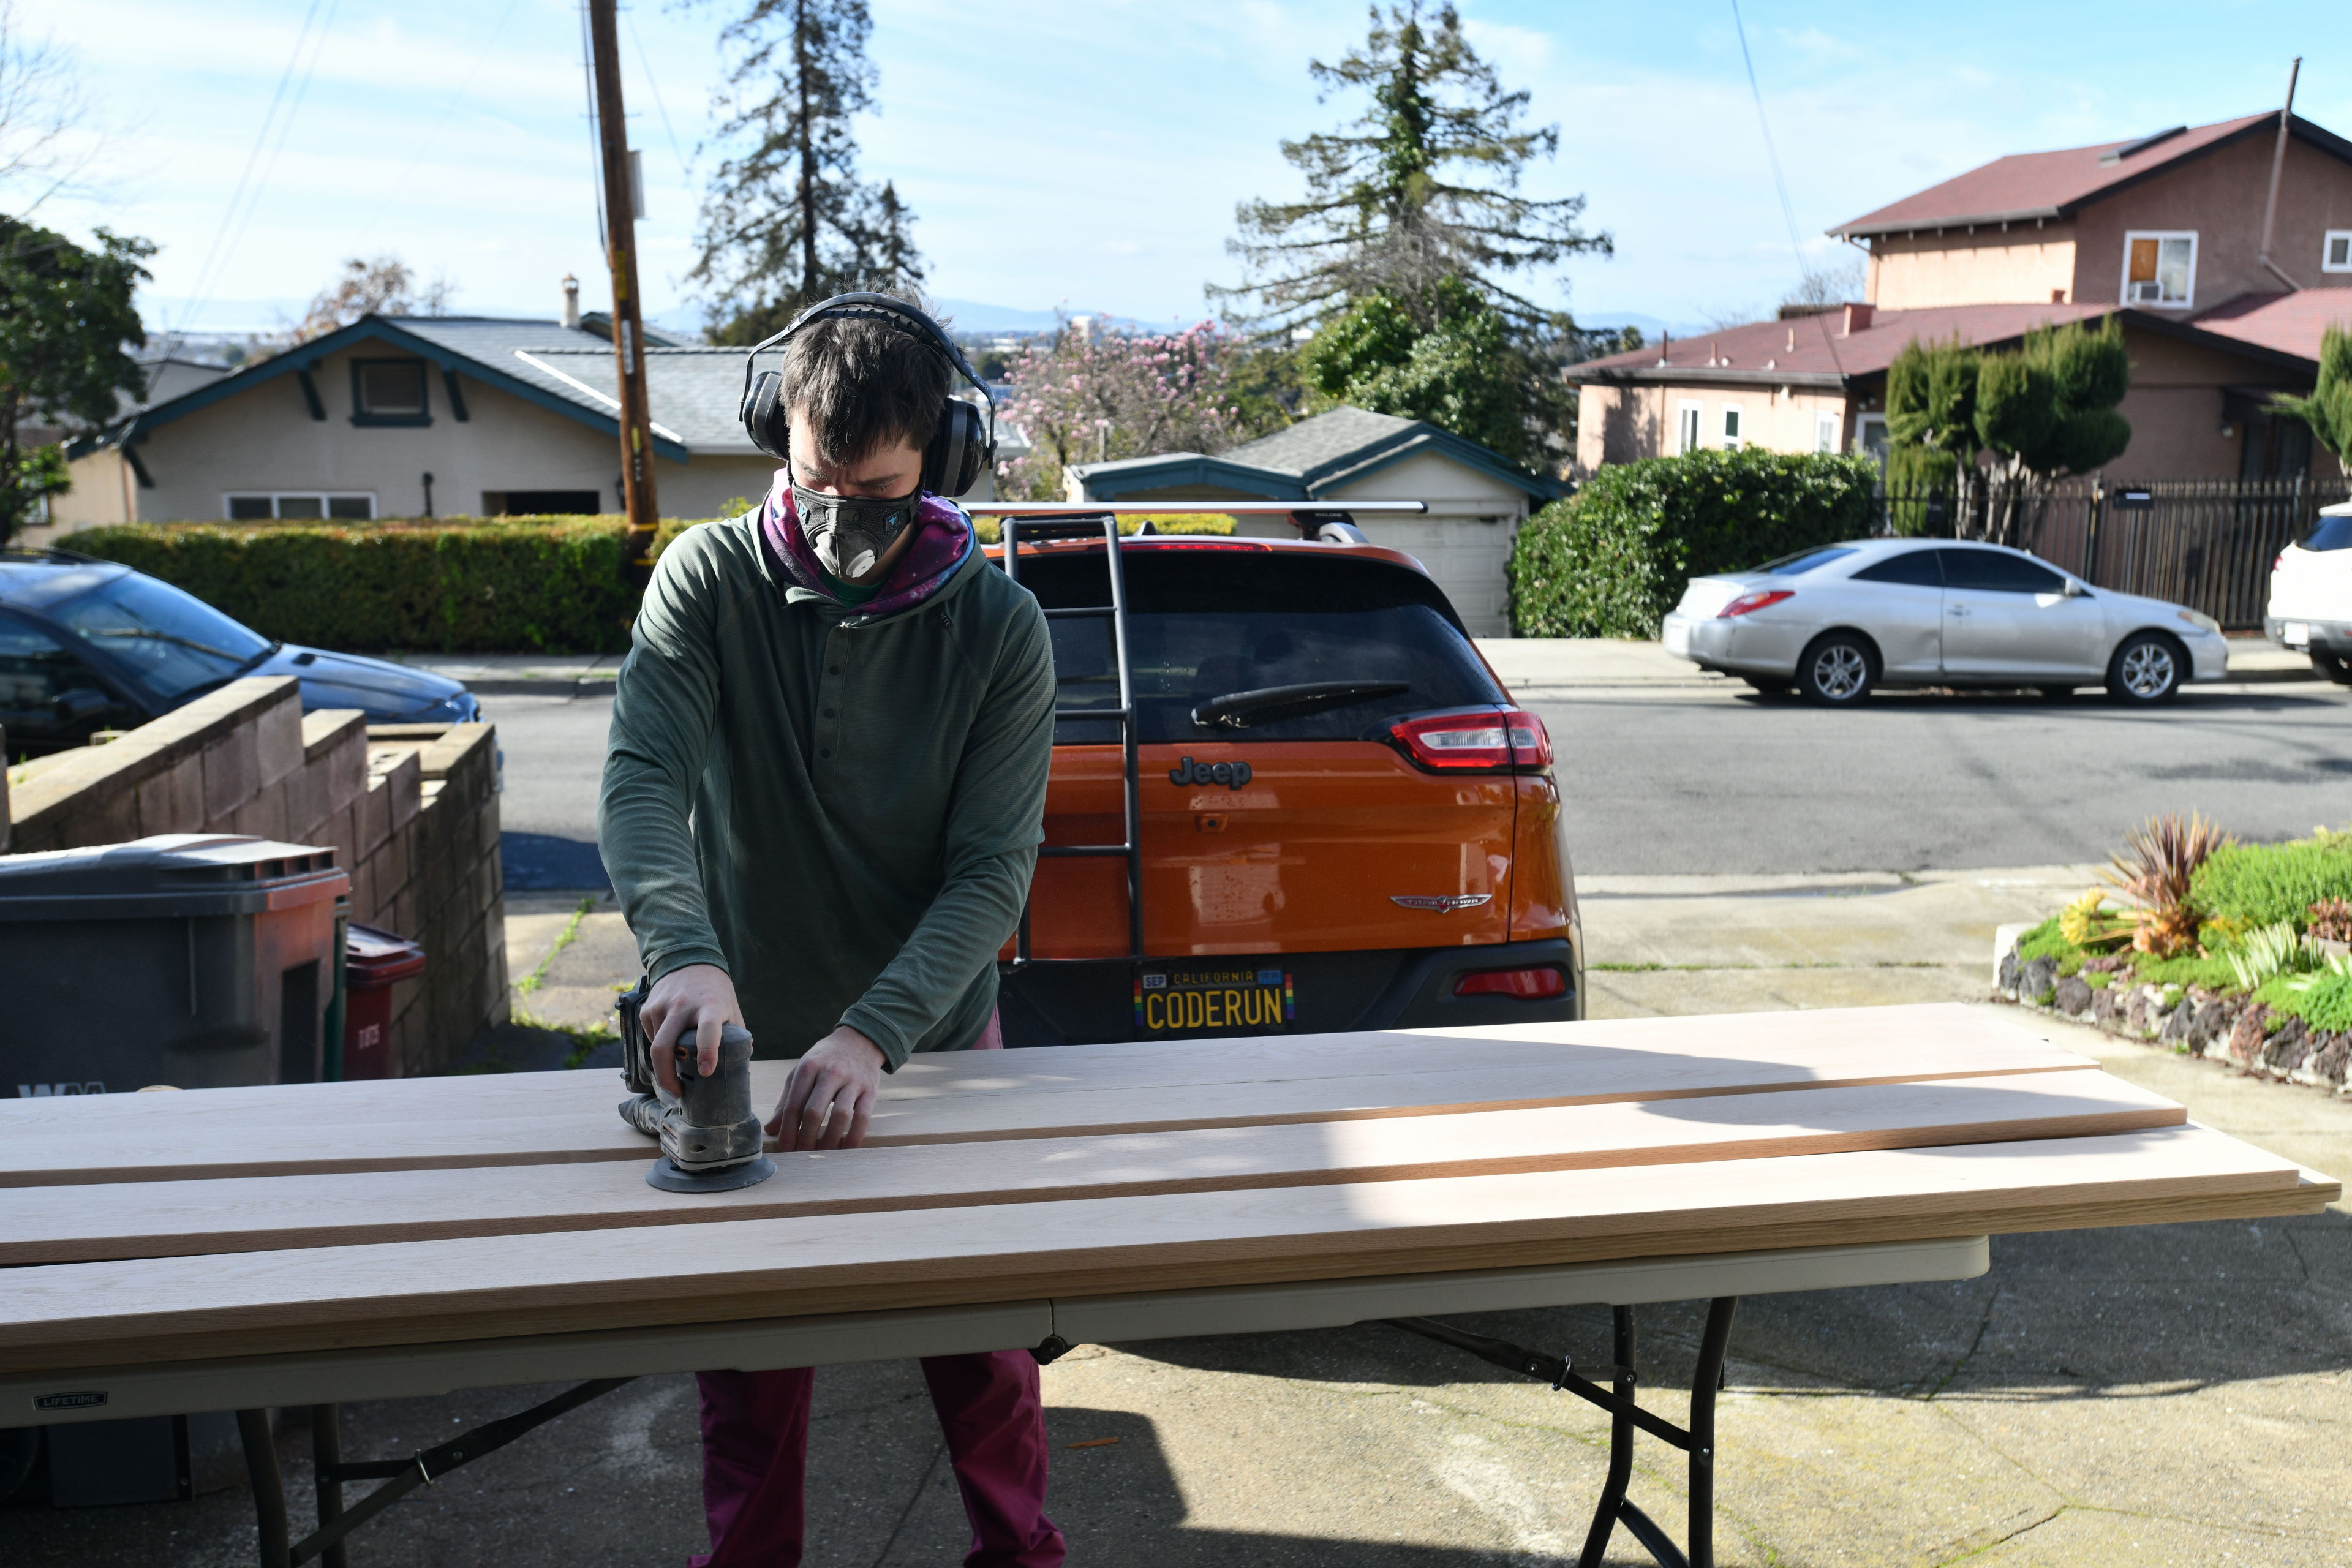
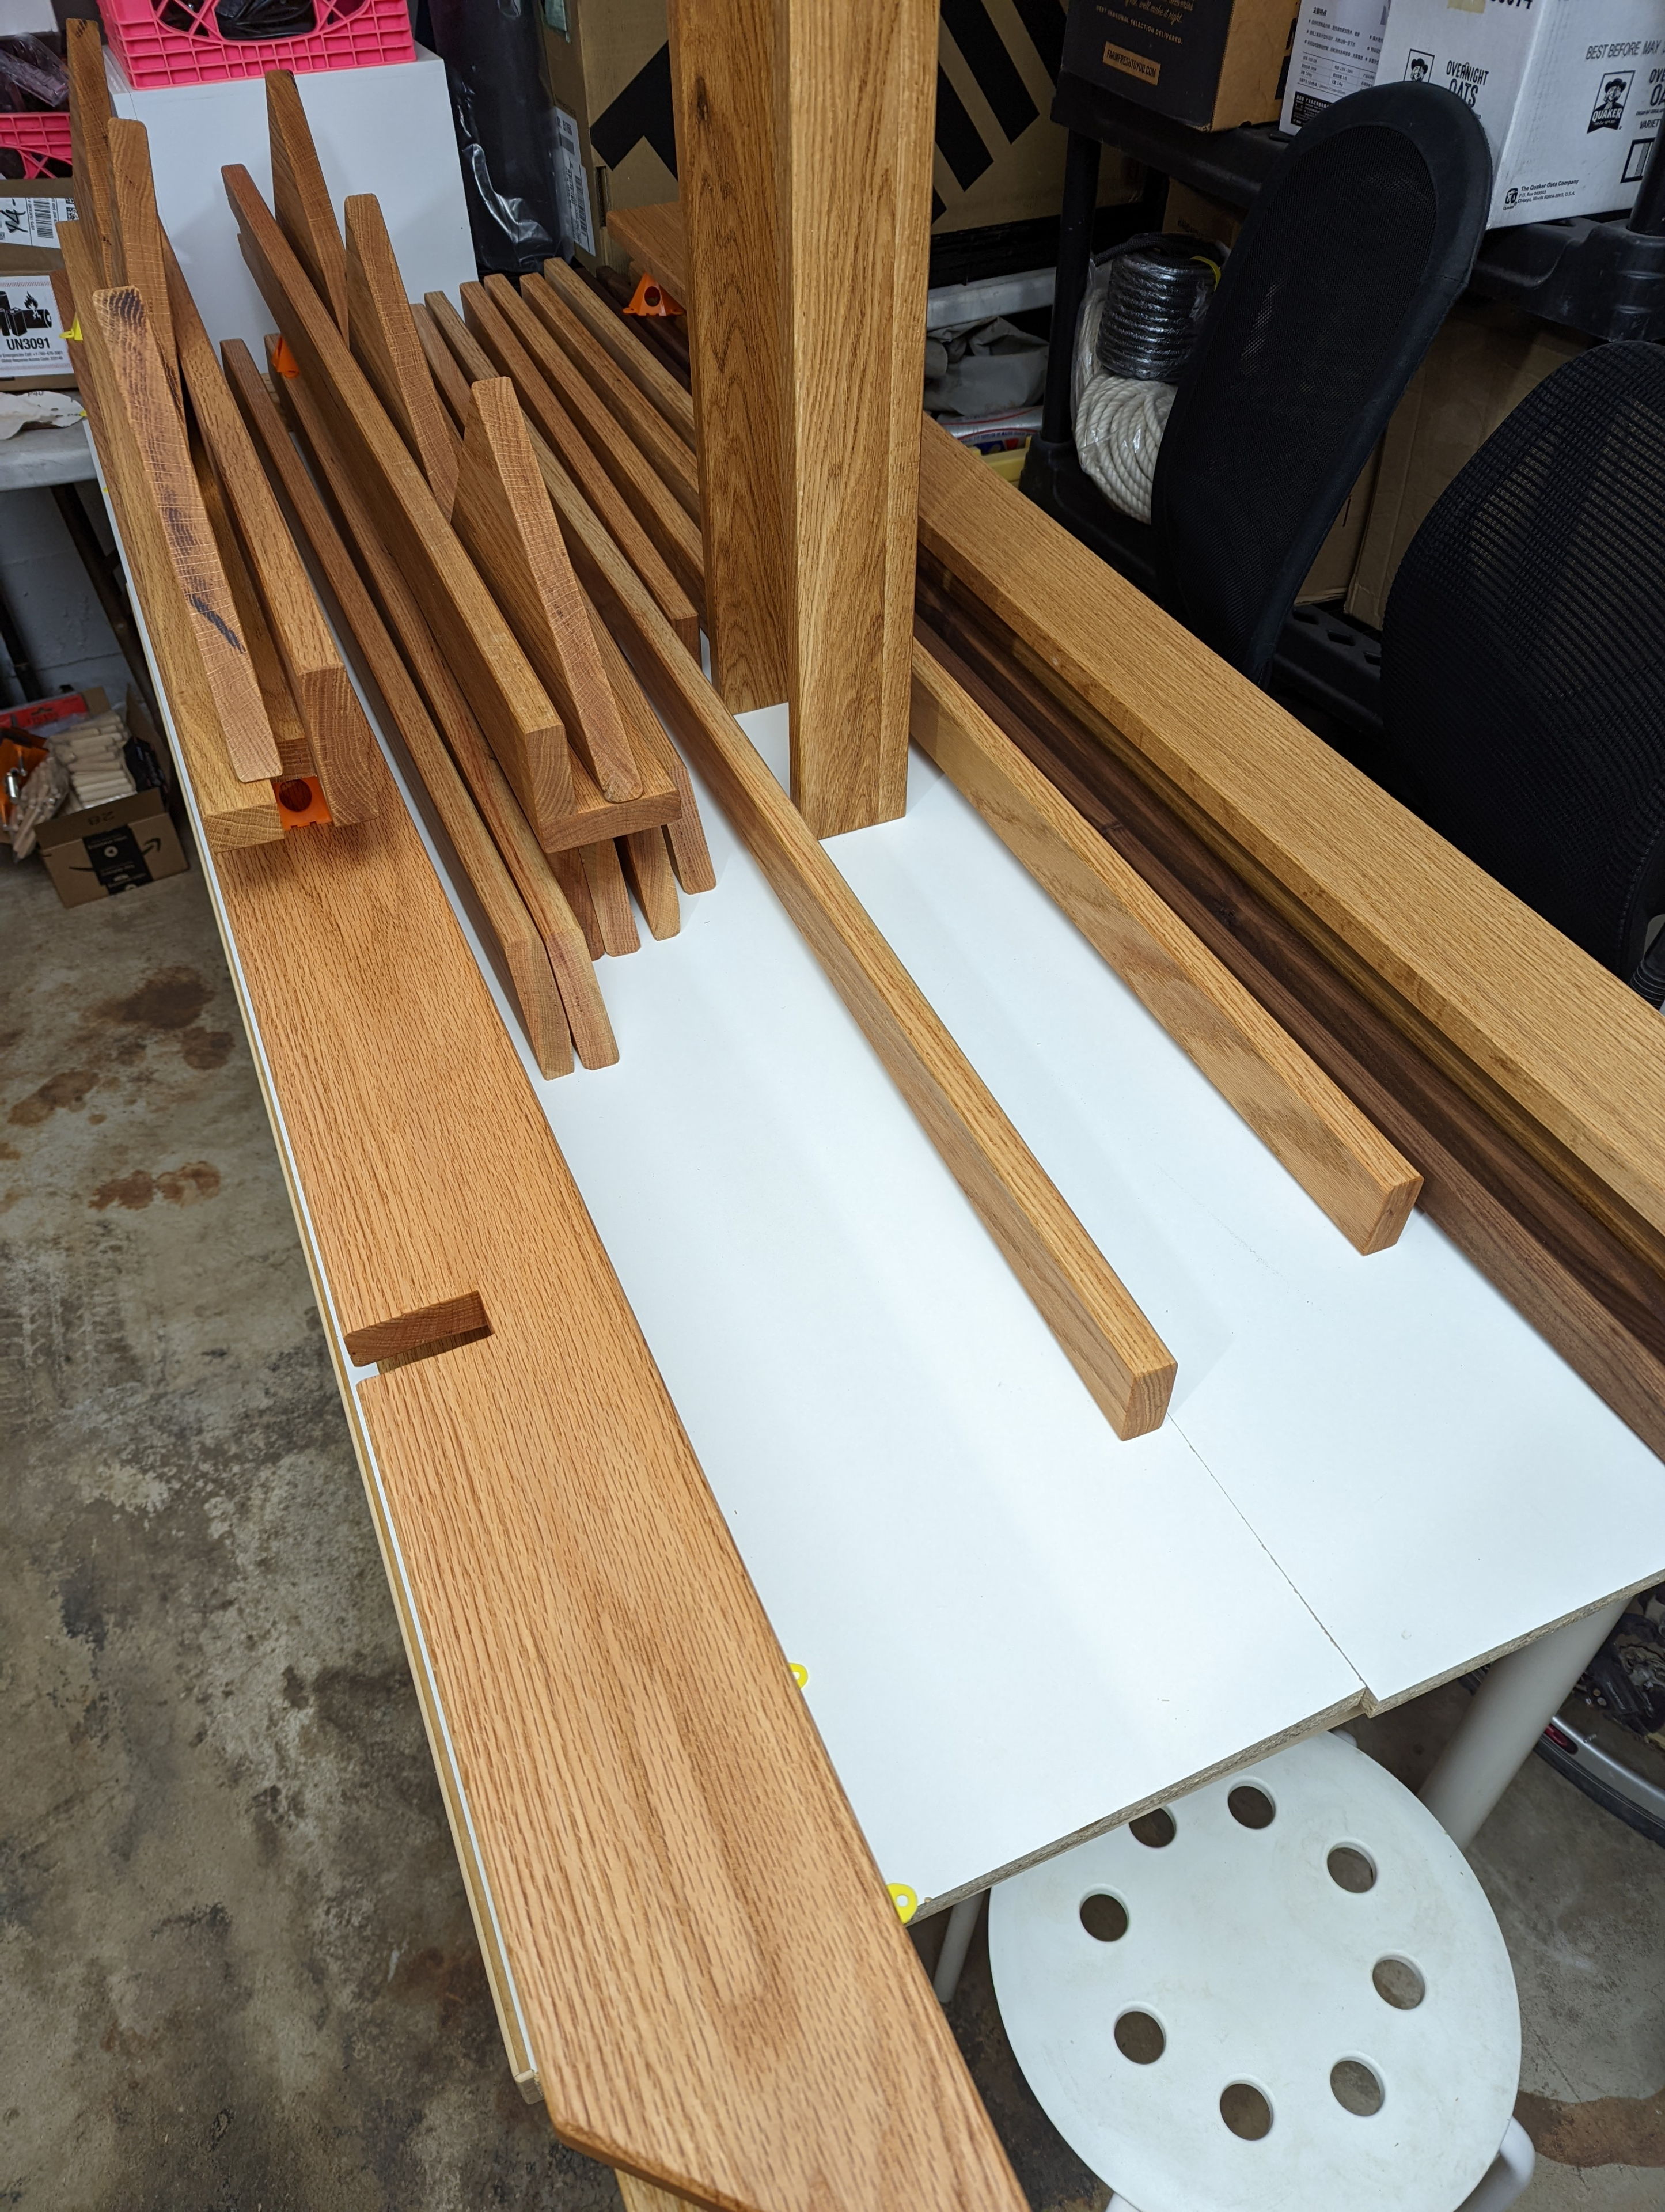
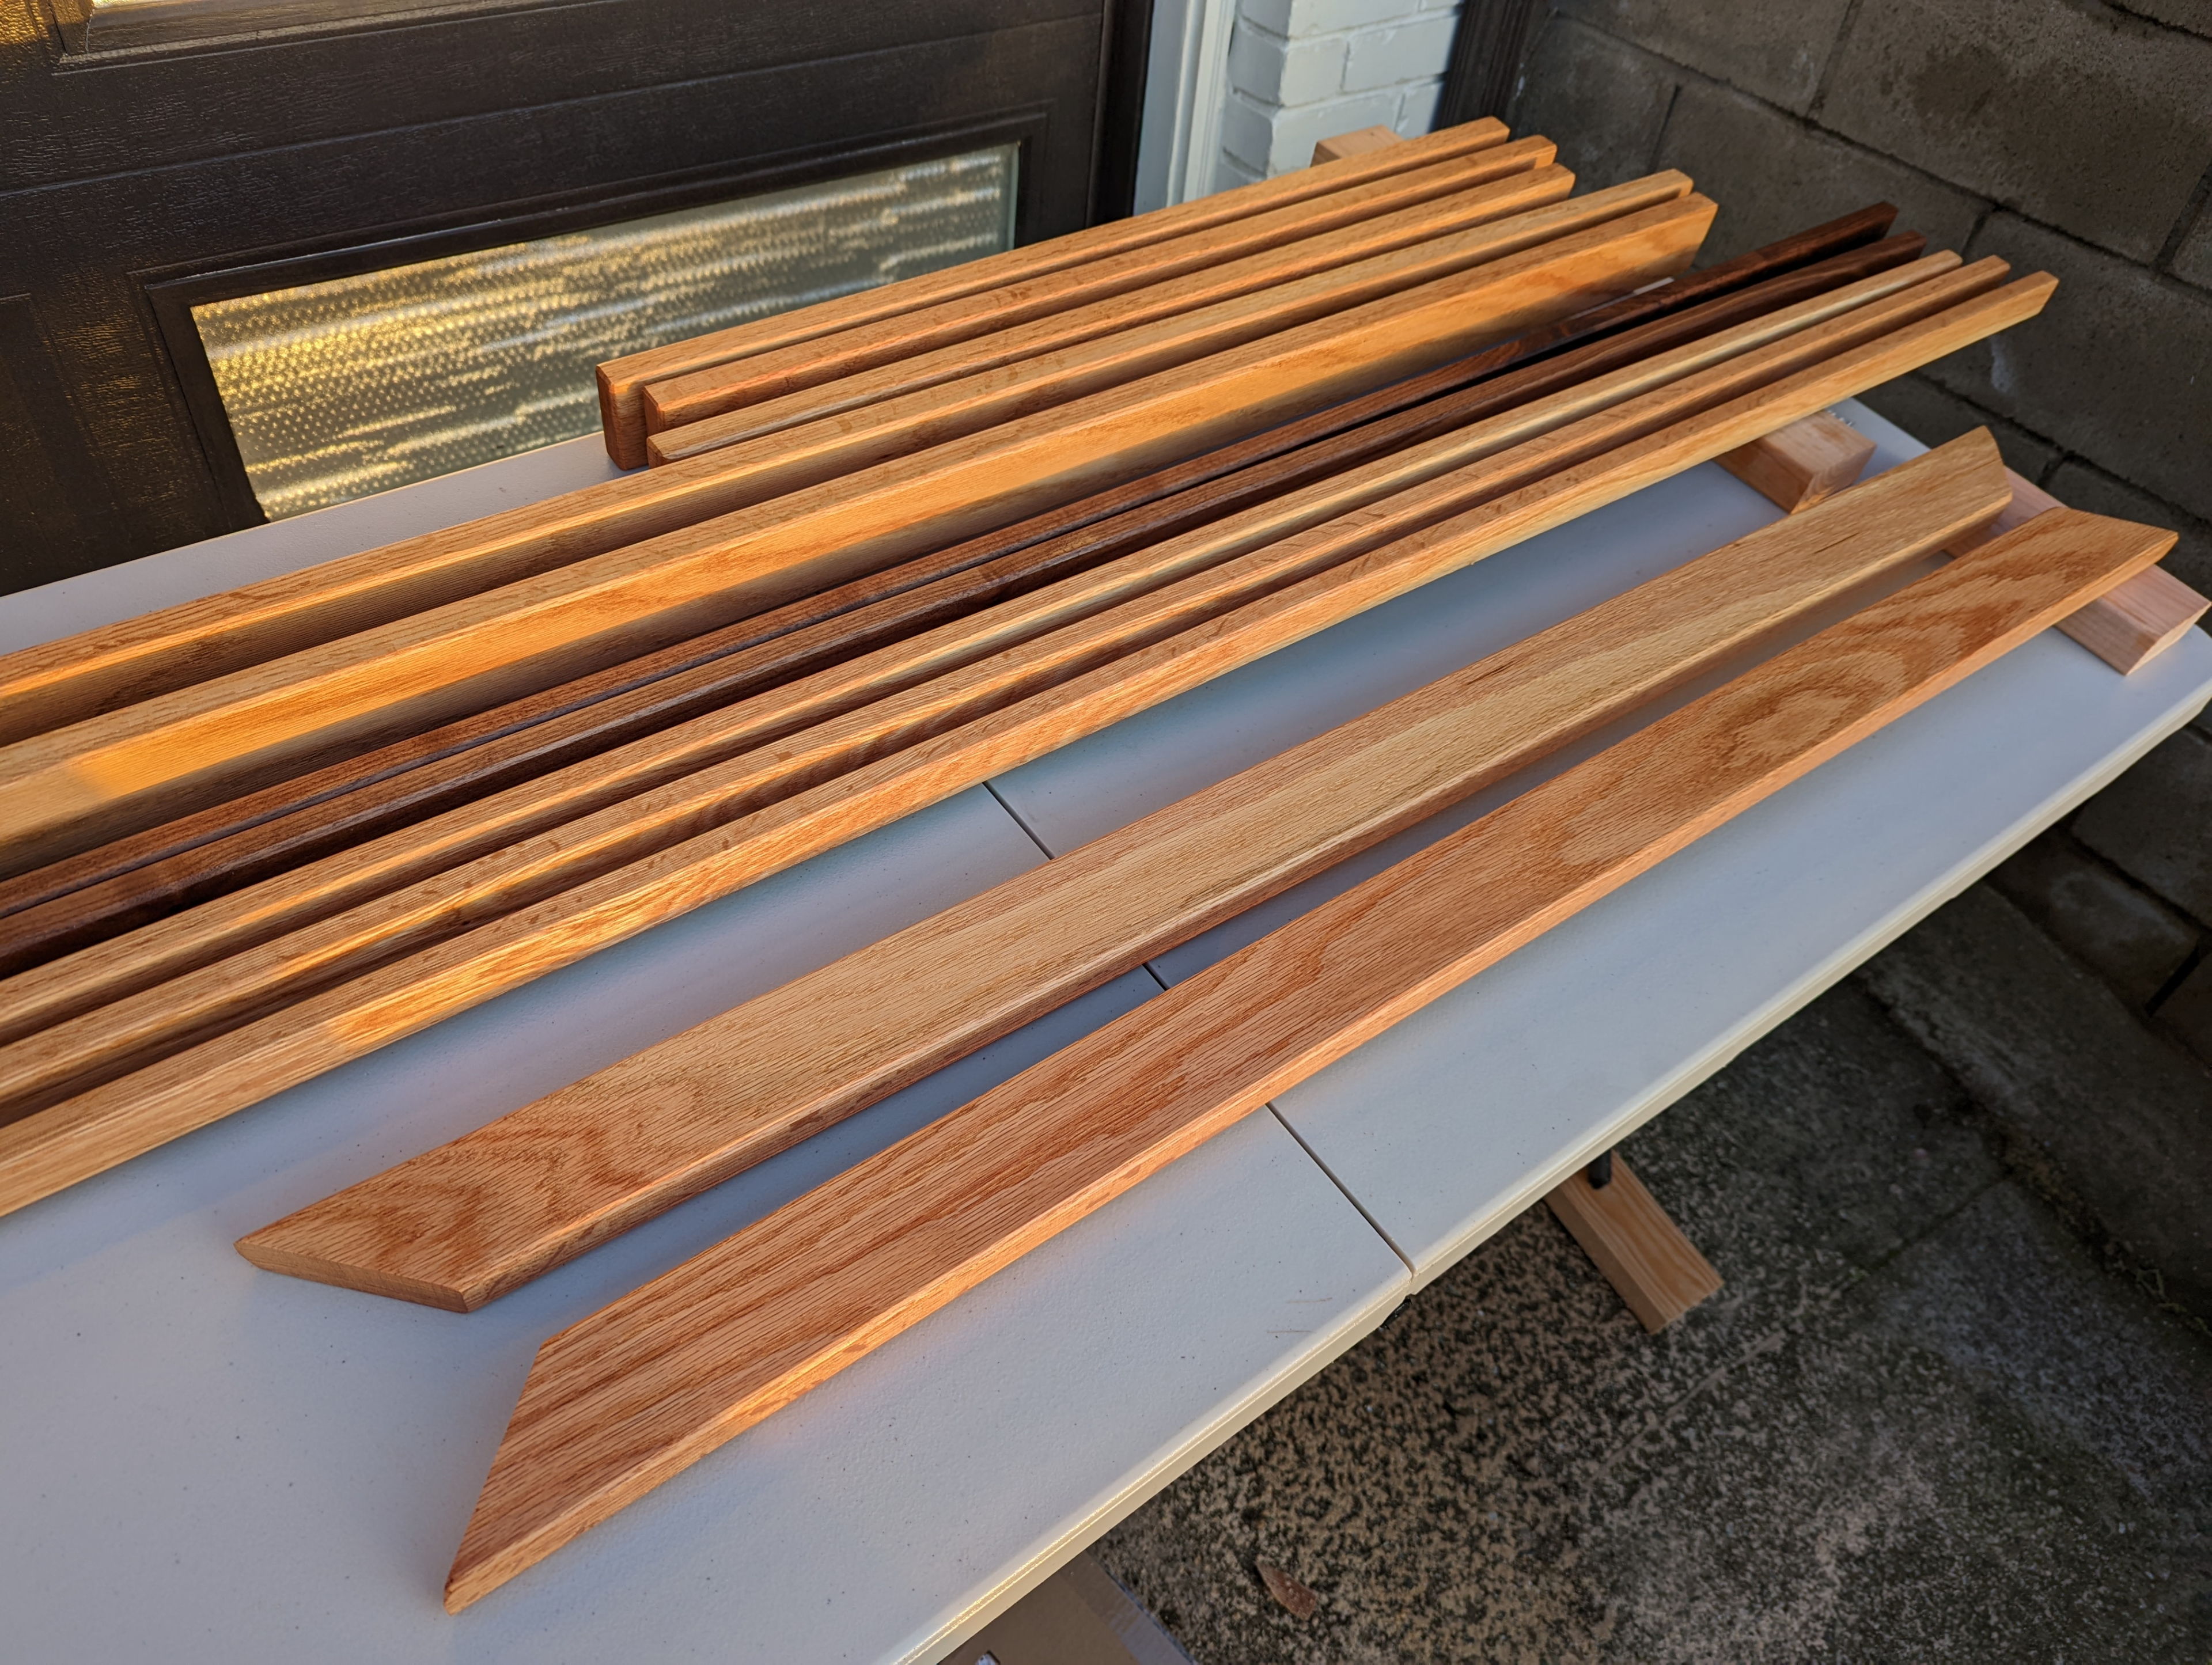
I started by cutting fourth straight edges on all the bed slats that I wanted to essentially be as wide as possible. It took me a while to get the hang of pushing 8.5 foot heavy boards through the saw without bringing them out of square. I used some featherboards and an extended fence to help, but it was still an imperfect process. I ended up with same saw marks on the boards, and the saw binded a few times. But overall it worked pretty well.
Then I just looked at my diagram and worked through the cuts, selecting the most obvious boards for each and attempting to preserve a few in case I made any mistakes.
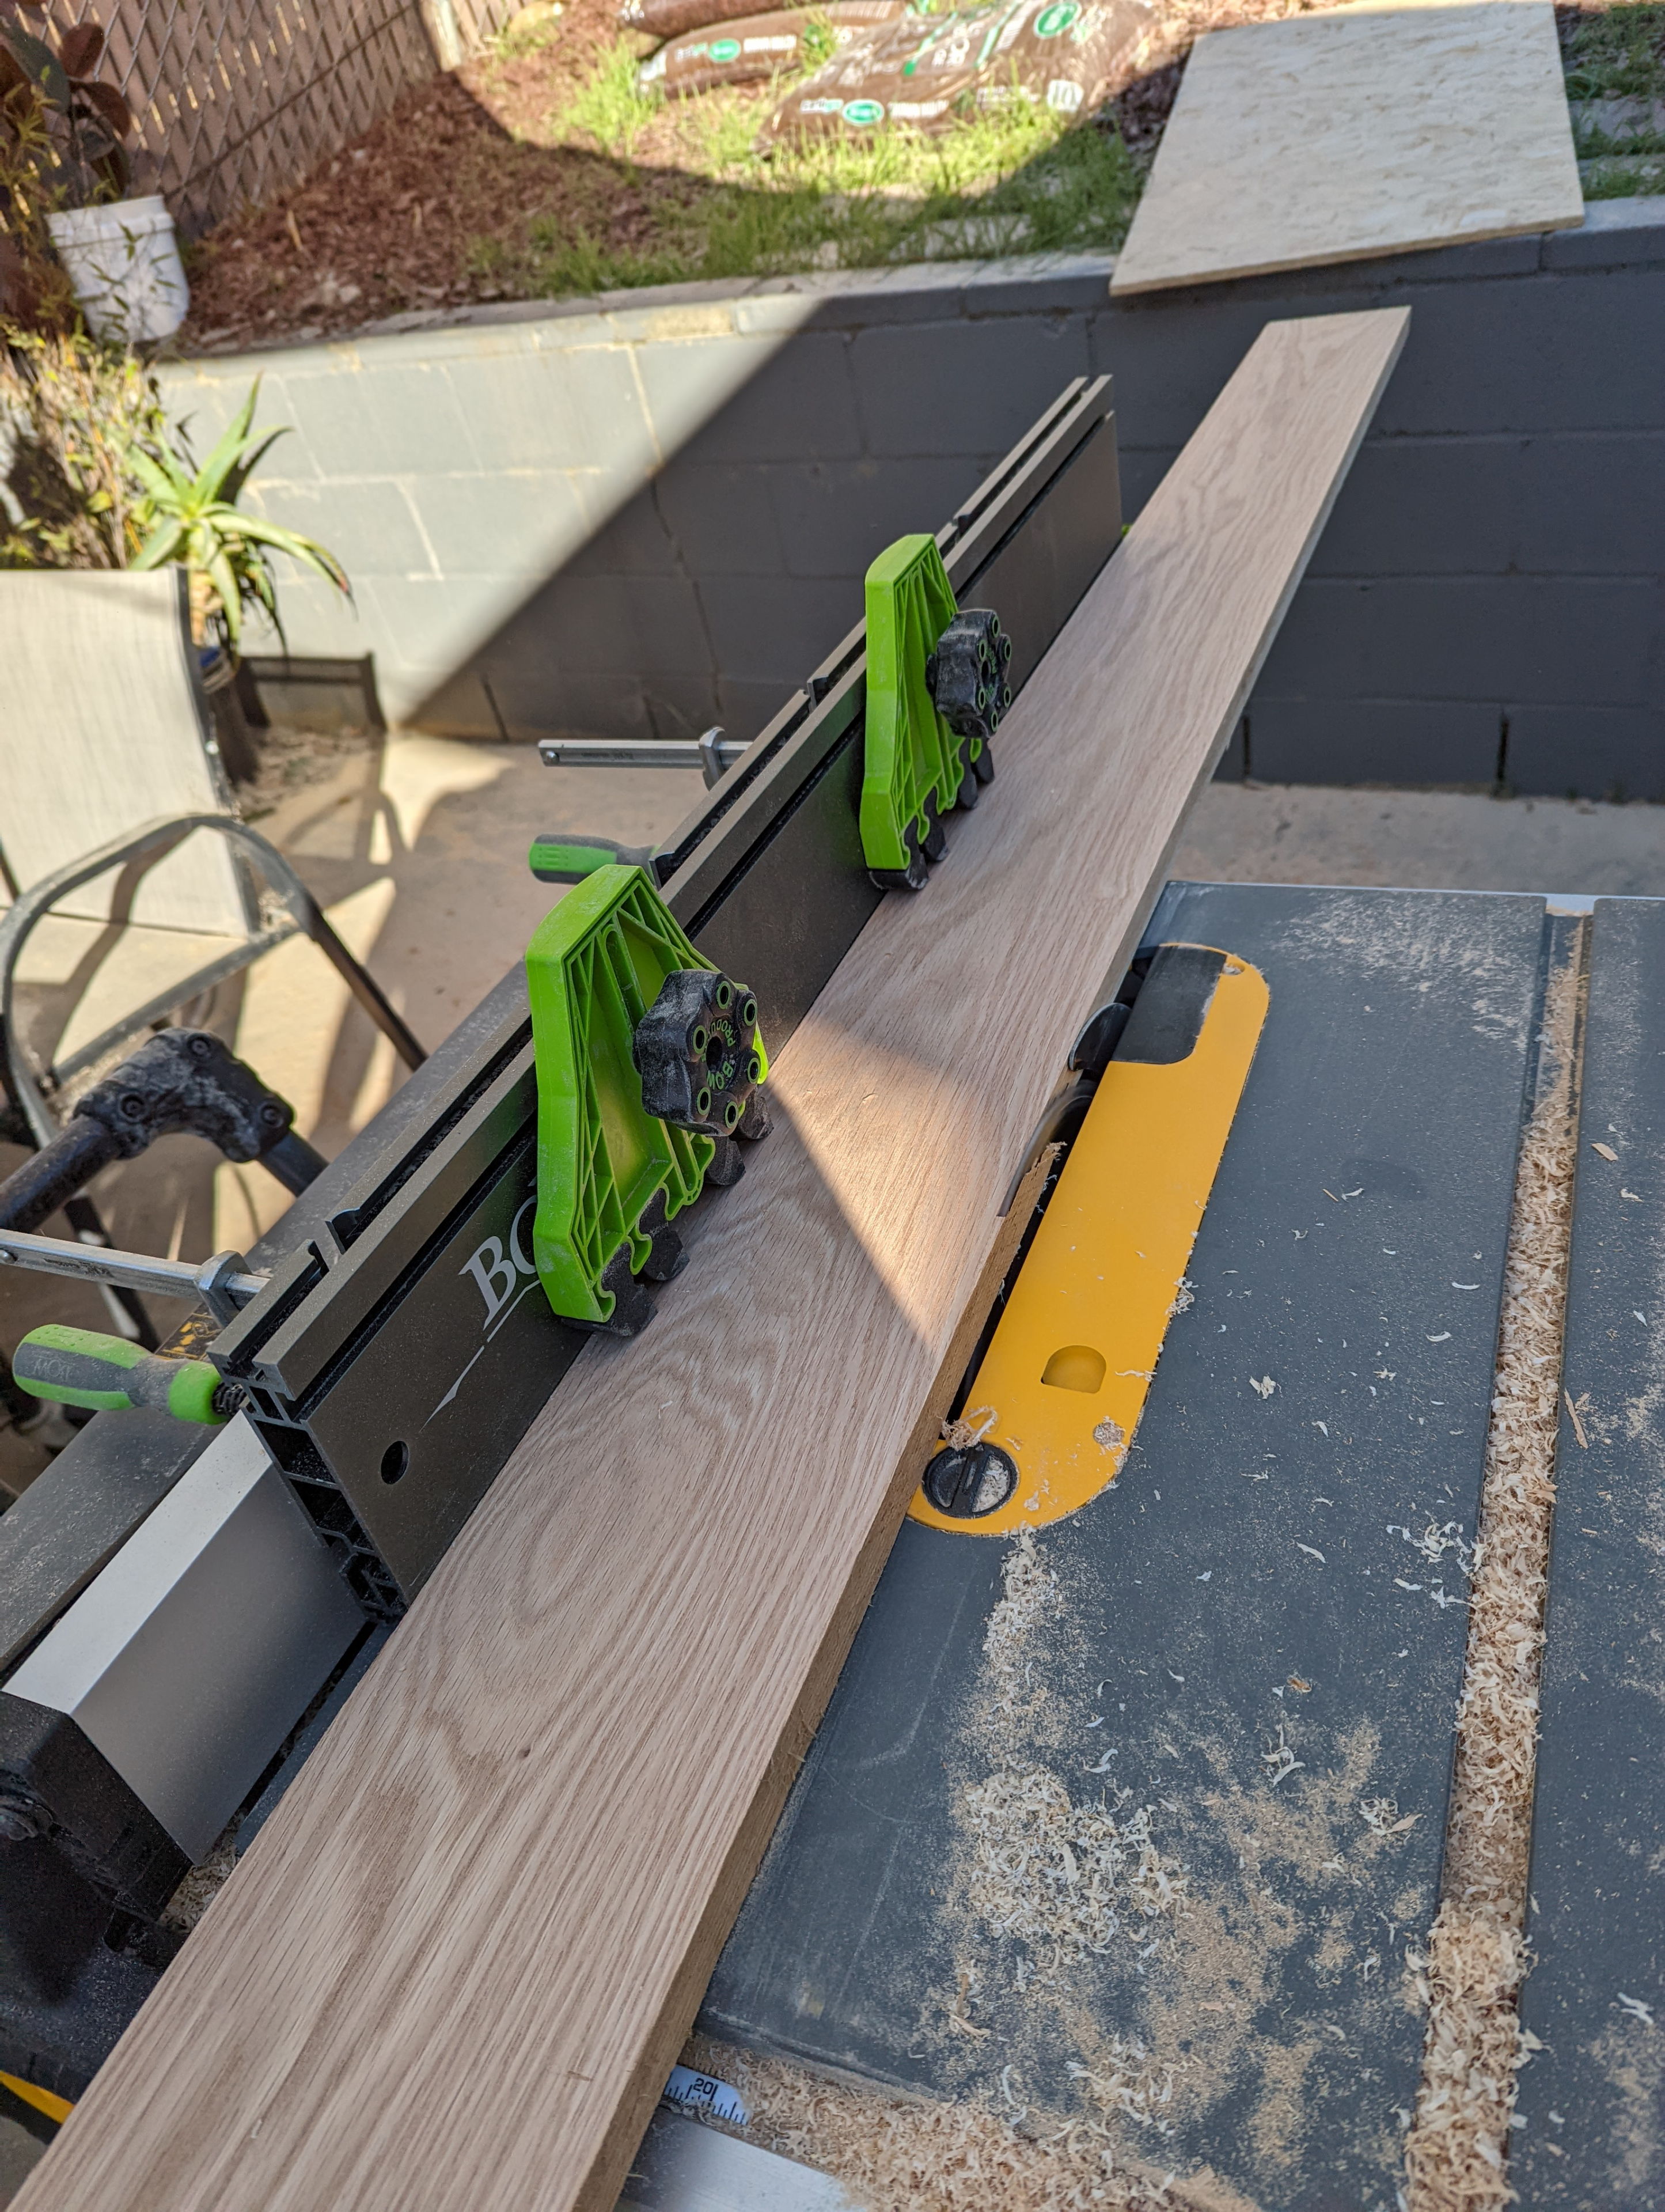
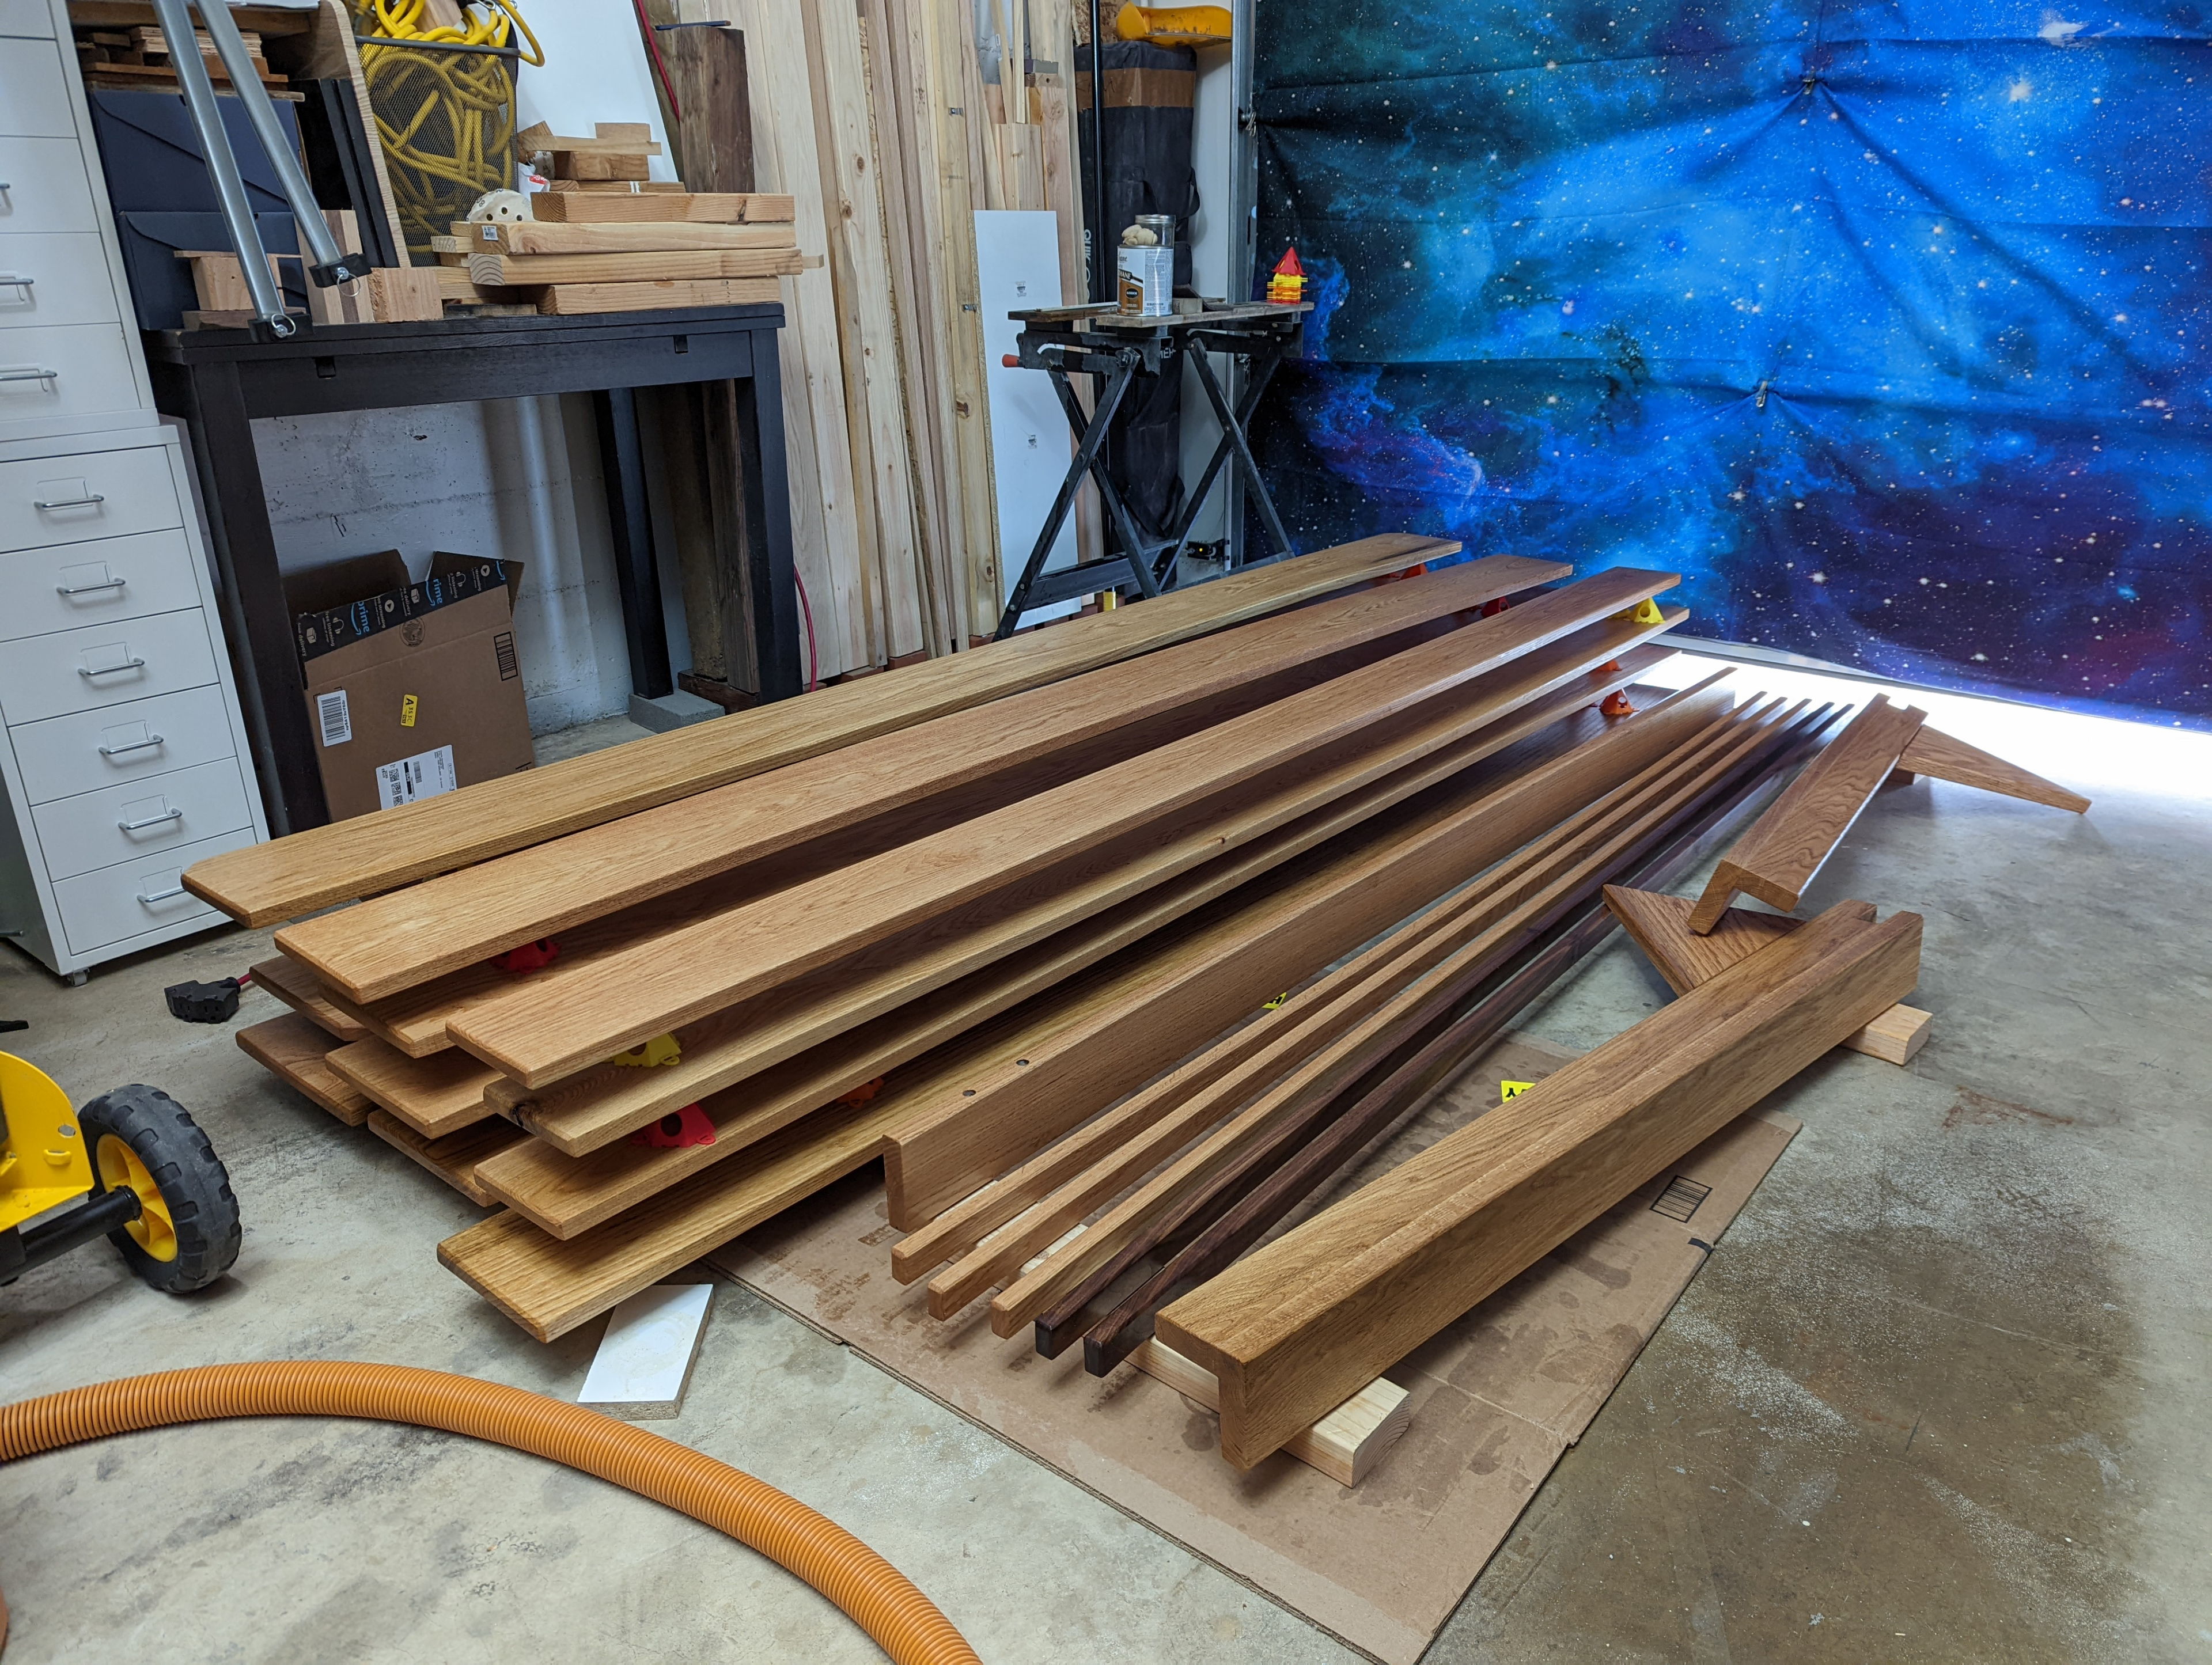
A few days later I began processing the lumber by ripping the pieces to width and length according to my plans. I hadnt't used a table saw in probably two decades, and it was also my first time using featherboards. I had a lot to figure out.
A few days later I began processing the lumber by ripping the pieces to width and length according to my plans. I hadnt't used a table saw in probably two decades, and it was also my first time using featherboards. I had a lot to figure out.
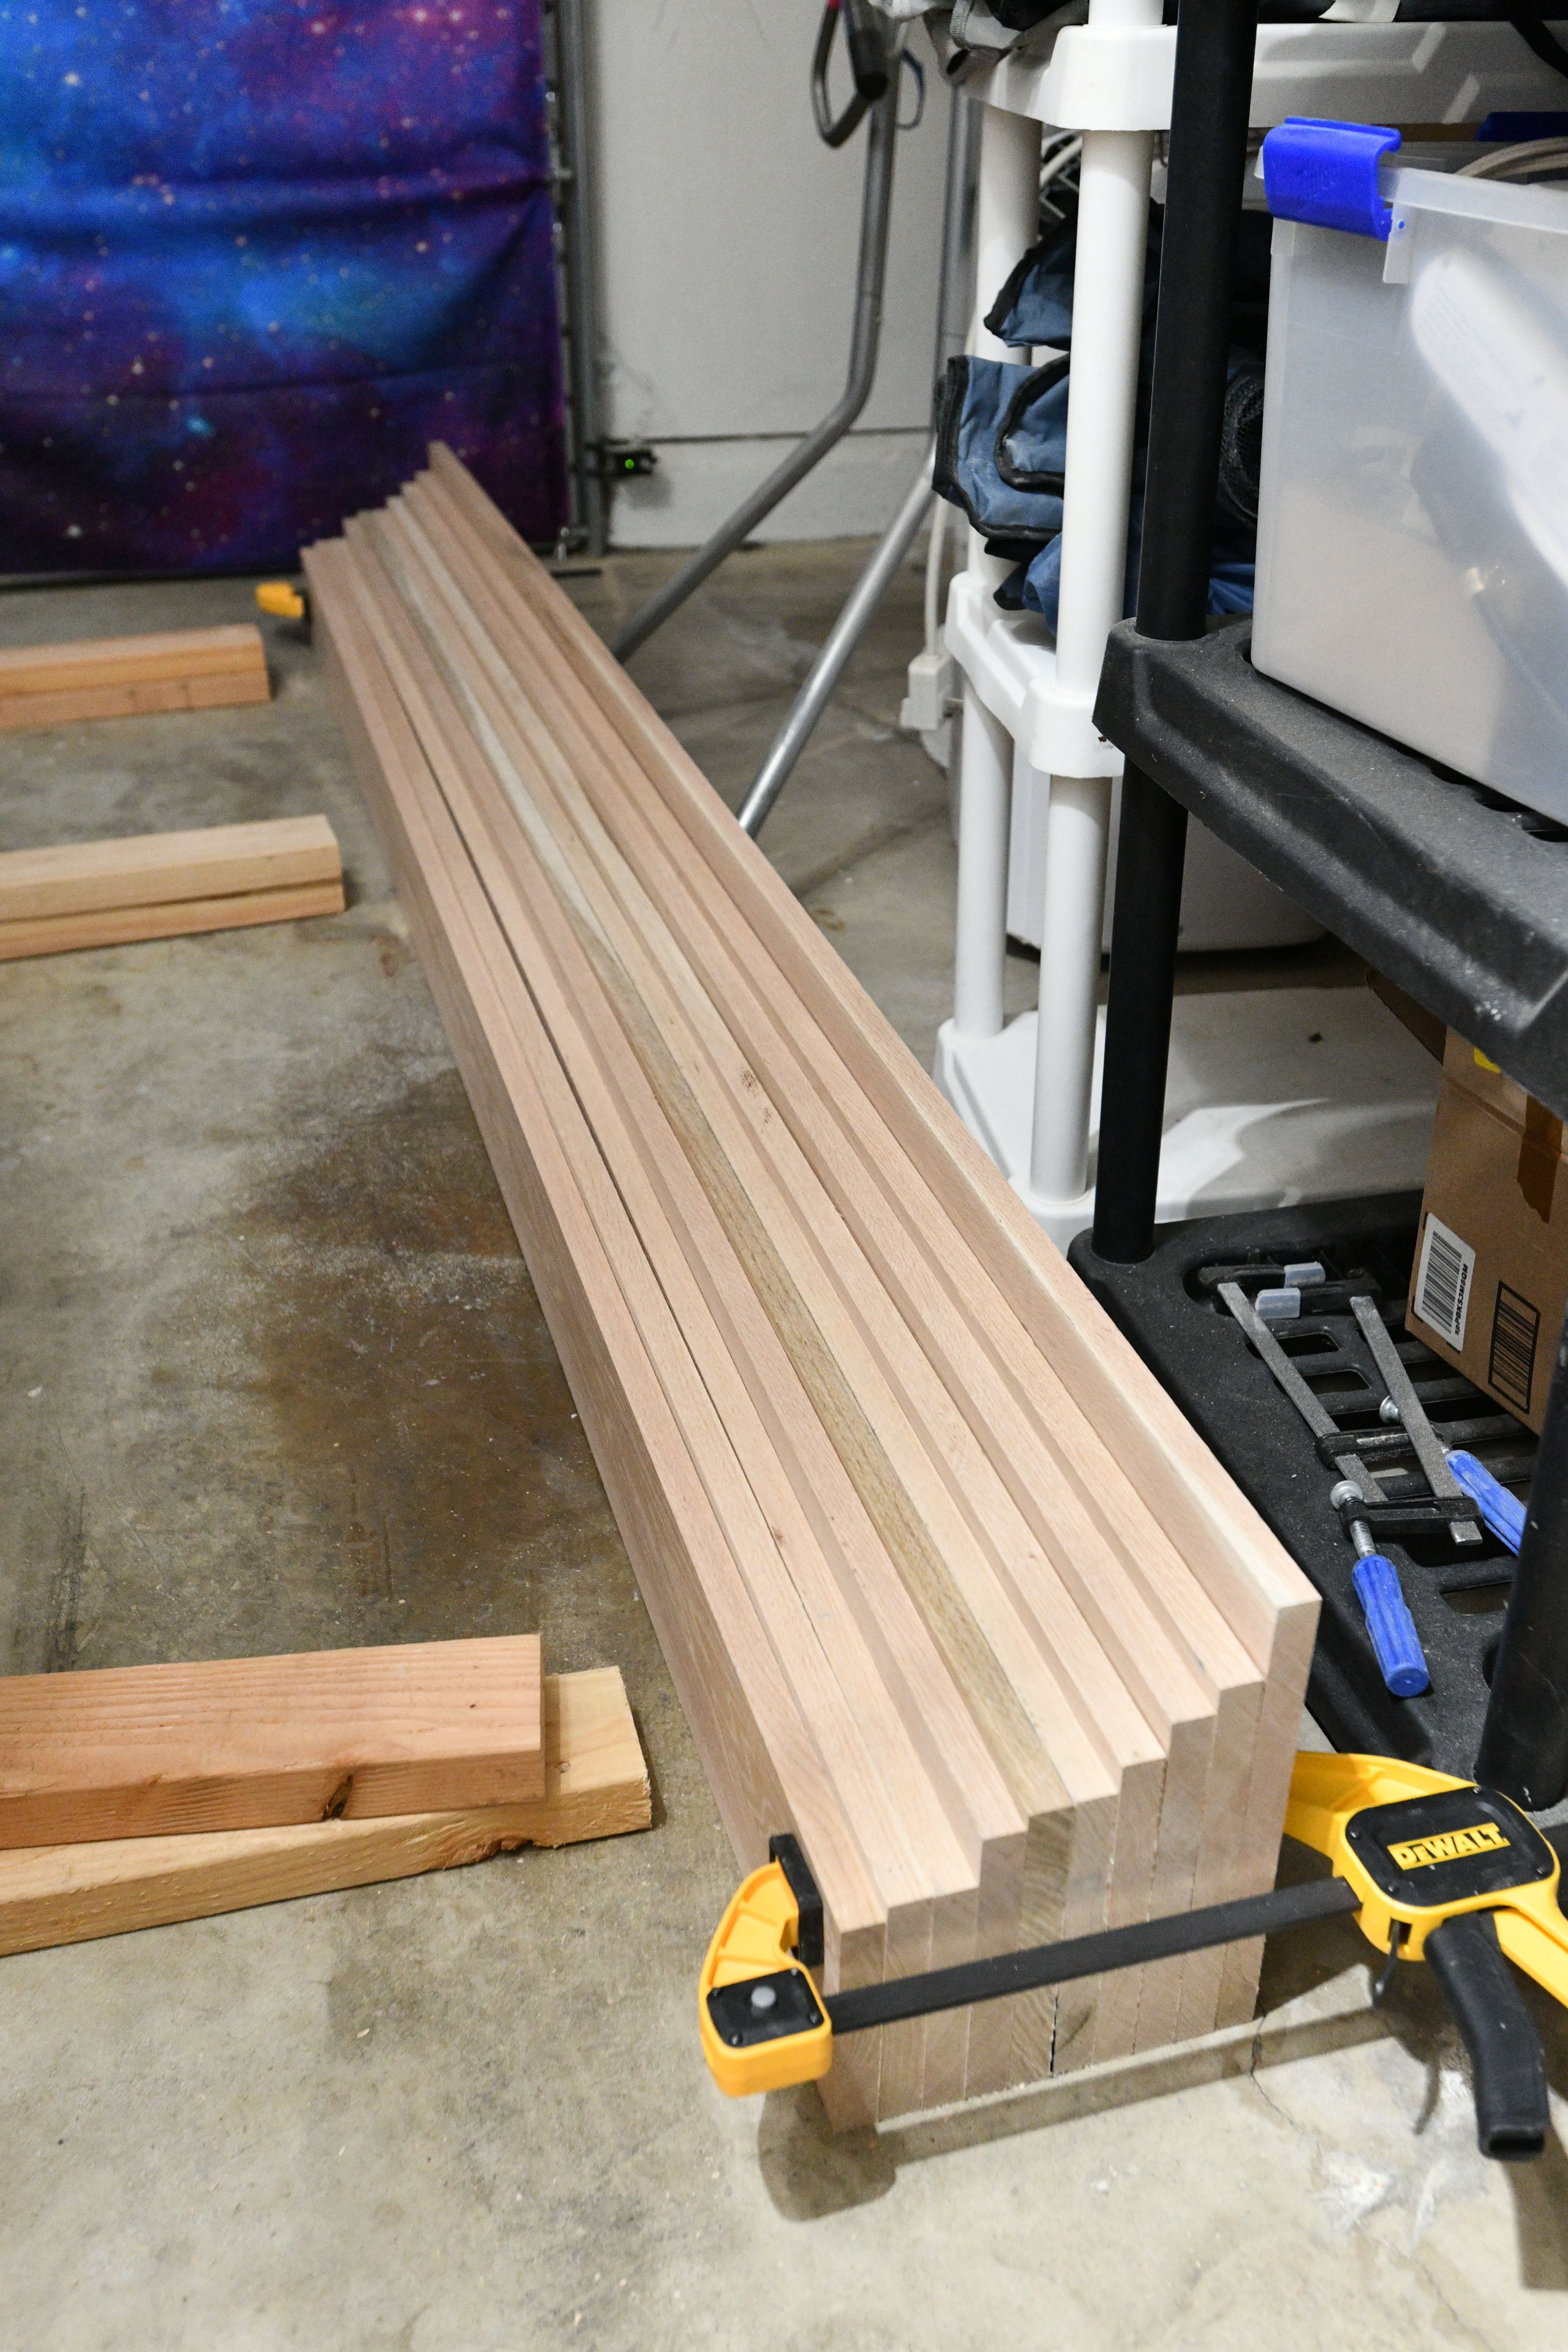
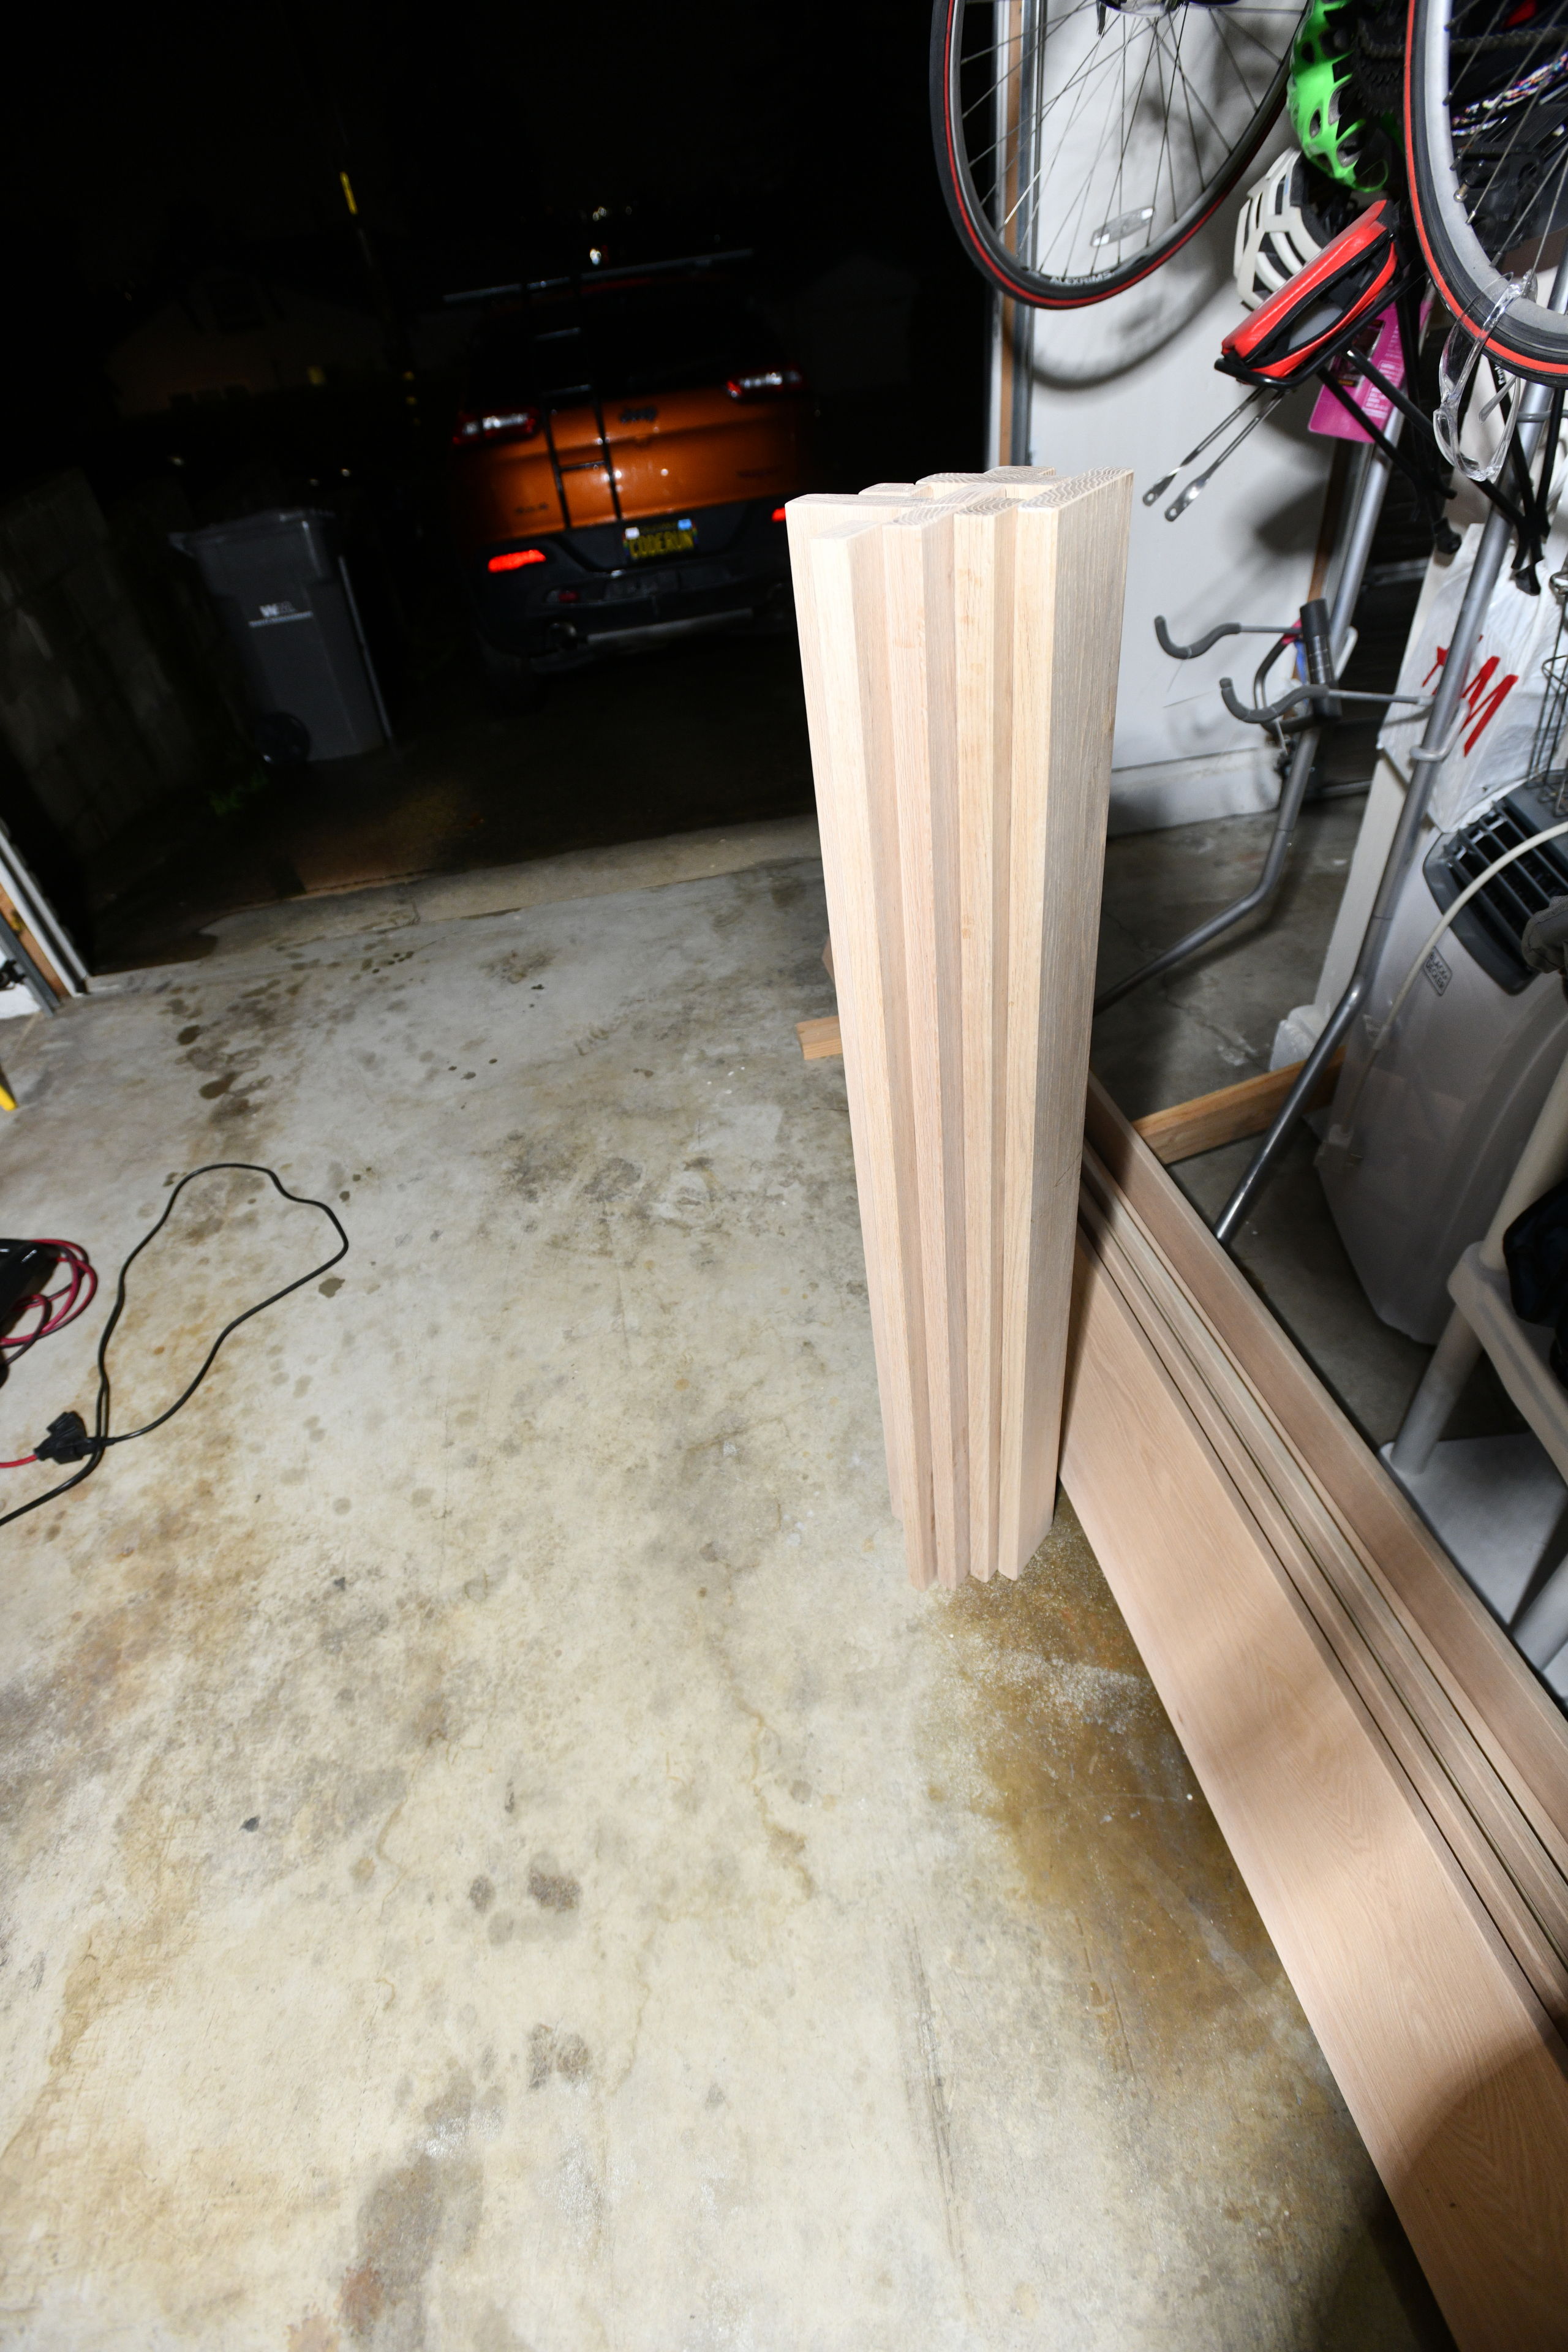
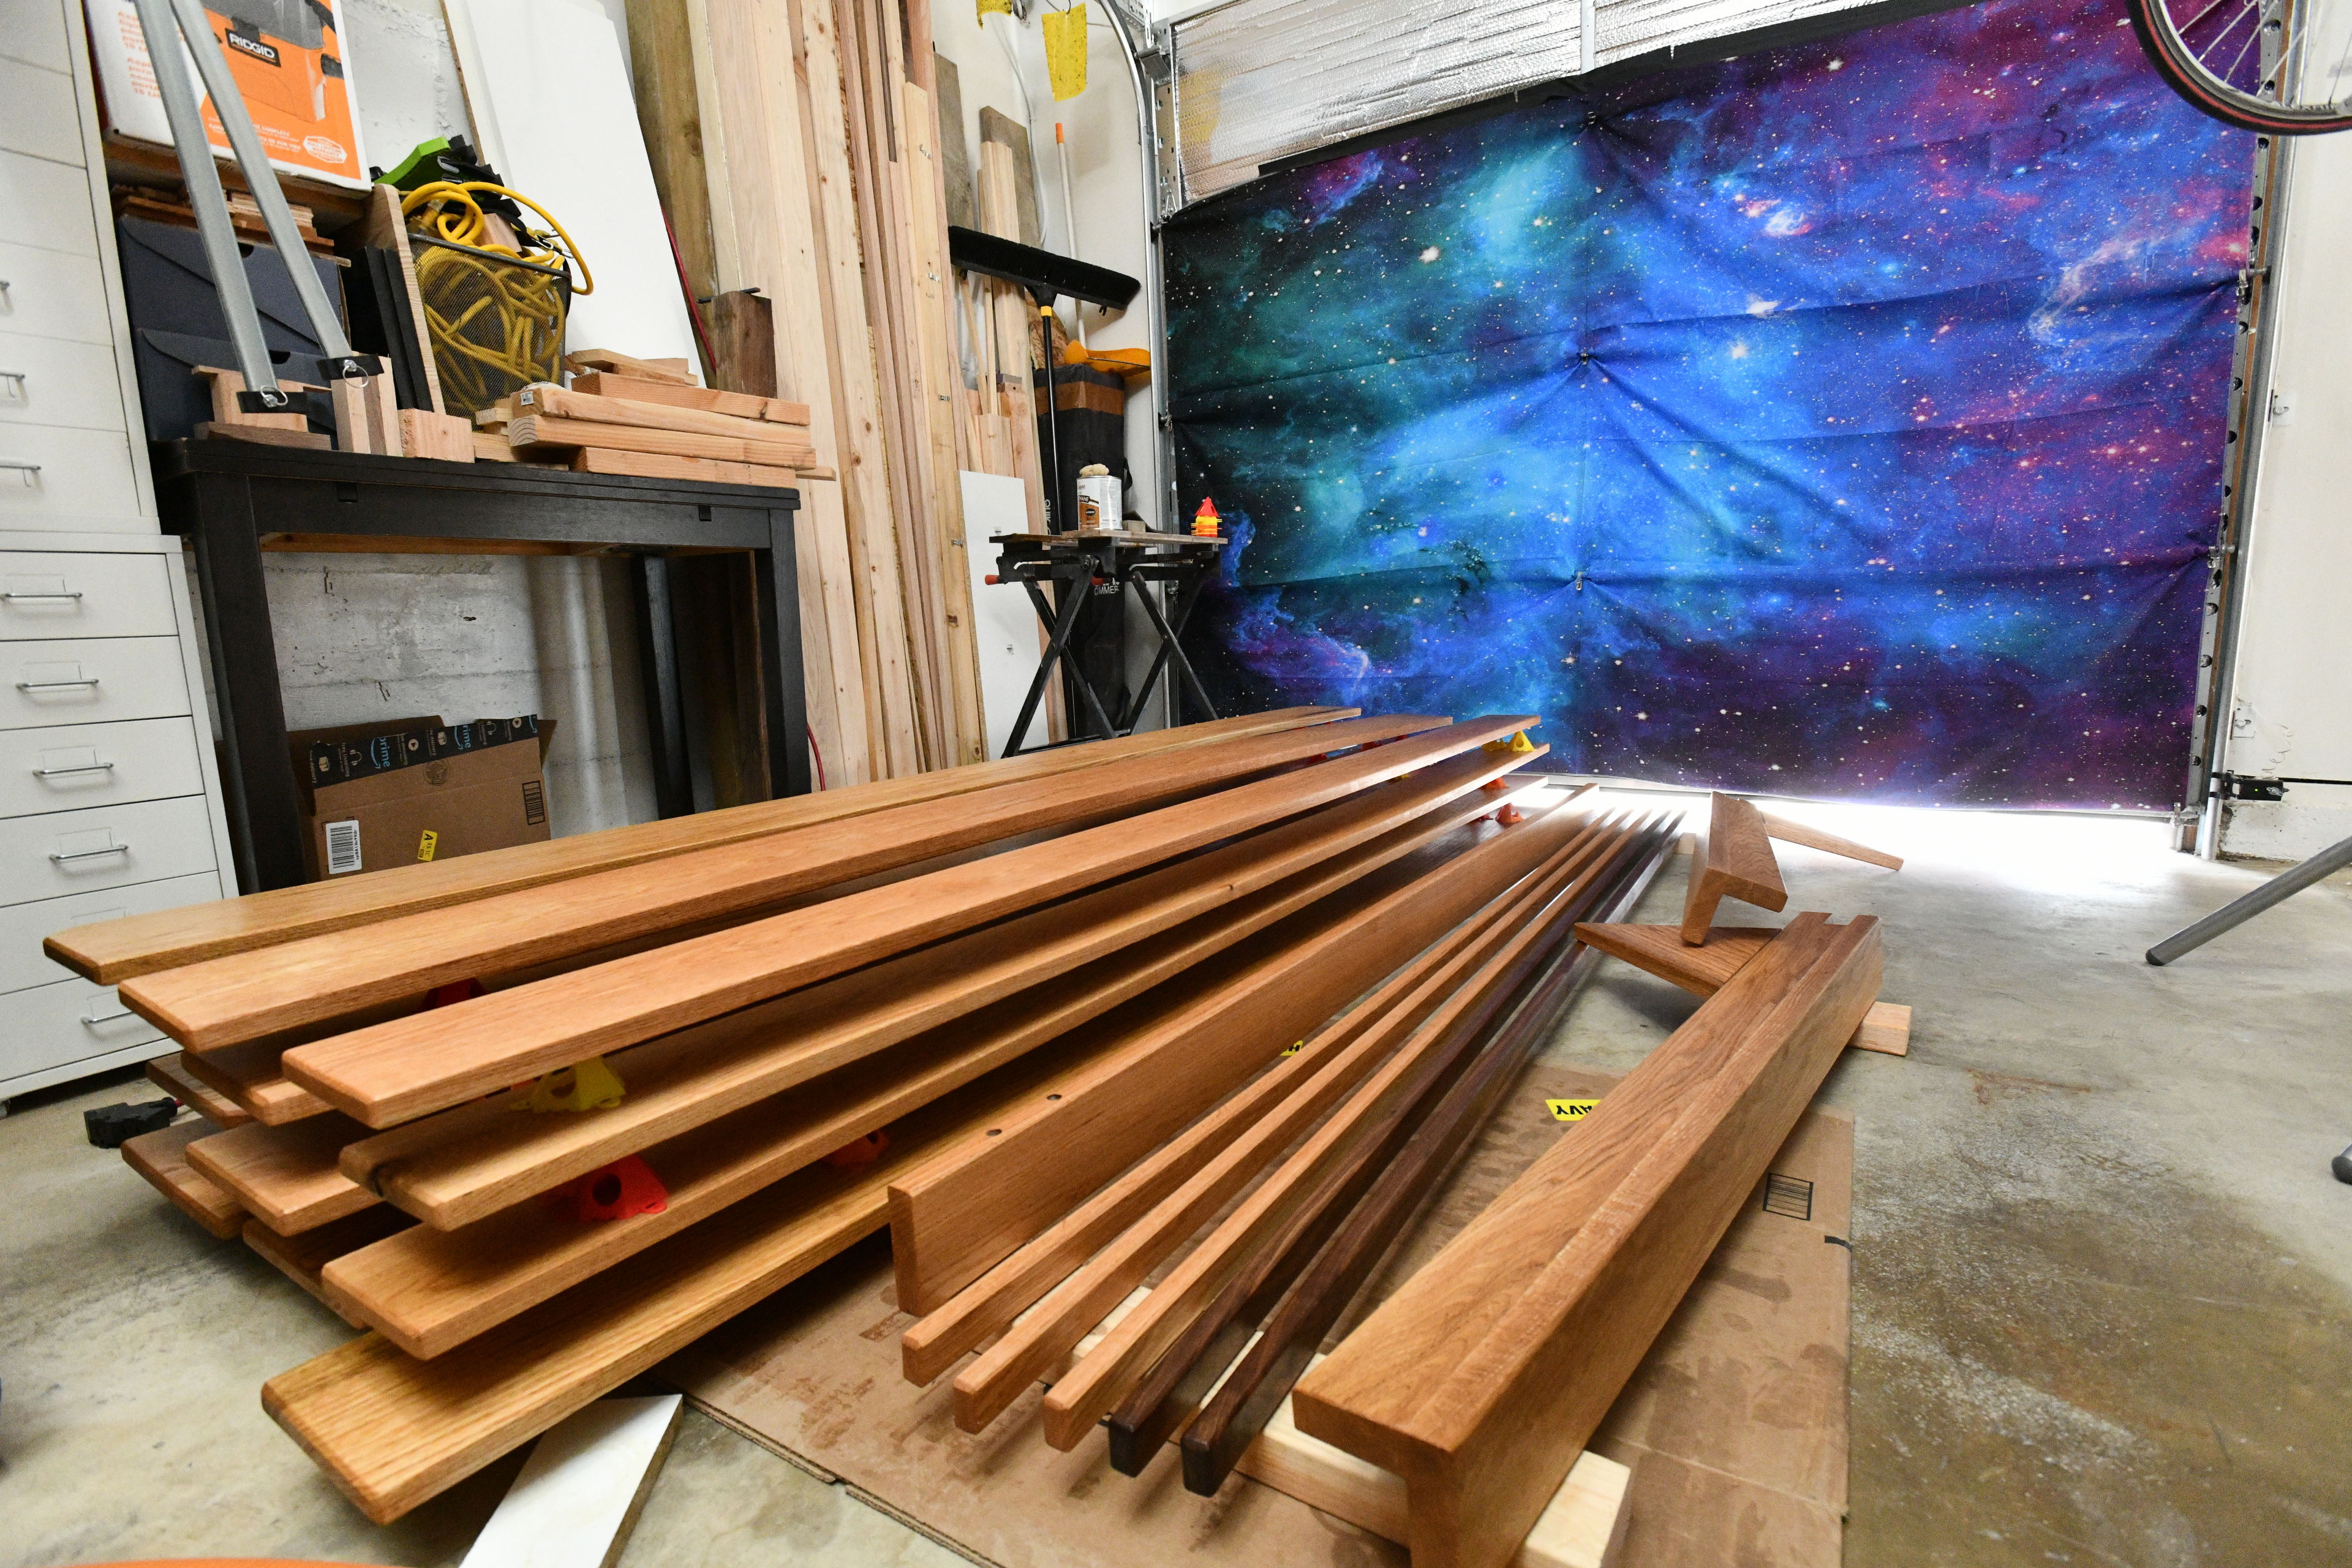
This is the pile of what will become the slats under the mattress. I wanted to preserve as much wood as possible for these, hence the seemingly random widths.
Legs
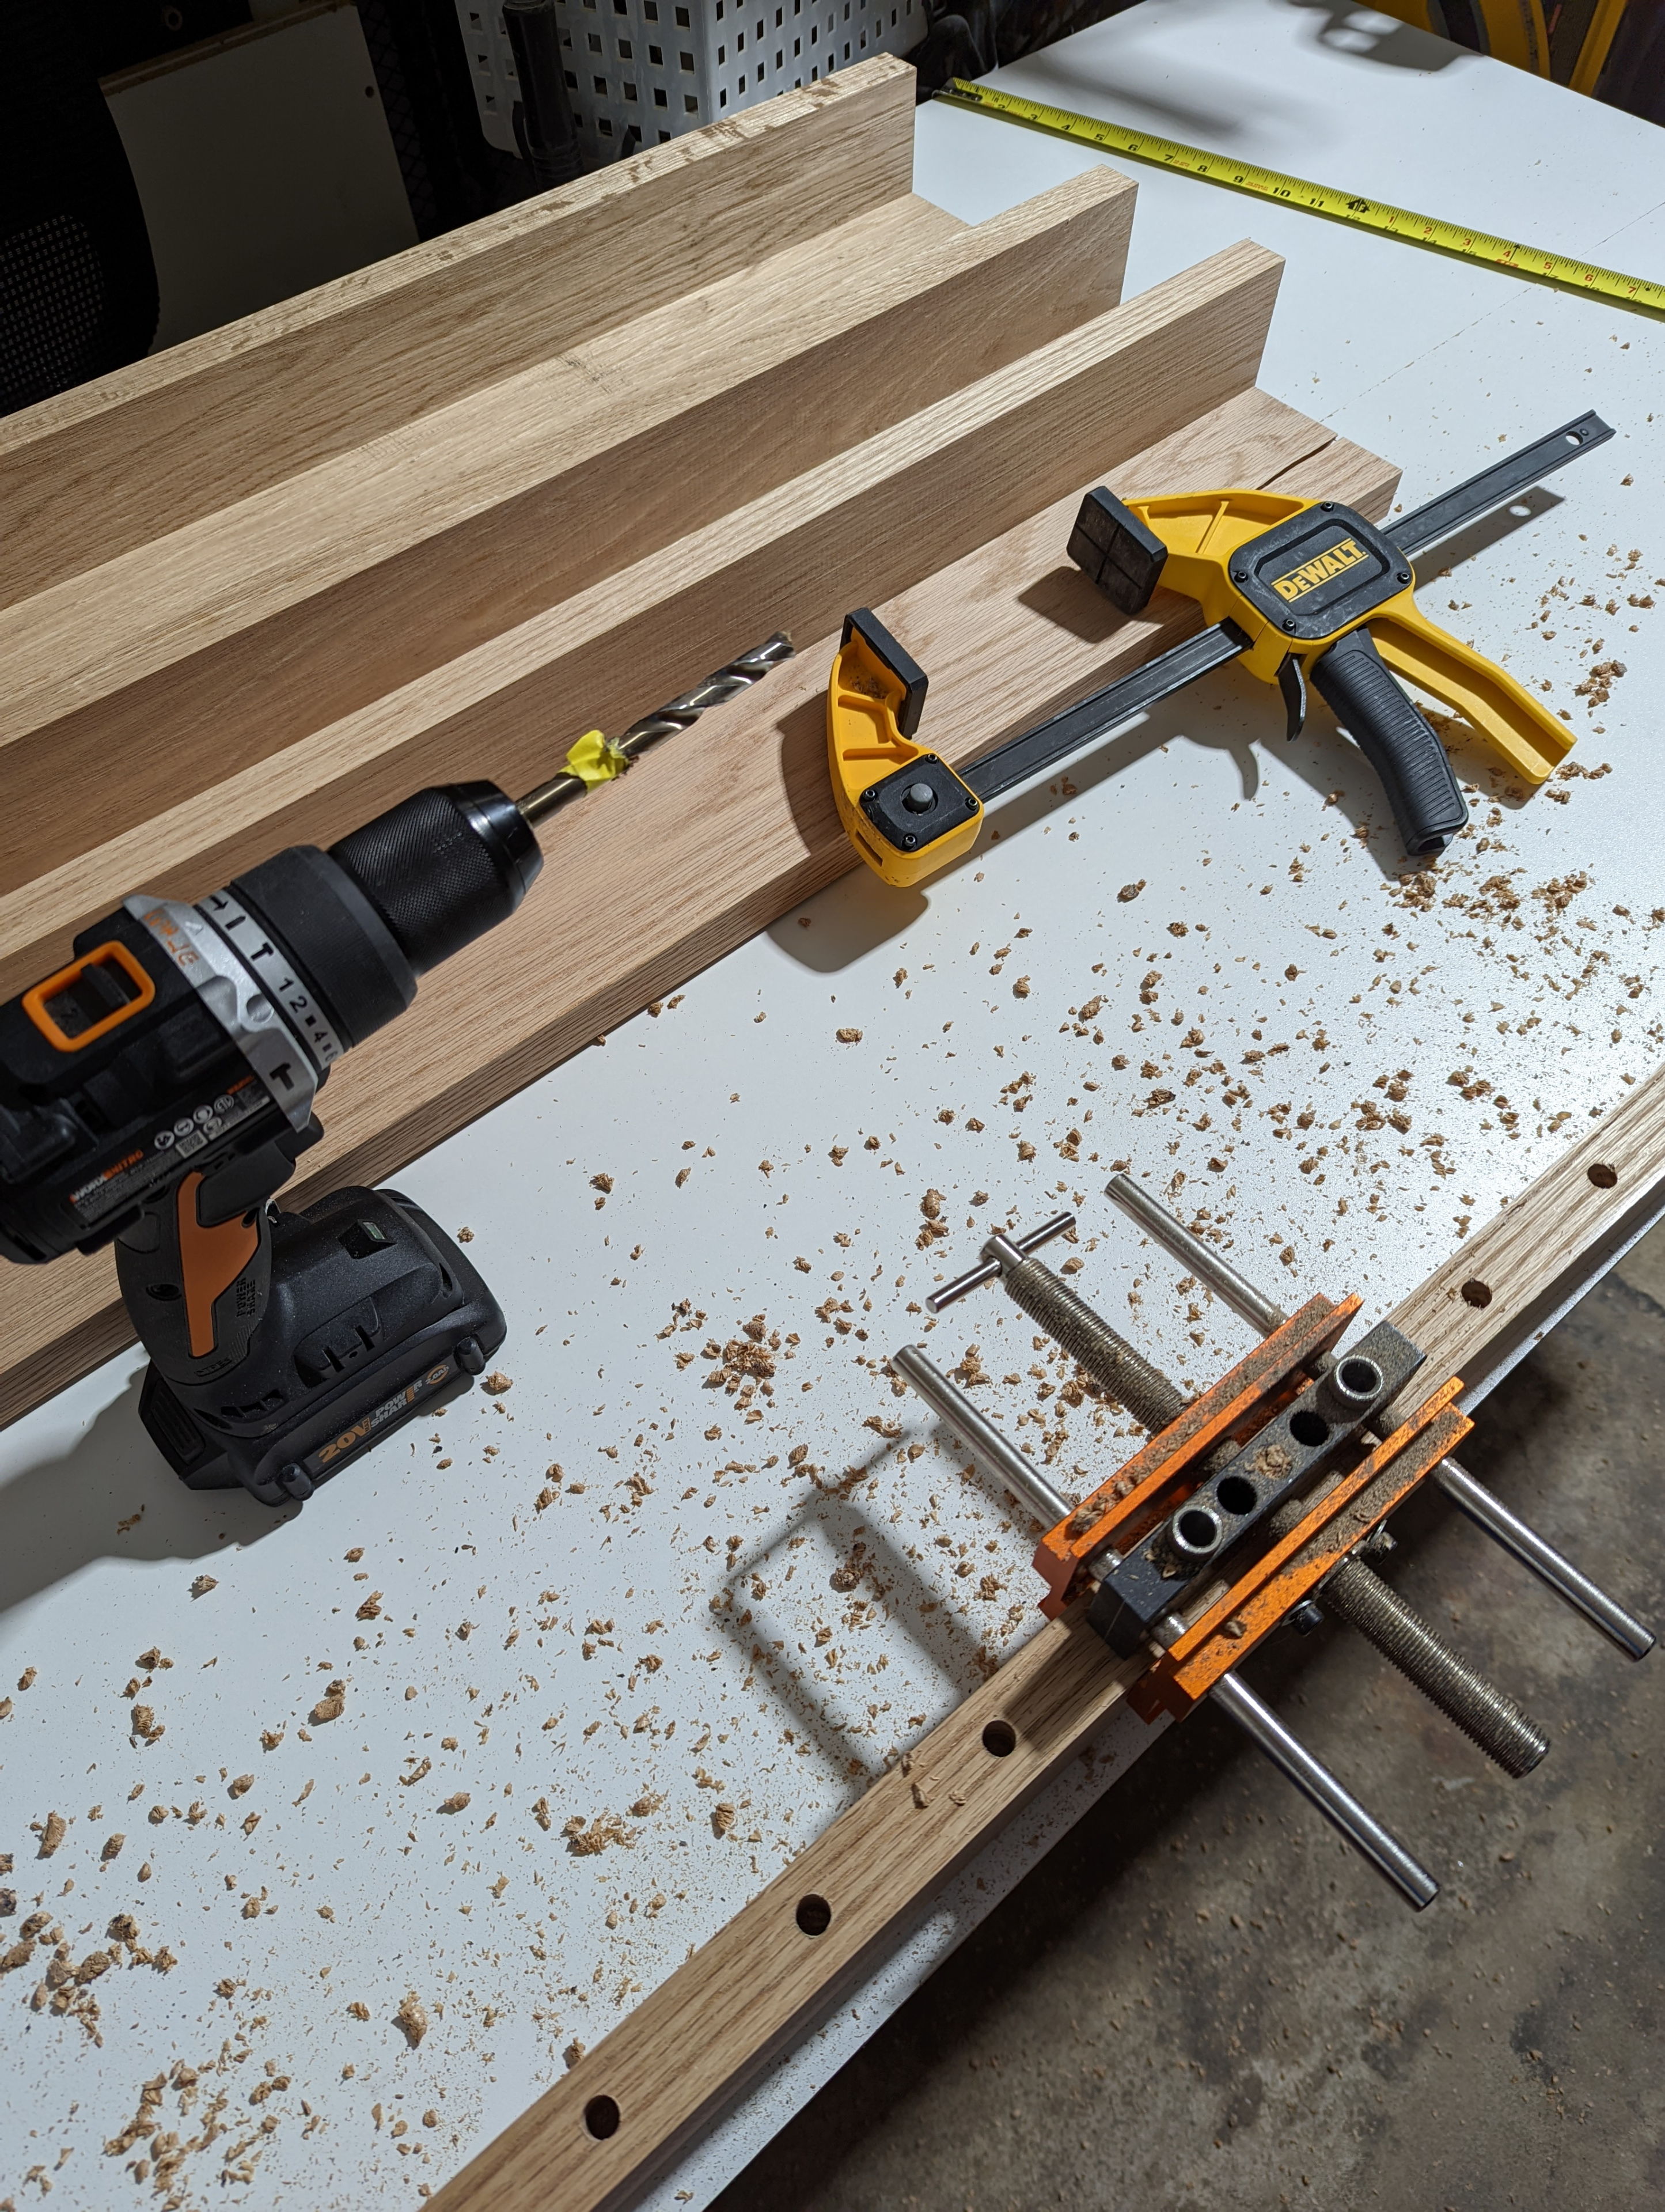
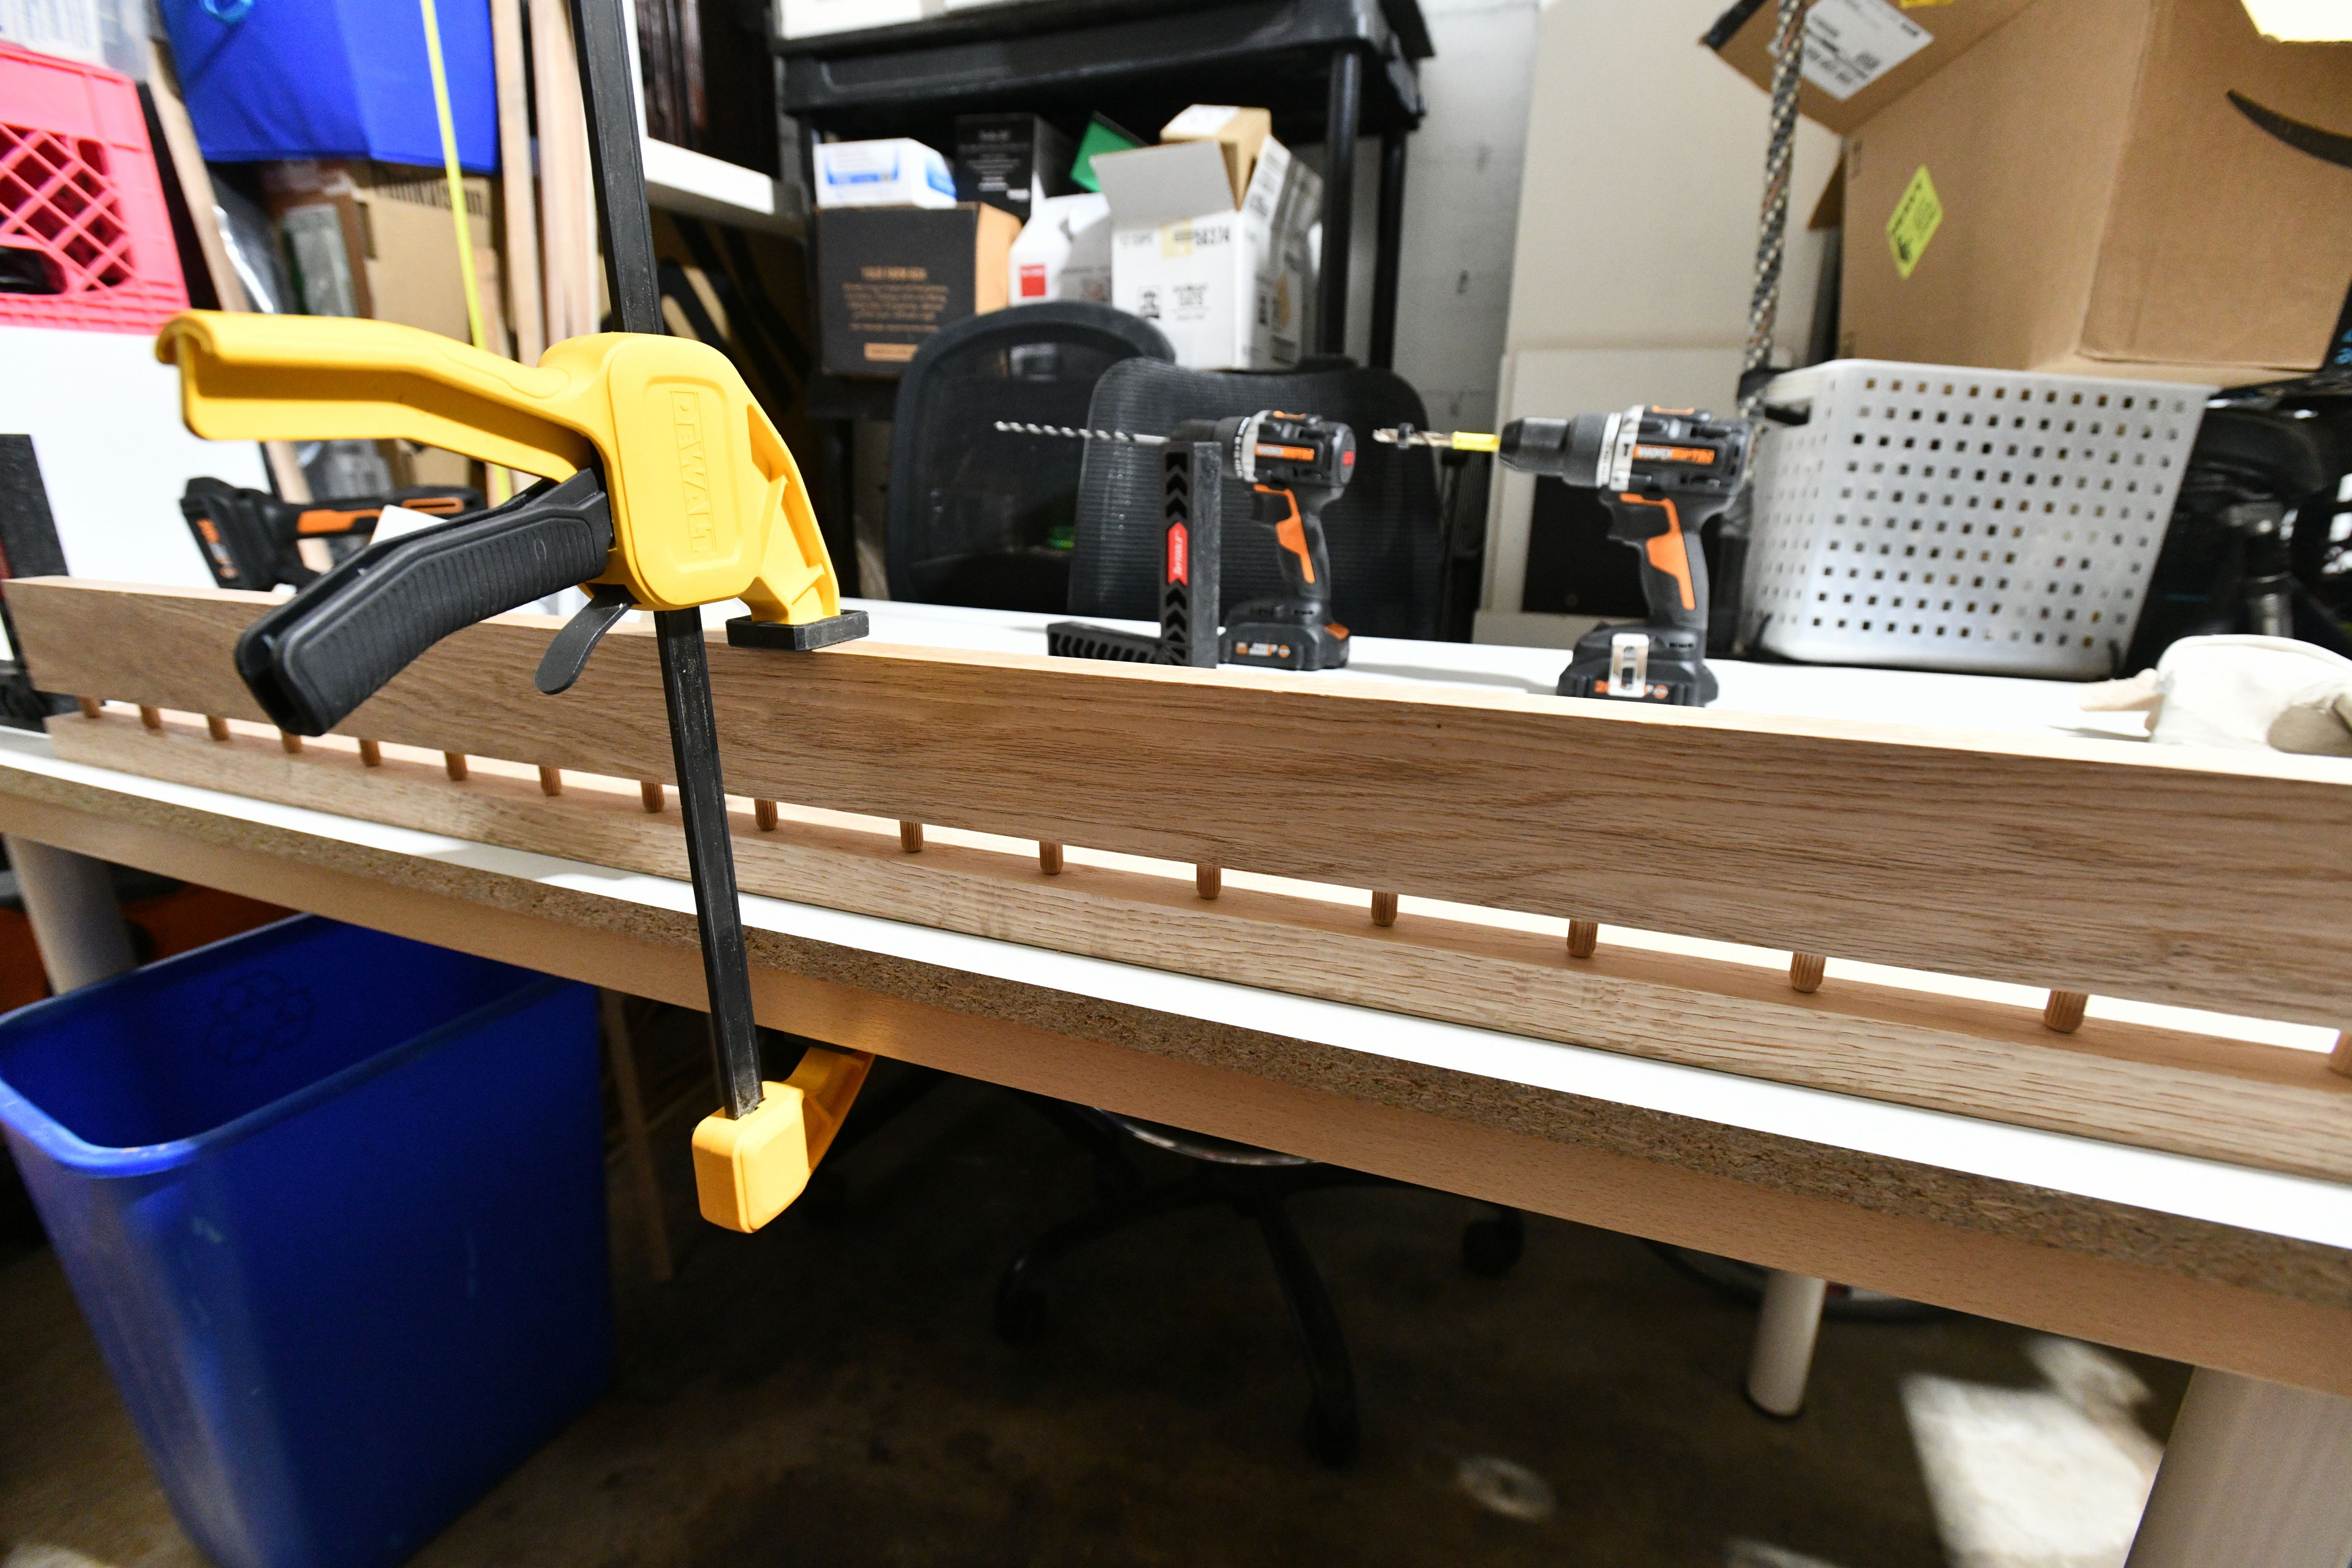
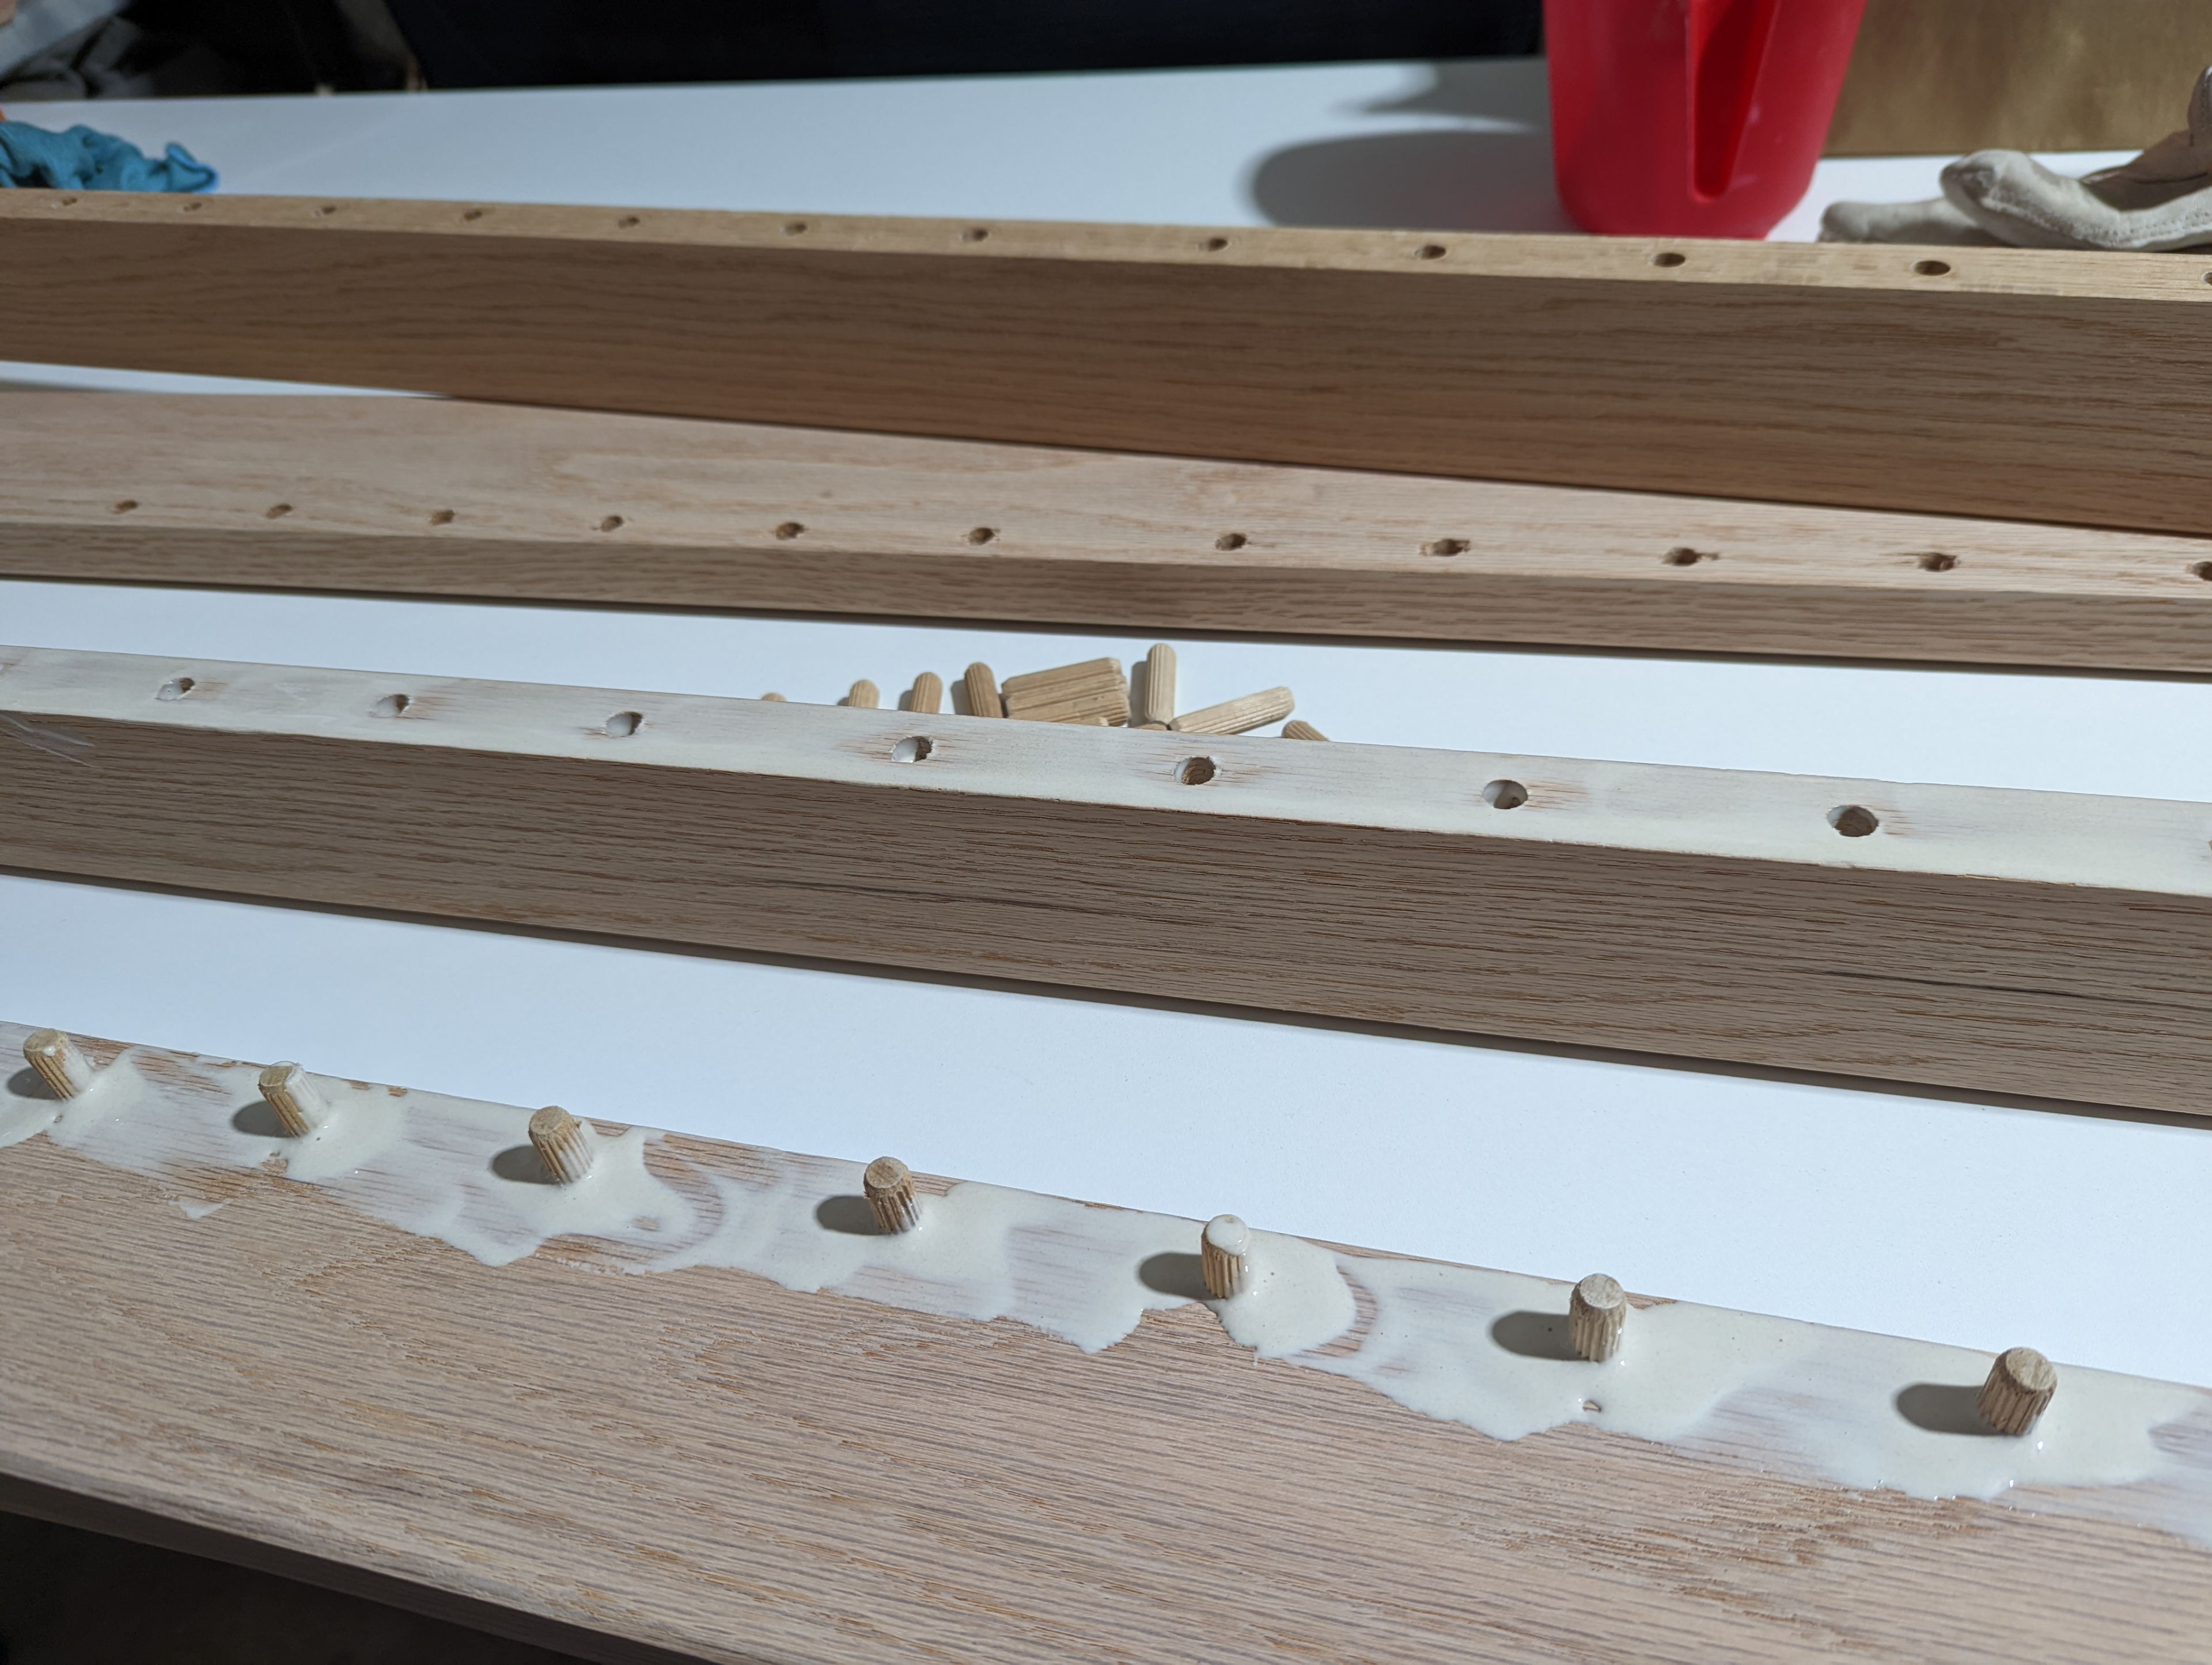
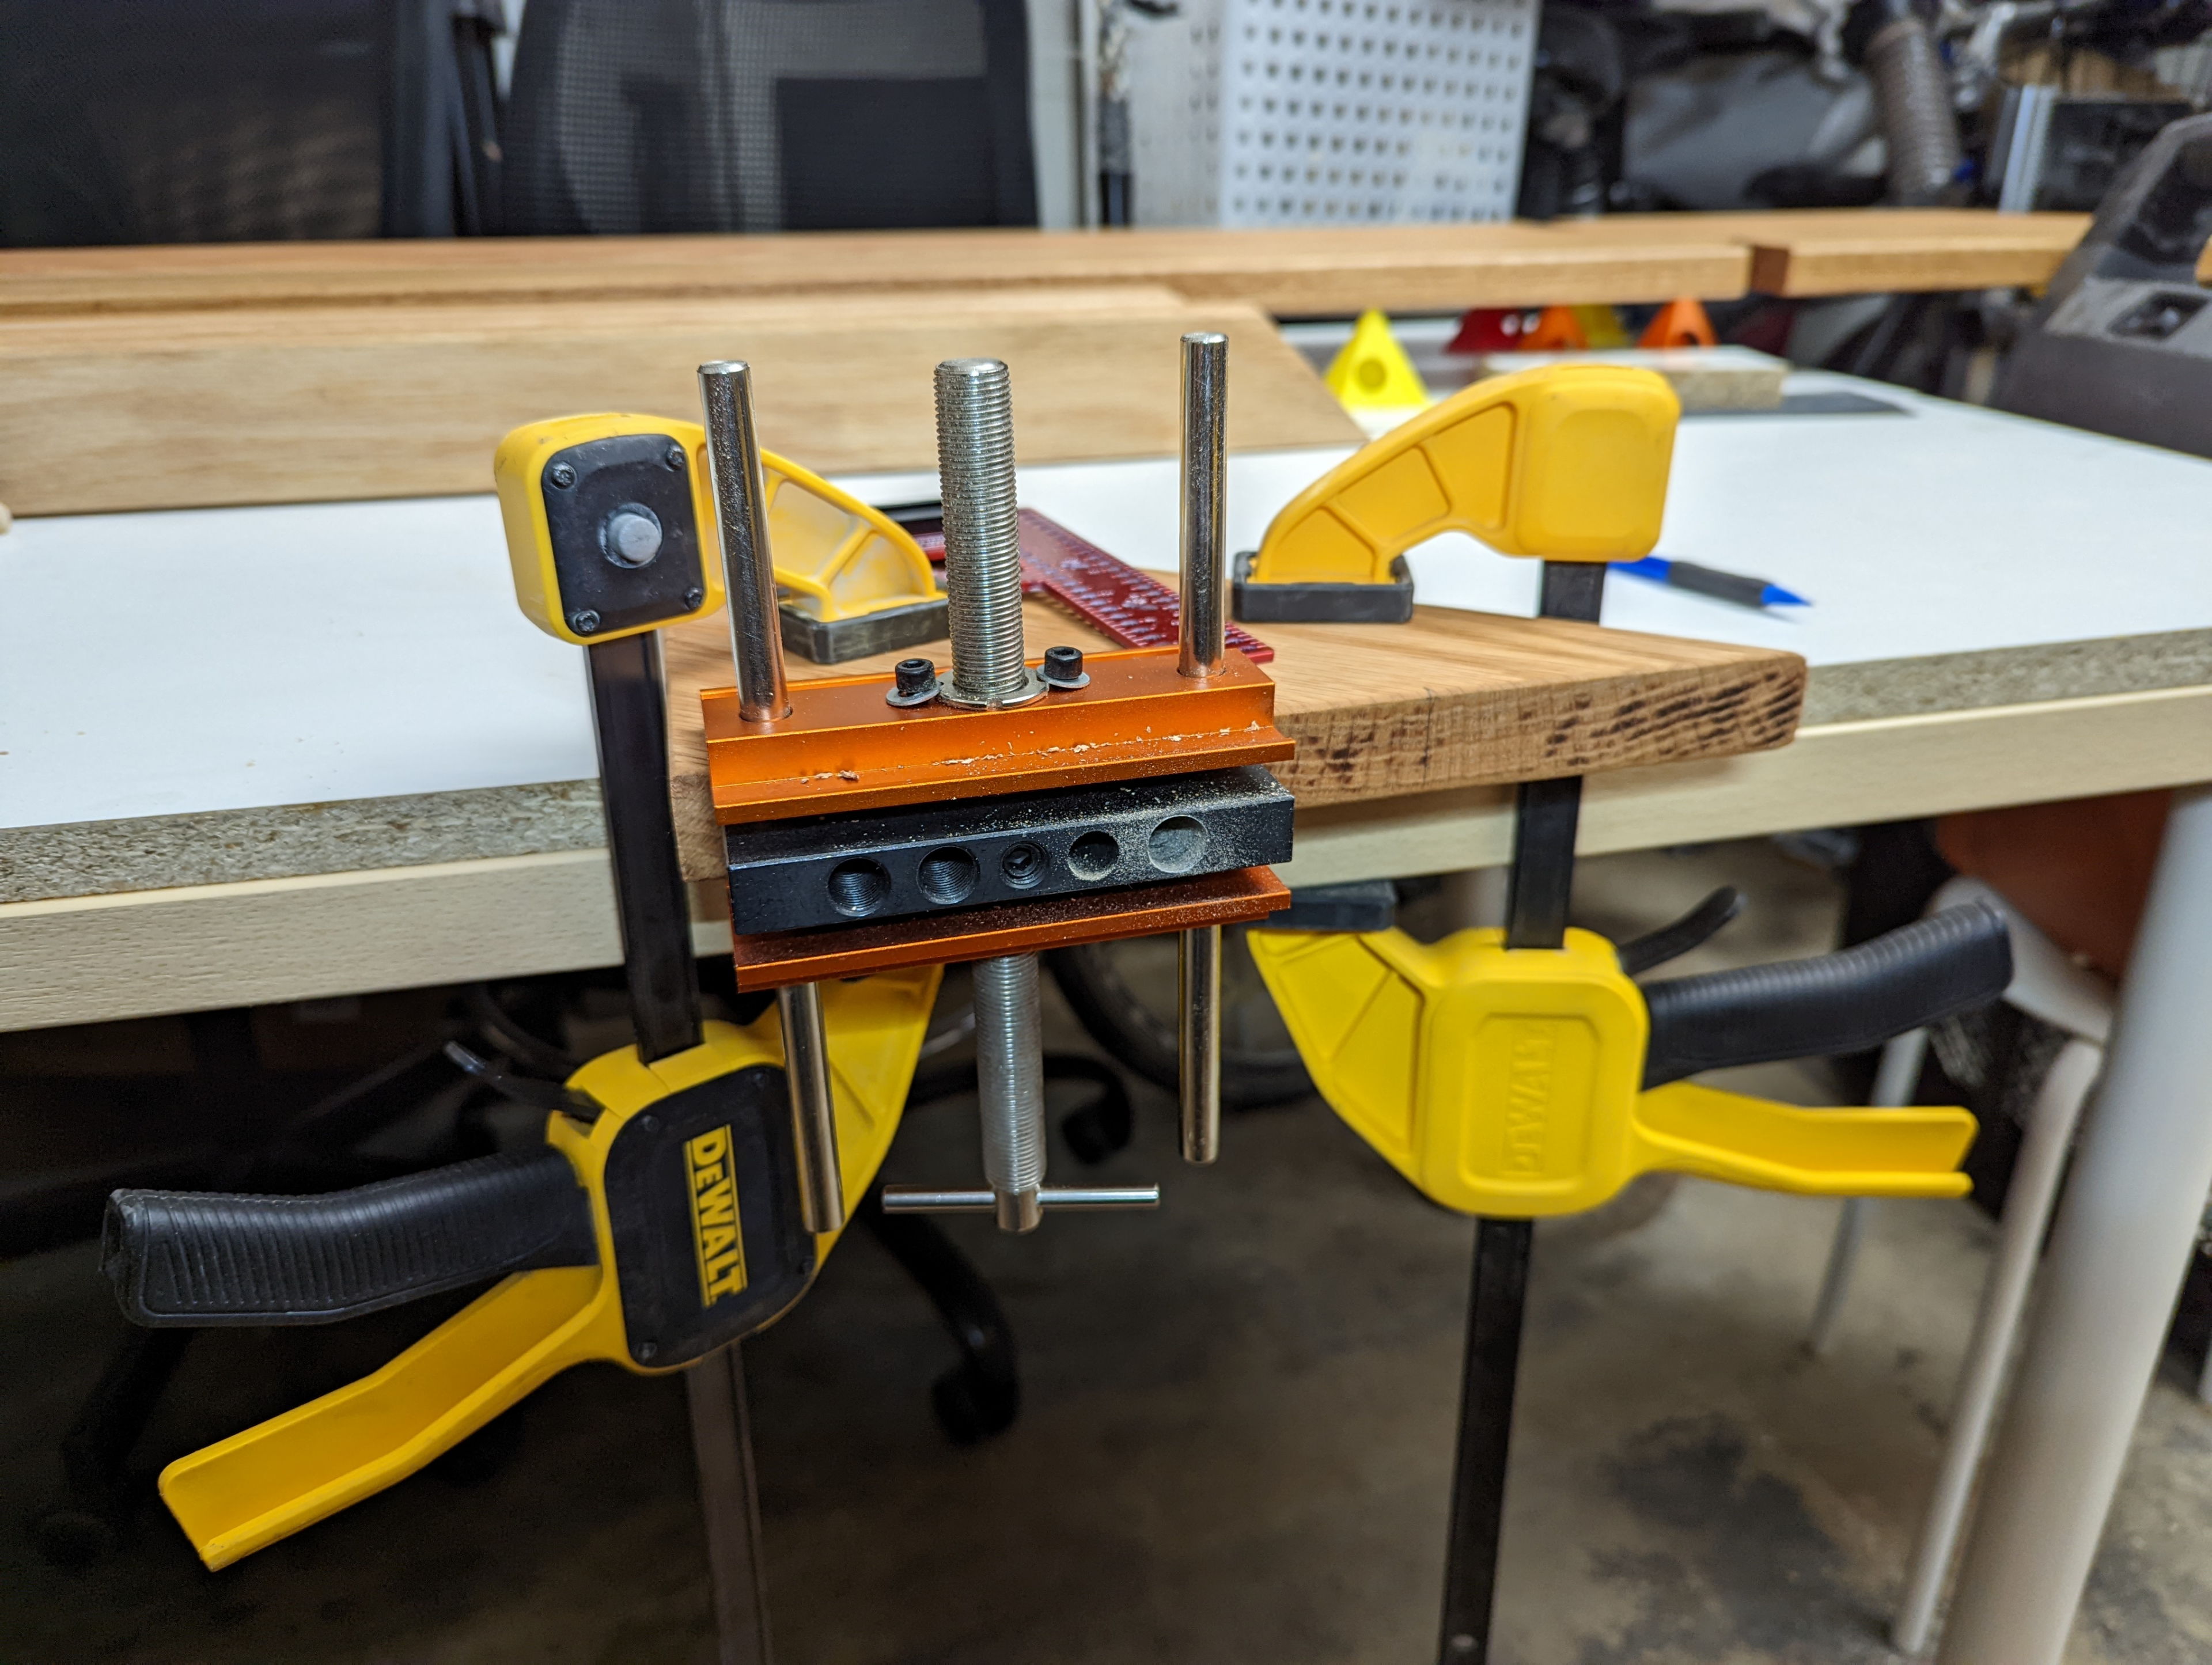
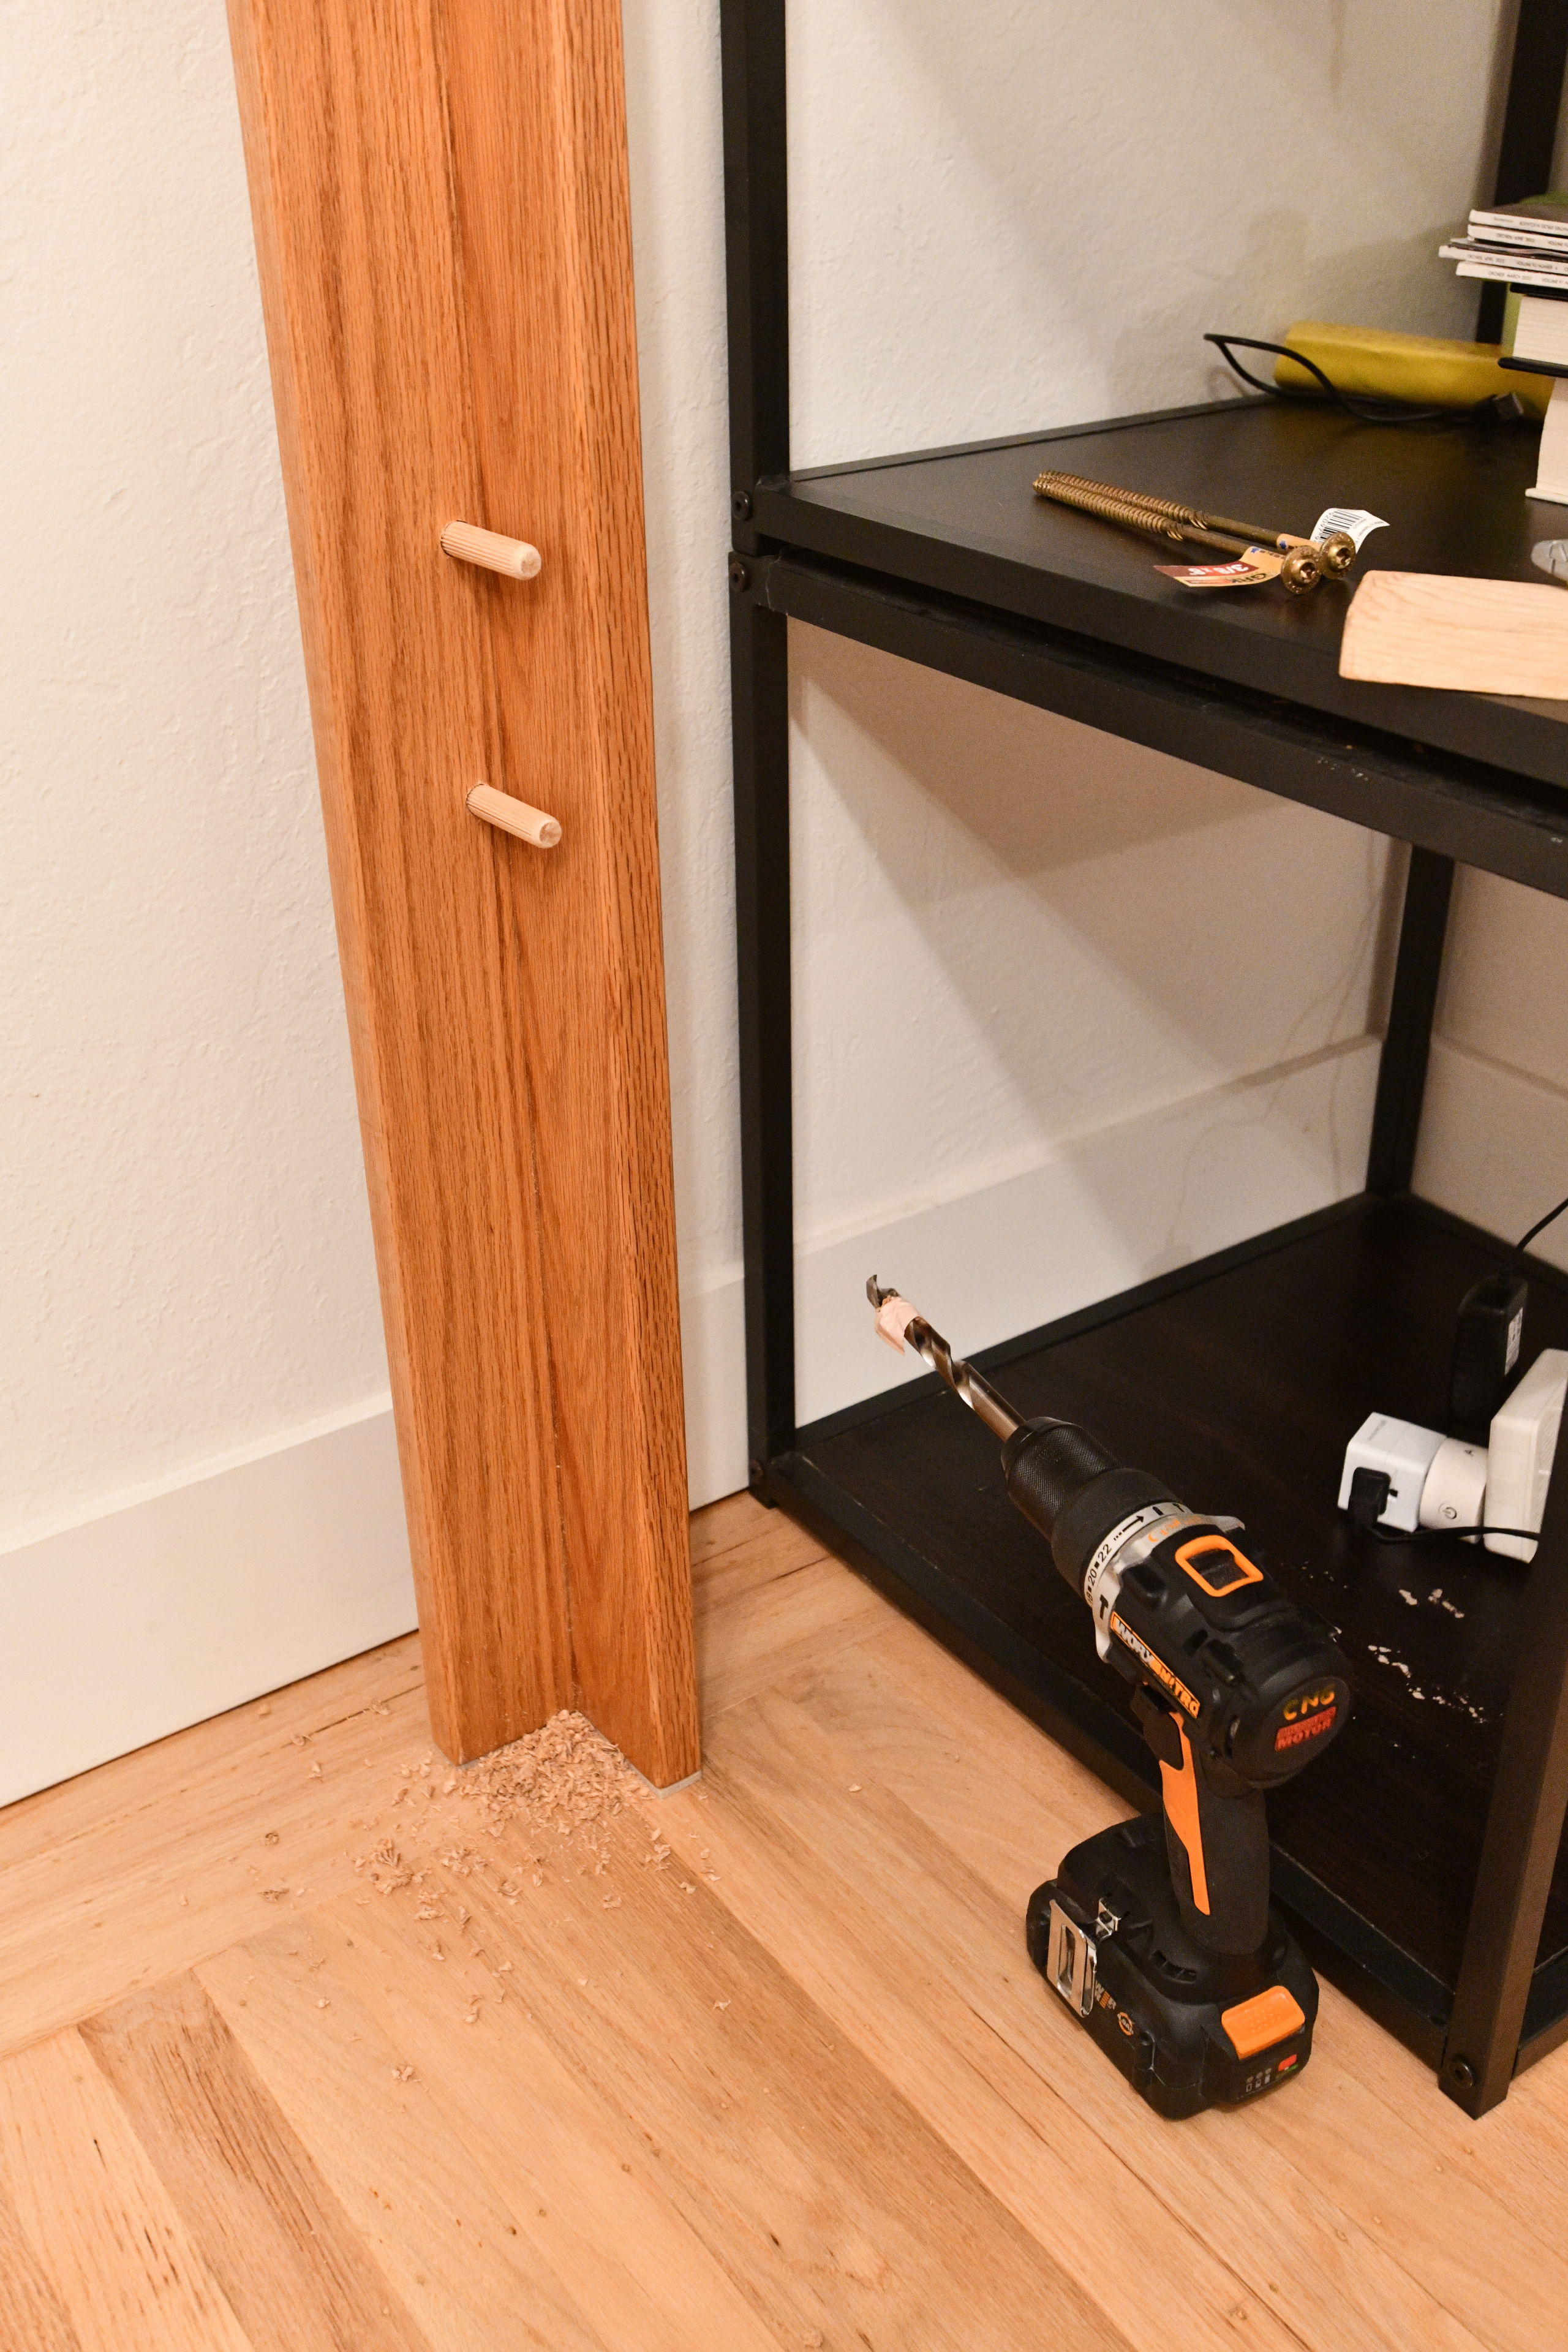
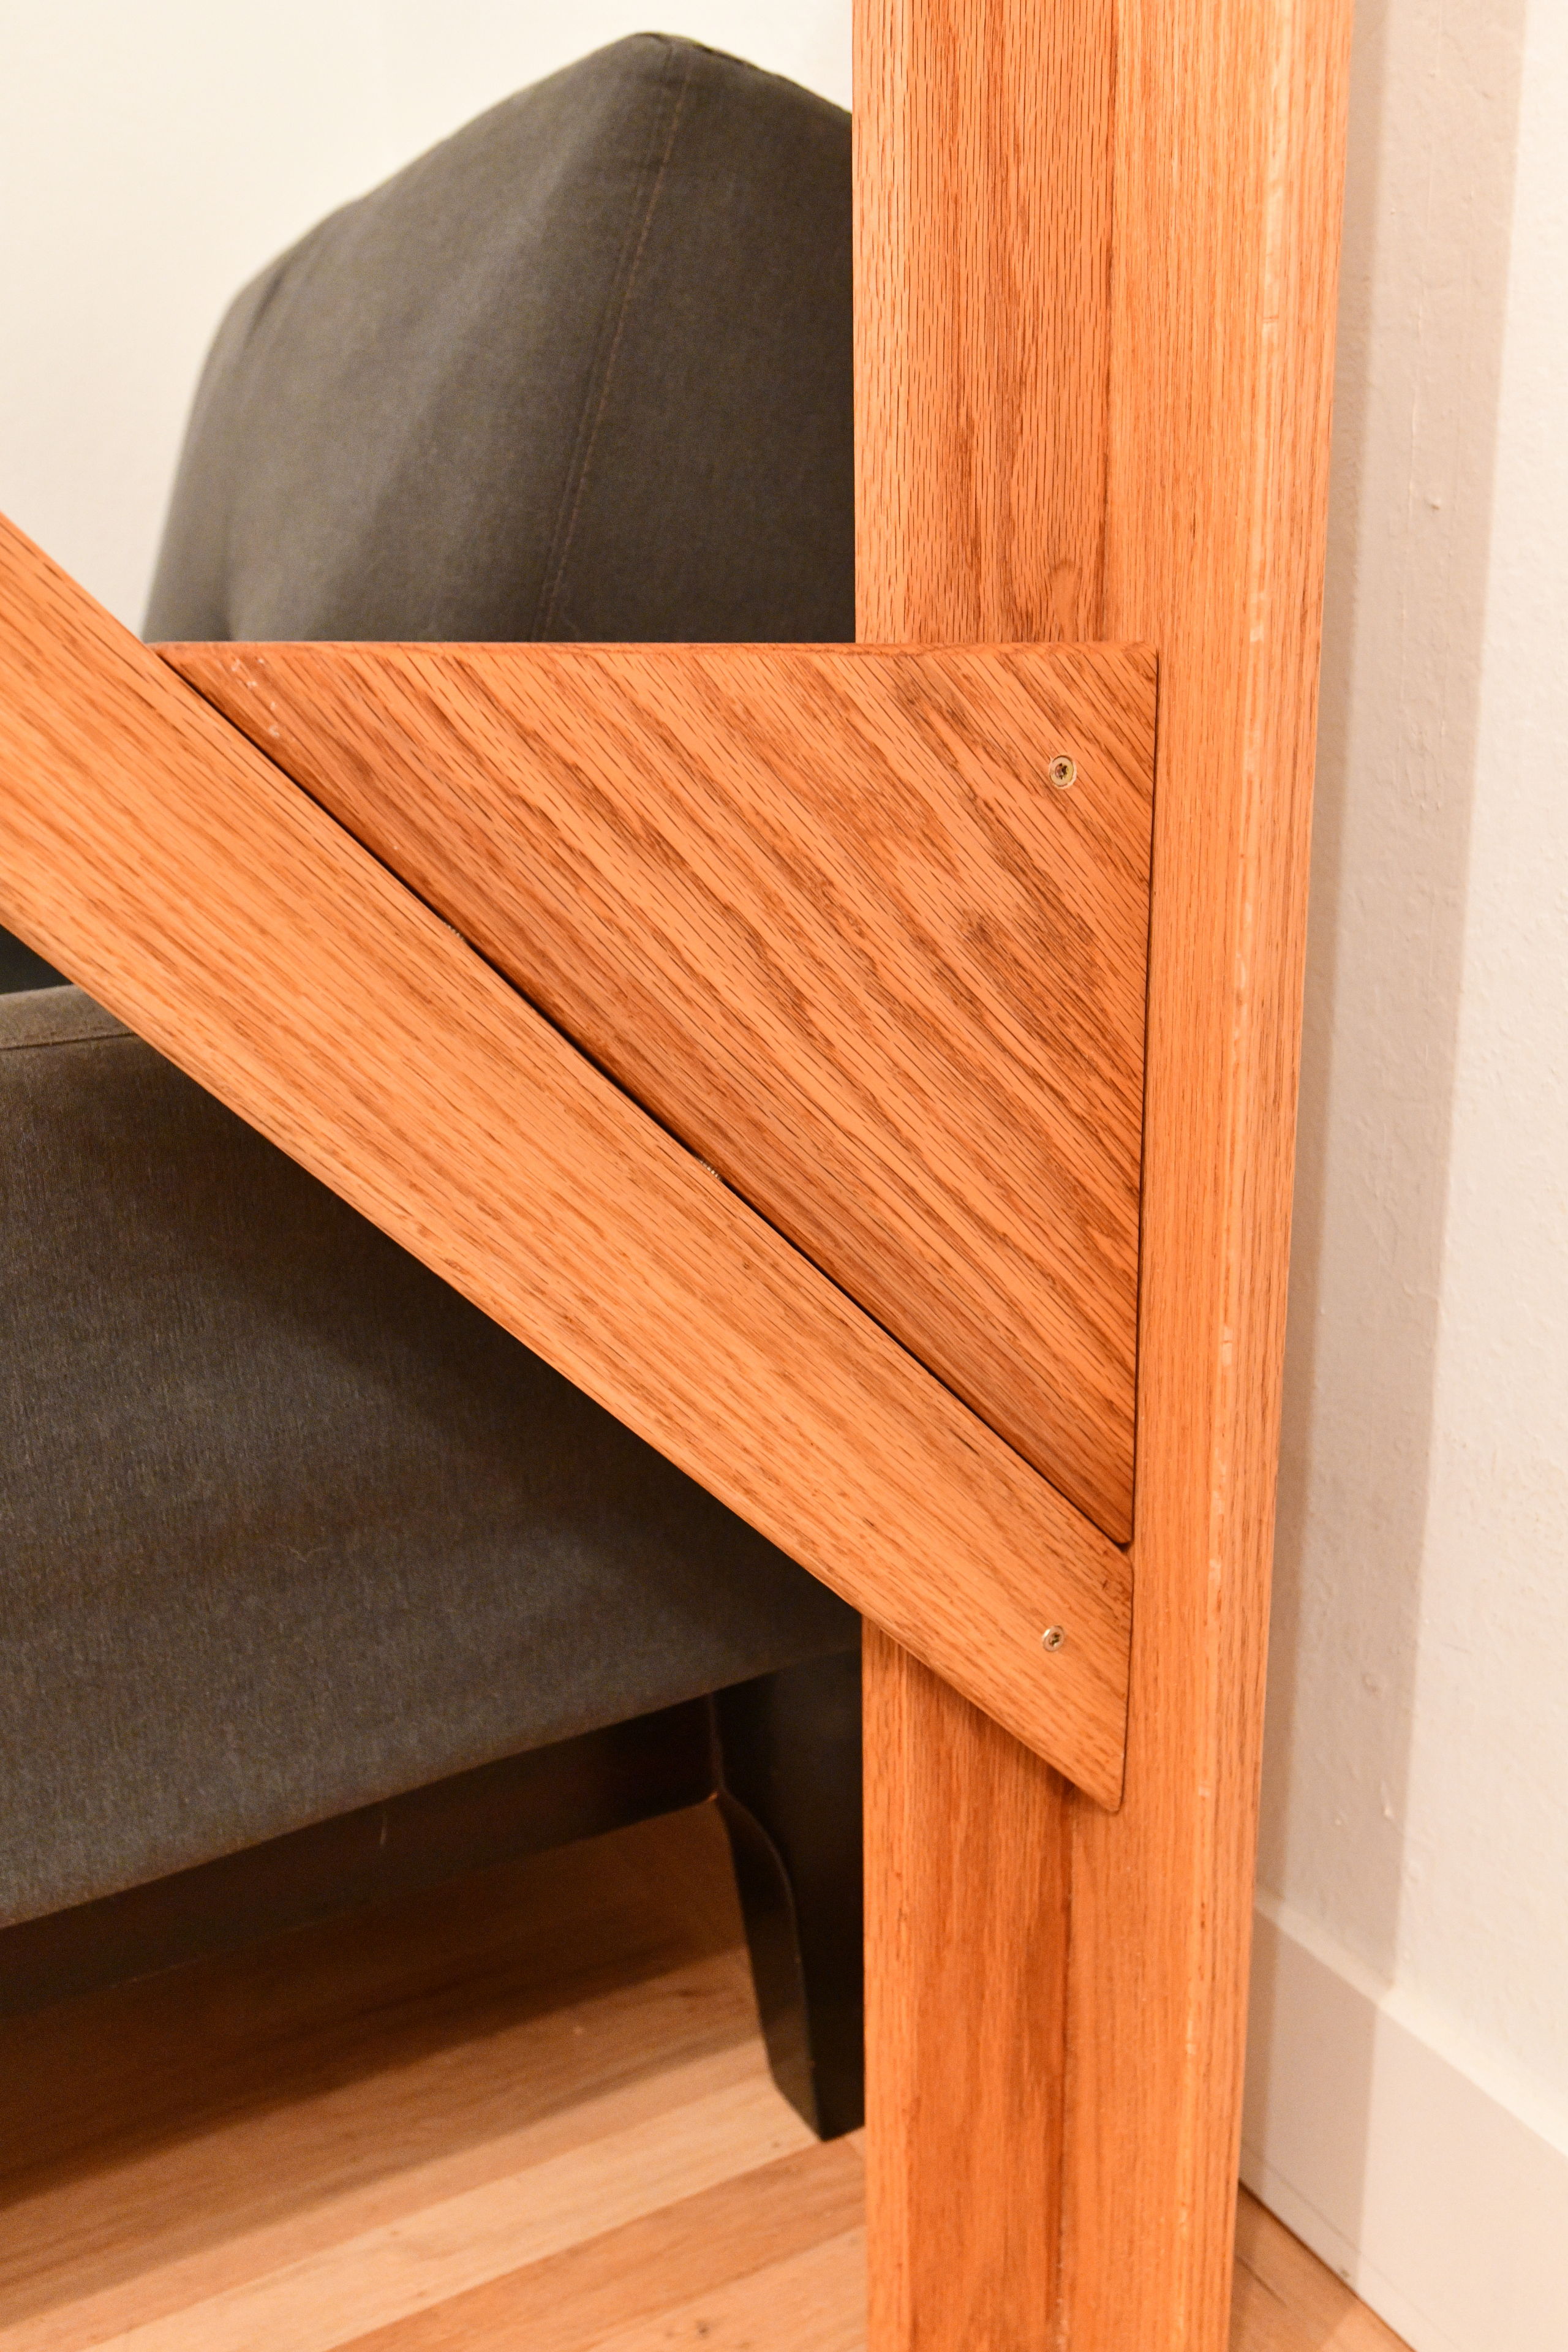
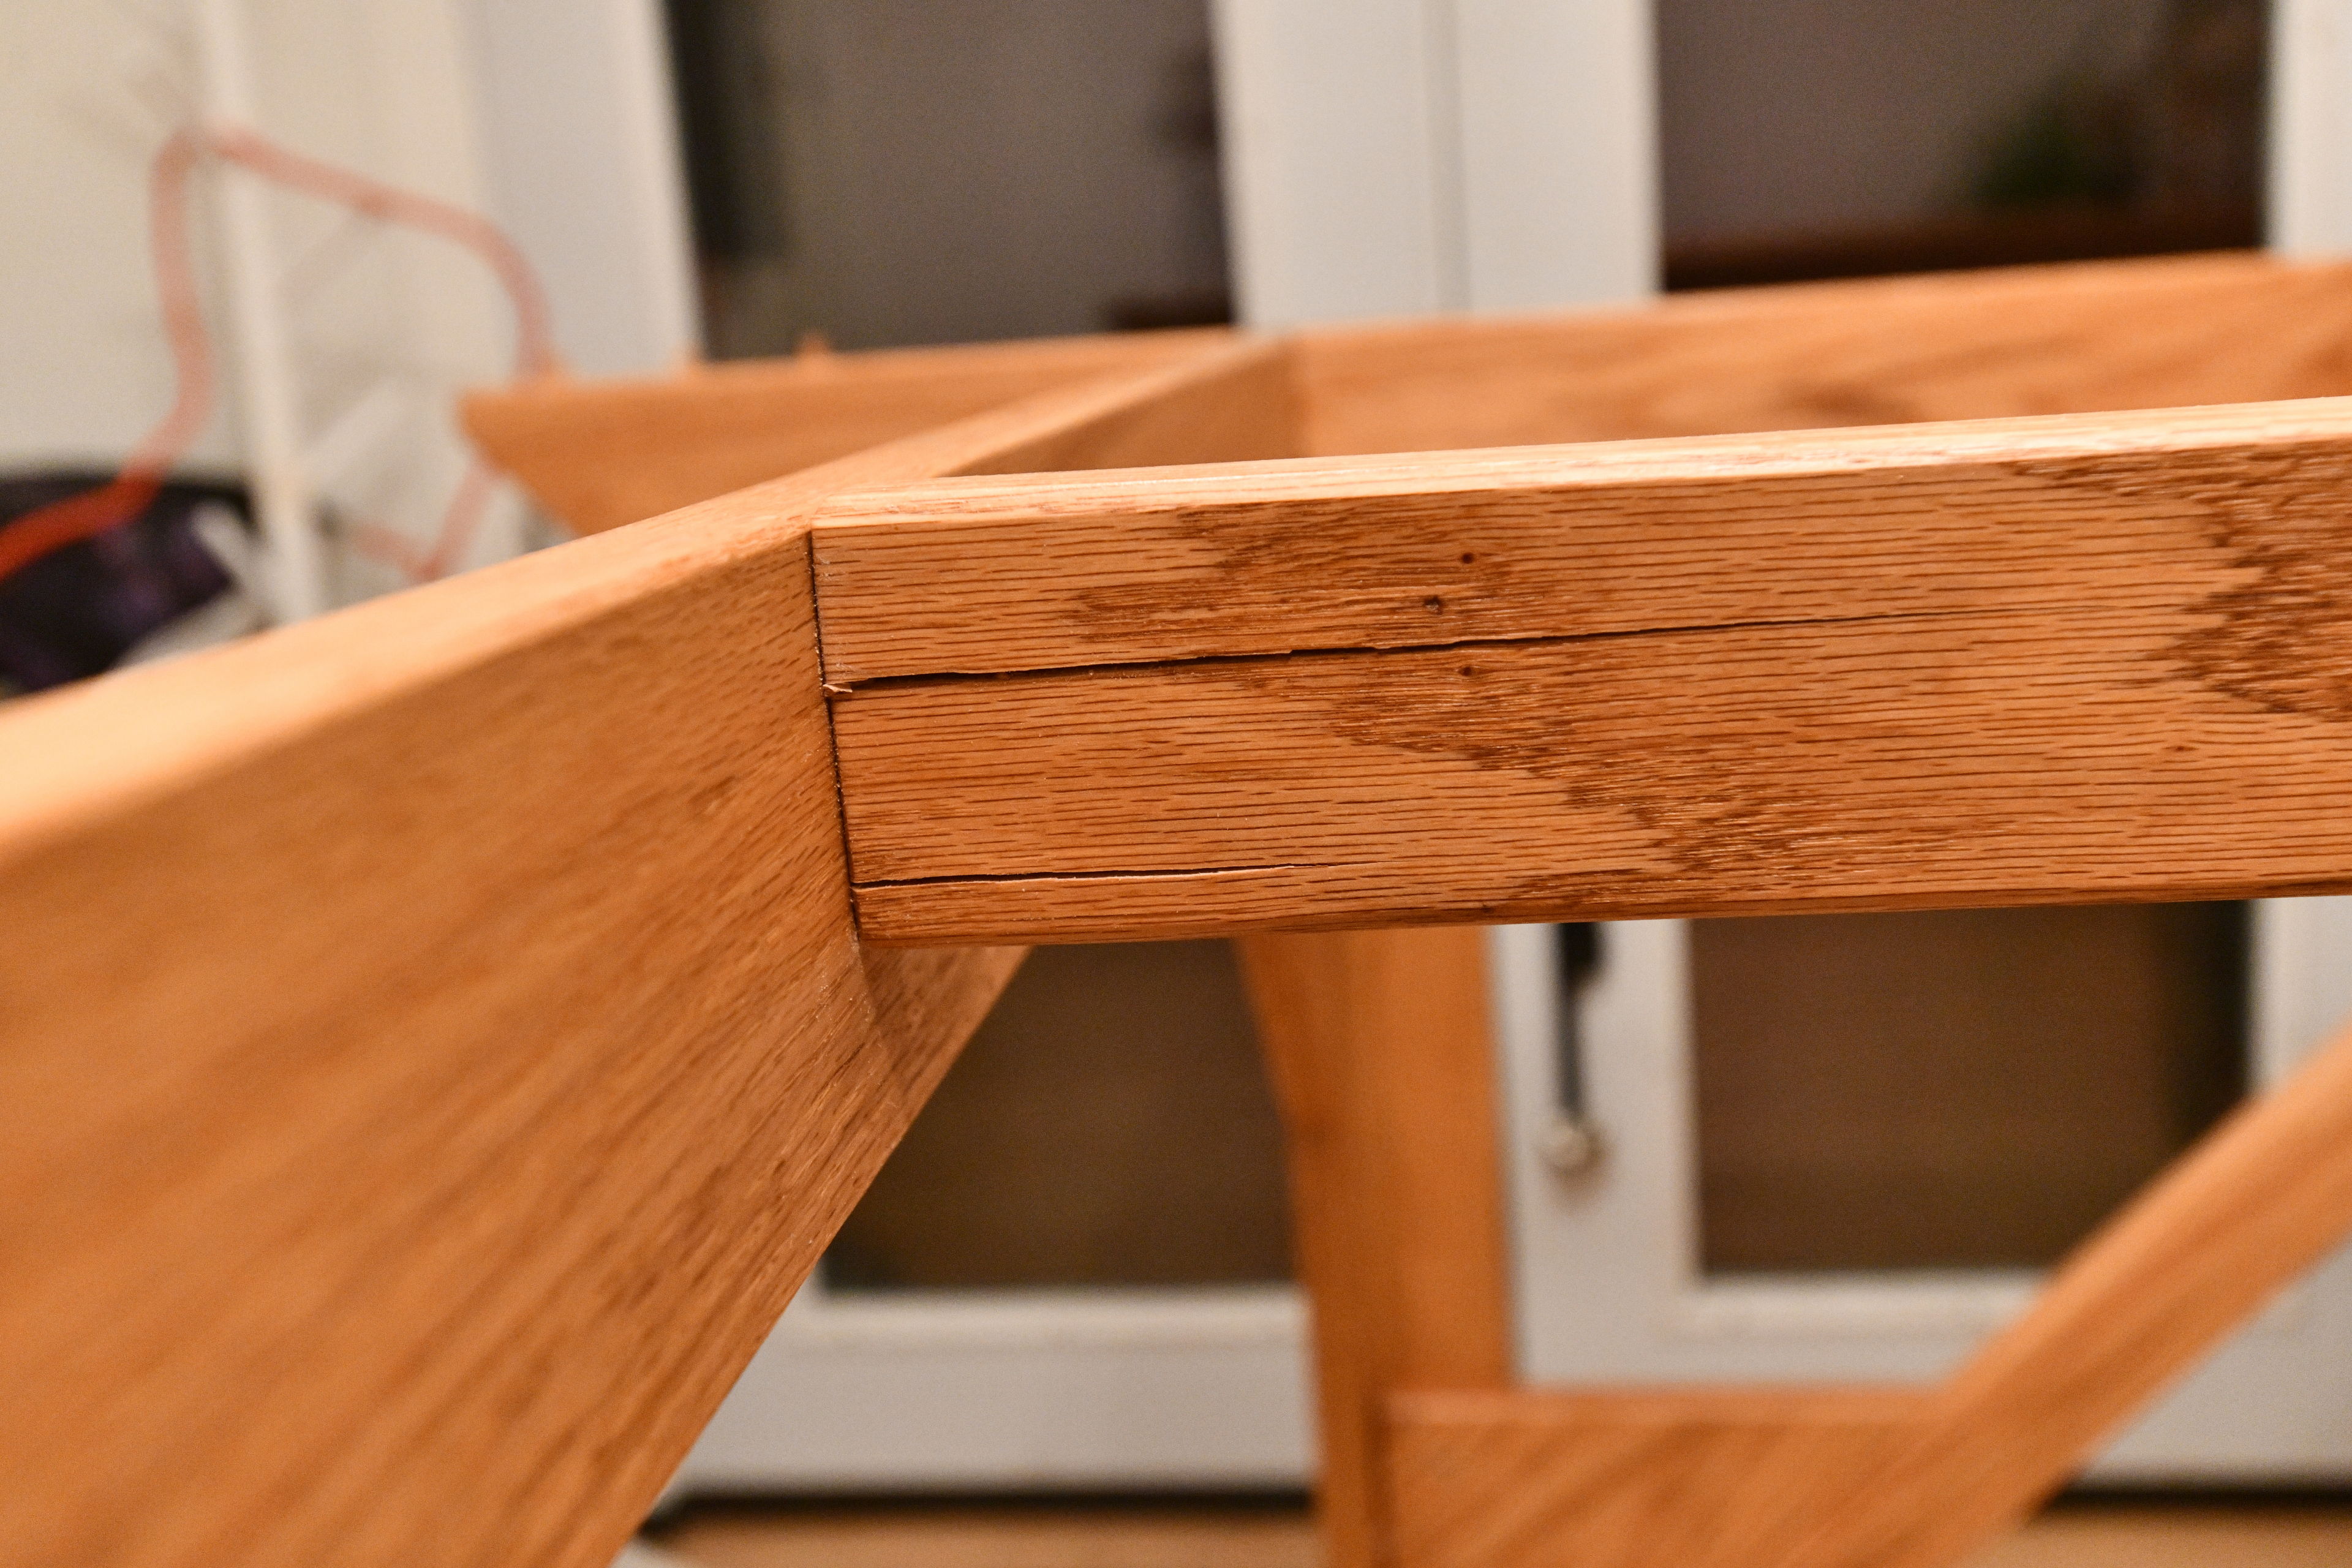
Next I focused on figuring out how I would join the two boards for each leg at a right angle. I was pretty sure I would glue them, but wasn’t sure if I should use any mechanical joint beyond that. I settled on using dowels along the length, using my new self centering doweling jig. I started by drilling holes in all four holes before I realized that would be way too many dowels. I then spaced them out as much as I could while still keying off a dowel in the fourth slot. I was not able to use the jig for the facing board, as those holes were not centered. I used pencil to draw circles around dowels and did my best to drill matching holes. Then I glued the legs together and clamped them all at once.

I switched from my original idea of using 4 inch square posts as legs to using two boards joined at a right angle. I decided to use dowels and glue to join these. It was my first time cutting dowel holes, and using a doweling jig.
I switched from my original idea of using 4 inch square posts as legs to using two boards joined at a right angle. I decided to use dowels and glue to join these. It was my first time cutting dowel holes, and using a doweling jig.
I switched from my original idea of using 4 inch square posts as legs to using two boards joined at a right angle. I decided to use dowels and glue to join these. It was my first time cutting dowel holes, and using a doweling jig.
I switched from my original idea of using 4 inch square posts as legs to using two boards joined at a right angle. I decided to use dowels and glue to join these. It was my first time cutting dowel holes, and using a doweling jig.
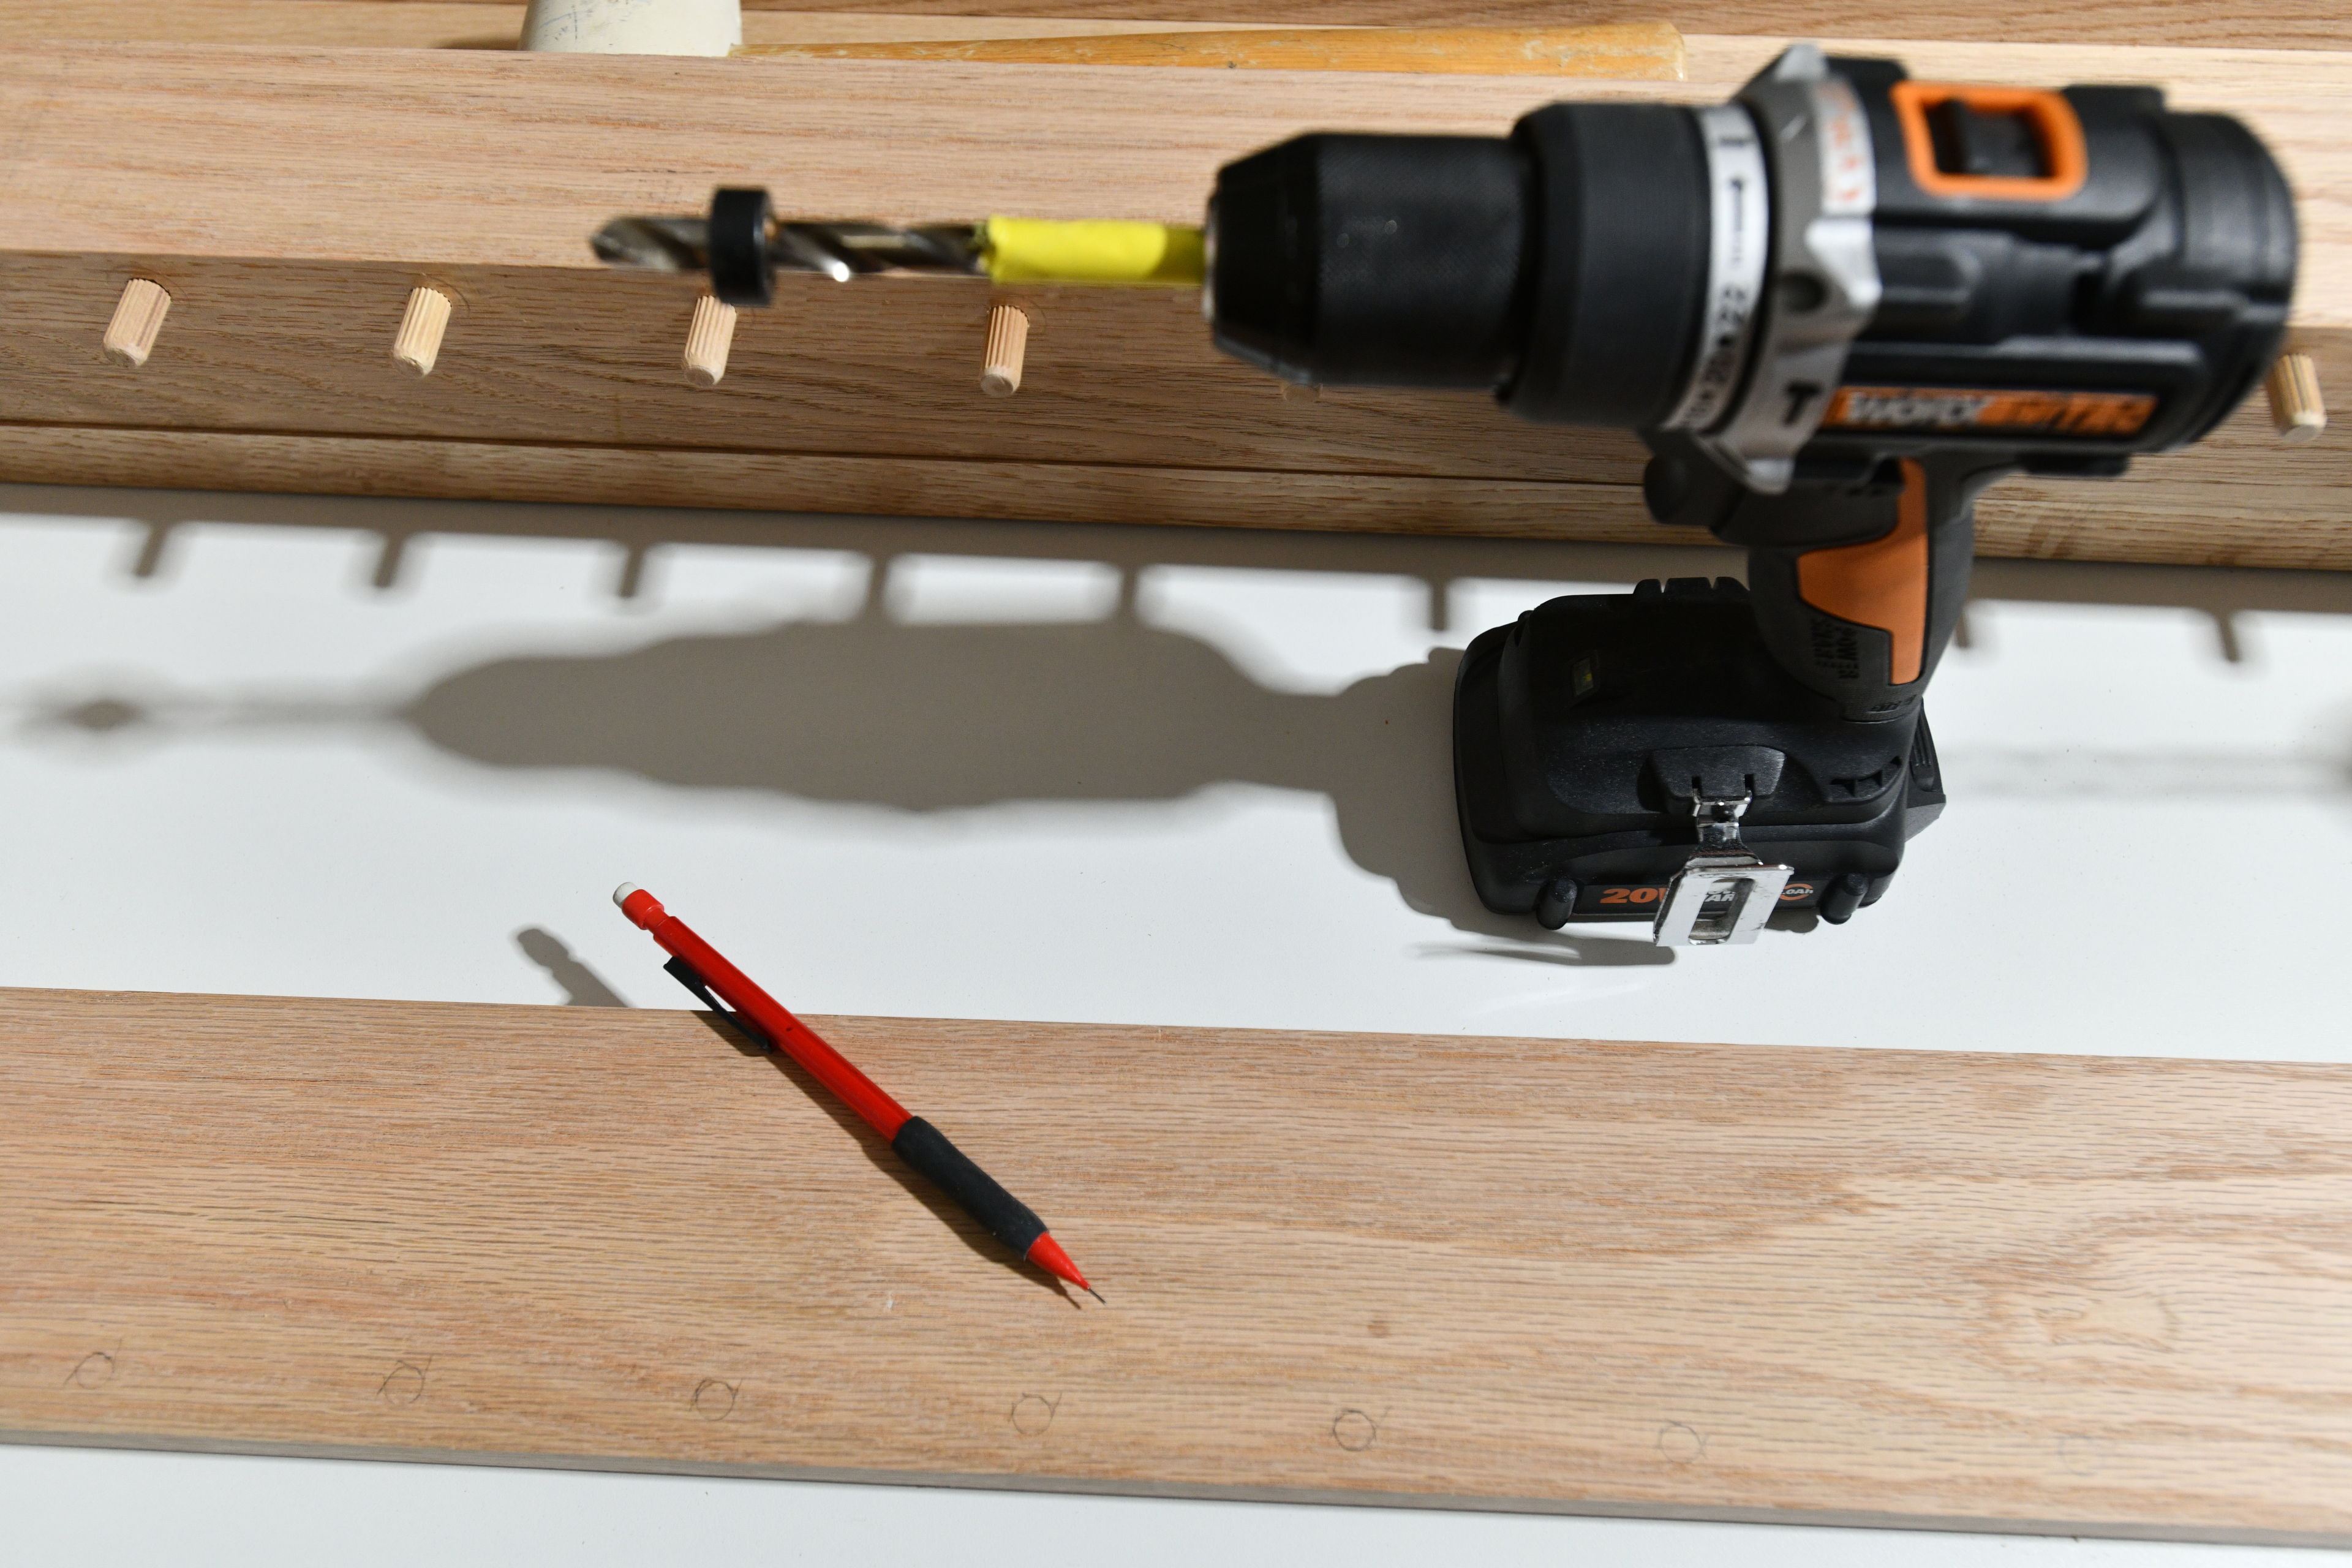
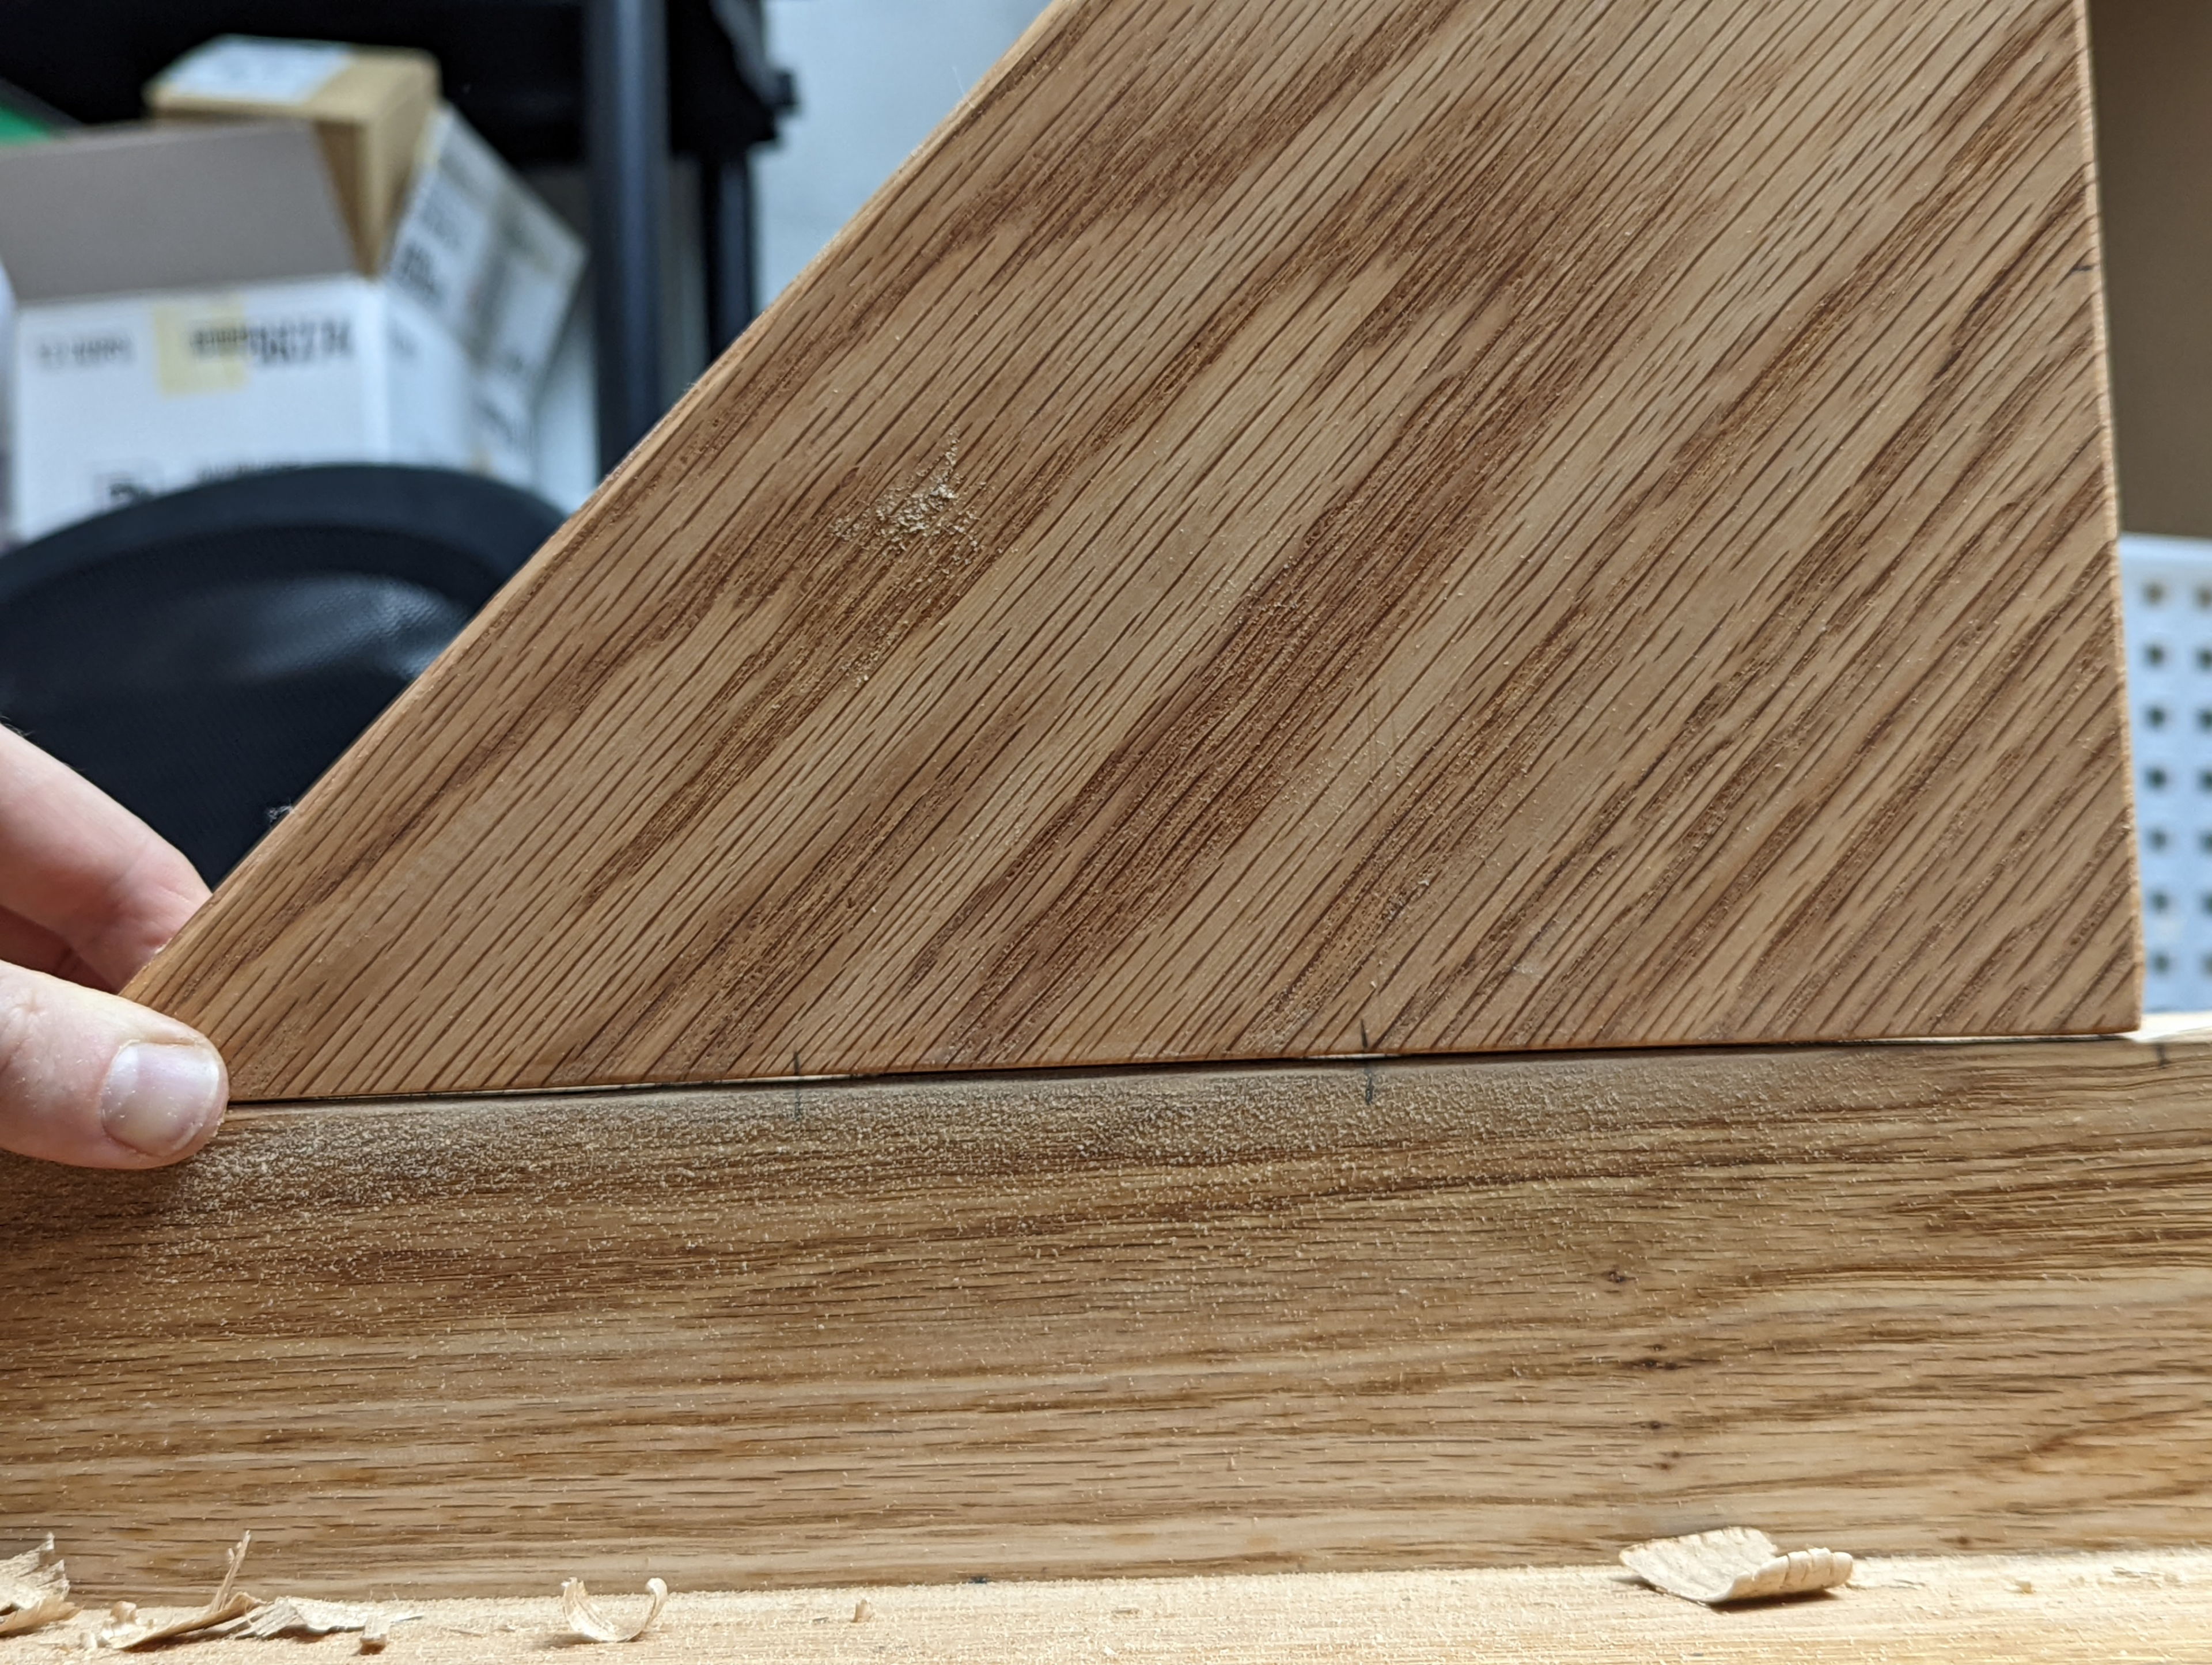
I did my best to transfer the hole locations to the mating boards by lining up the dowels and circling them with pencil.
I did my best to transfer the hole locations to the mating boards by lining up the dowels and circling them with pencil.
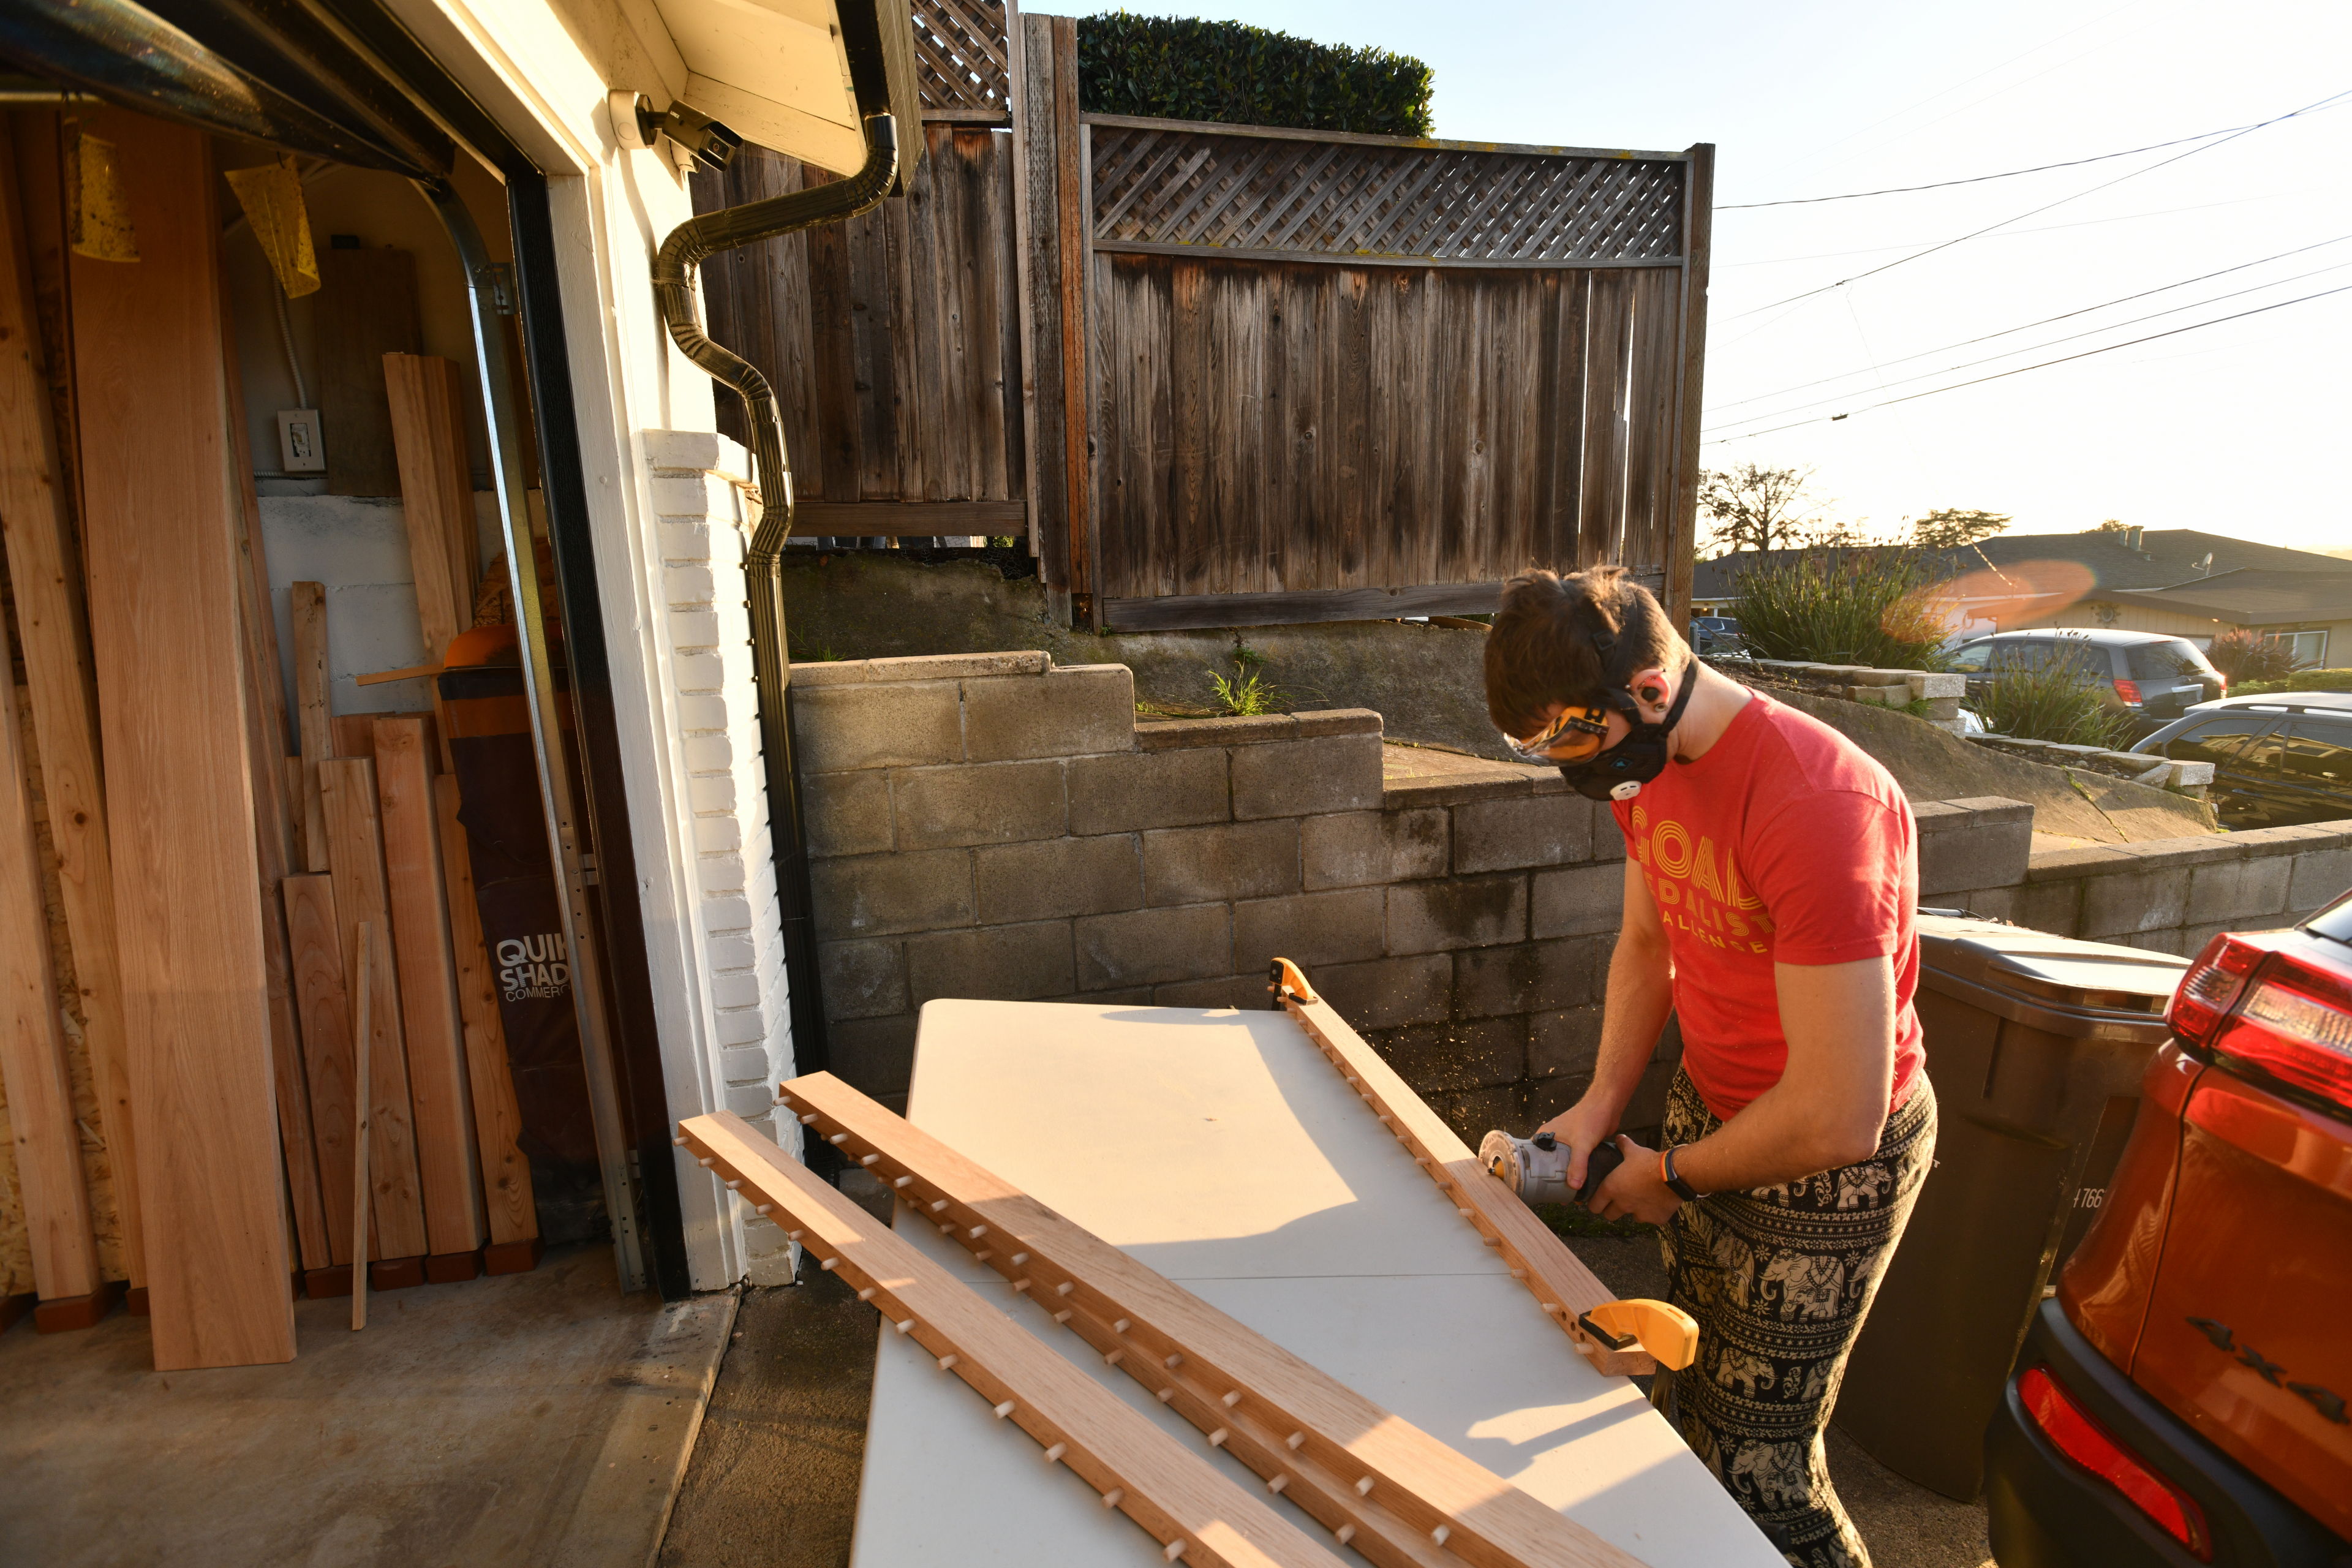
I used a 45 degree router bit to take the sharp corner off all the edges, slightly.

Lining up the leg pieces while getting ready for gluing.
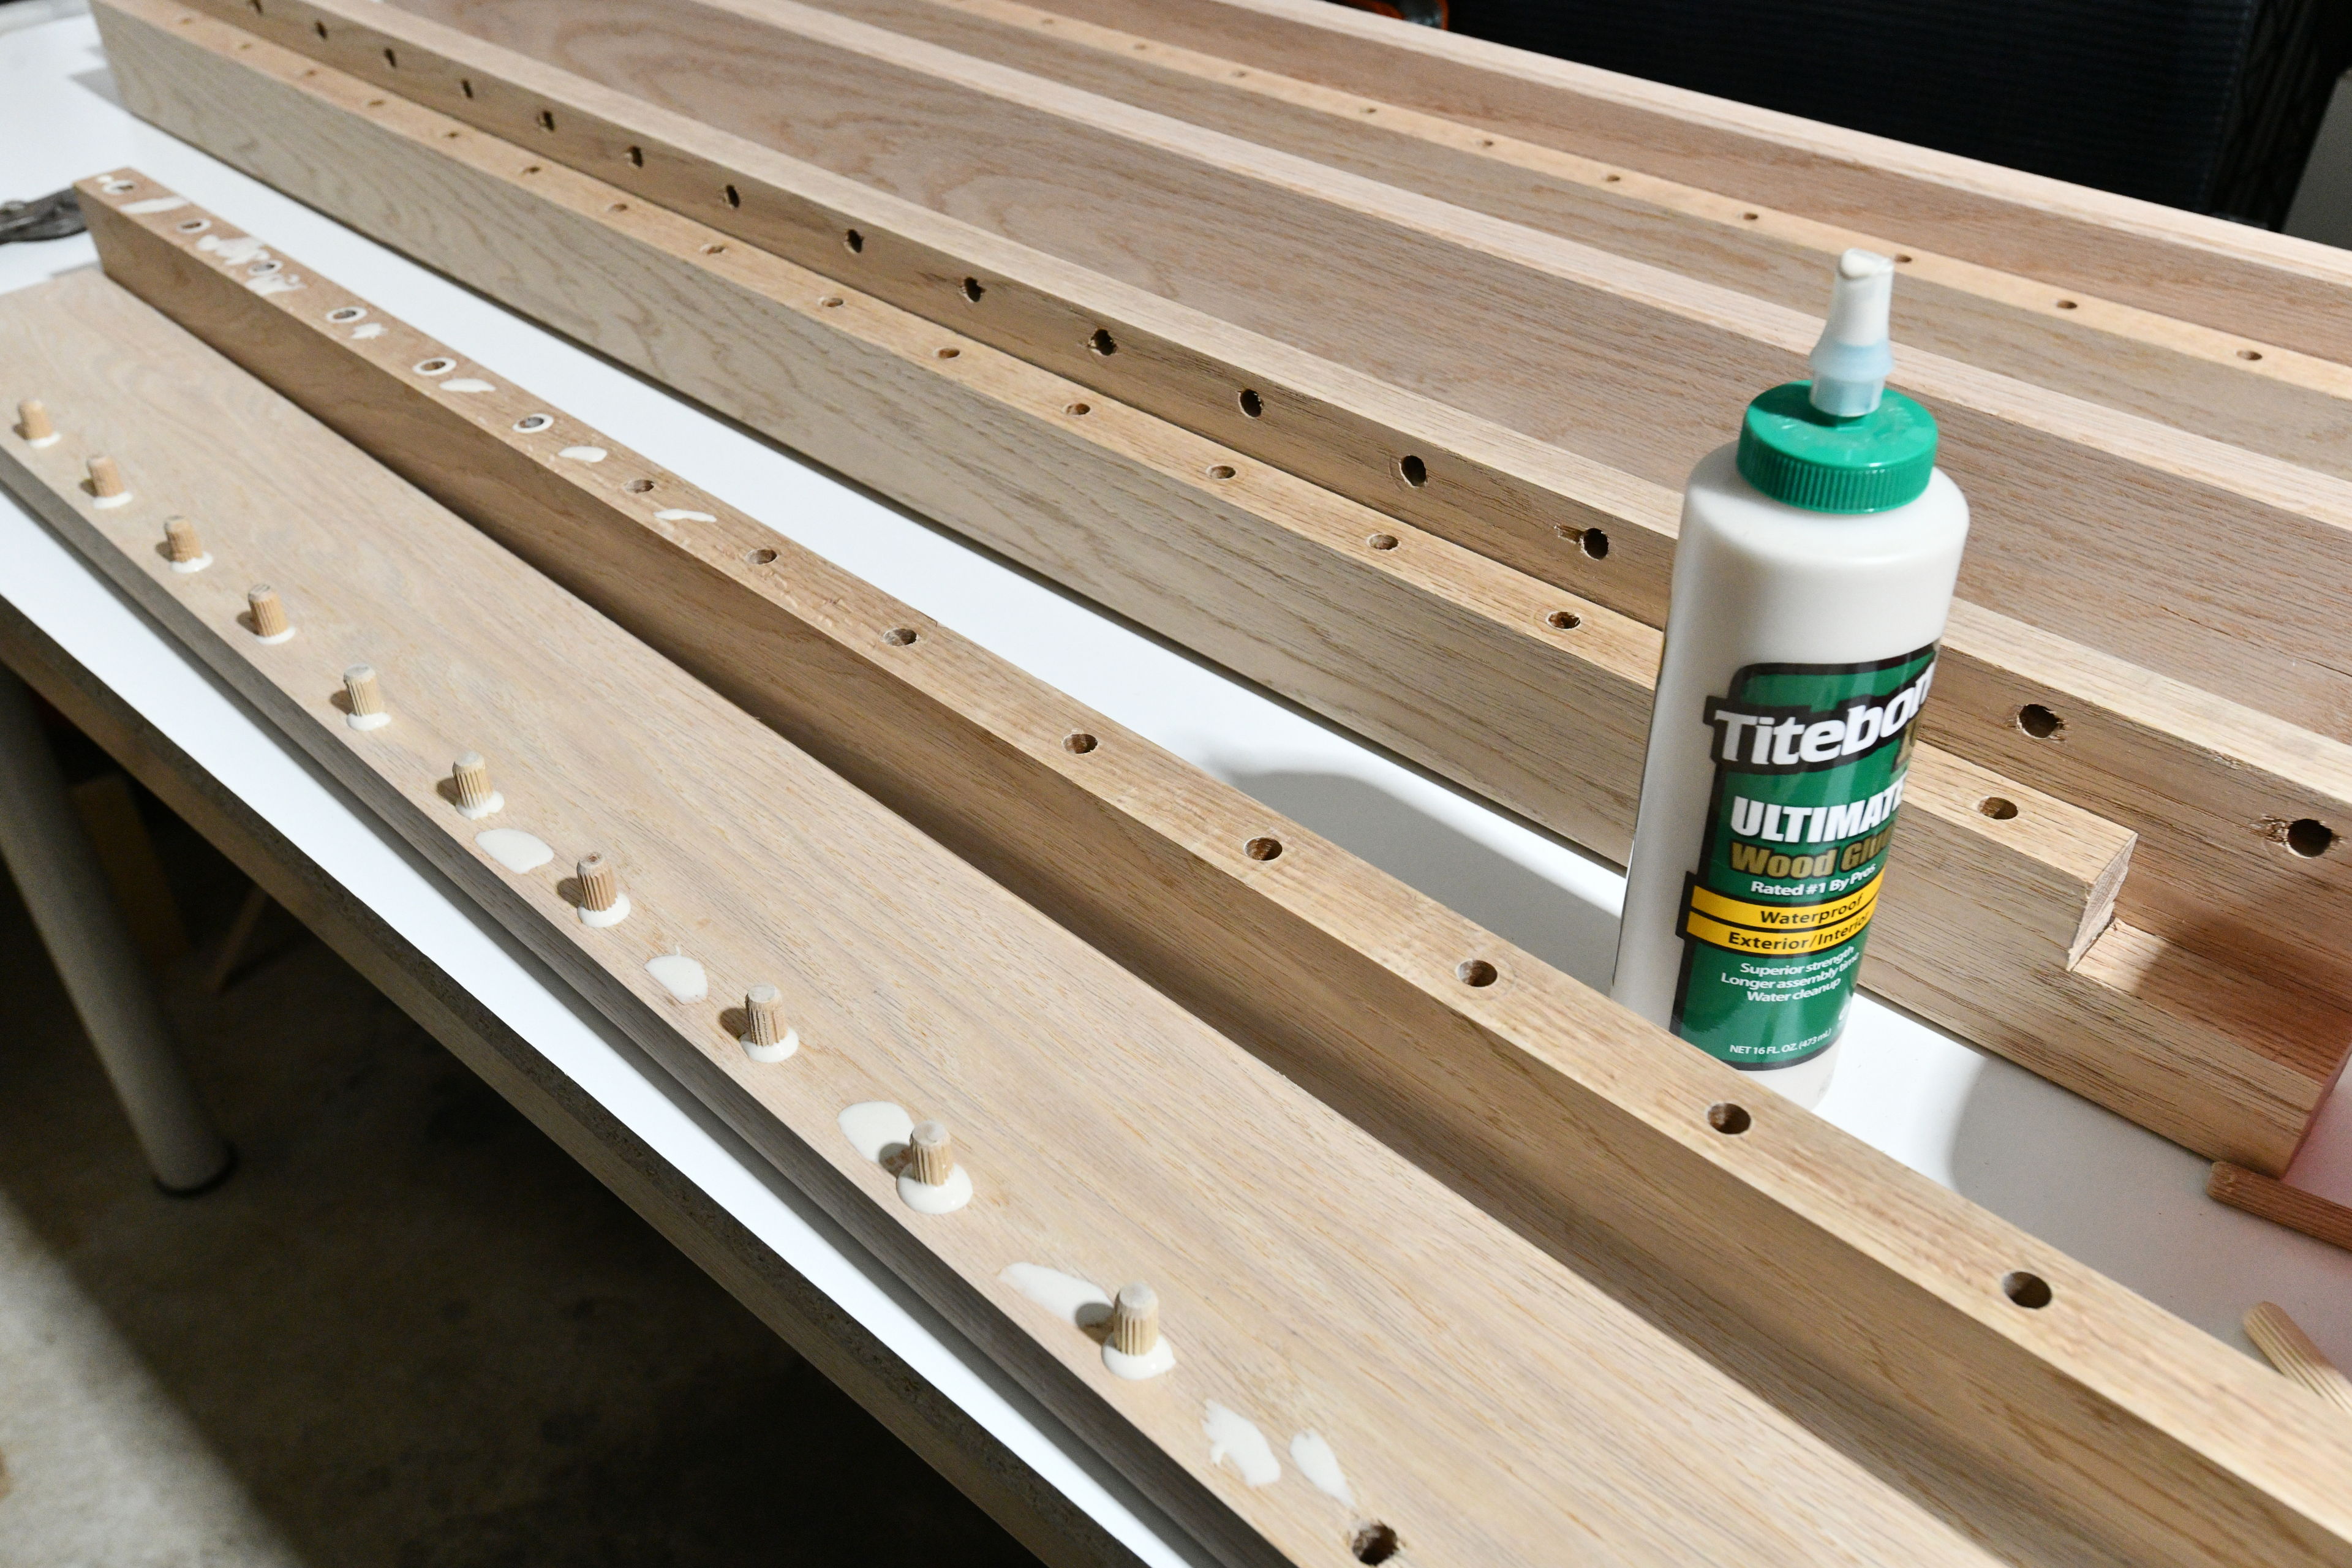
My gluing strategy was to first pour glue into the holes, insert the dowels, then pour glue around them and smear it a bit, and then glue to other board and join them before clamping. It wasn't particularly elegant, but it worked.
My gluing strategy was to first pour glue into the holes, insert the dowels, then pour glue around them and smear it a bit, and then glue to other board and join them before clamping. It wasn't particularly elegant, but it worked.
My gluing strategy was to first pour glue into the holes, insert the dowels, then pour glue around them and smear it a bit, and then glue to other board and join them before clamping. It wasn't particularly elegant, but it worked.
My gluing strategy was to first pour glue into the holes, insert the dowels, then pour glue around them and smear it a bit, and then glue to other board and join them before clamping. It wasn't particularly elegant, but it worked.
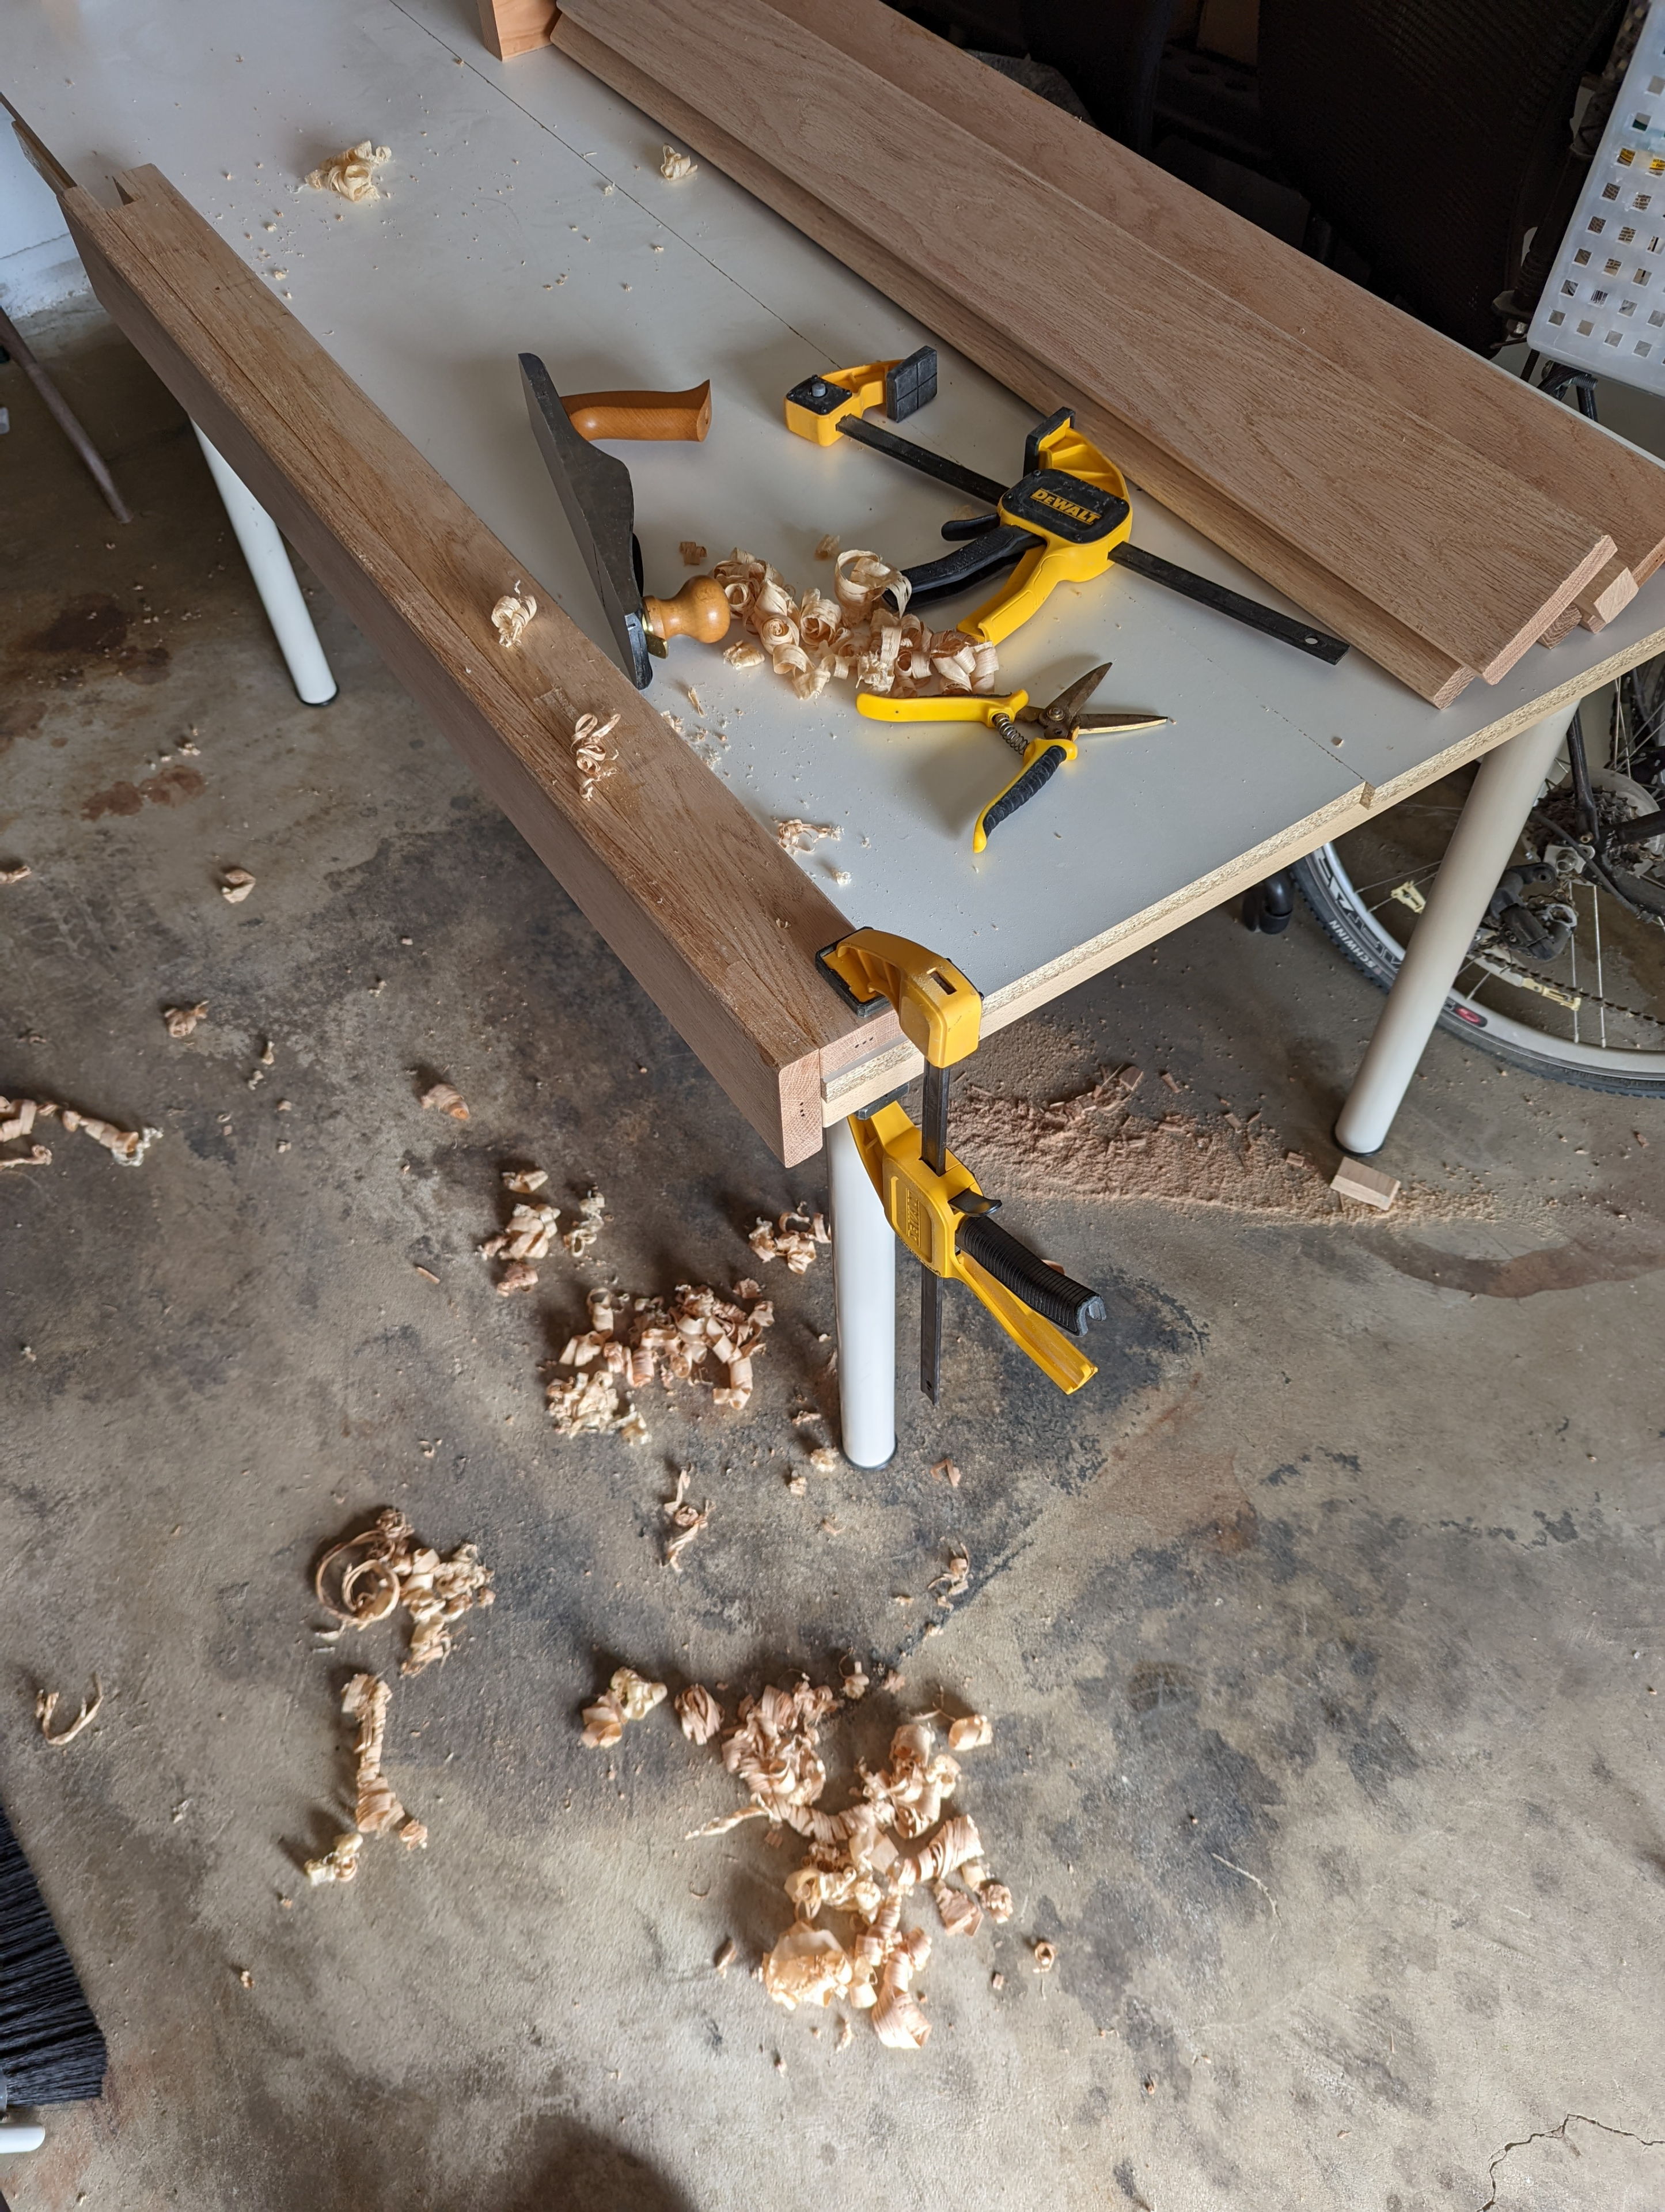
More joining, sanding
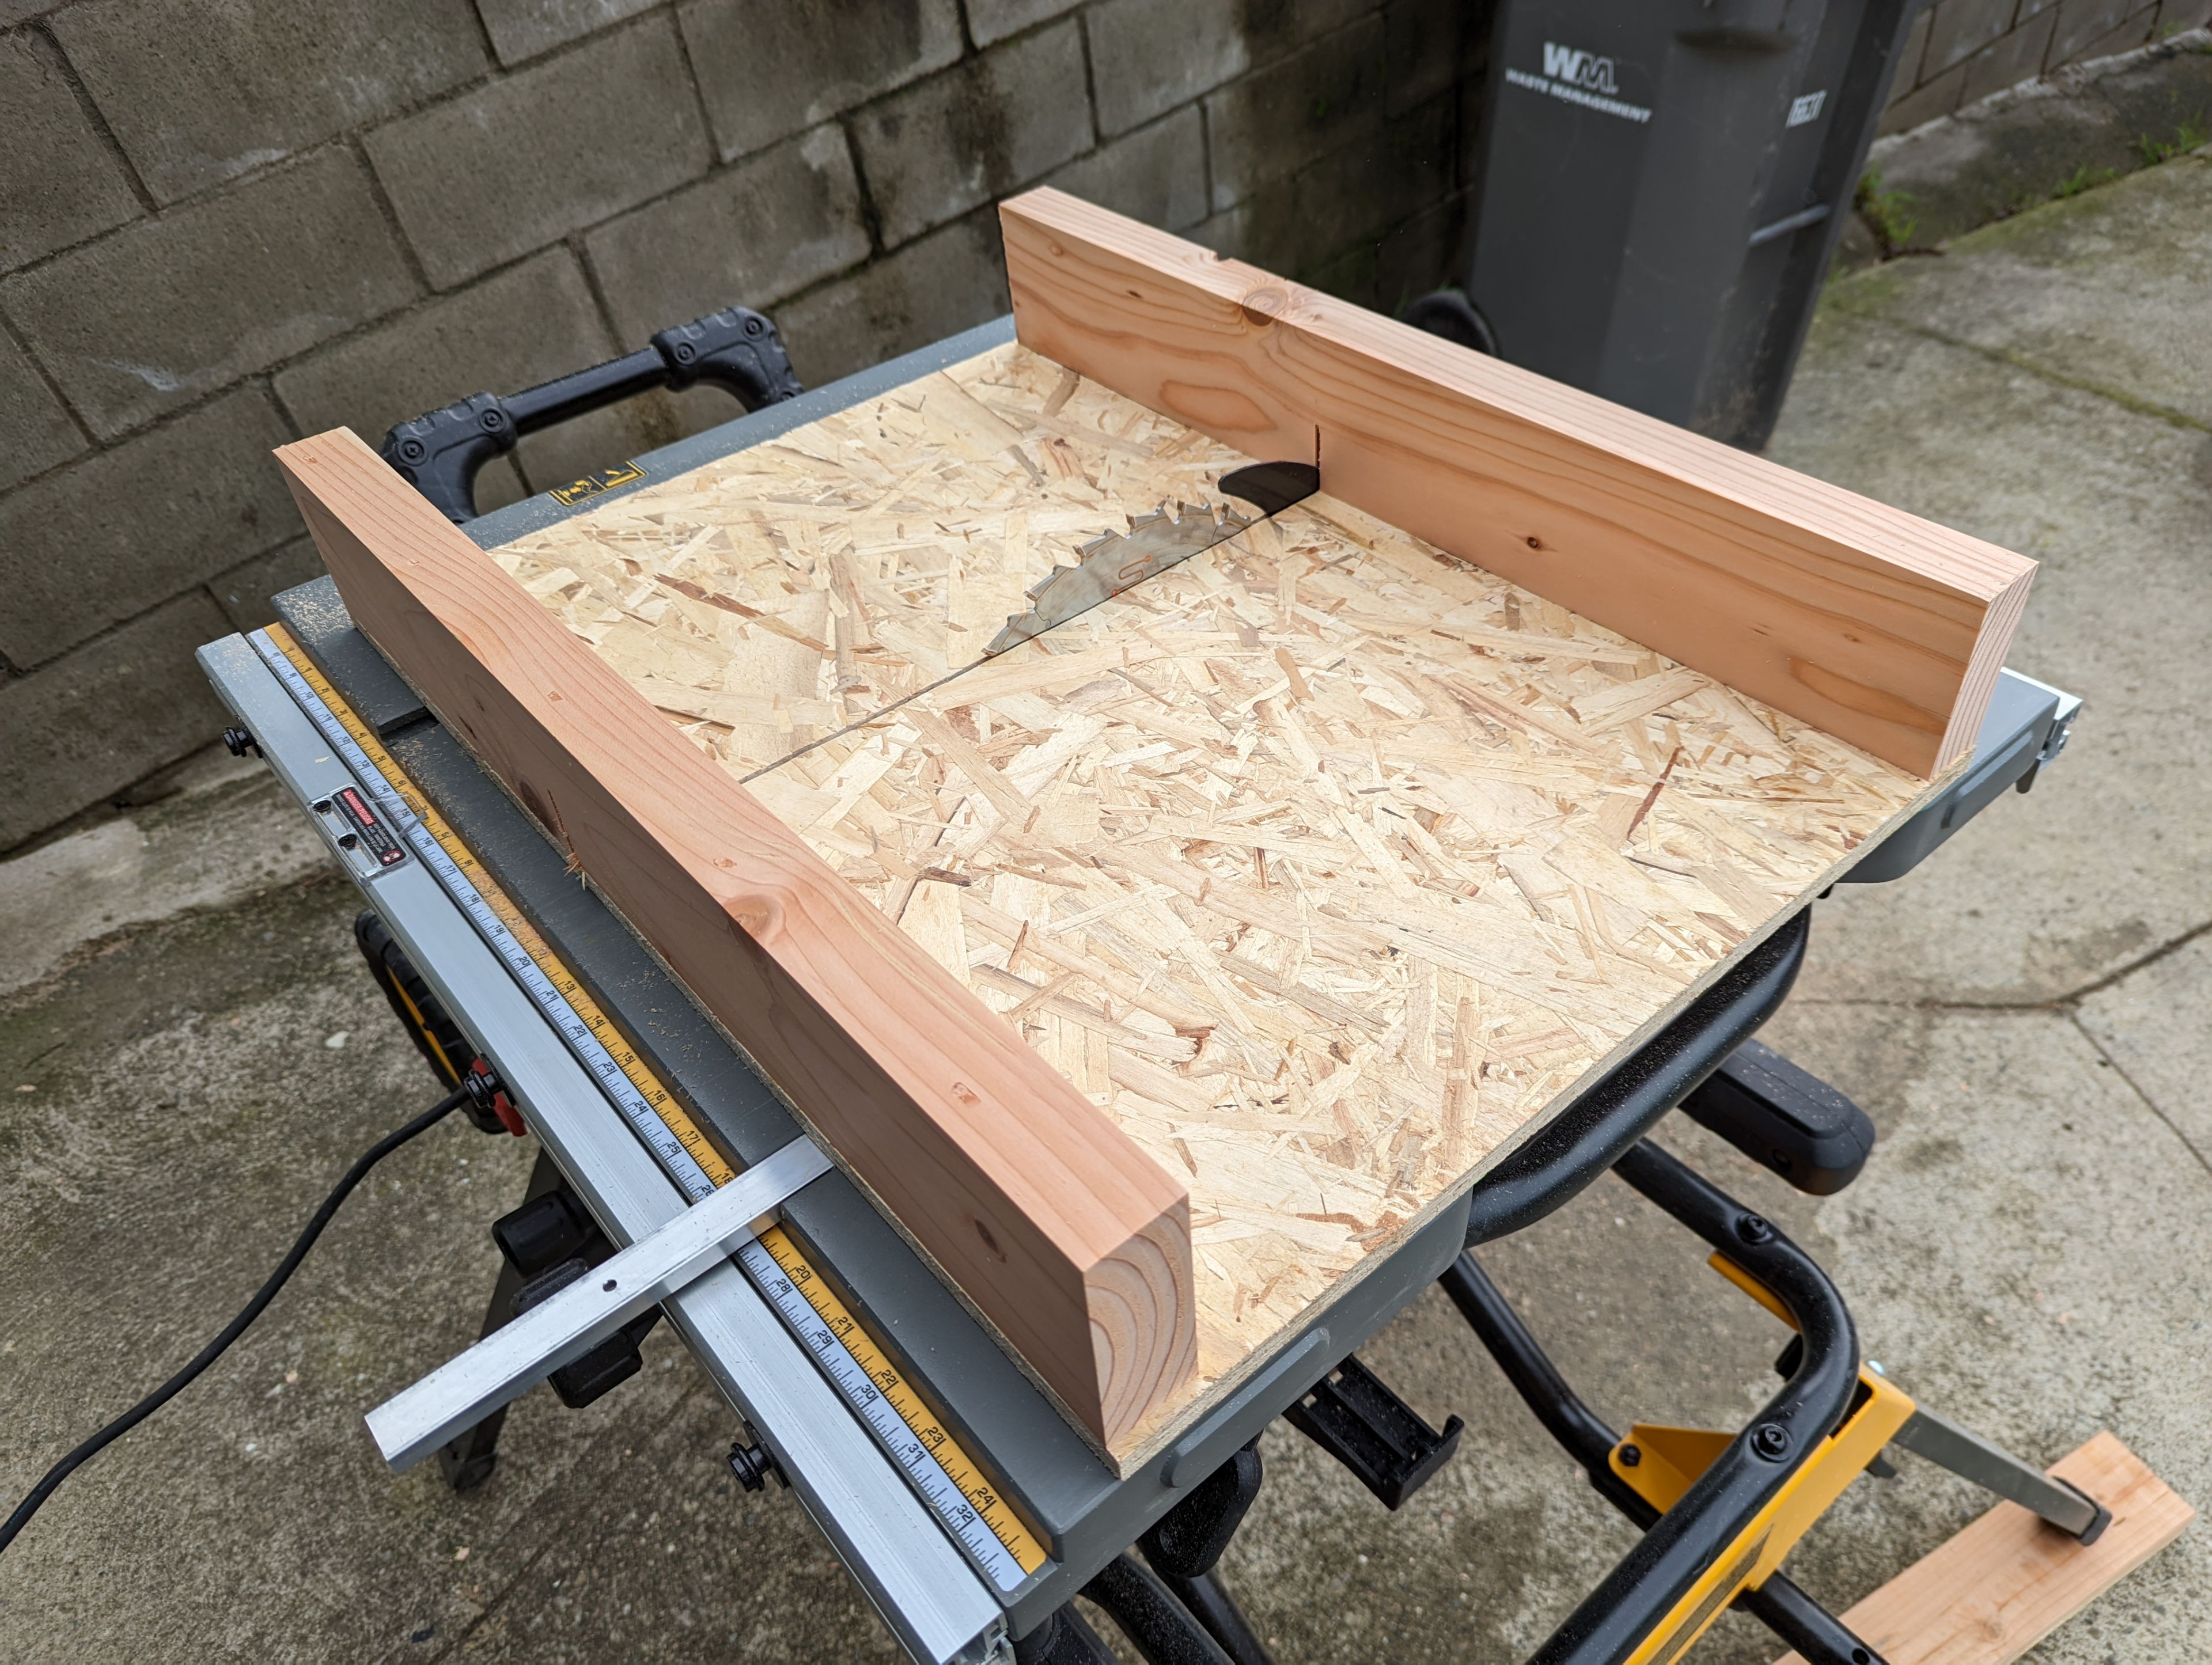
Next I cut slots into the two long supports for the slats. I decided to have them partially rest on the legs, such that it locks into the front legs but not the back legs, since I had to contend with the back face board. I wasn’t really sure what I was doing, but figured I would bolt whatever I needed in the later phase. I really failed at making a clean cuts for these, but it wasn’t really noticeable in the end.

I needed to cut out a few slots in the main frame, but didn't really know how to do it.
At first I tried to use the table saw for this, but realized it would only get partway through one side before cutting too far on the back side. Then I switched to a flimsy hand saw, but that went sideways. It worked out OK, but some of my cuts looked really bad.

My casual safety glasses when I didn't need dust protection.
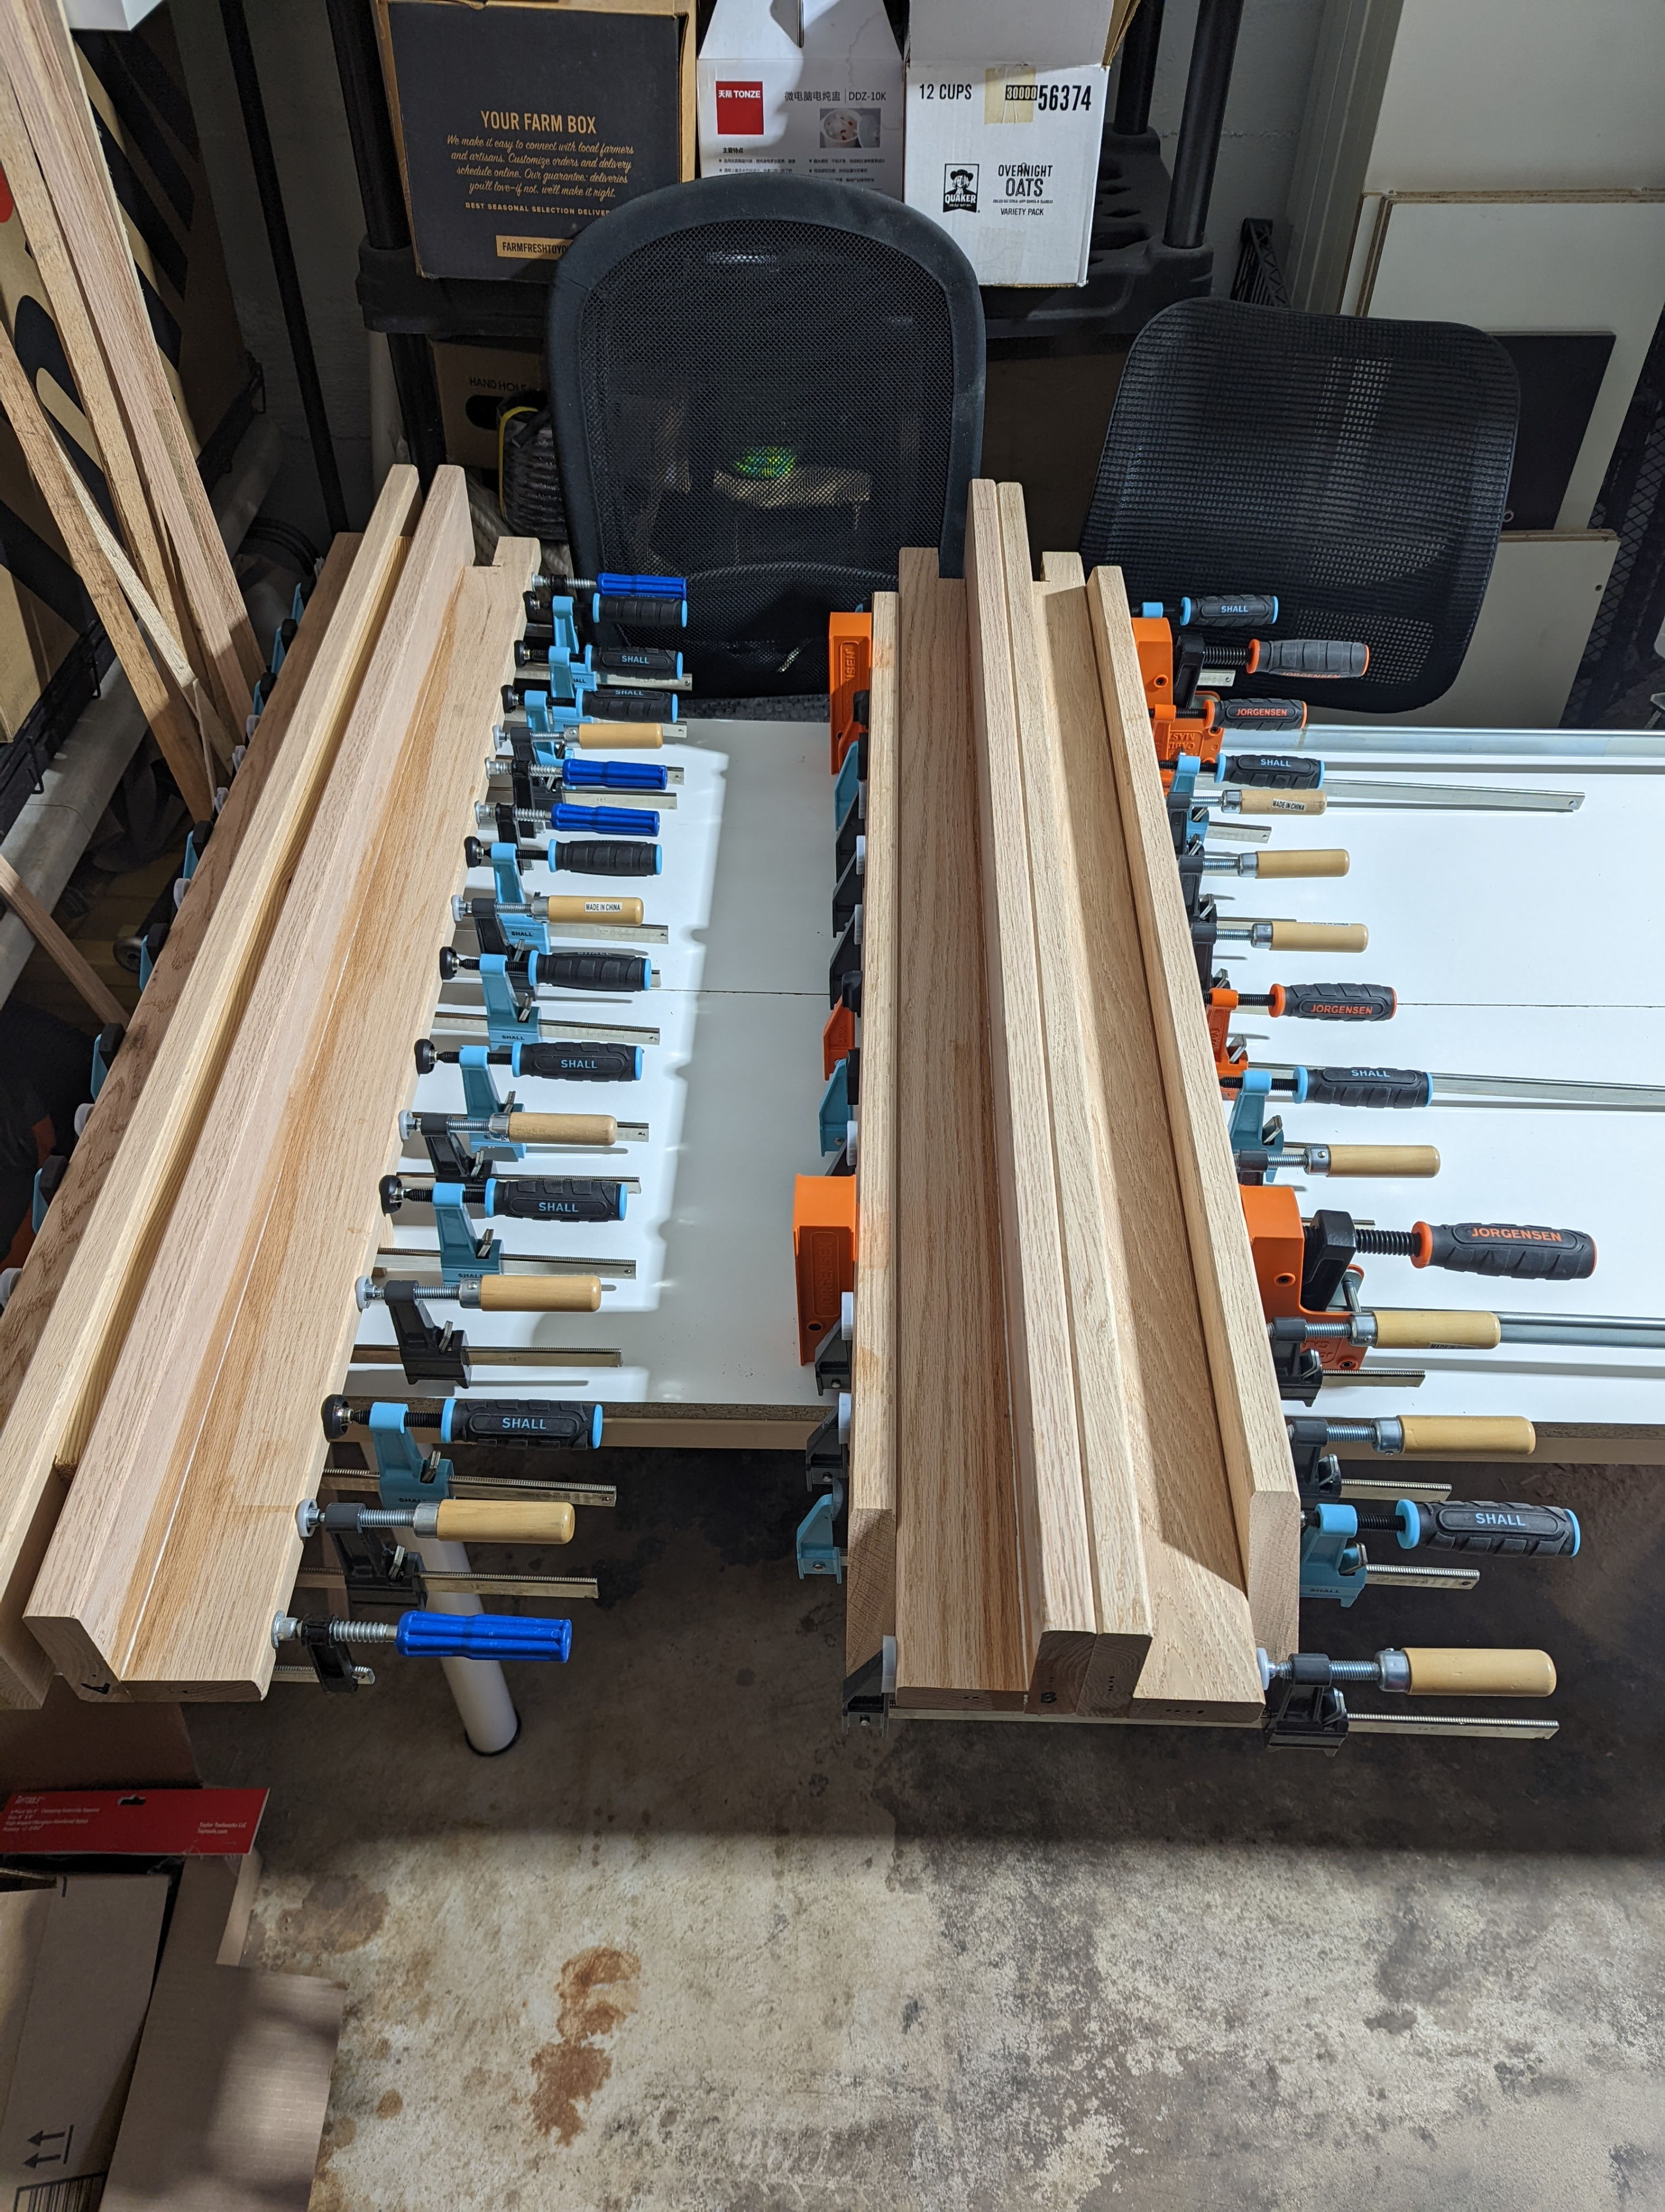
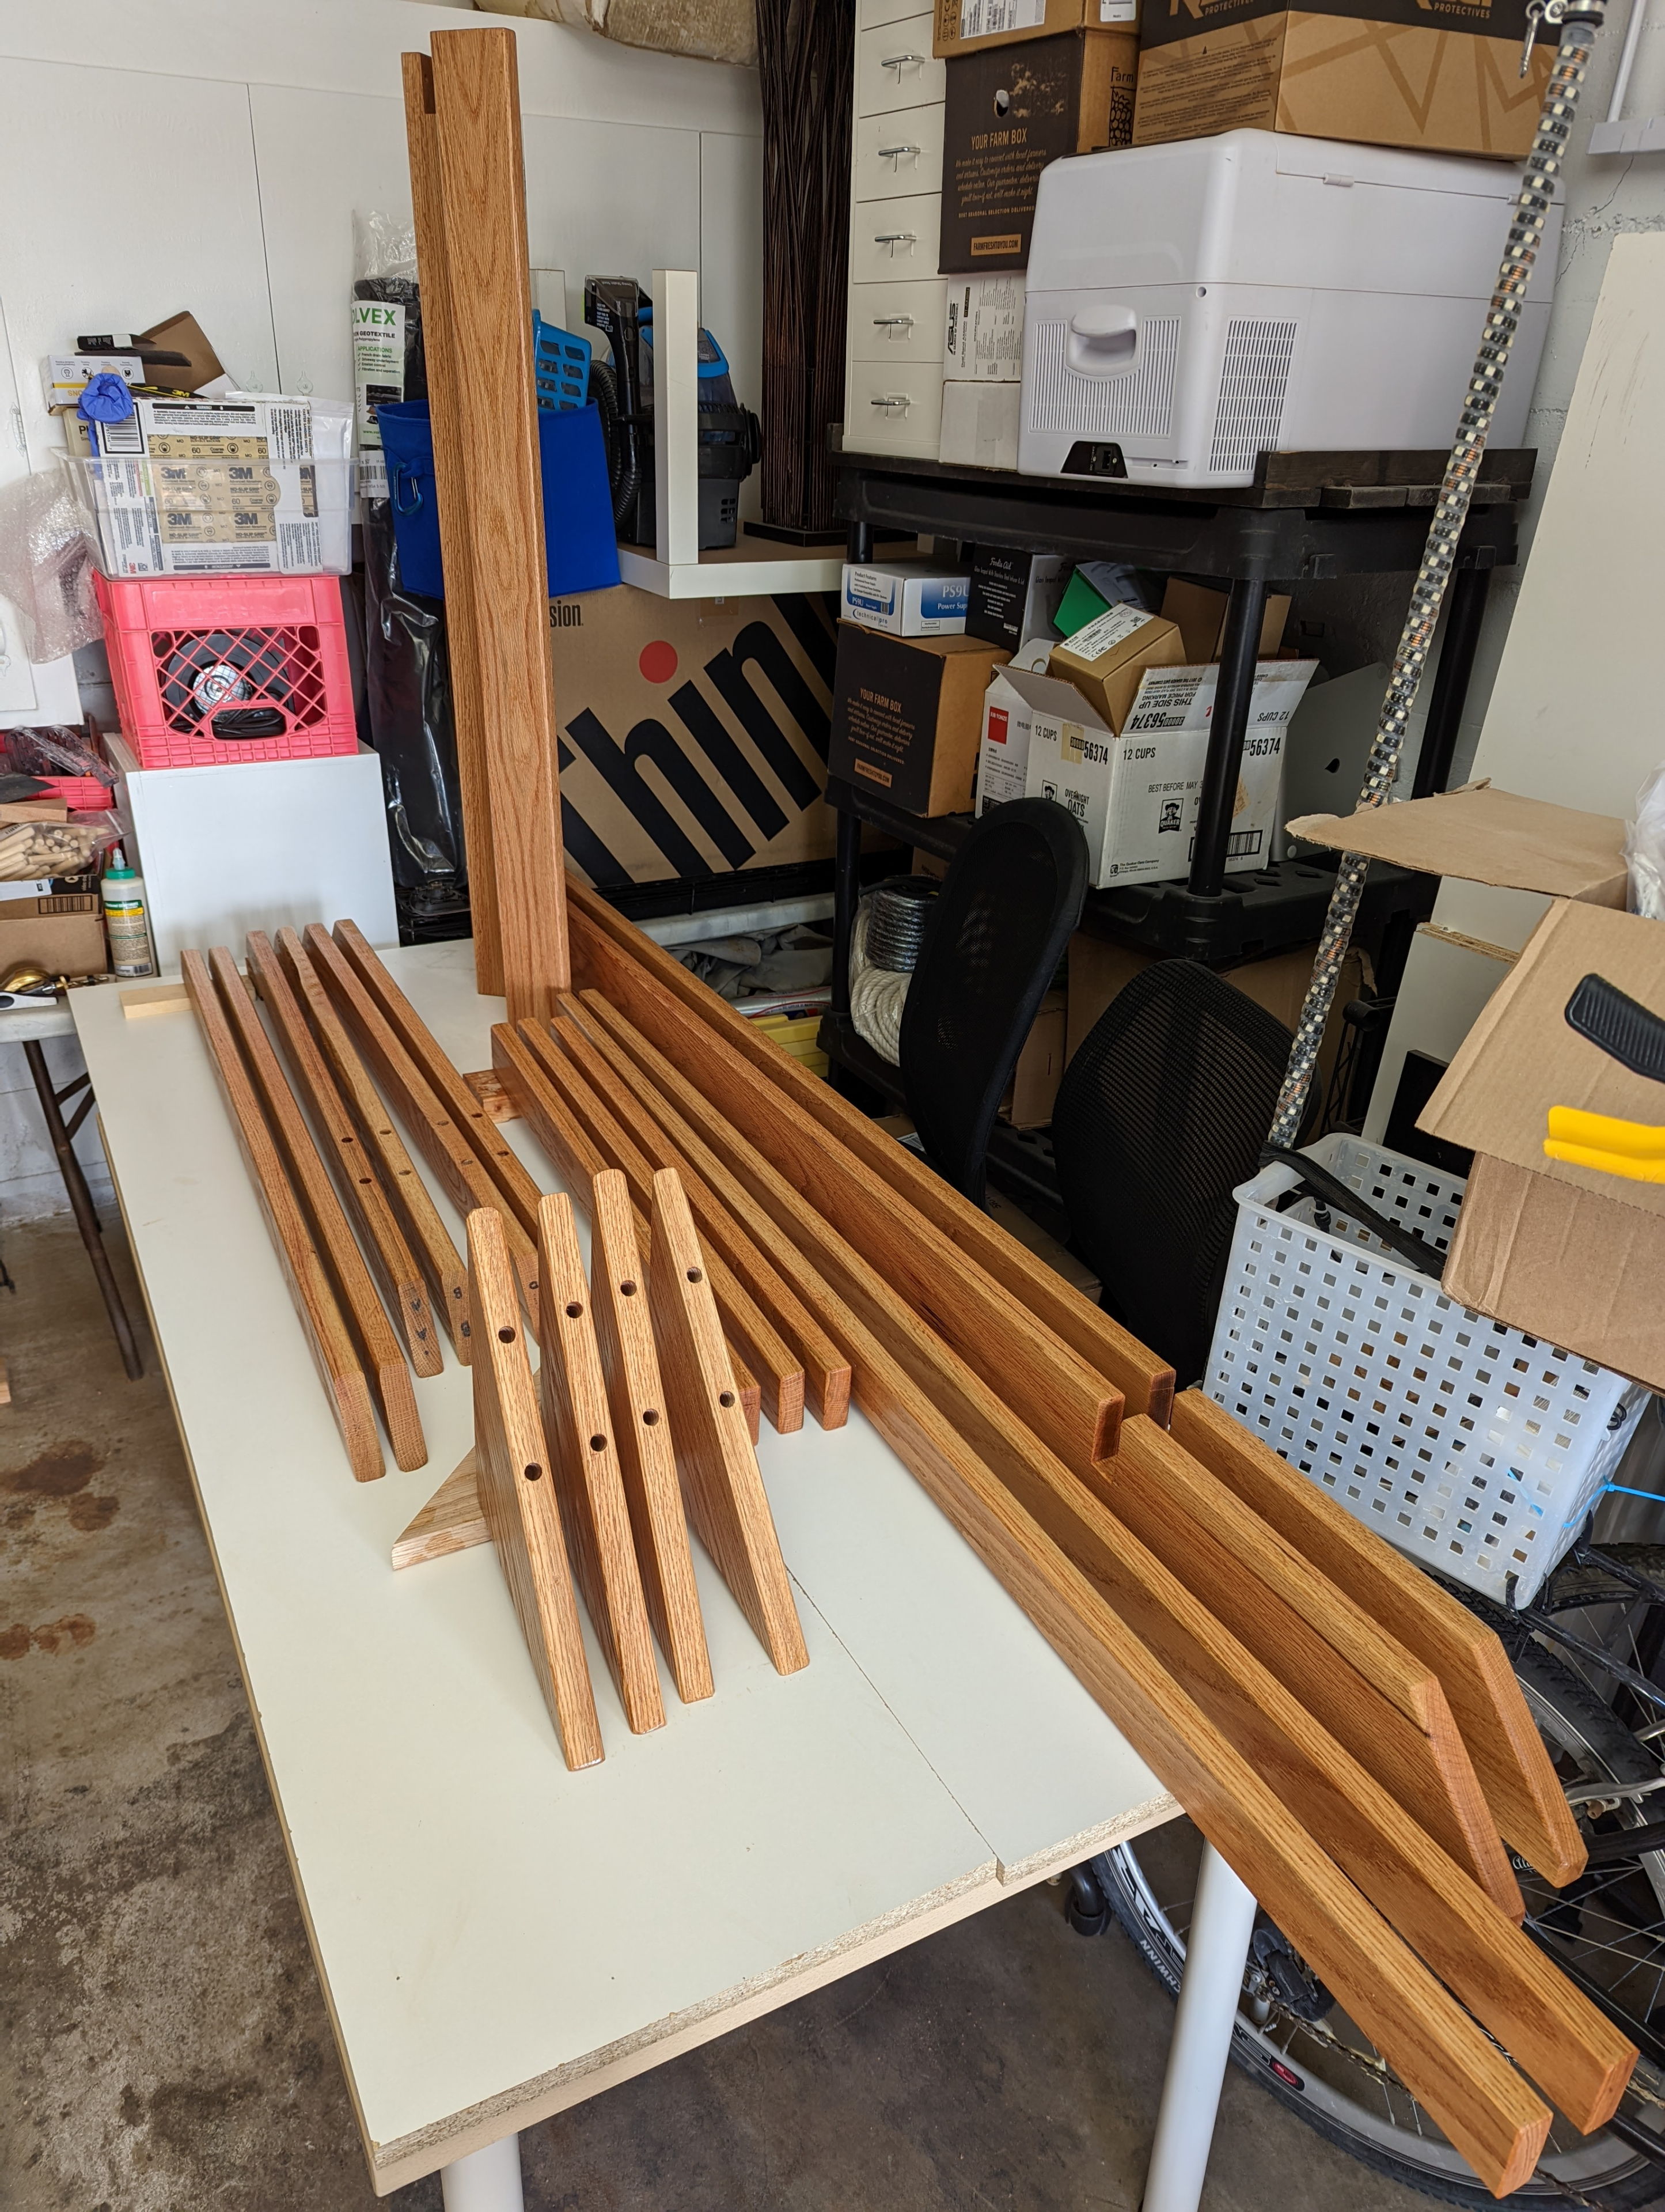
Next I sanded for days, literally. I worked through 80, 120, 150 and 180 grit for the most part, using a battery powered orbital sander. It was a good thing I had half a dozen batteries and chargers, because I was constantly cycling through them. I probably should have bought a corded sander.
Sanding took me a long, long time. I think it was several days at least.
Once the glue dried on my legs, I needed to trim the excess and clean up the edges a bit because they did not mate perfectly. I was able to make them look pretty good though once I figured out how to make my plane work OK.
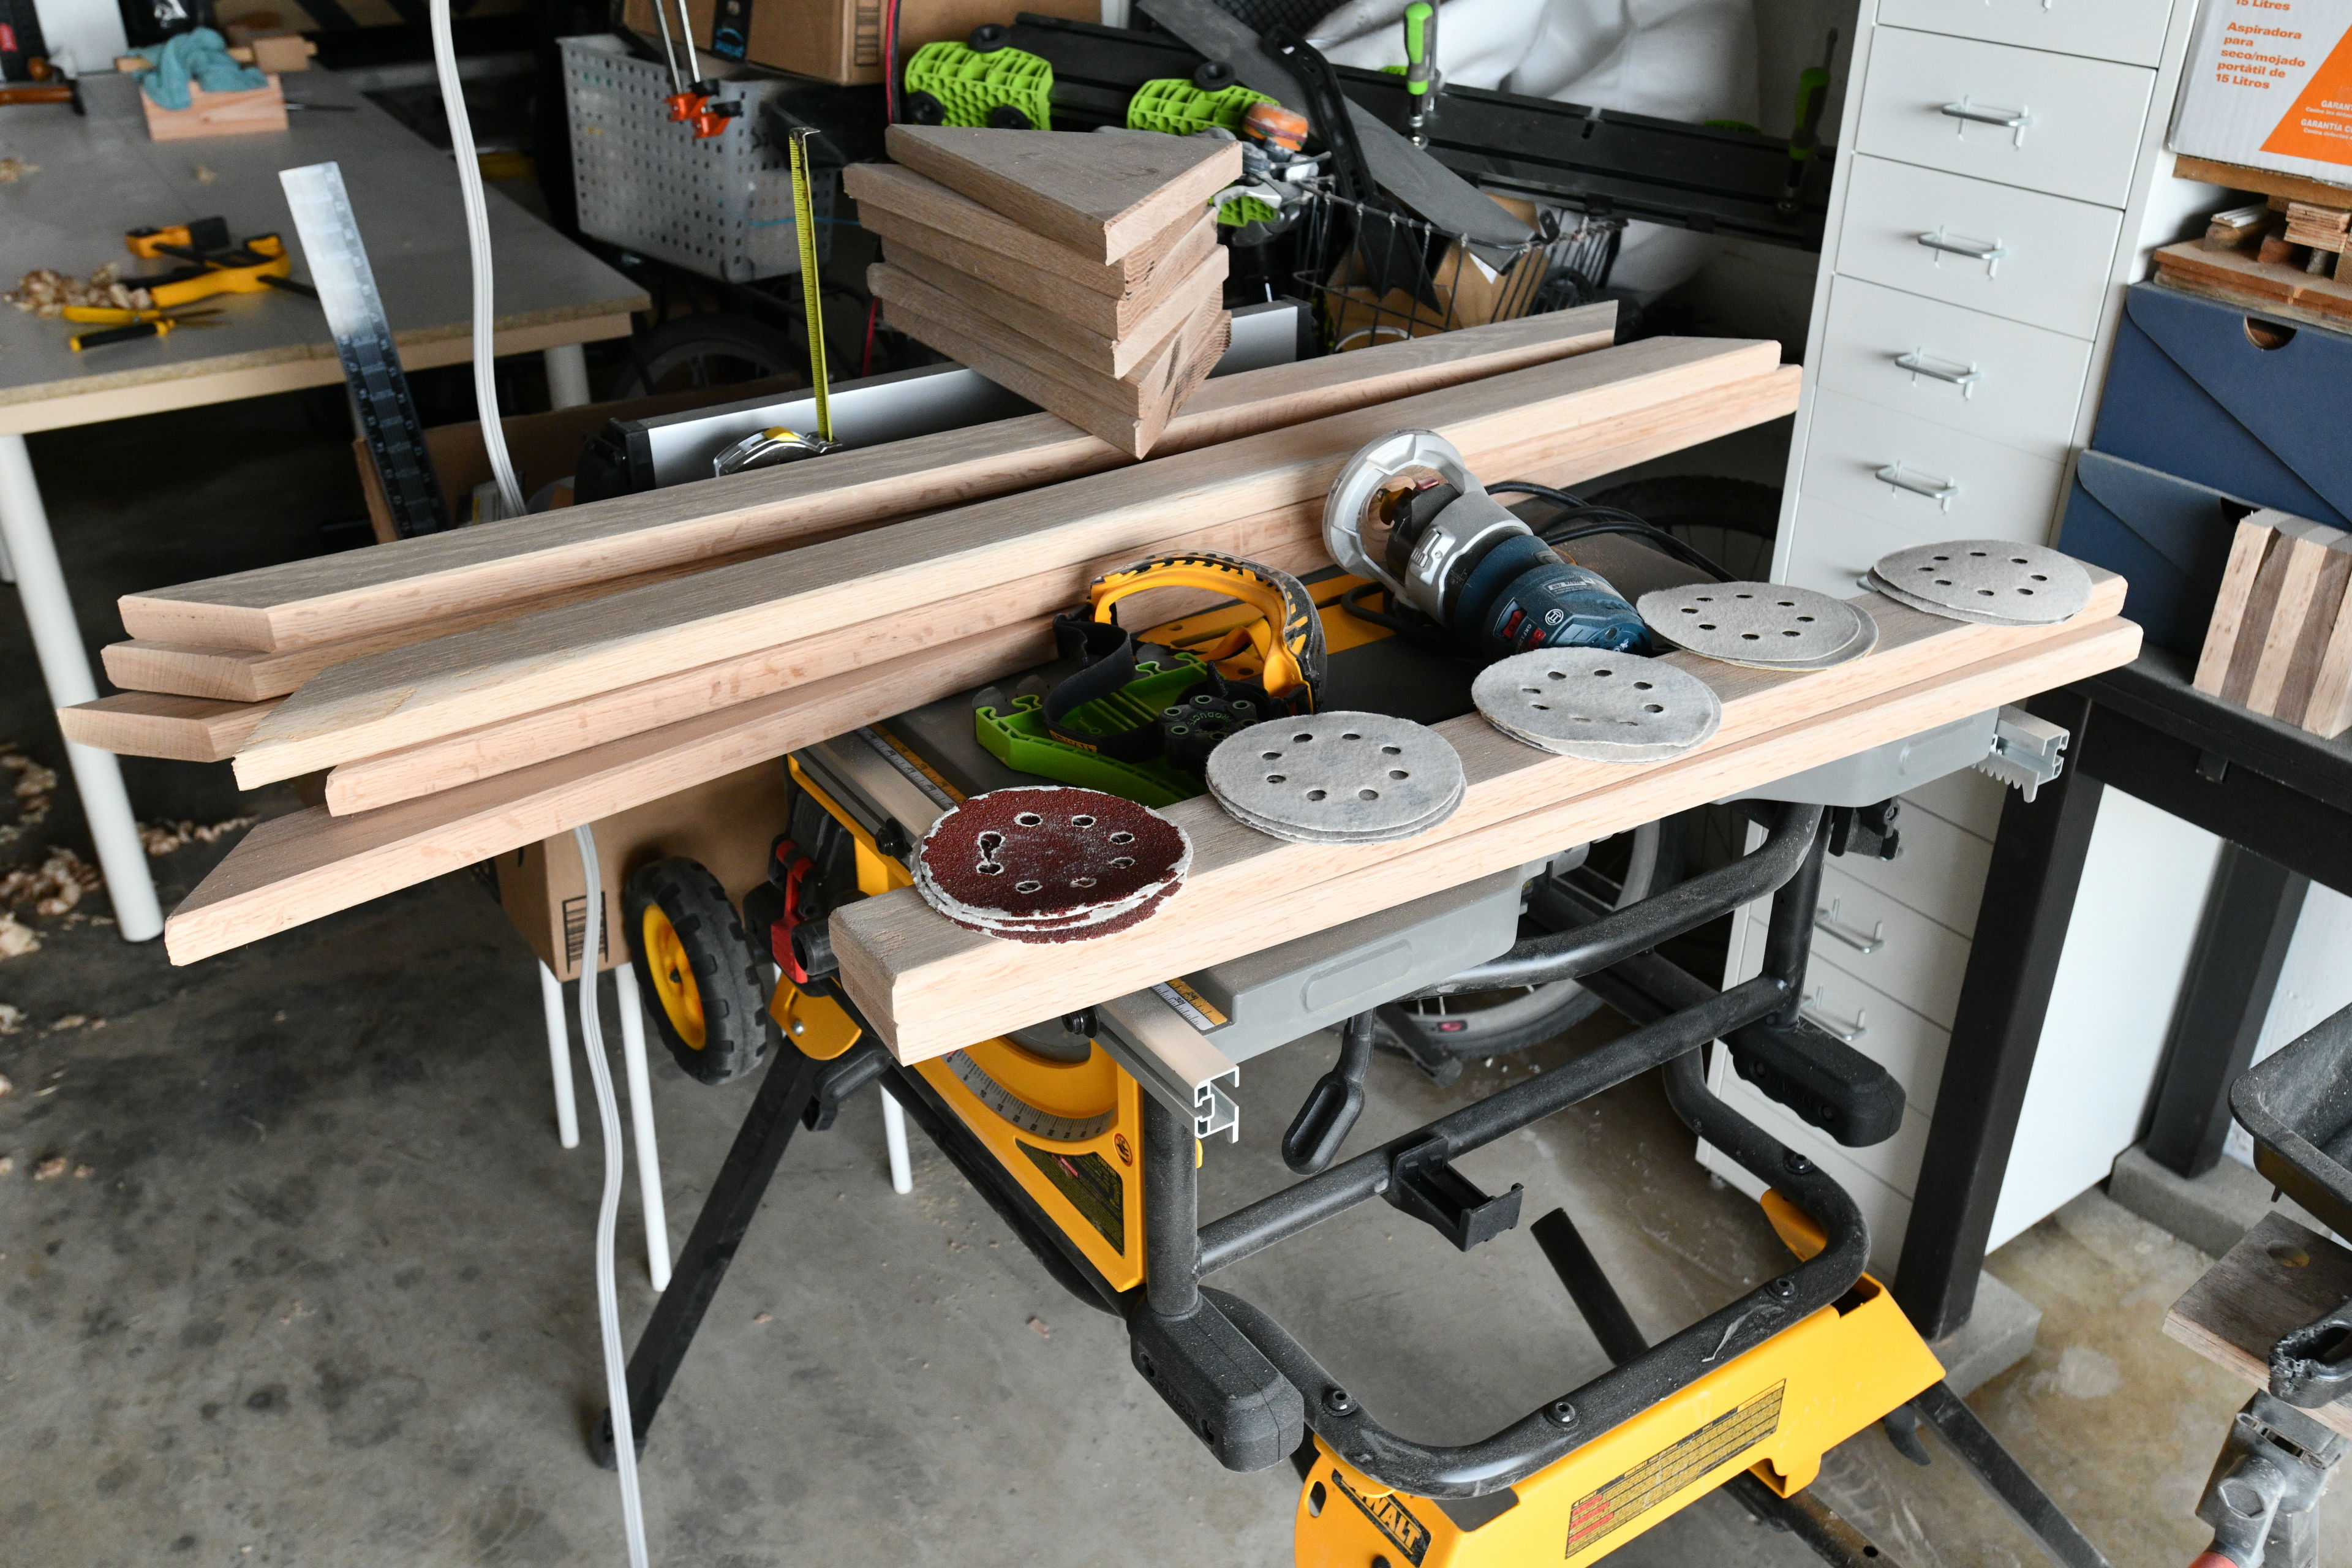
I went through a lot of sandpaper discs.
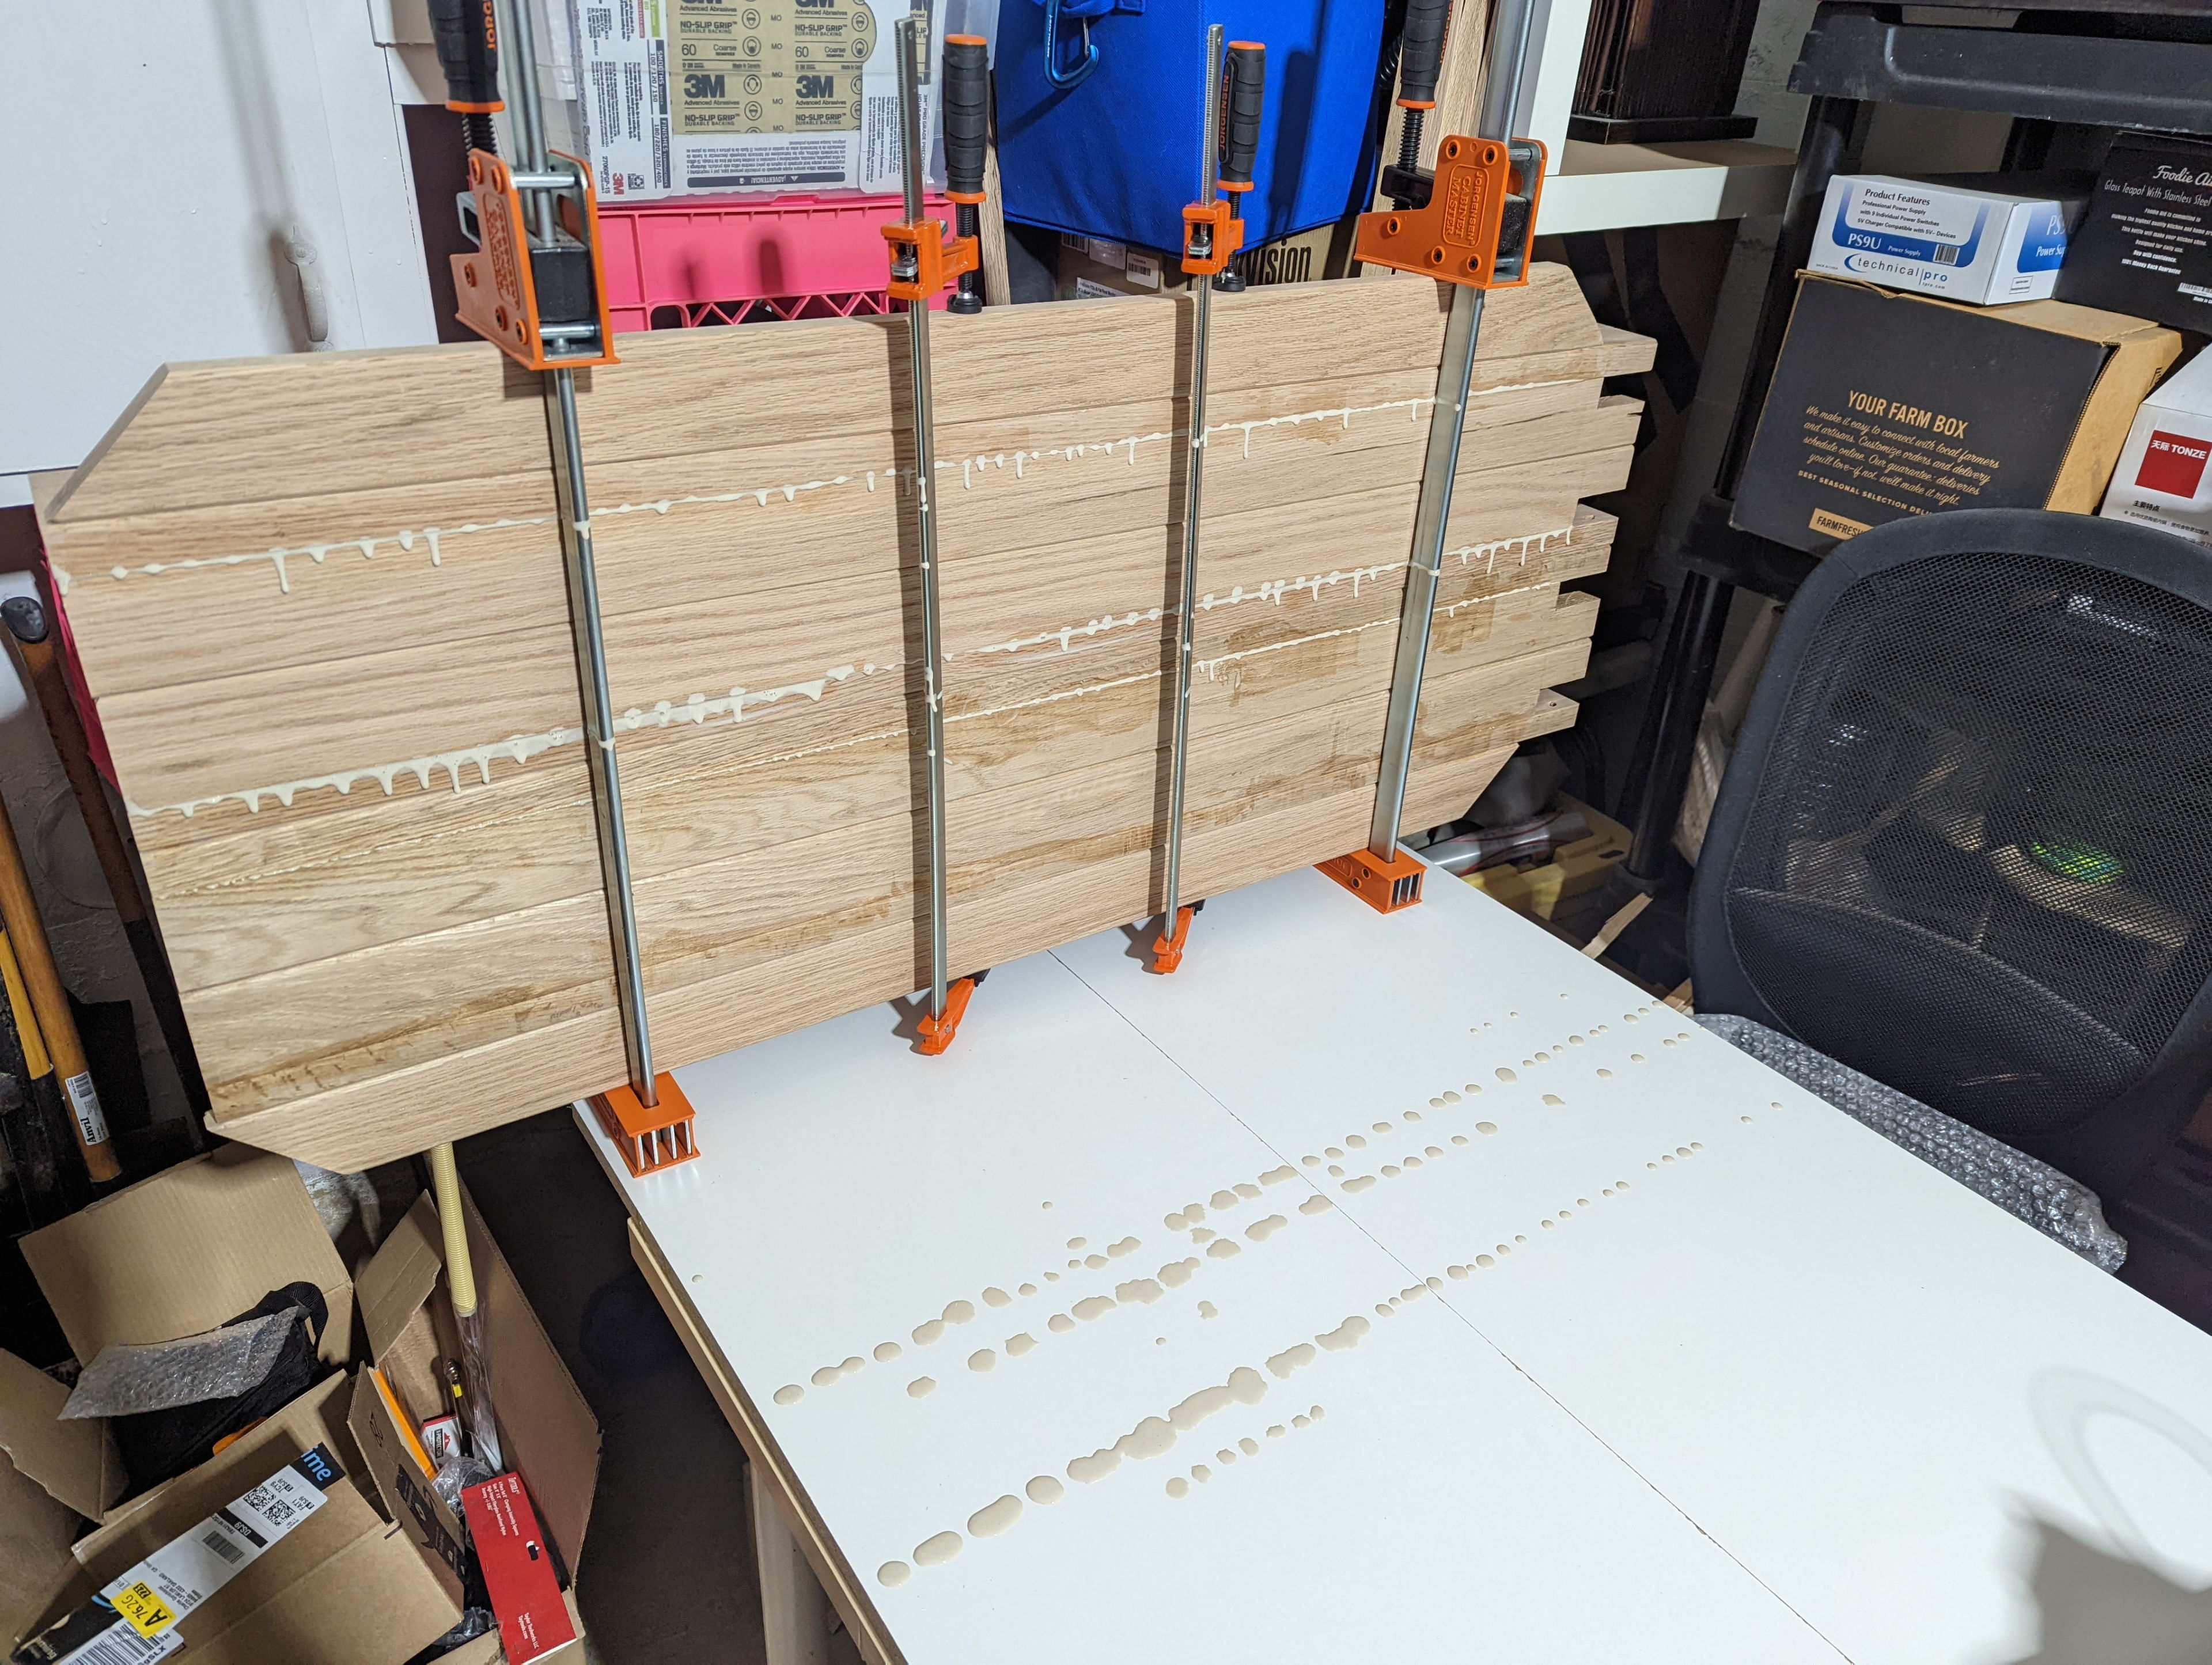
When I was mostly done sanding, I decided to do a test run to make sure everything fit together as I expected. This was a bit stressful, but thankfully it looked promising once I managed to clamp some of the boards together. At this point I realized I completely forgot to add in the center support beam. I think I held off on this before because I was trying to make it not interfere with the headboard I had planned, which also had a center column. So I decided to make two support beams and would figure out their placement on final assembly. So I started the lumber processing over for another board, and went through the routing and sanding for the two last pieces.
Once I was mostly done sanding, I decided to do a test assembly and figure out how I was going to actually attach the parts of the frame together. This made me realize I had forgotten to add one or two center support beams, so I grabbed an unused board and processed it into two small beams.
Once I was mostly done sanding, I decided to do a test assembly and figure out how I was going to actually attach the parts of the frame together. This made me realize I had forgotten to add one or two center support beams, so I grabbed an unused board and processed it into two small beams.
I also decided to cut the bottom of the legs once more now that they were glued together, to make the square a little more perfect. Of course I couldn’t actually cut all the way through the leg in one pass, though, so I had an imperfect matching up of two saw marks anyway. A little sanding and it was mostly perfect.
I was pleased that my legs seemed pretty square, but once they were assembled, I did go back to the table saw and recut the bases to make sure they were perfectly square. Not that my bedroom floor is going to be square...
Finishing
I had taken notes on a whole slew of finishing videos. It’s a confusing world out there. What I ended up doing was nearly as discussed in the video The Only Wood Finish I Need, but some substitutions since I wasn’t able to find the exact products he mentioned and I bought some things that misunderstood. So I used what I had.
I did two to three wiped on coats of a mixture of roughly equal parts of “Tung Oil One Step Finish”, boiled linseed oil, oil based polyurethane and paint thinner. Then I did another coat of that applied with a plastic abrasive pad. It took almost two weeks to do these coats due to high humidity and low temperatures in my garage on account of the rain we had lately.
The final two coats were basically the same mixture but with the poly replaced with a wood finishing wax product I got at Home Depot. I applied the second coat with the abrasive pad wiped it off with a cotton cloth till it was mostly dry and smooth. I still had some sticky areas in the end, but tried to wipe these out as best I could. This thing had a ton of surface area though, so it was a bit tiring!
Finally, after almost two weeks, I was ready to start applying finish. I used a mixture of tung oil, poly, boiled linseed oil and paint thinner for the first three coats, which I wiped on with a cotton cloth.
Finally, after almost two weeks, I was ready to start applying finish. I used a mixture of tung oil, poly, boiled linseed oil and paint thinner for the first three coats, which I wiped on with a cotton cloth.
Finally, after almost two weeks, I was ready to start applying finish. I used a mixture of tung oil, poly, boiled linseed oil and paint thinner for the first three coats, which I wiped on with a cotton cloth.
I believe this was the second day of finishing, after applying a second coat.
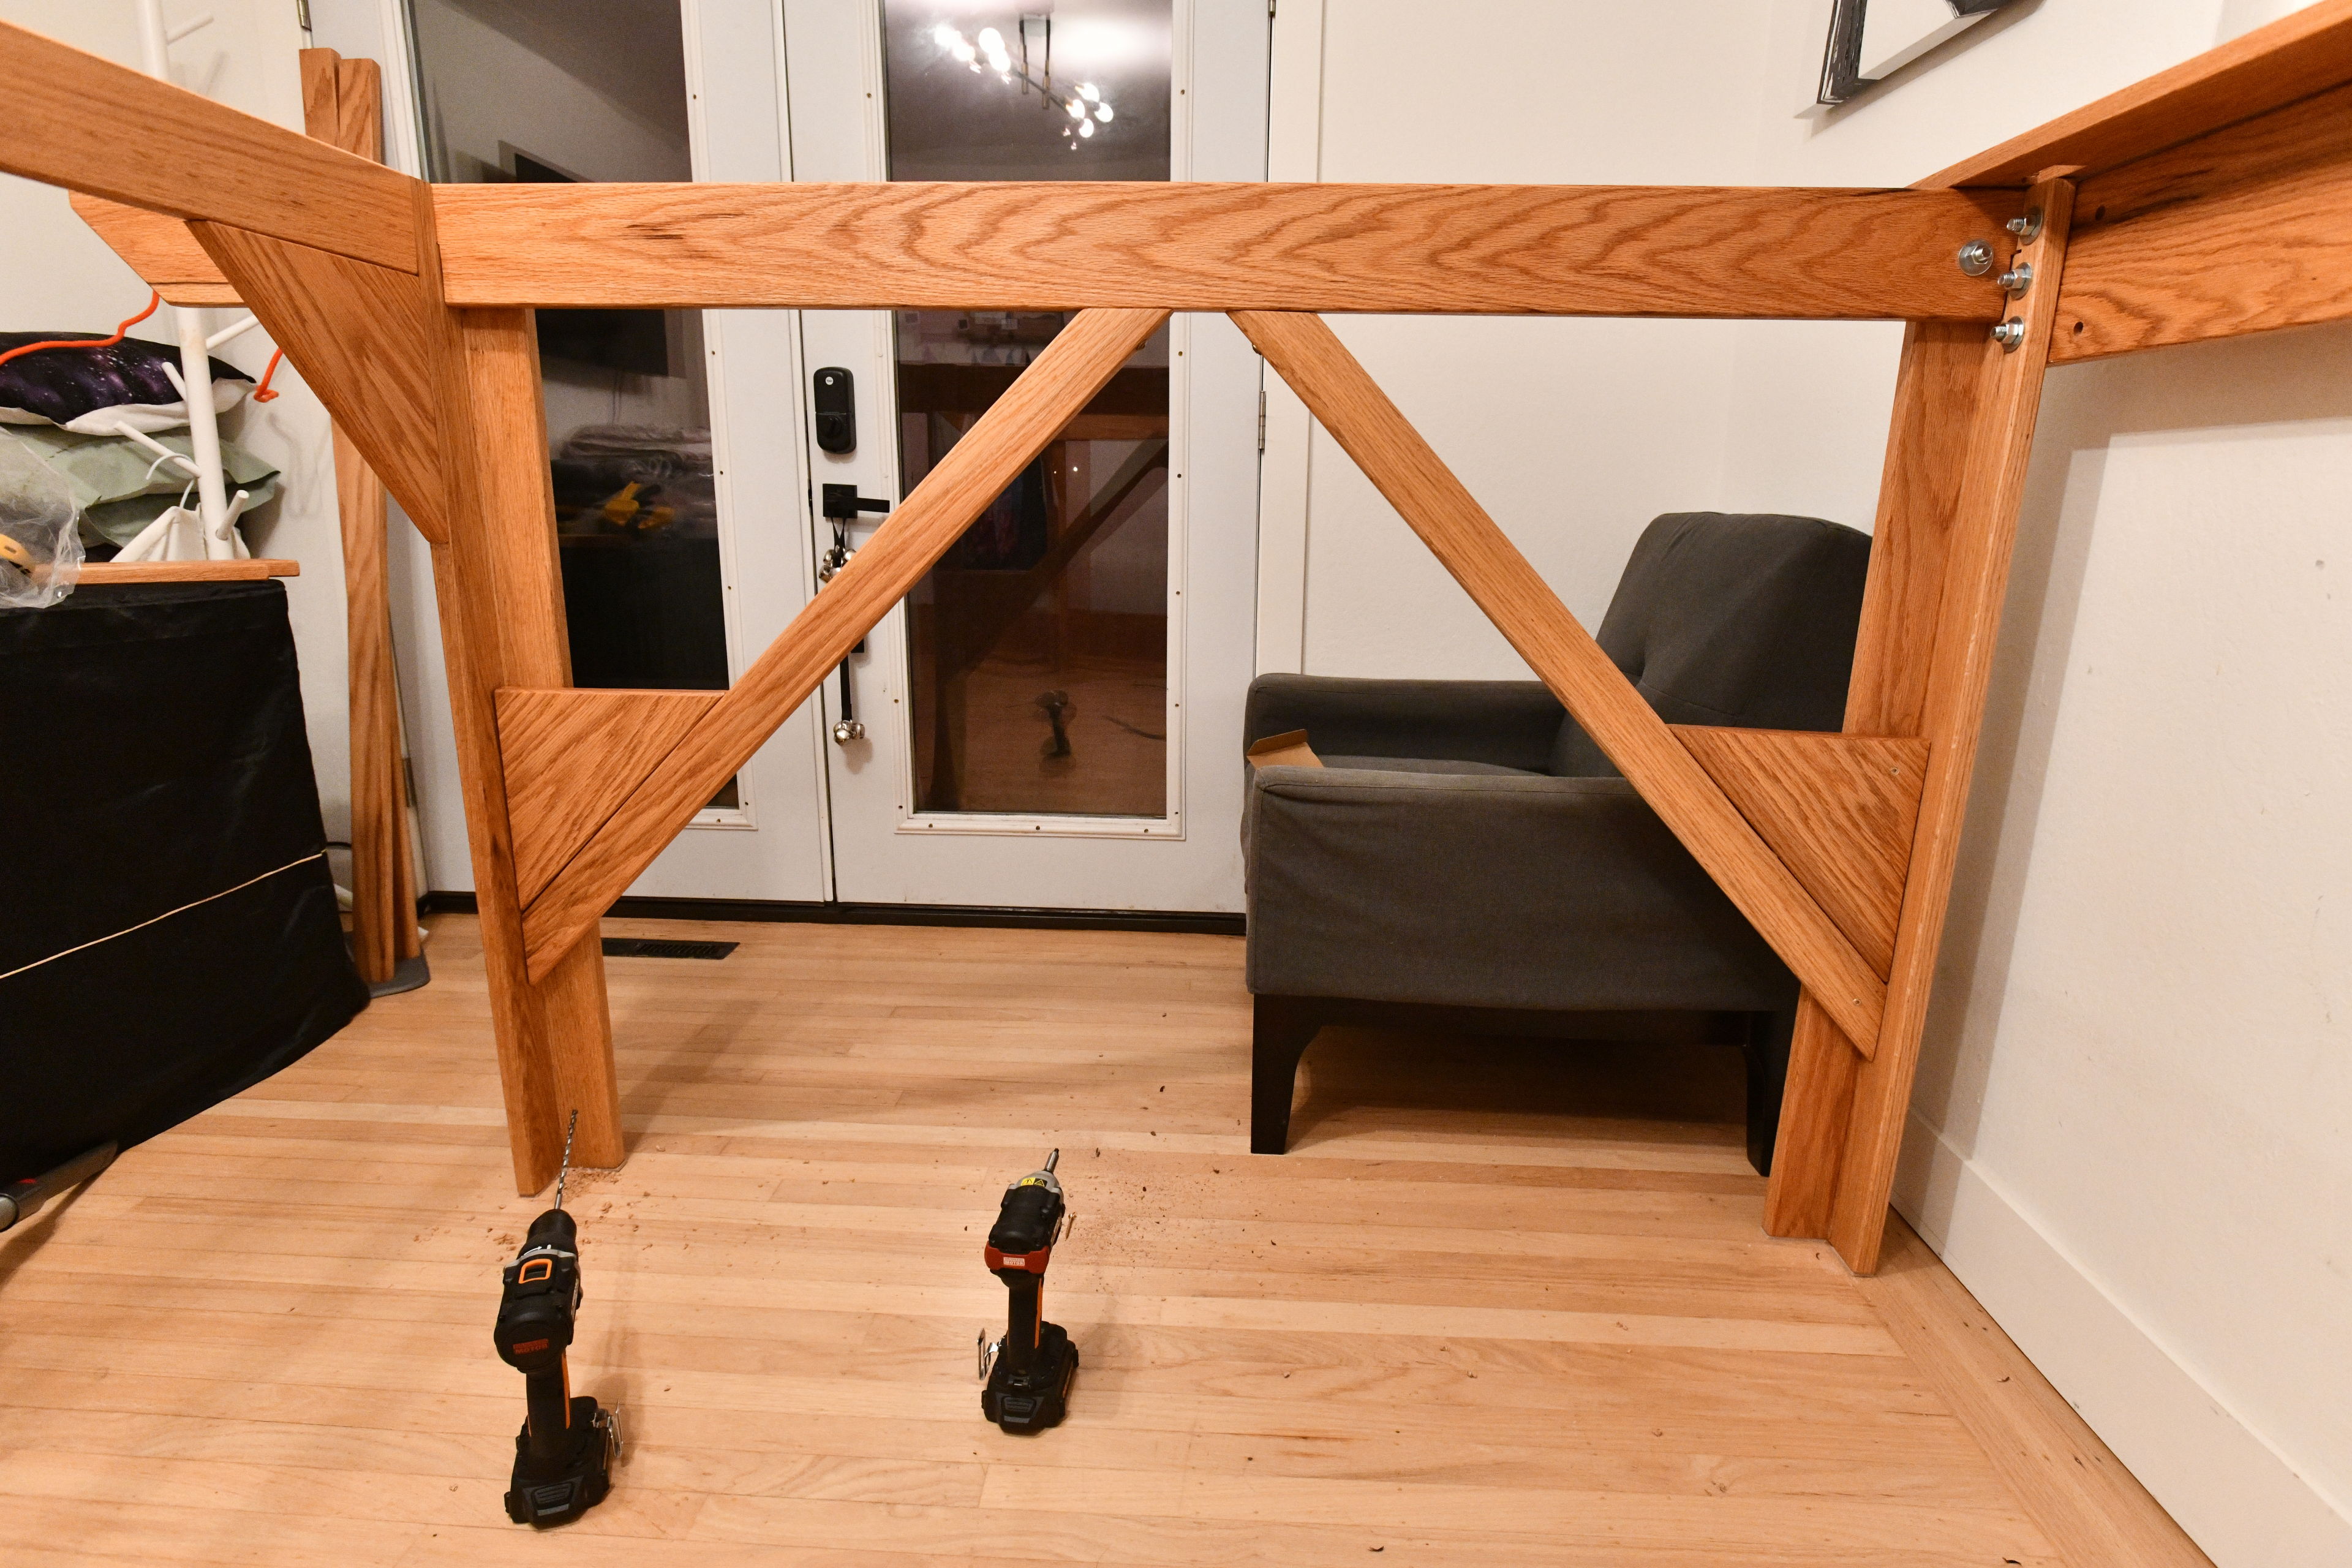
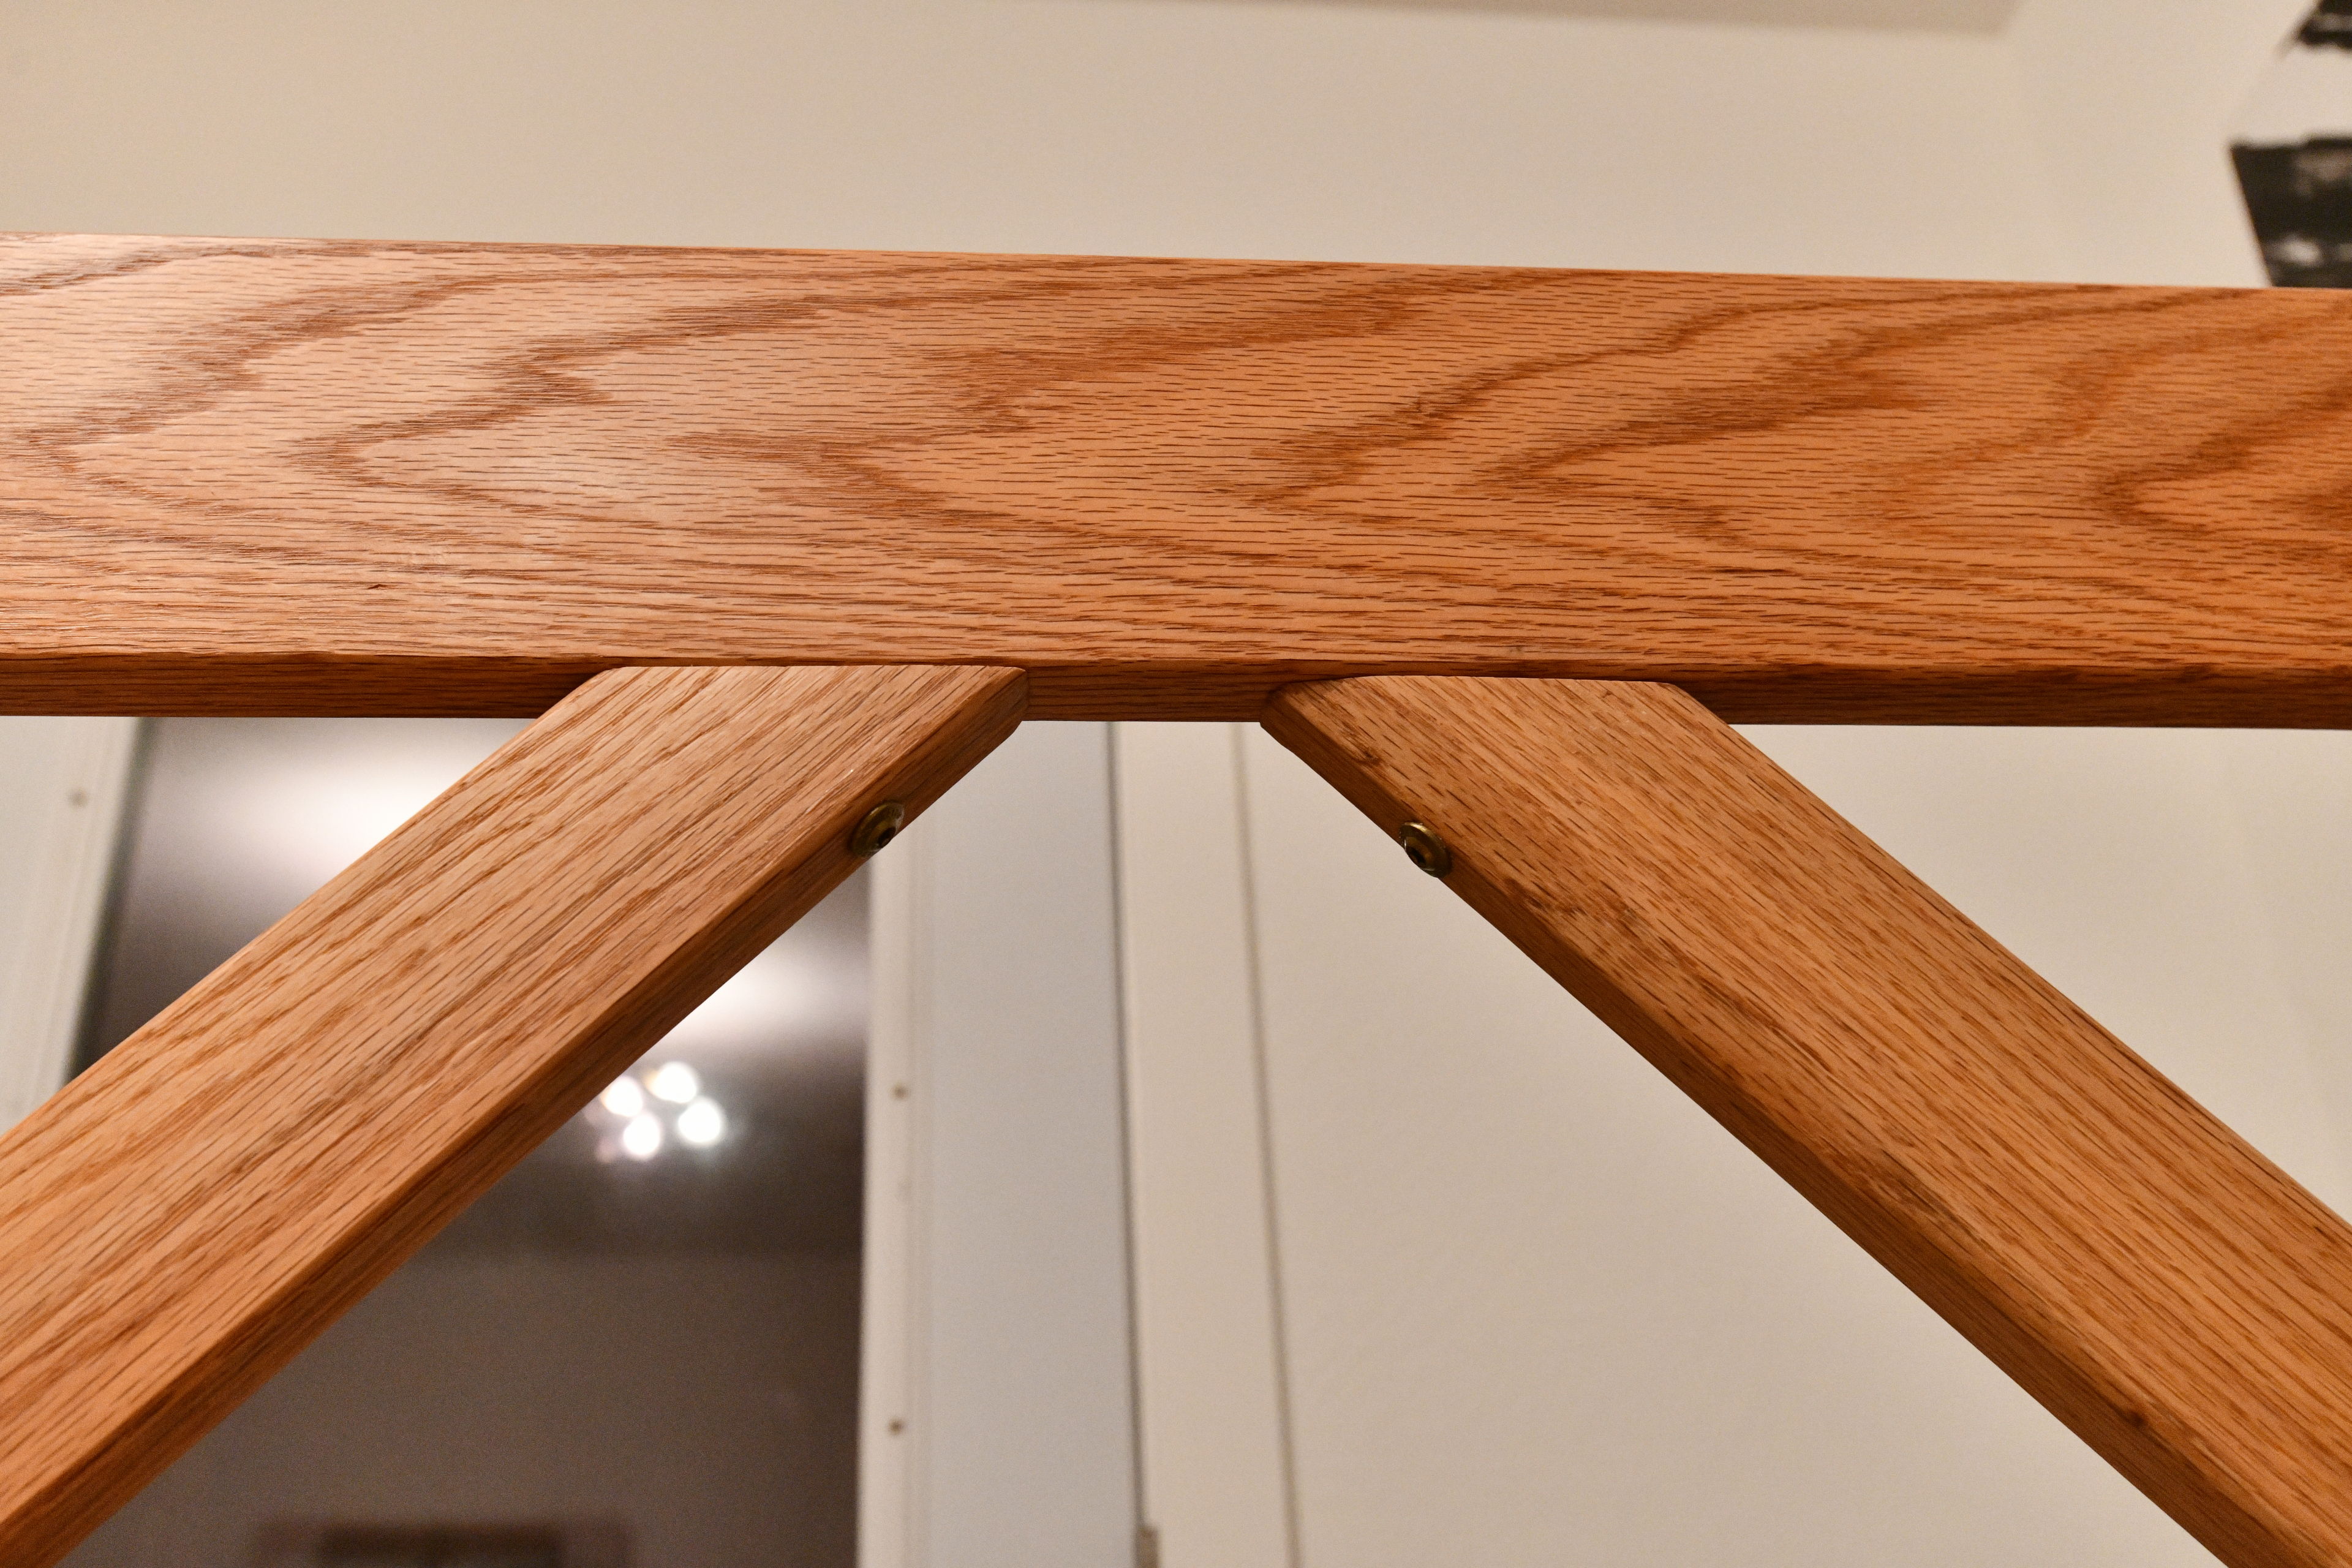
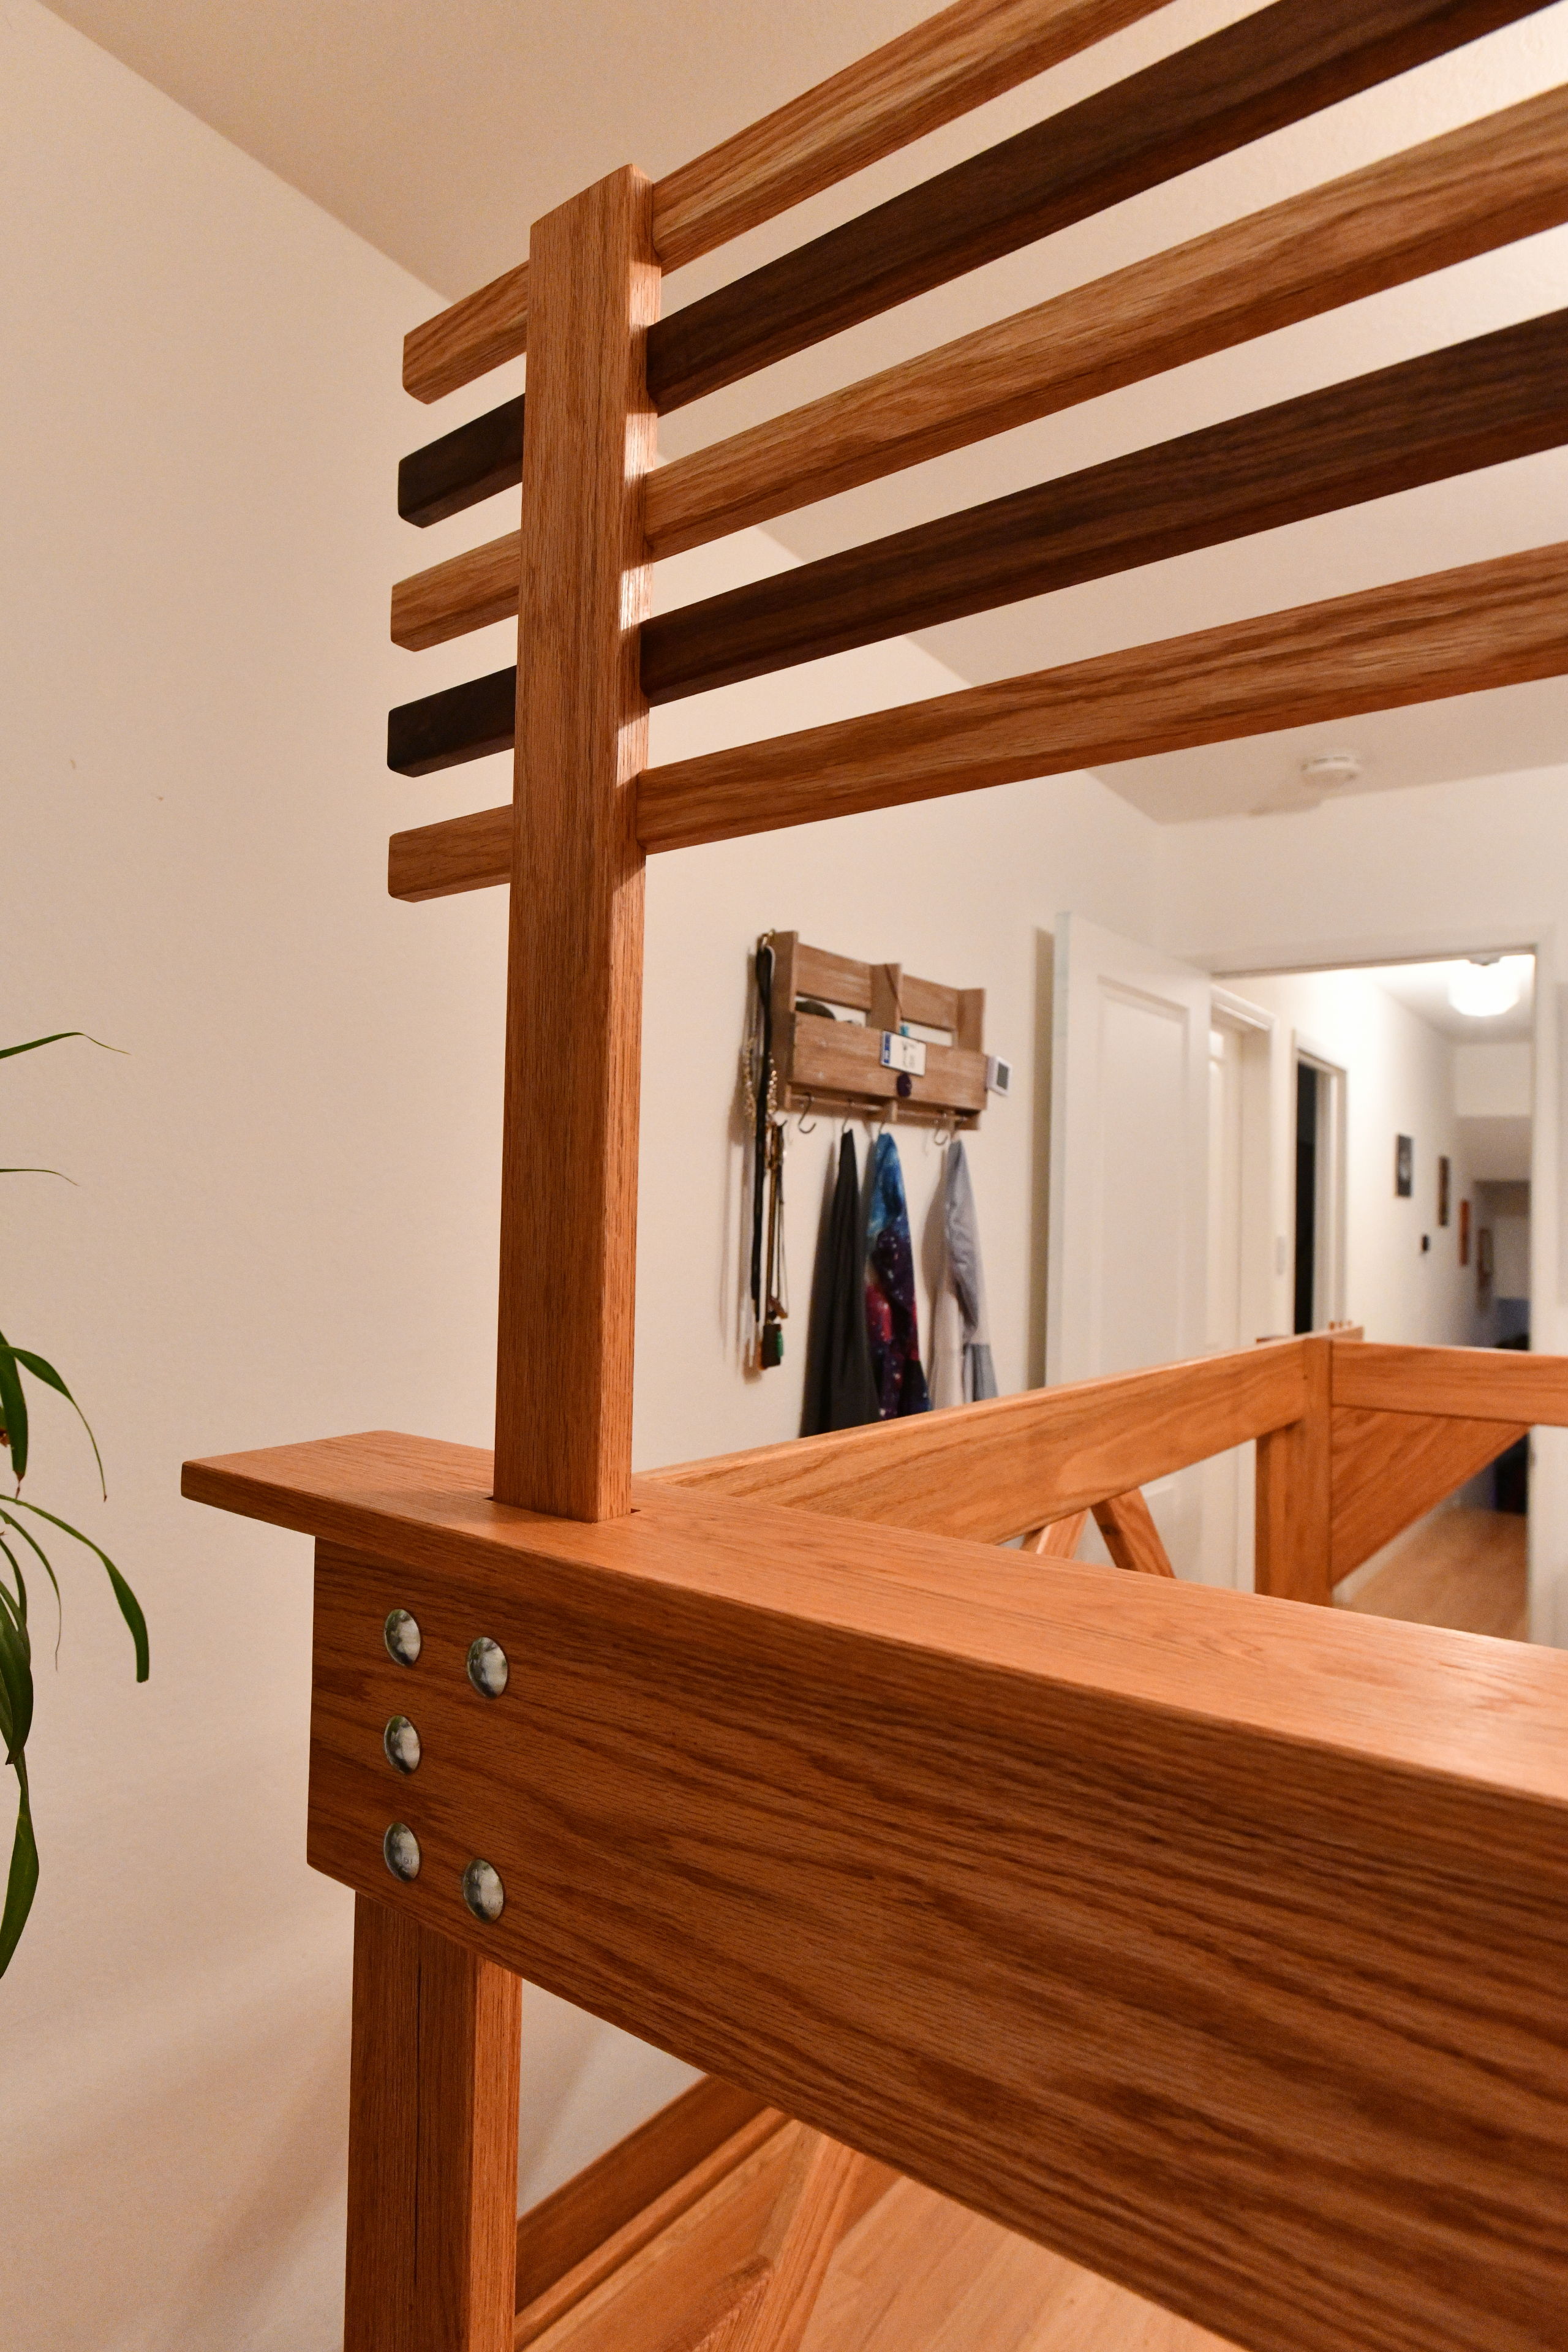
Some more test assembly led me to decide to drill more dowel holes and glue this triangle support to the legs, to make final assembly easier.
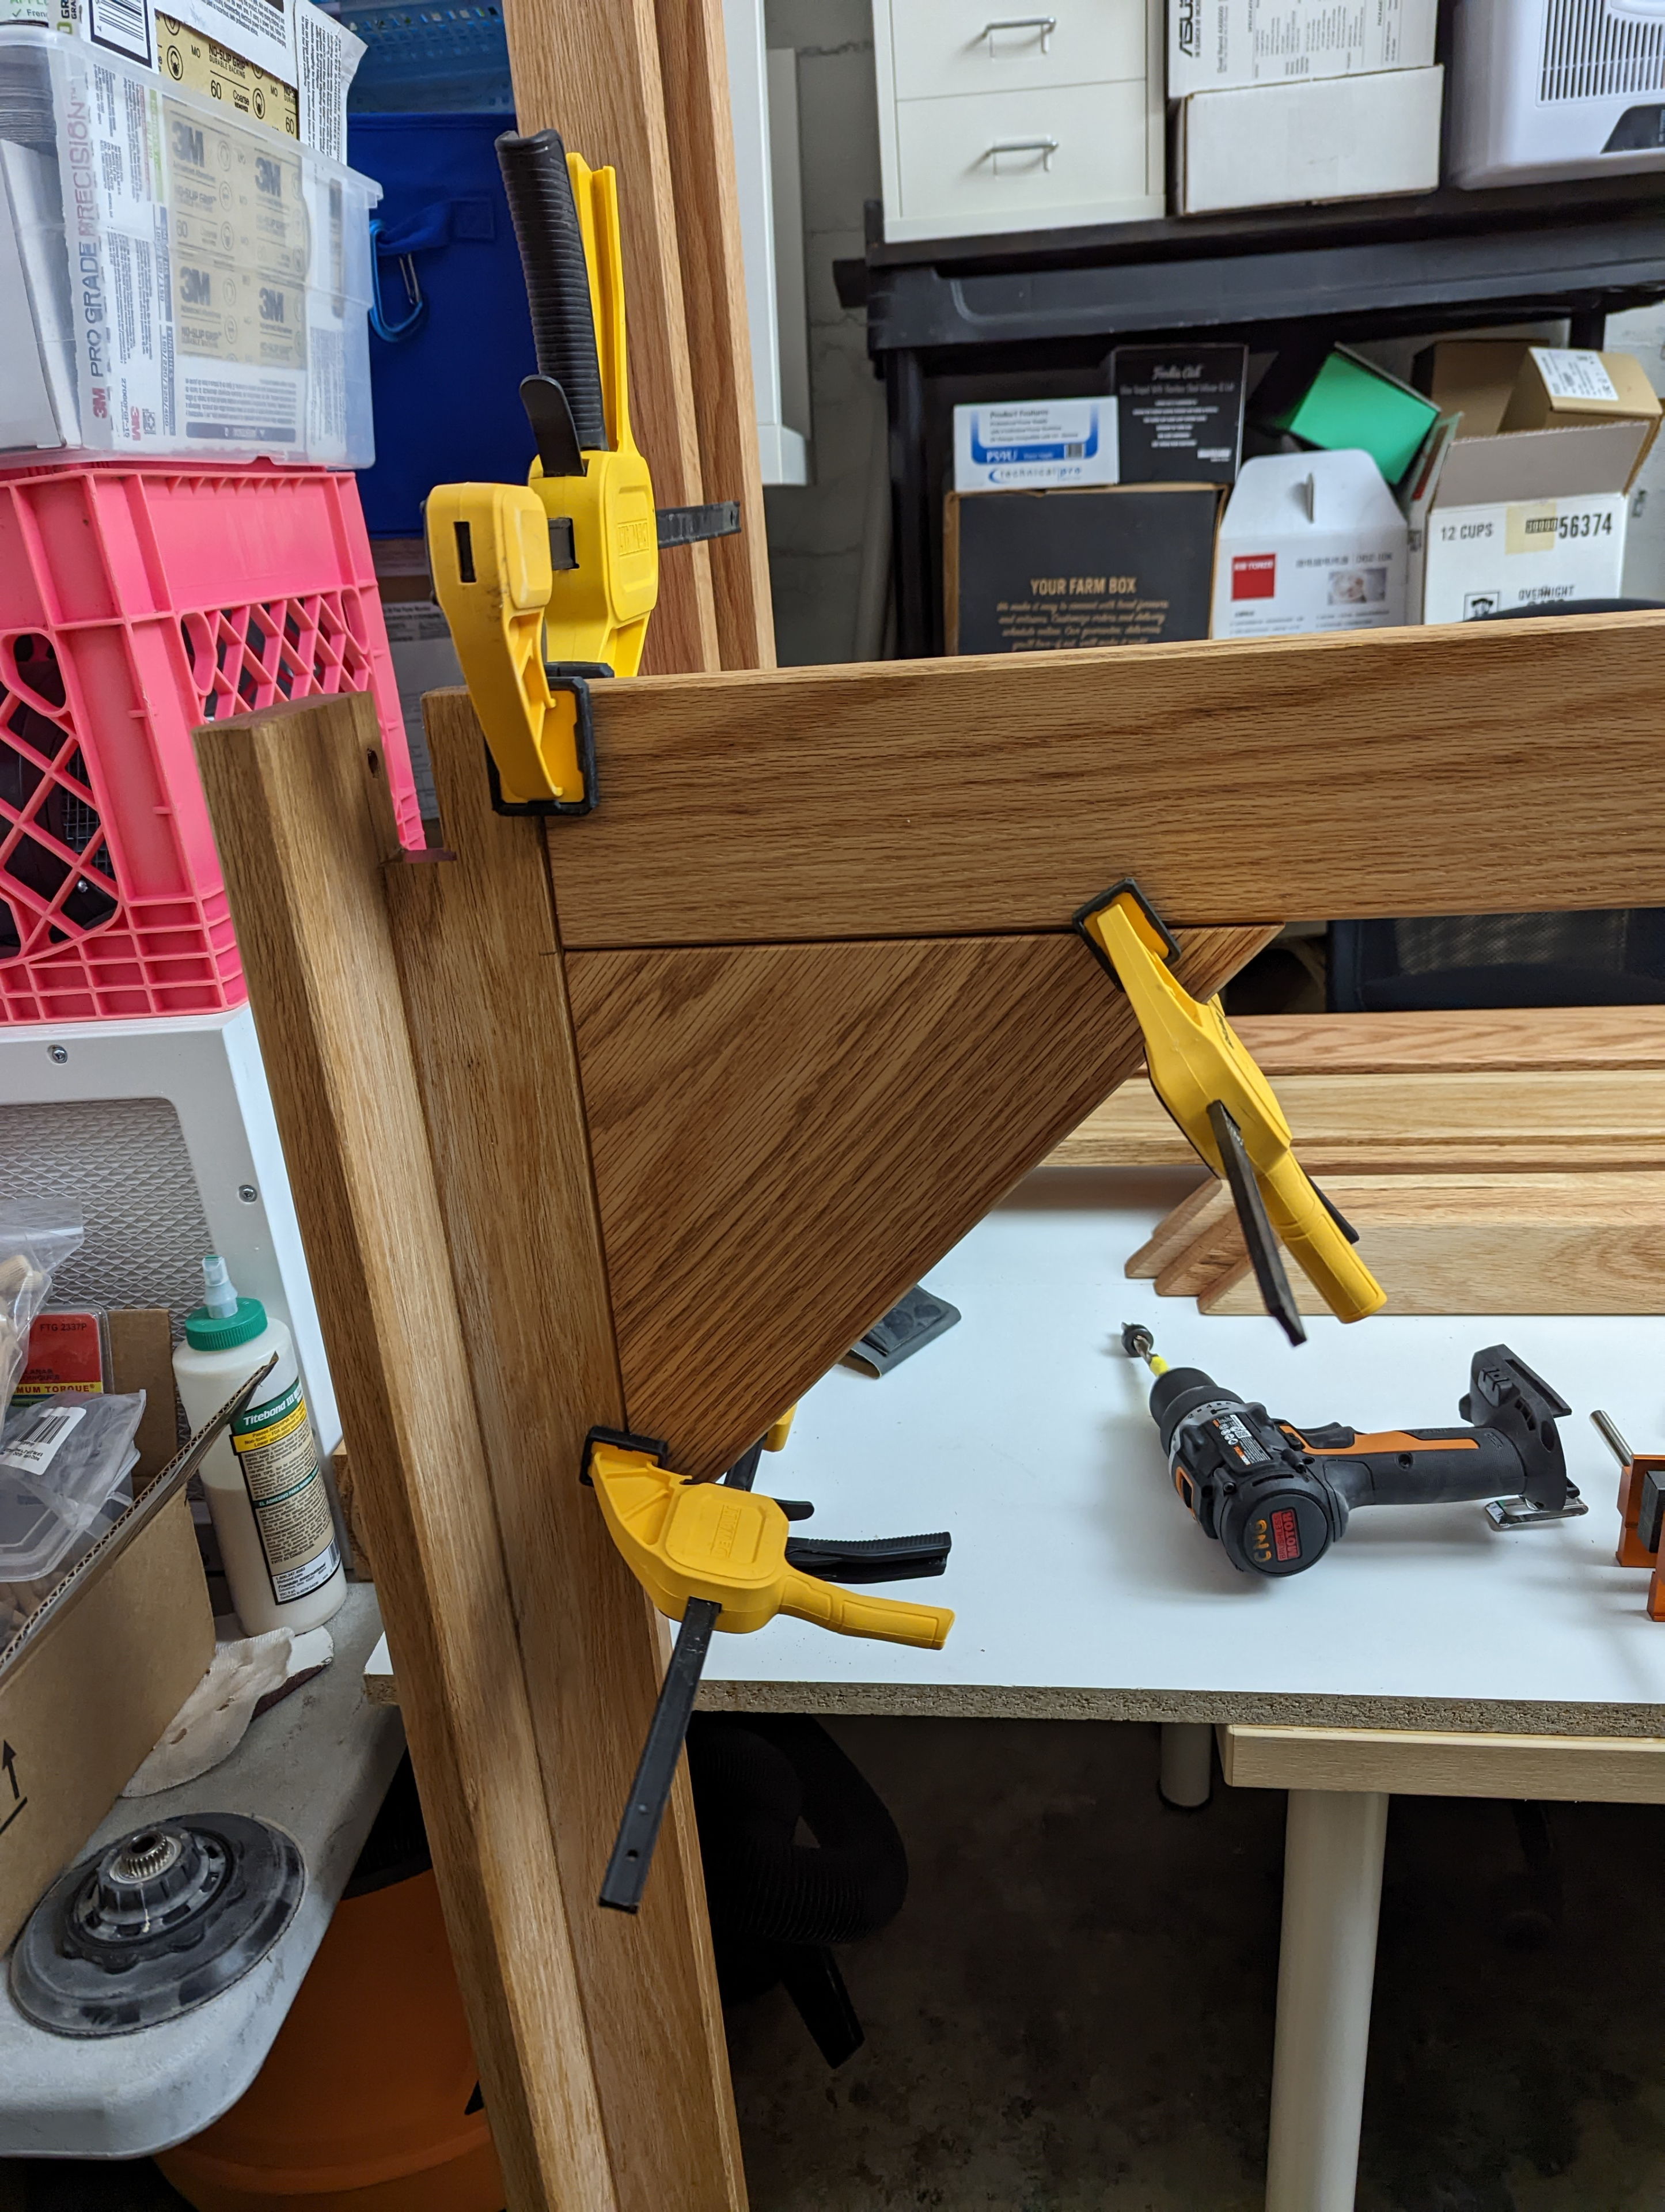
I decided to dowel and glue these triangle braces to the legs, since they would not stick out too much and also allow me to just rest the cross support of the frame vertically onto them with more dowels, making assembly easier and hopefully stronger. The joint wasn't perfect for glueing since it had some gaps, but it turned out good enough and felt strong in the end.
I decided to dowel and glue these triangle braces to the legs, since they would not stick out too much and also allow me to just rest the cross support of the frame vertically onto them with more dowels, making assembly easier and hopefully stronger. The joint wasn't perfect for glueing since it had some gaps, but it turned out good enough and felt strong in the end.
I decided to dowel and glue these triangle braces to the legs, since they would not stick out too much and also allow me to just rest the cross support of the frame vertically onto them with more dowels, making assembly easier and hopefully stronger. The joint wasn't perfect for glueing since it had some gaps, but it turned out good enough and felt strong in the end.
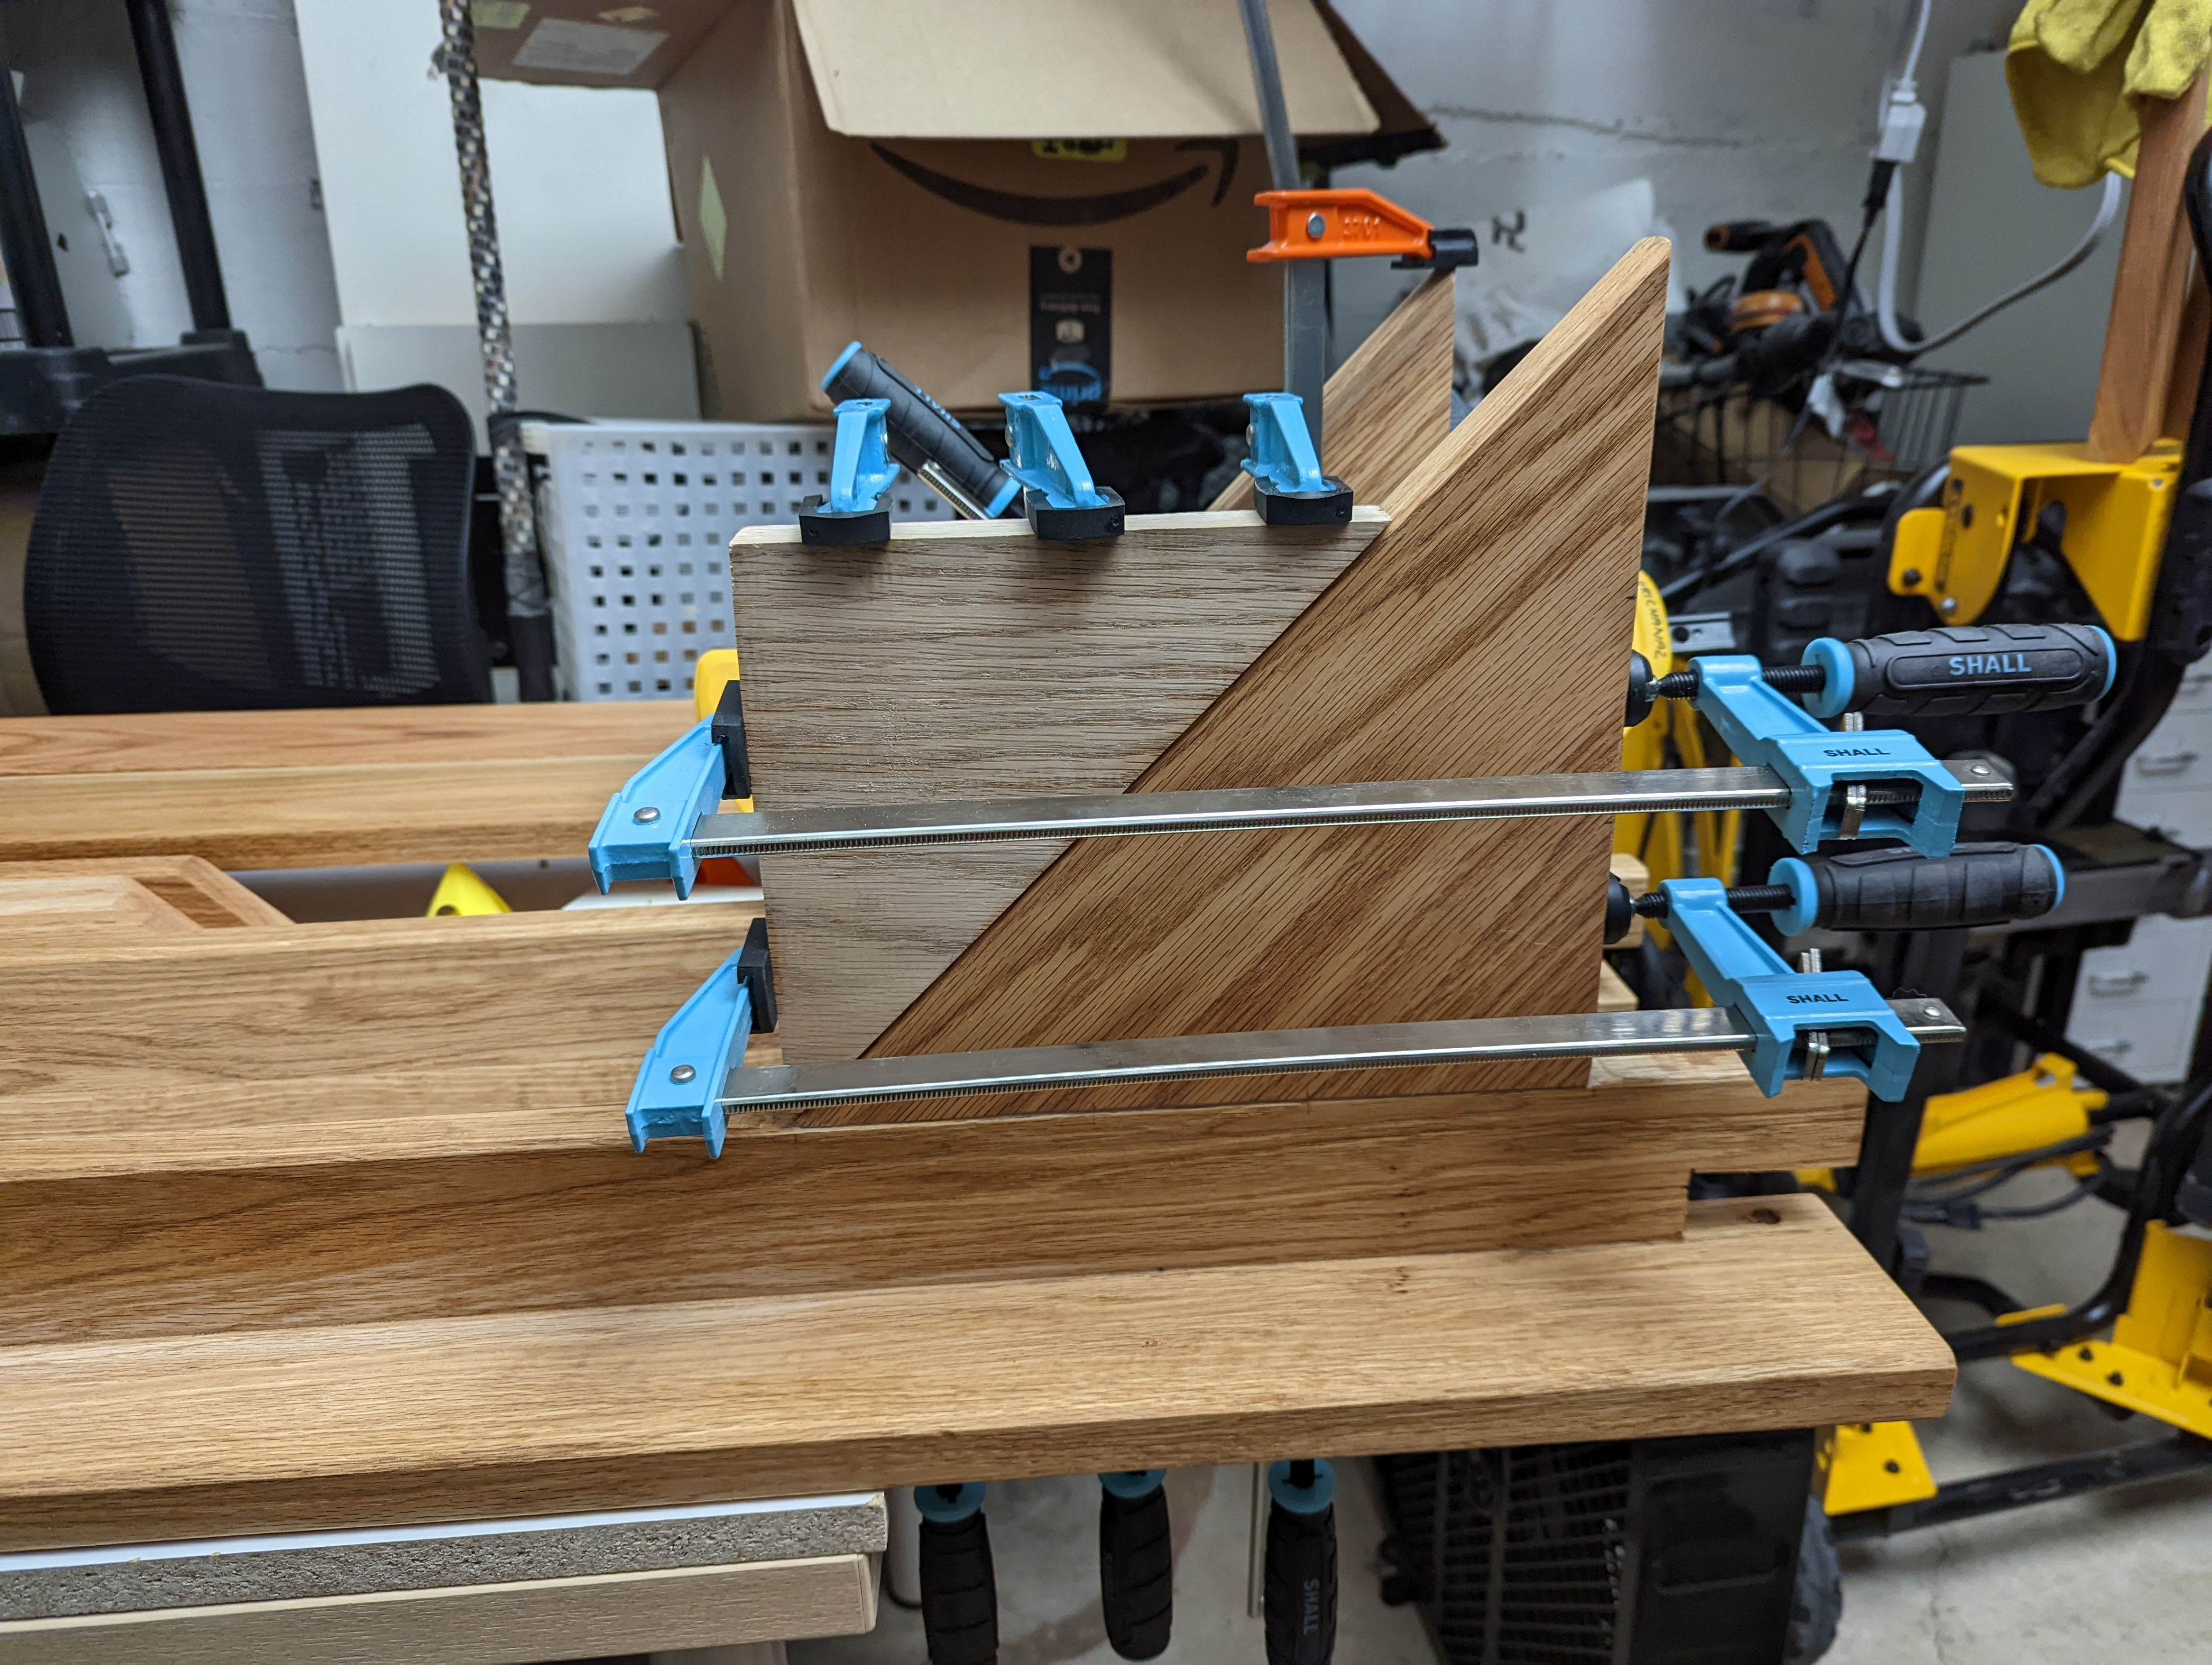
I decided to dowel and glue these triangle braces to the legs, since they would not stick out too much and also allow me to just rest the cross support of the frame vertically onto them with more dowels, making assembly easier and hopefully stronger. The joint wasn't perfect for glueing since it had some gaps, but it turned out good enough and felt strong in the end.
This is the third day of finishing, and the third coat, for the most part.
This is the third day of finishing, and the third coat, for the most part.
This is the third day of finishing, and the third coat, for the most part.
We got some serious rain, which flooded my garage. The humidity being near 100 percent made my finish coats take a long time to cure. I waited some extra days for that to dry.
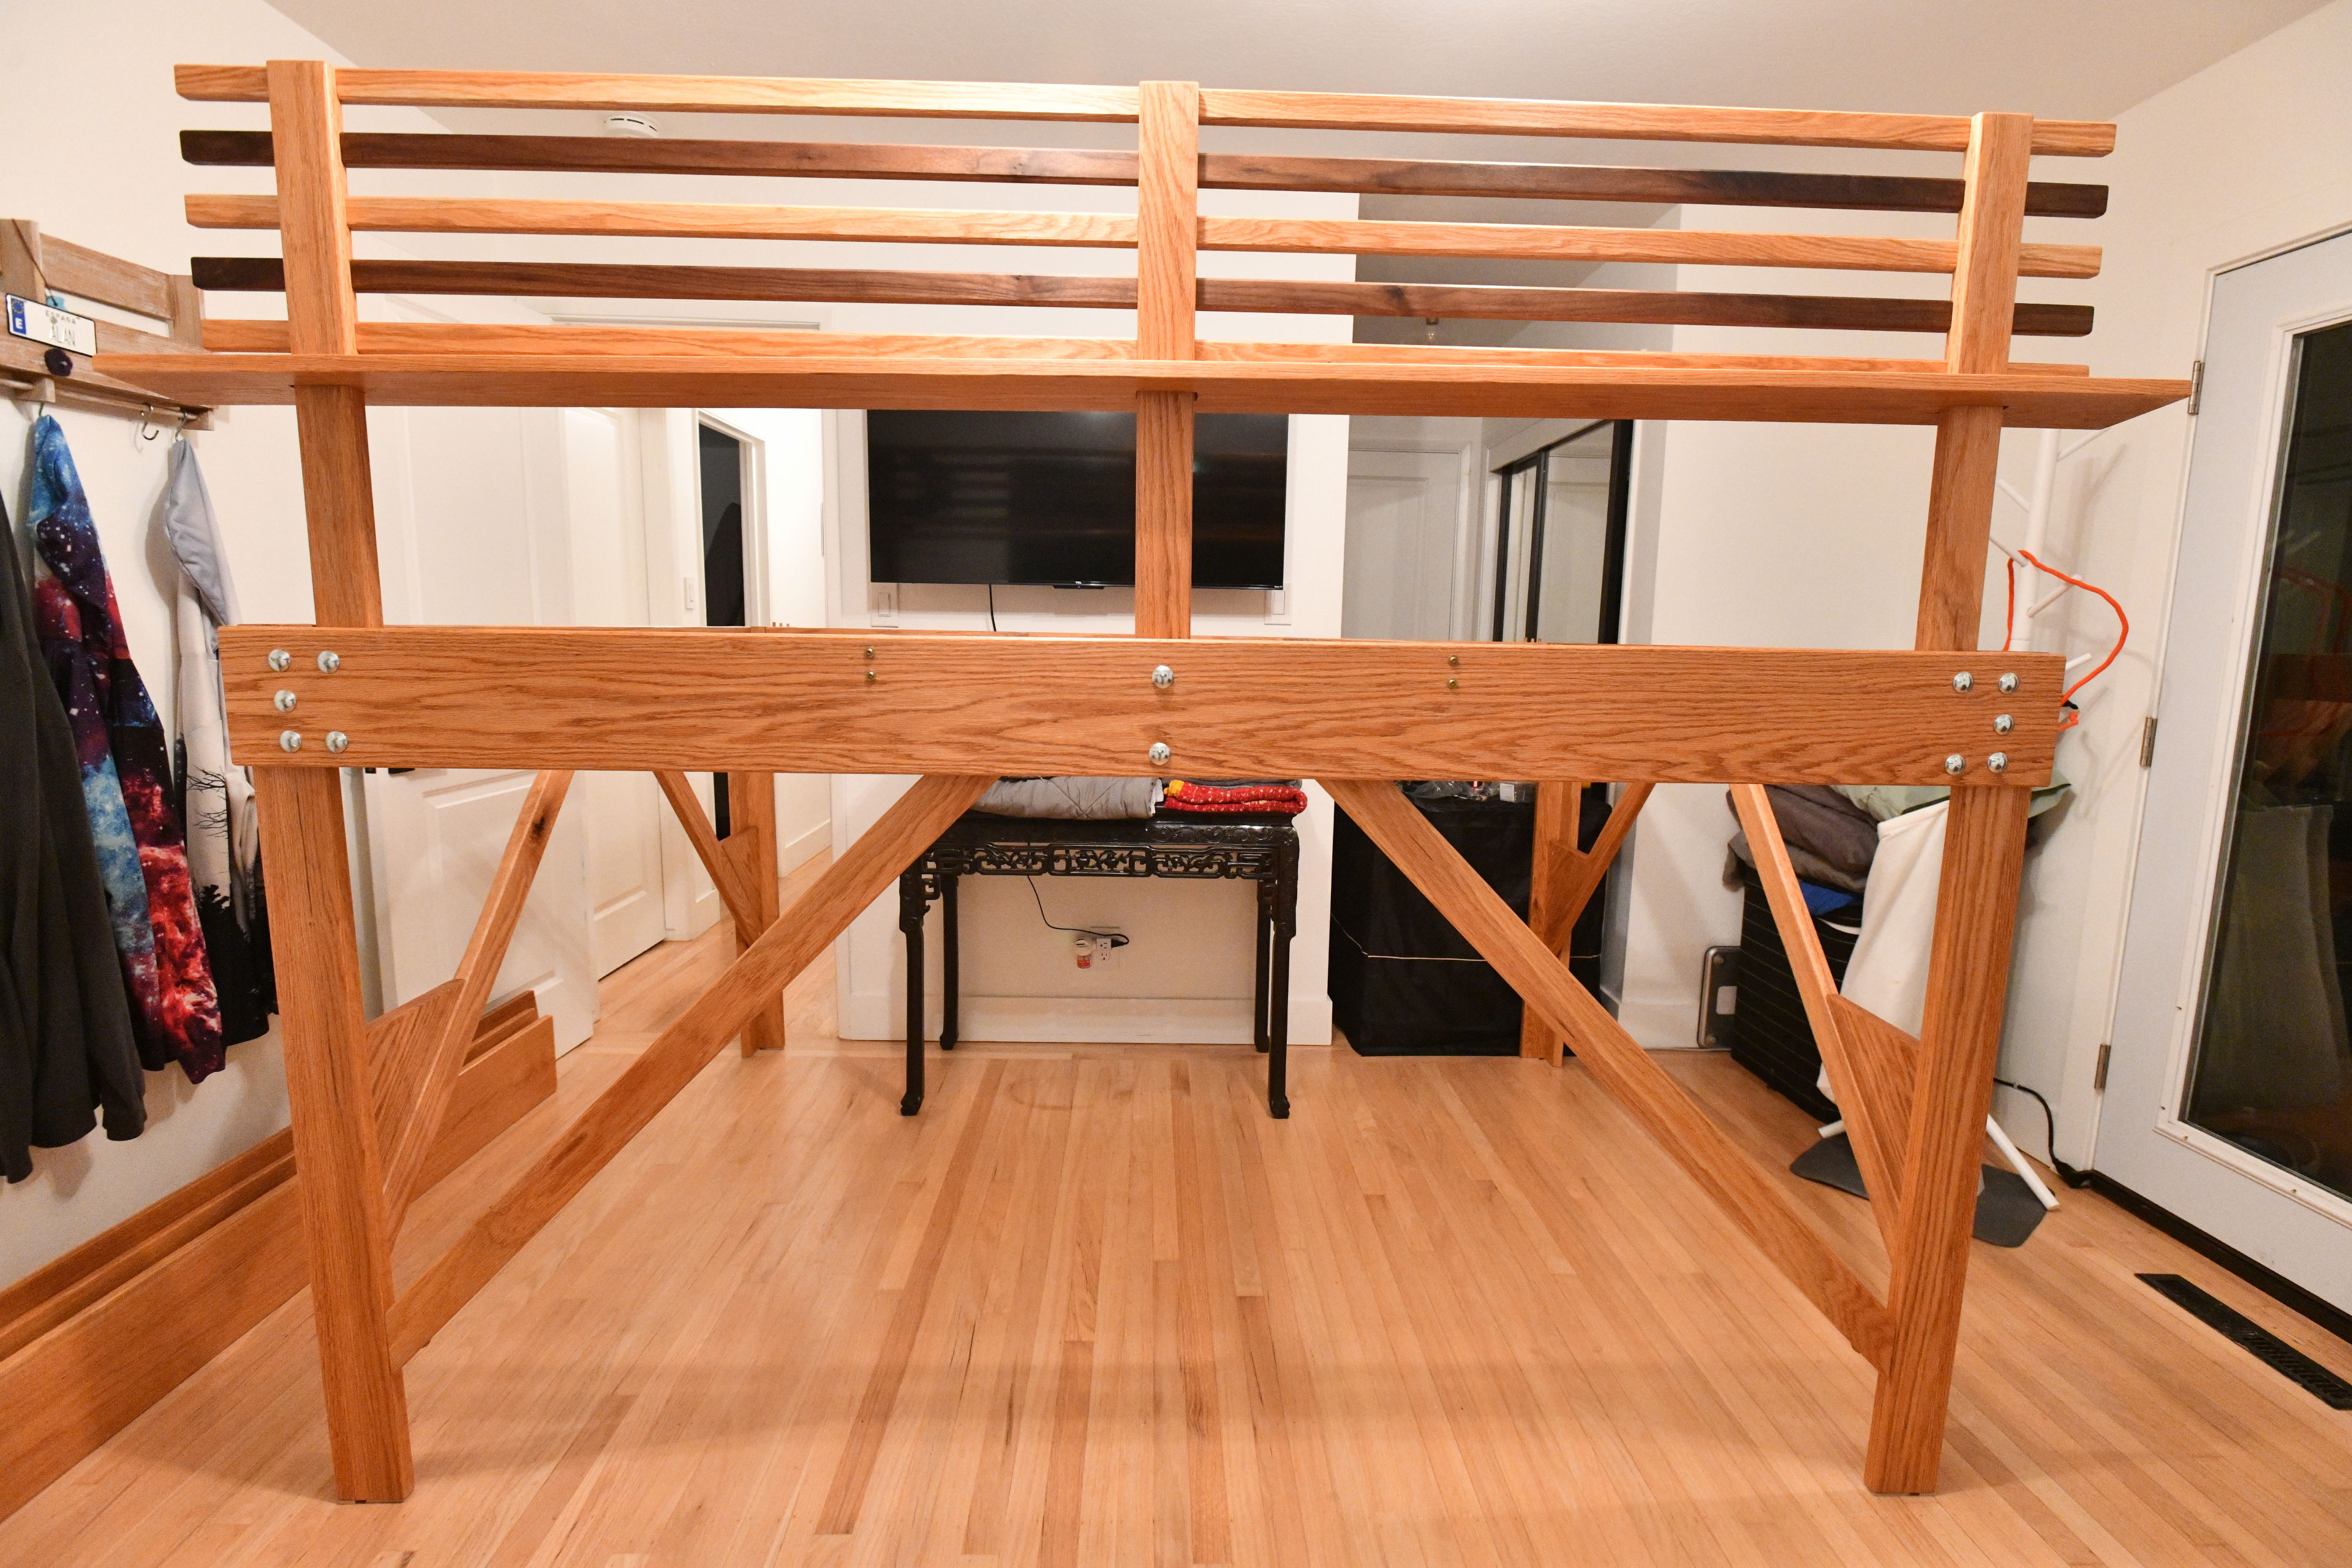
Test assembly
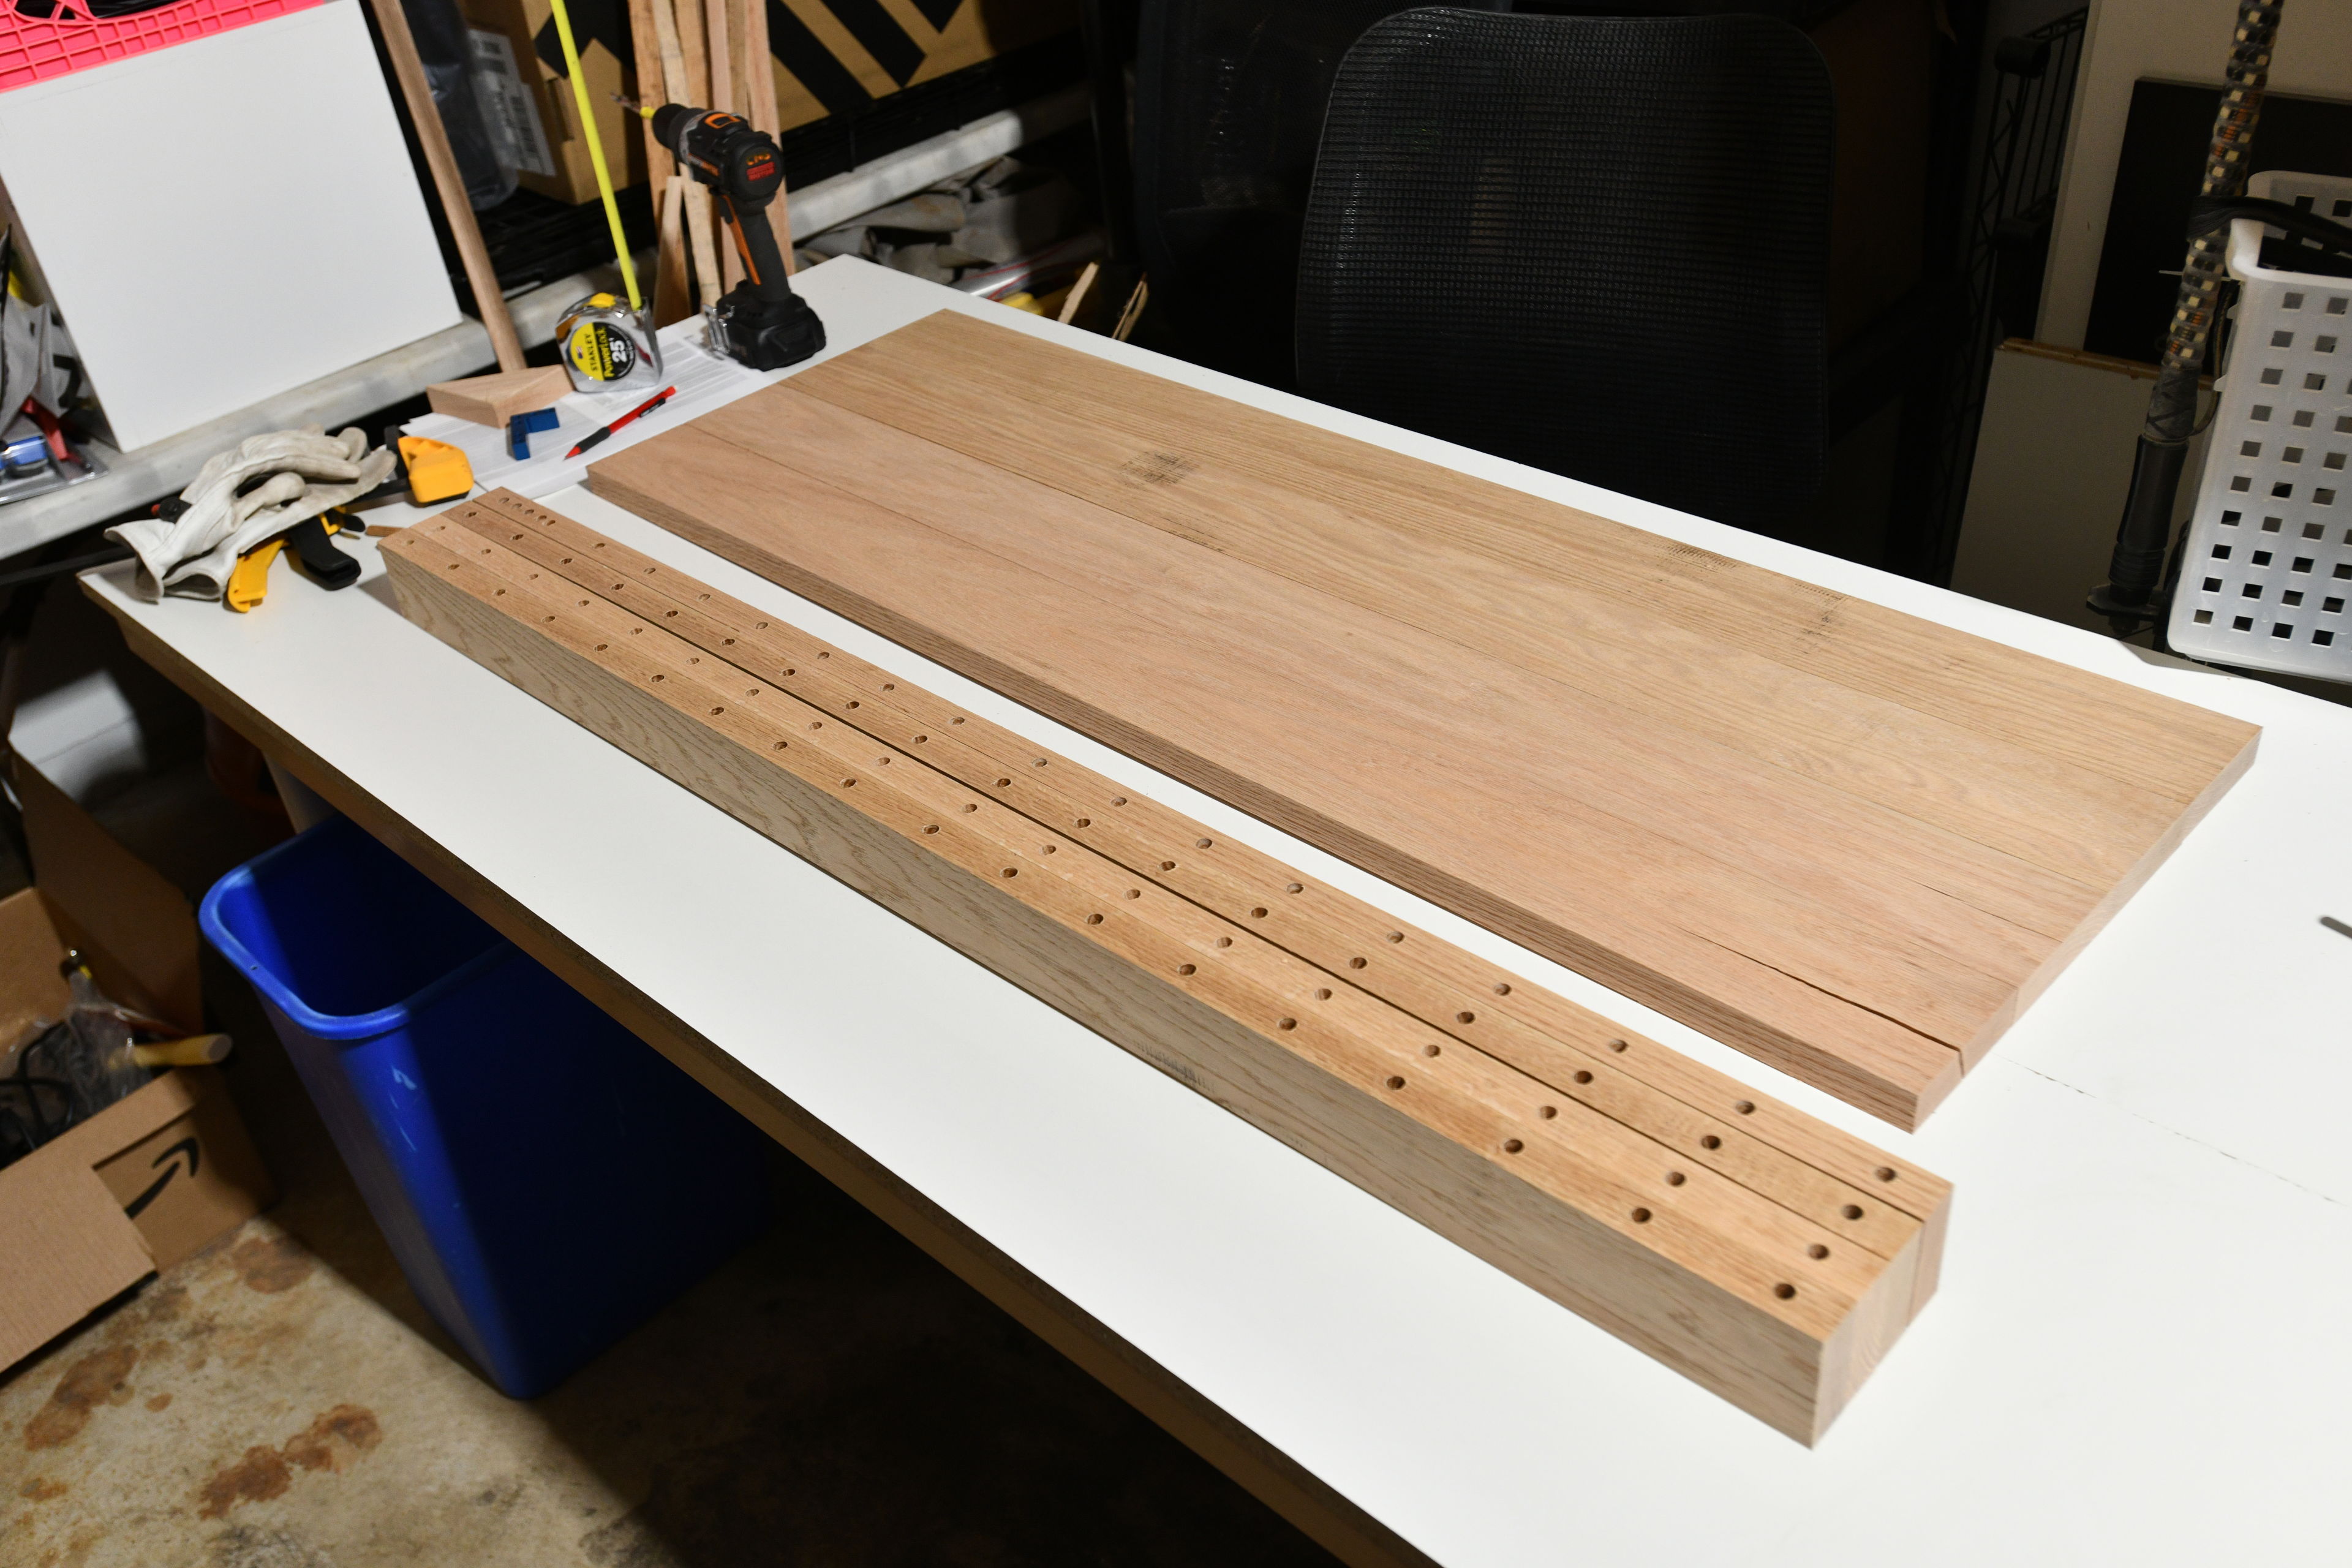
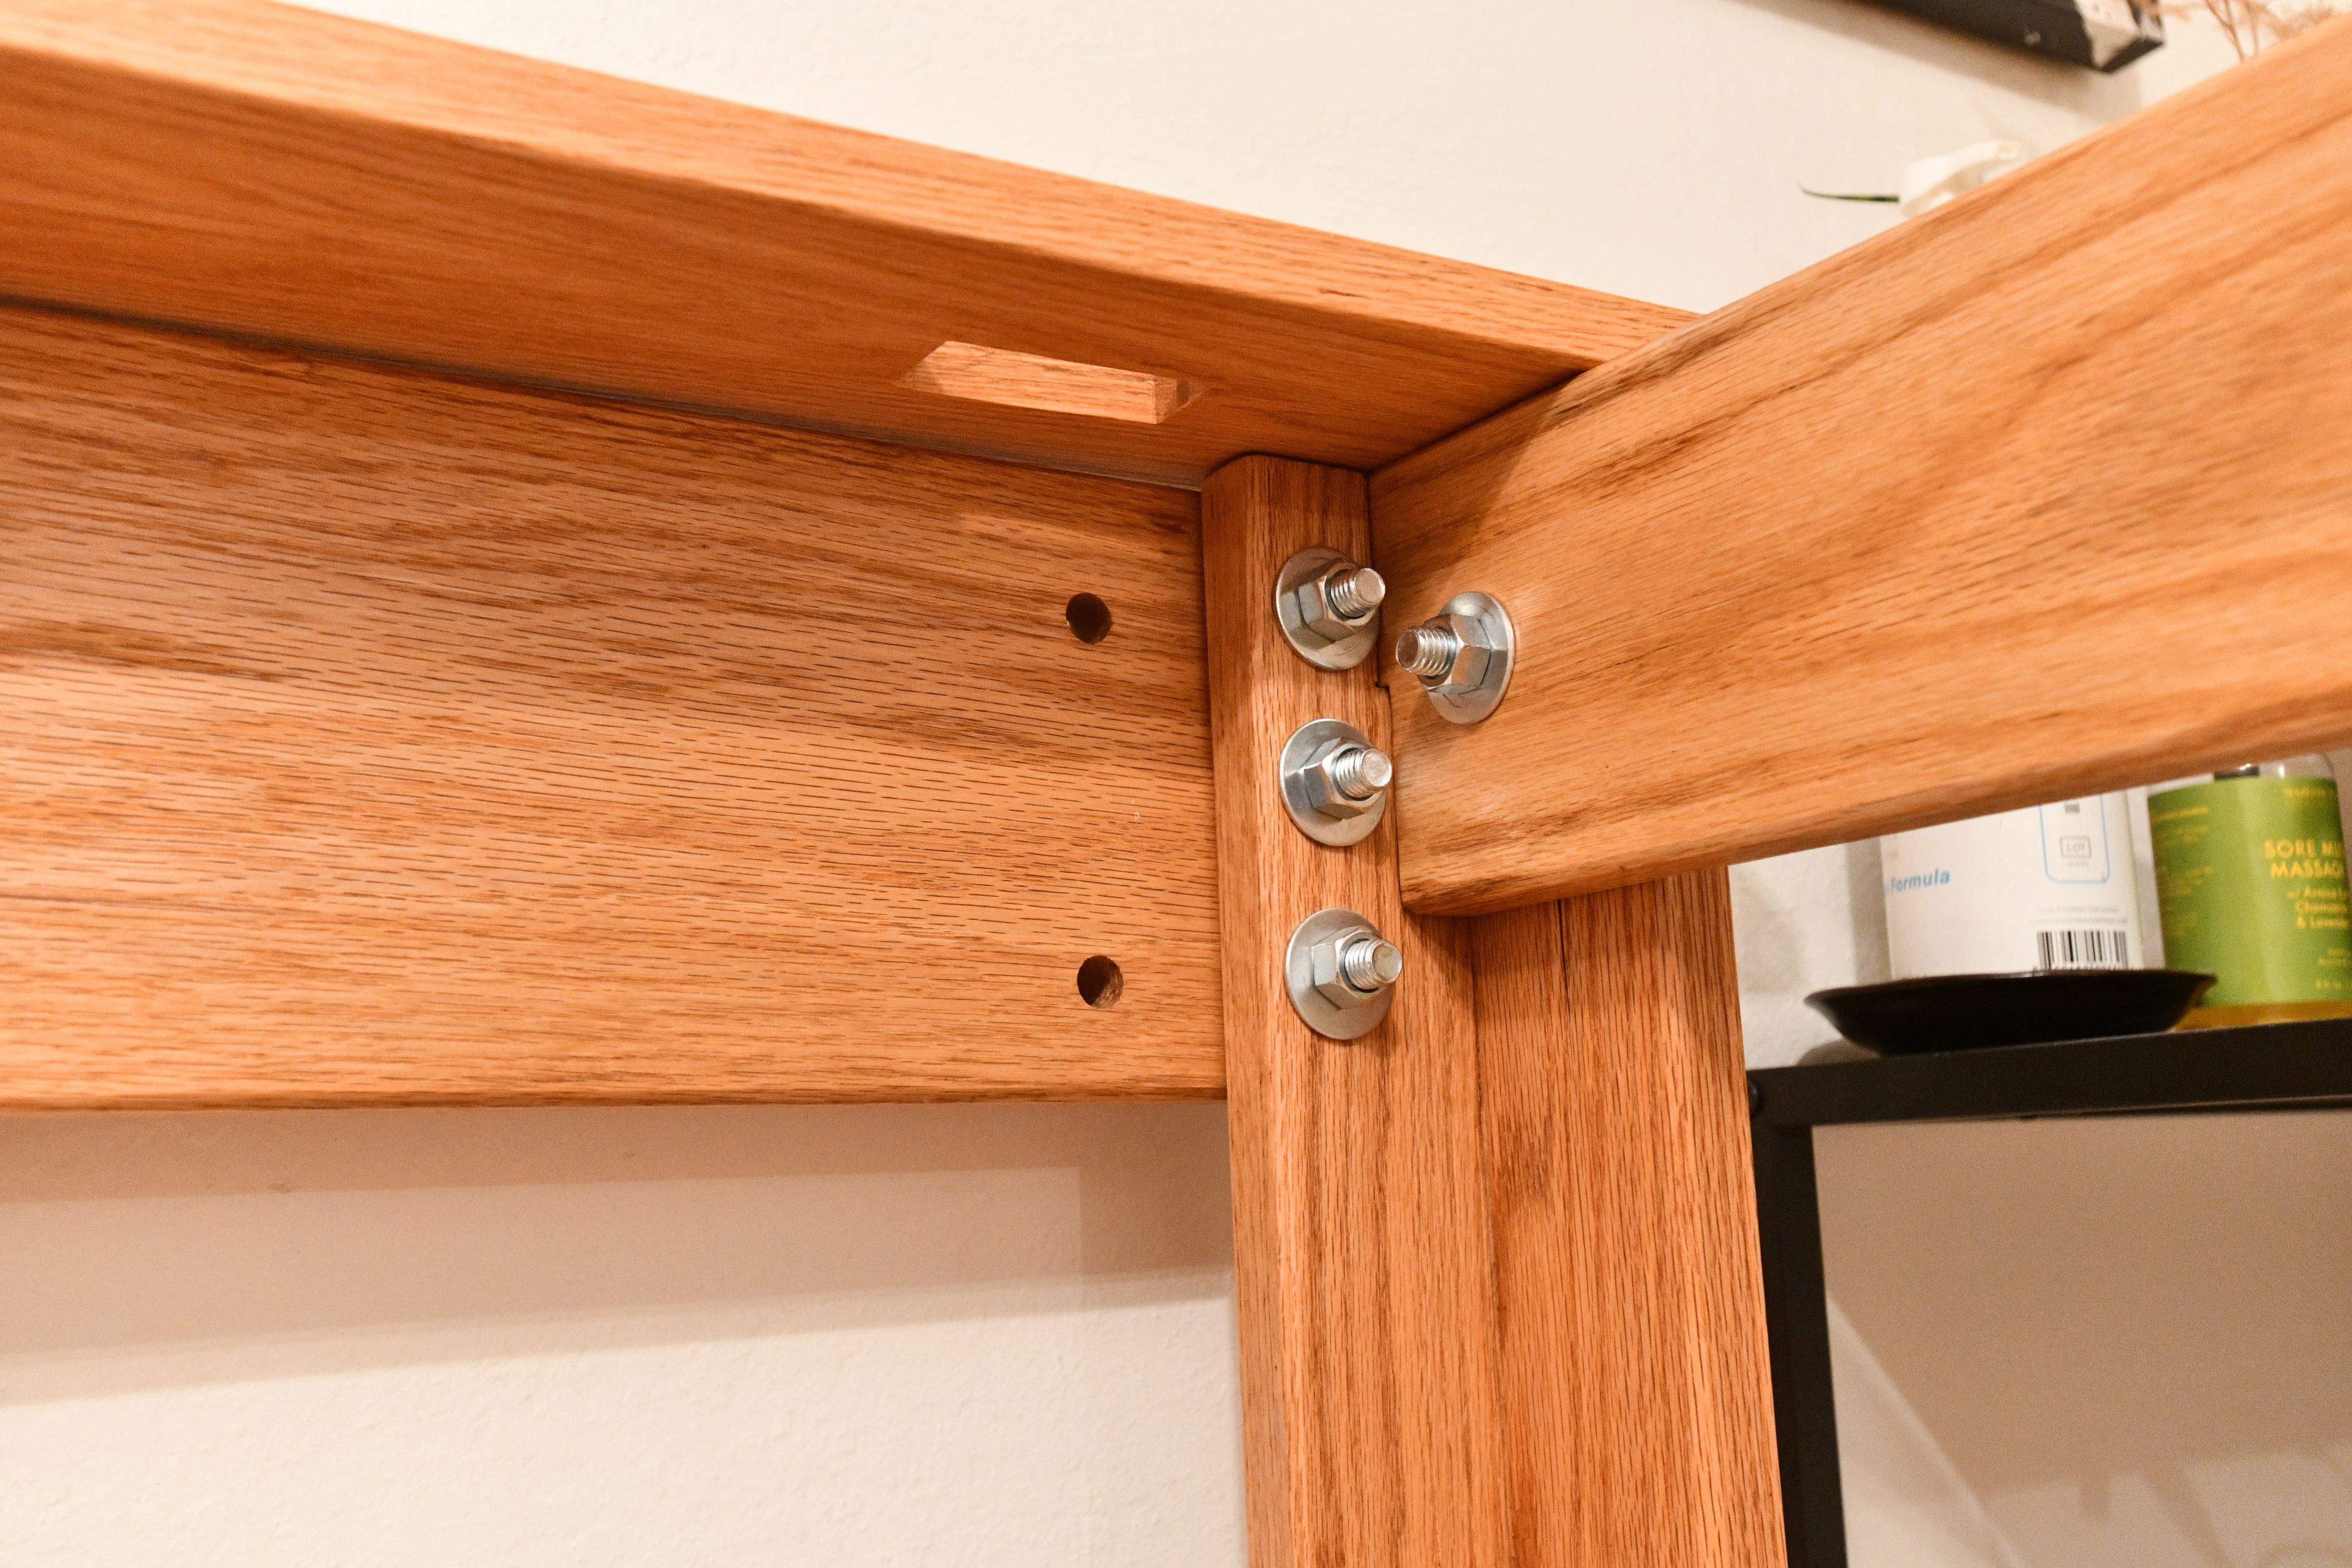
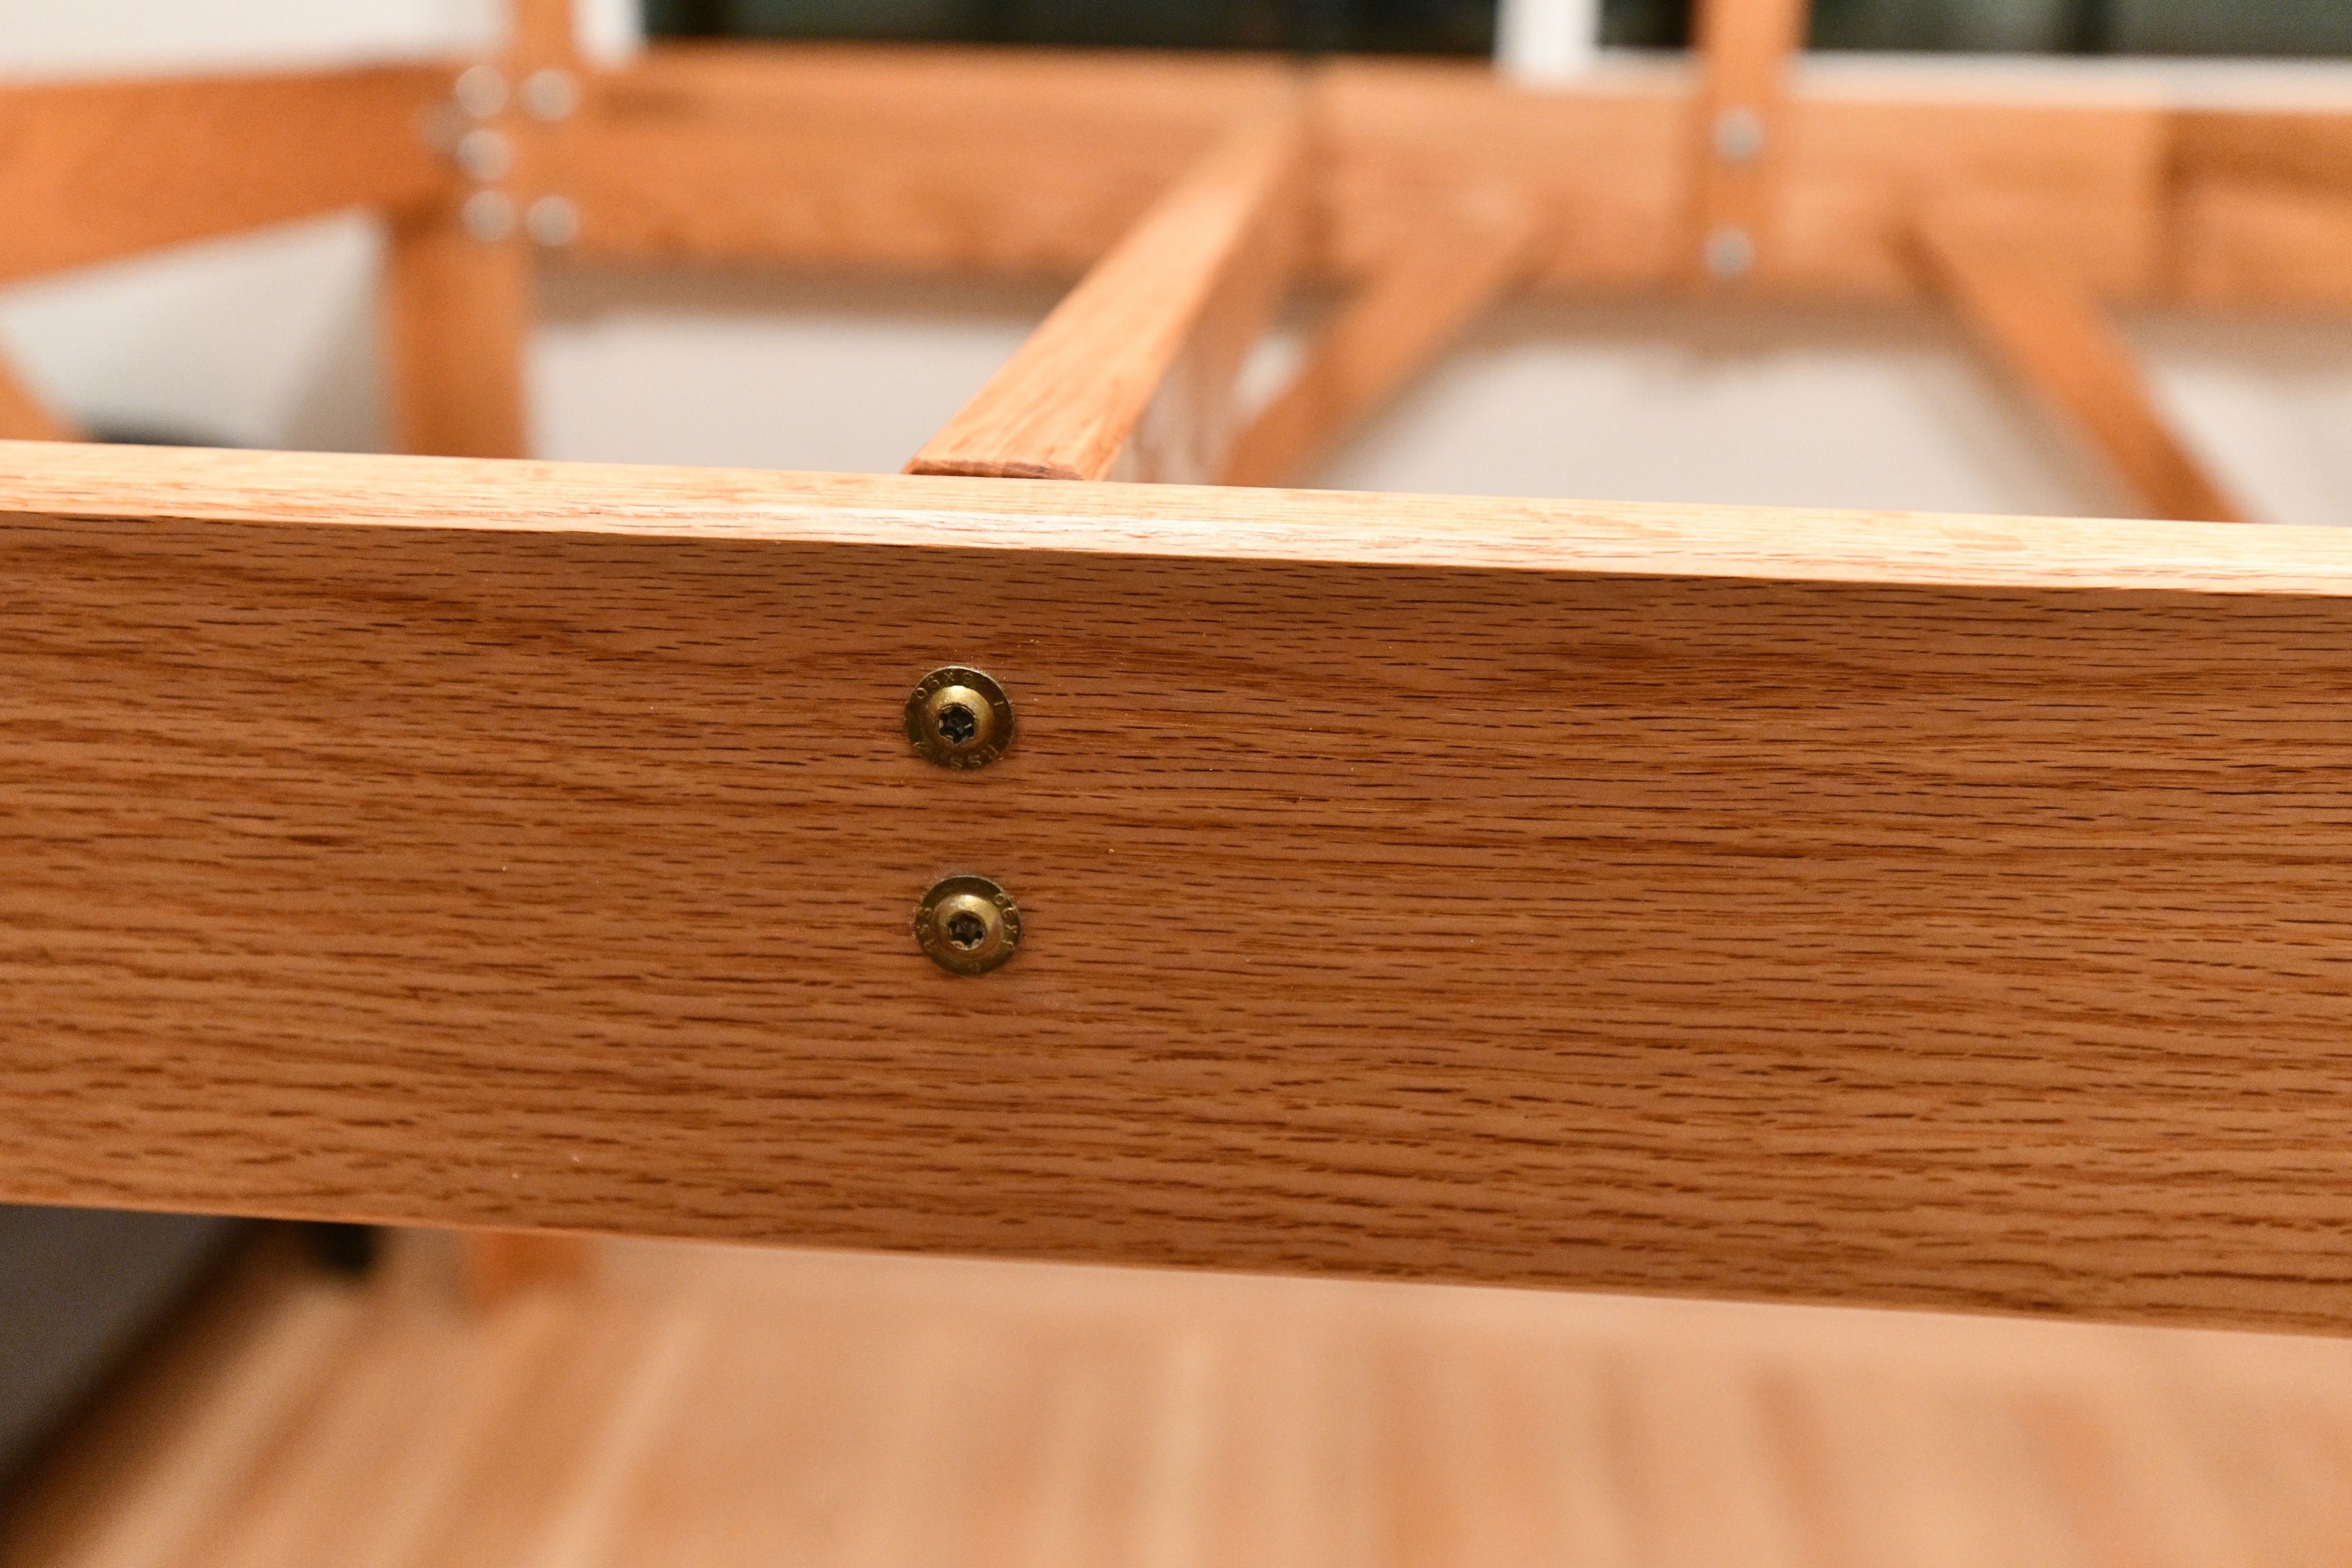
Next I did another assembly so I could drill holes for carriage bolts to replace the clamps I used in the first test. I settled on three bolts for each rear leg to attach to the rear board, and one bolt in each rear leg to attach to the long slat supports. I opted for no bolts on the front legs since the long support rests in the slot, holding it in place, and I wanted a cleaner look in the front.
I settled on using carriage bolts to attach the heavy back board to the legs, as well as to lock the sides of the frame to the back legs. I had hoped to recess these bolts a bit, but they were too large relative to the wood to make that very feasible.
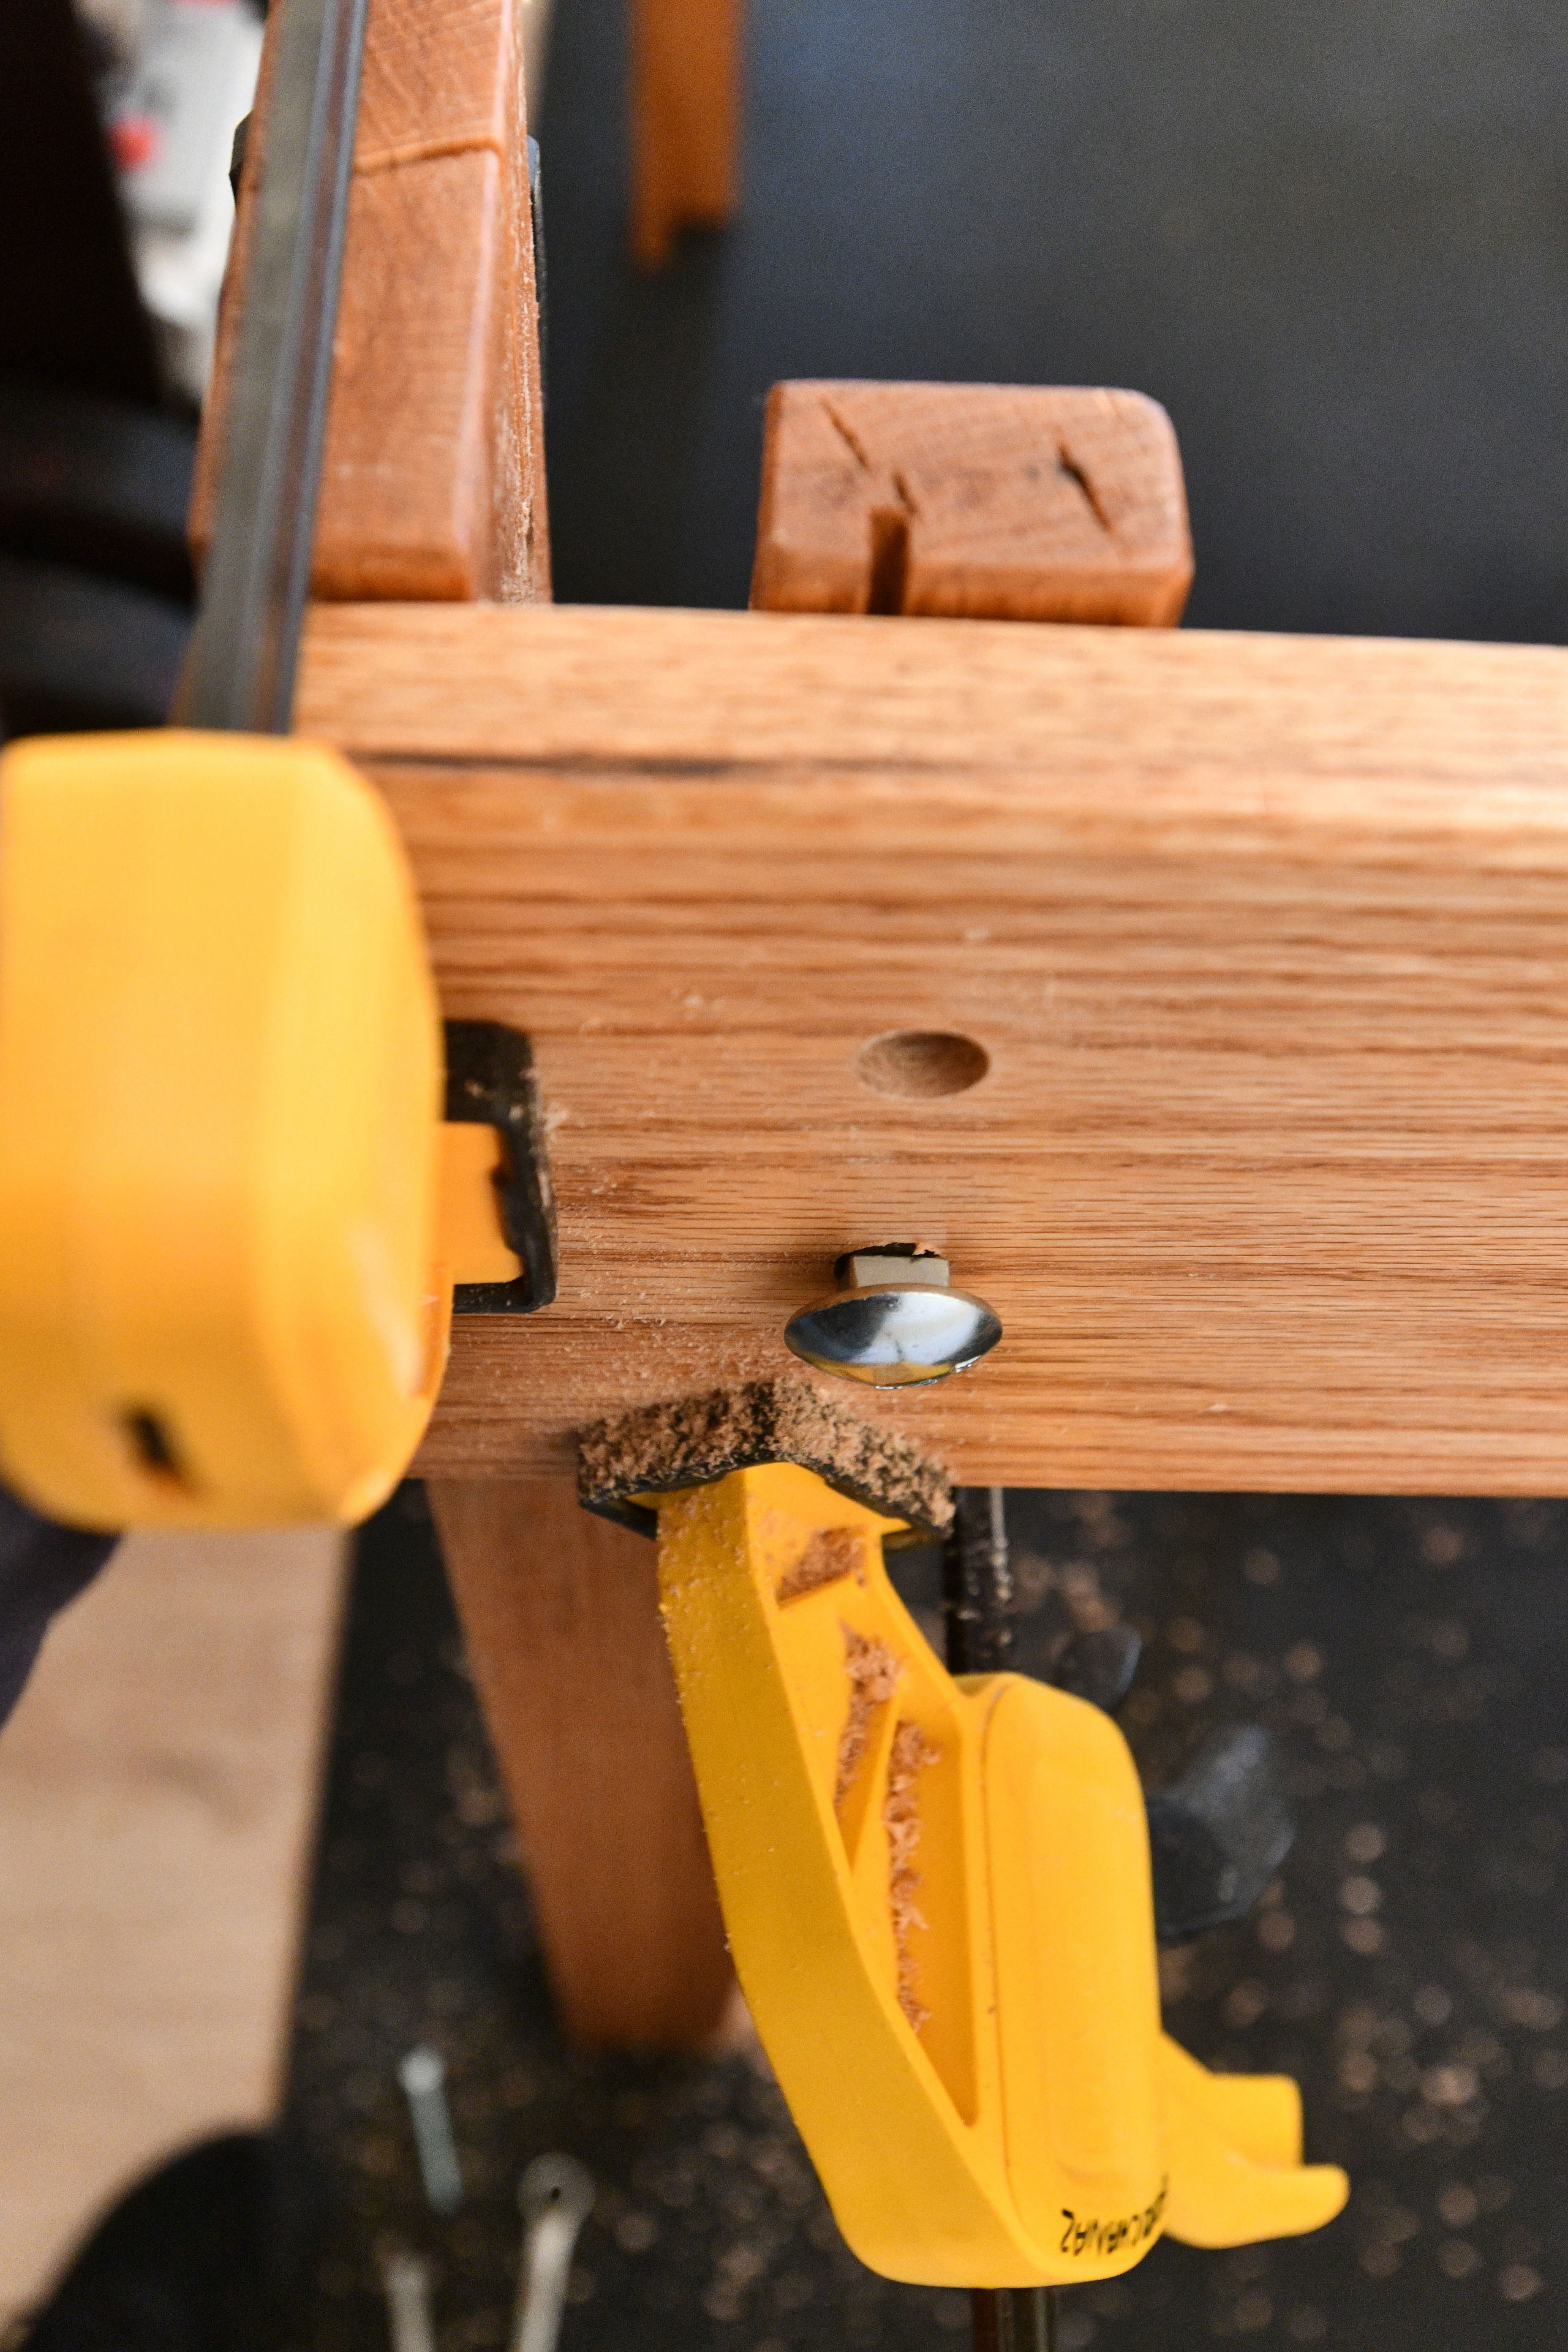
I settled on using carriage bolts to attach the heavy back board to the legs, as well as to lock the sides of the frame to the back legs. I had hoped to recess these bolts a bit, but they were too large relative to the wood to make that very feasible.
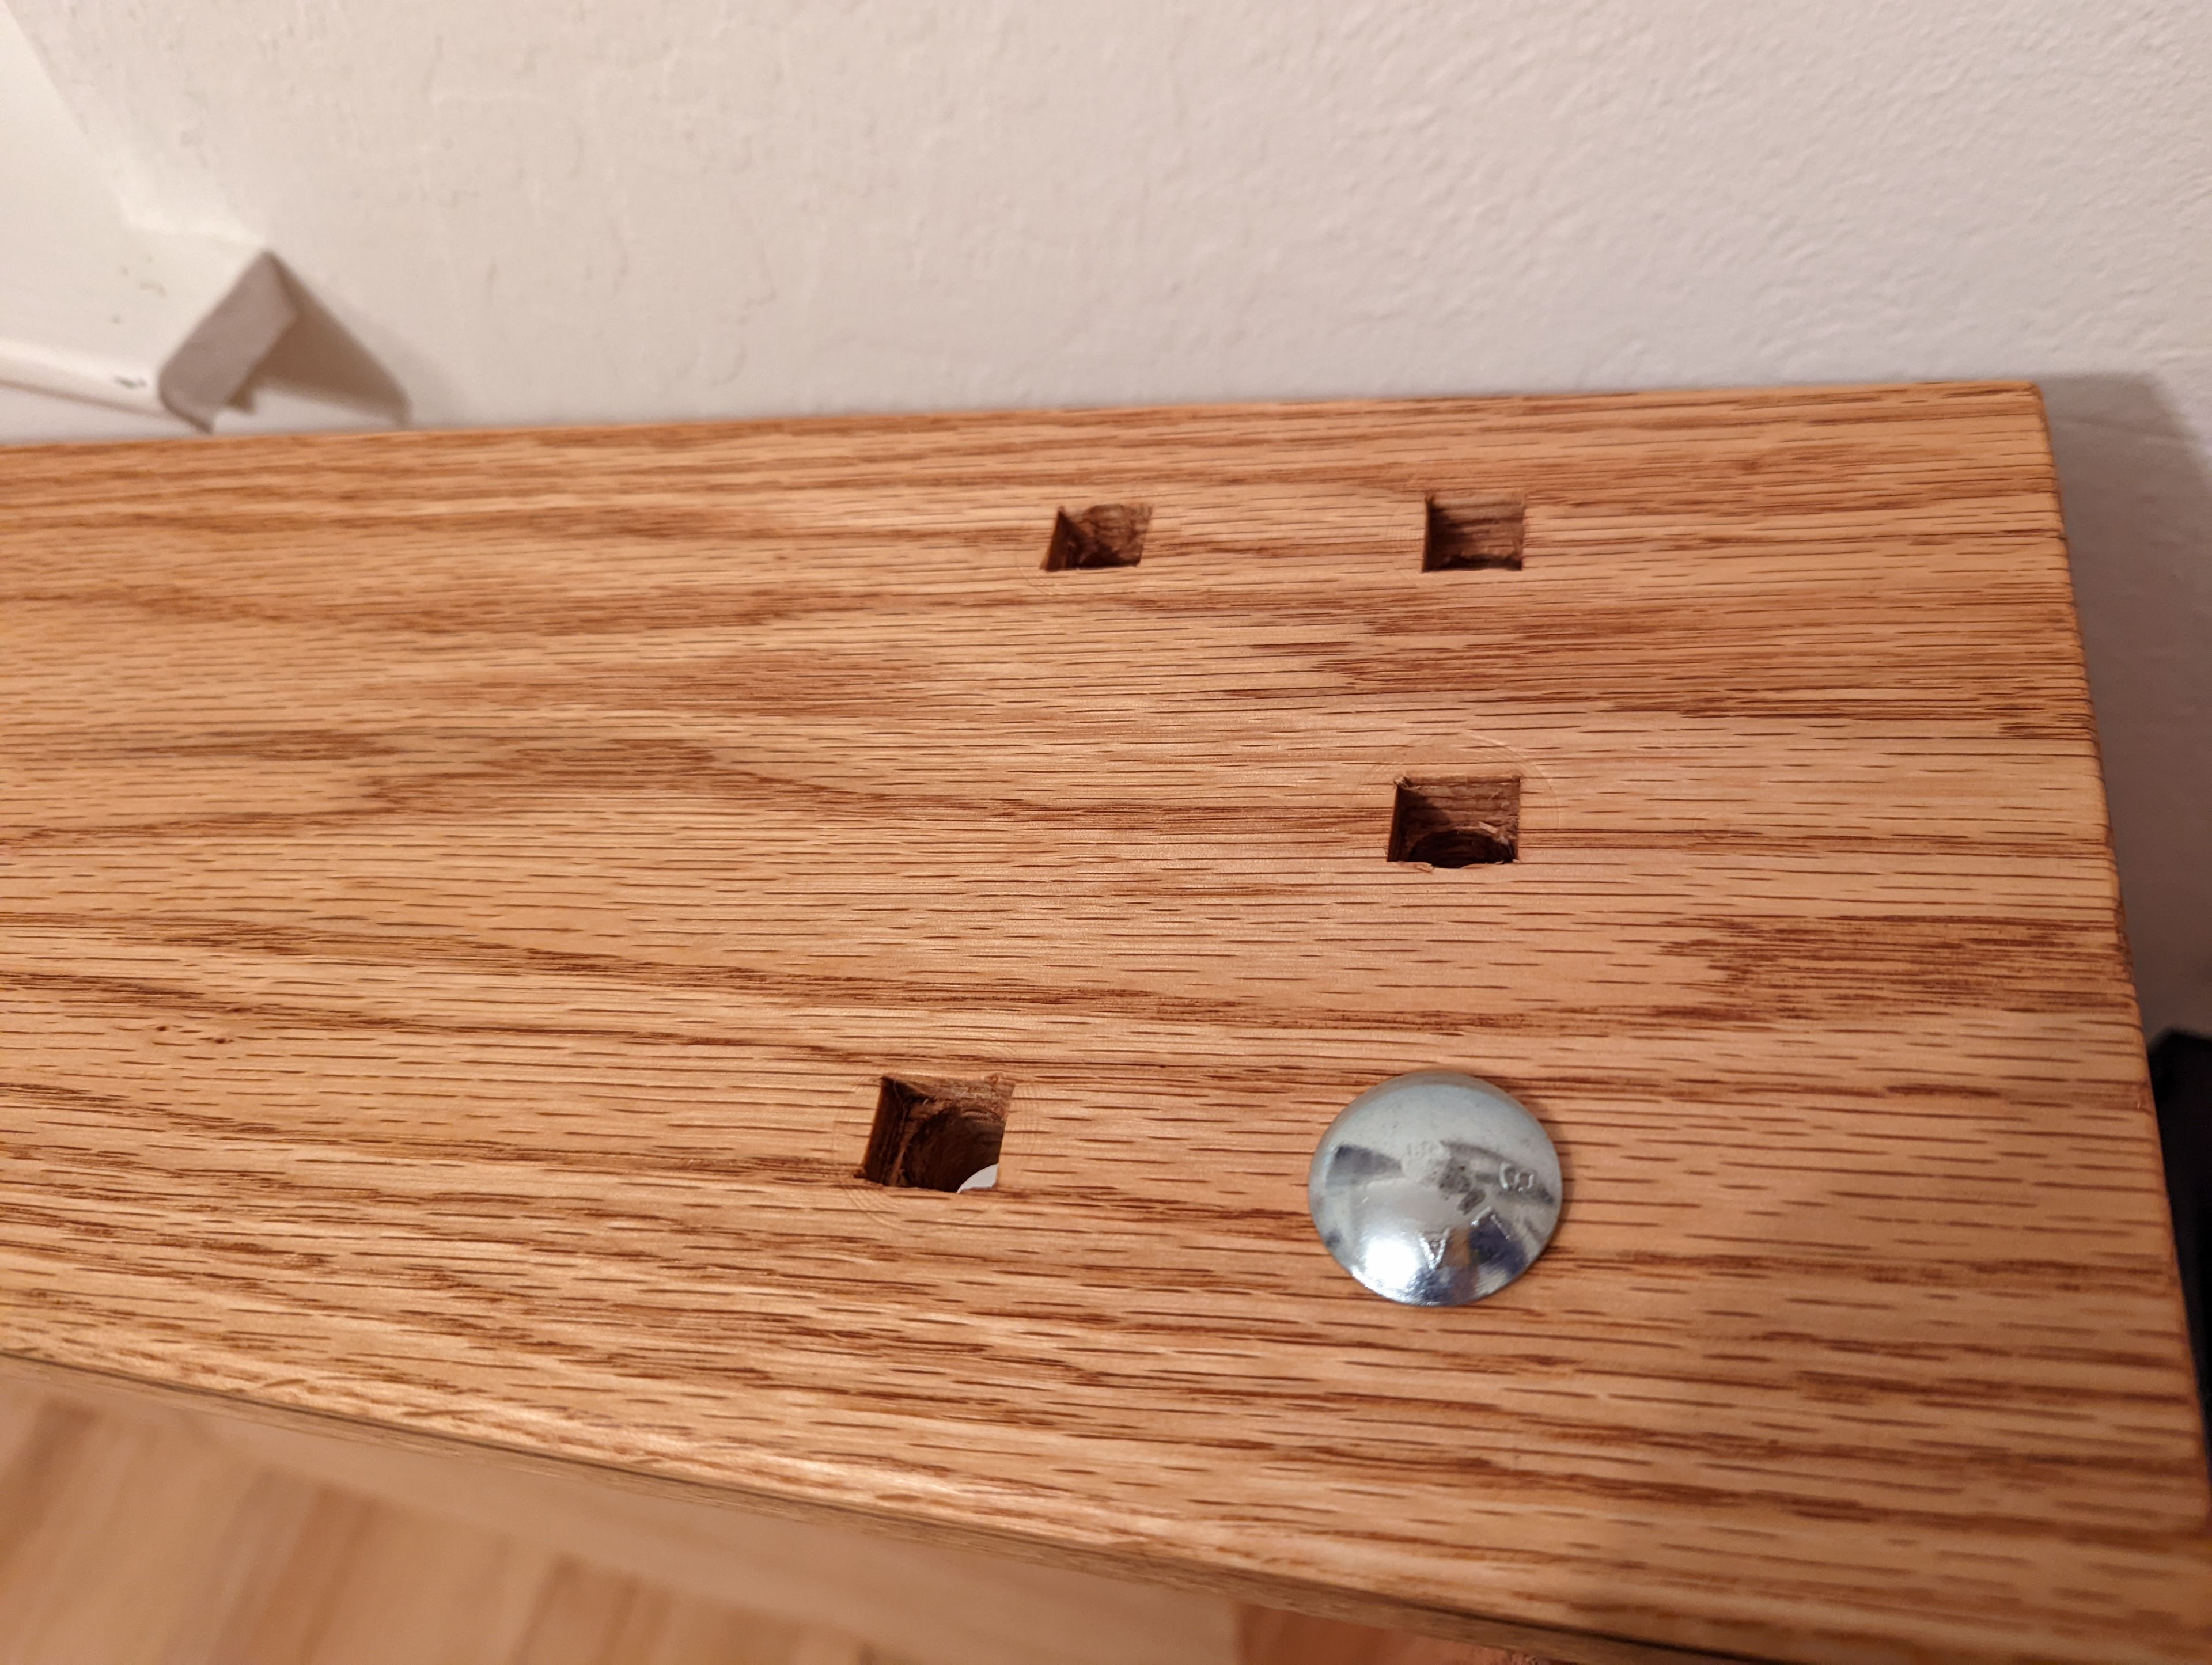
I drilled holes and then made them square with a chisel so the square underside of the carriage bolts would seat snugly.
Headboard
Next I had to figure out the headboard. I knew I at least wanted to bolt the three columns to that thick back board of the frame, so I started by cutting square holes in the rearmost slat. I used this nifty drill guide, Milescraft 1318 DrillMate, to substitute for not having a drill press. It wasn’t quite as rigid as I hoped, but it was good enough once I clamped the corners down.
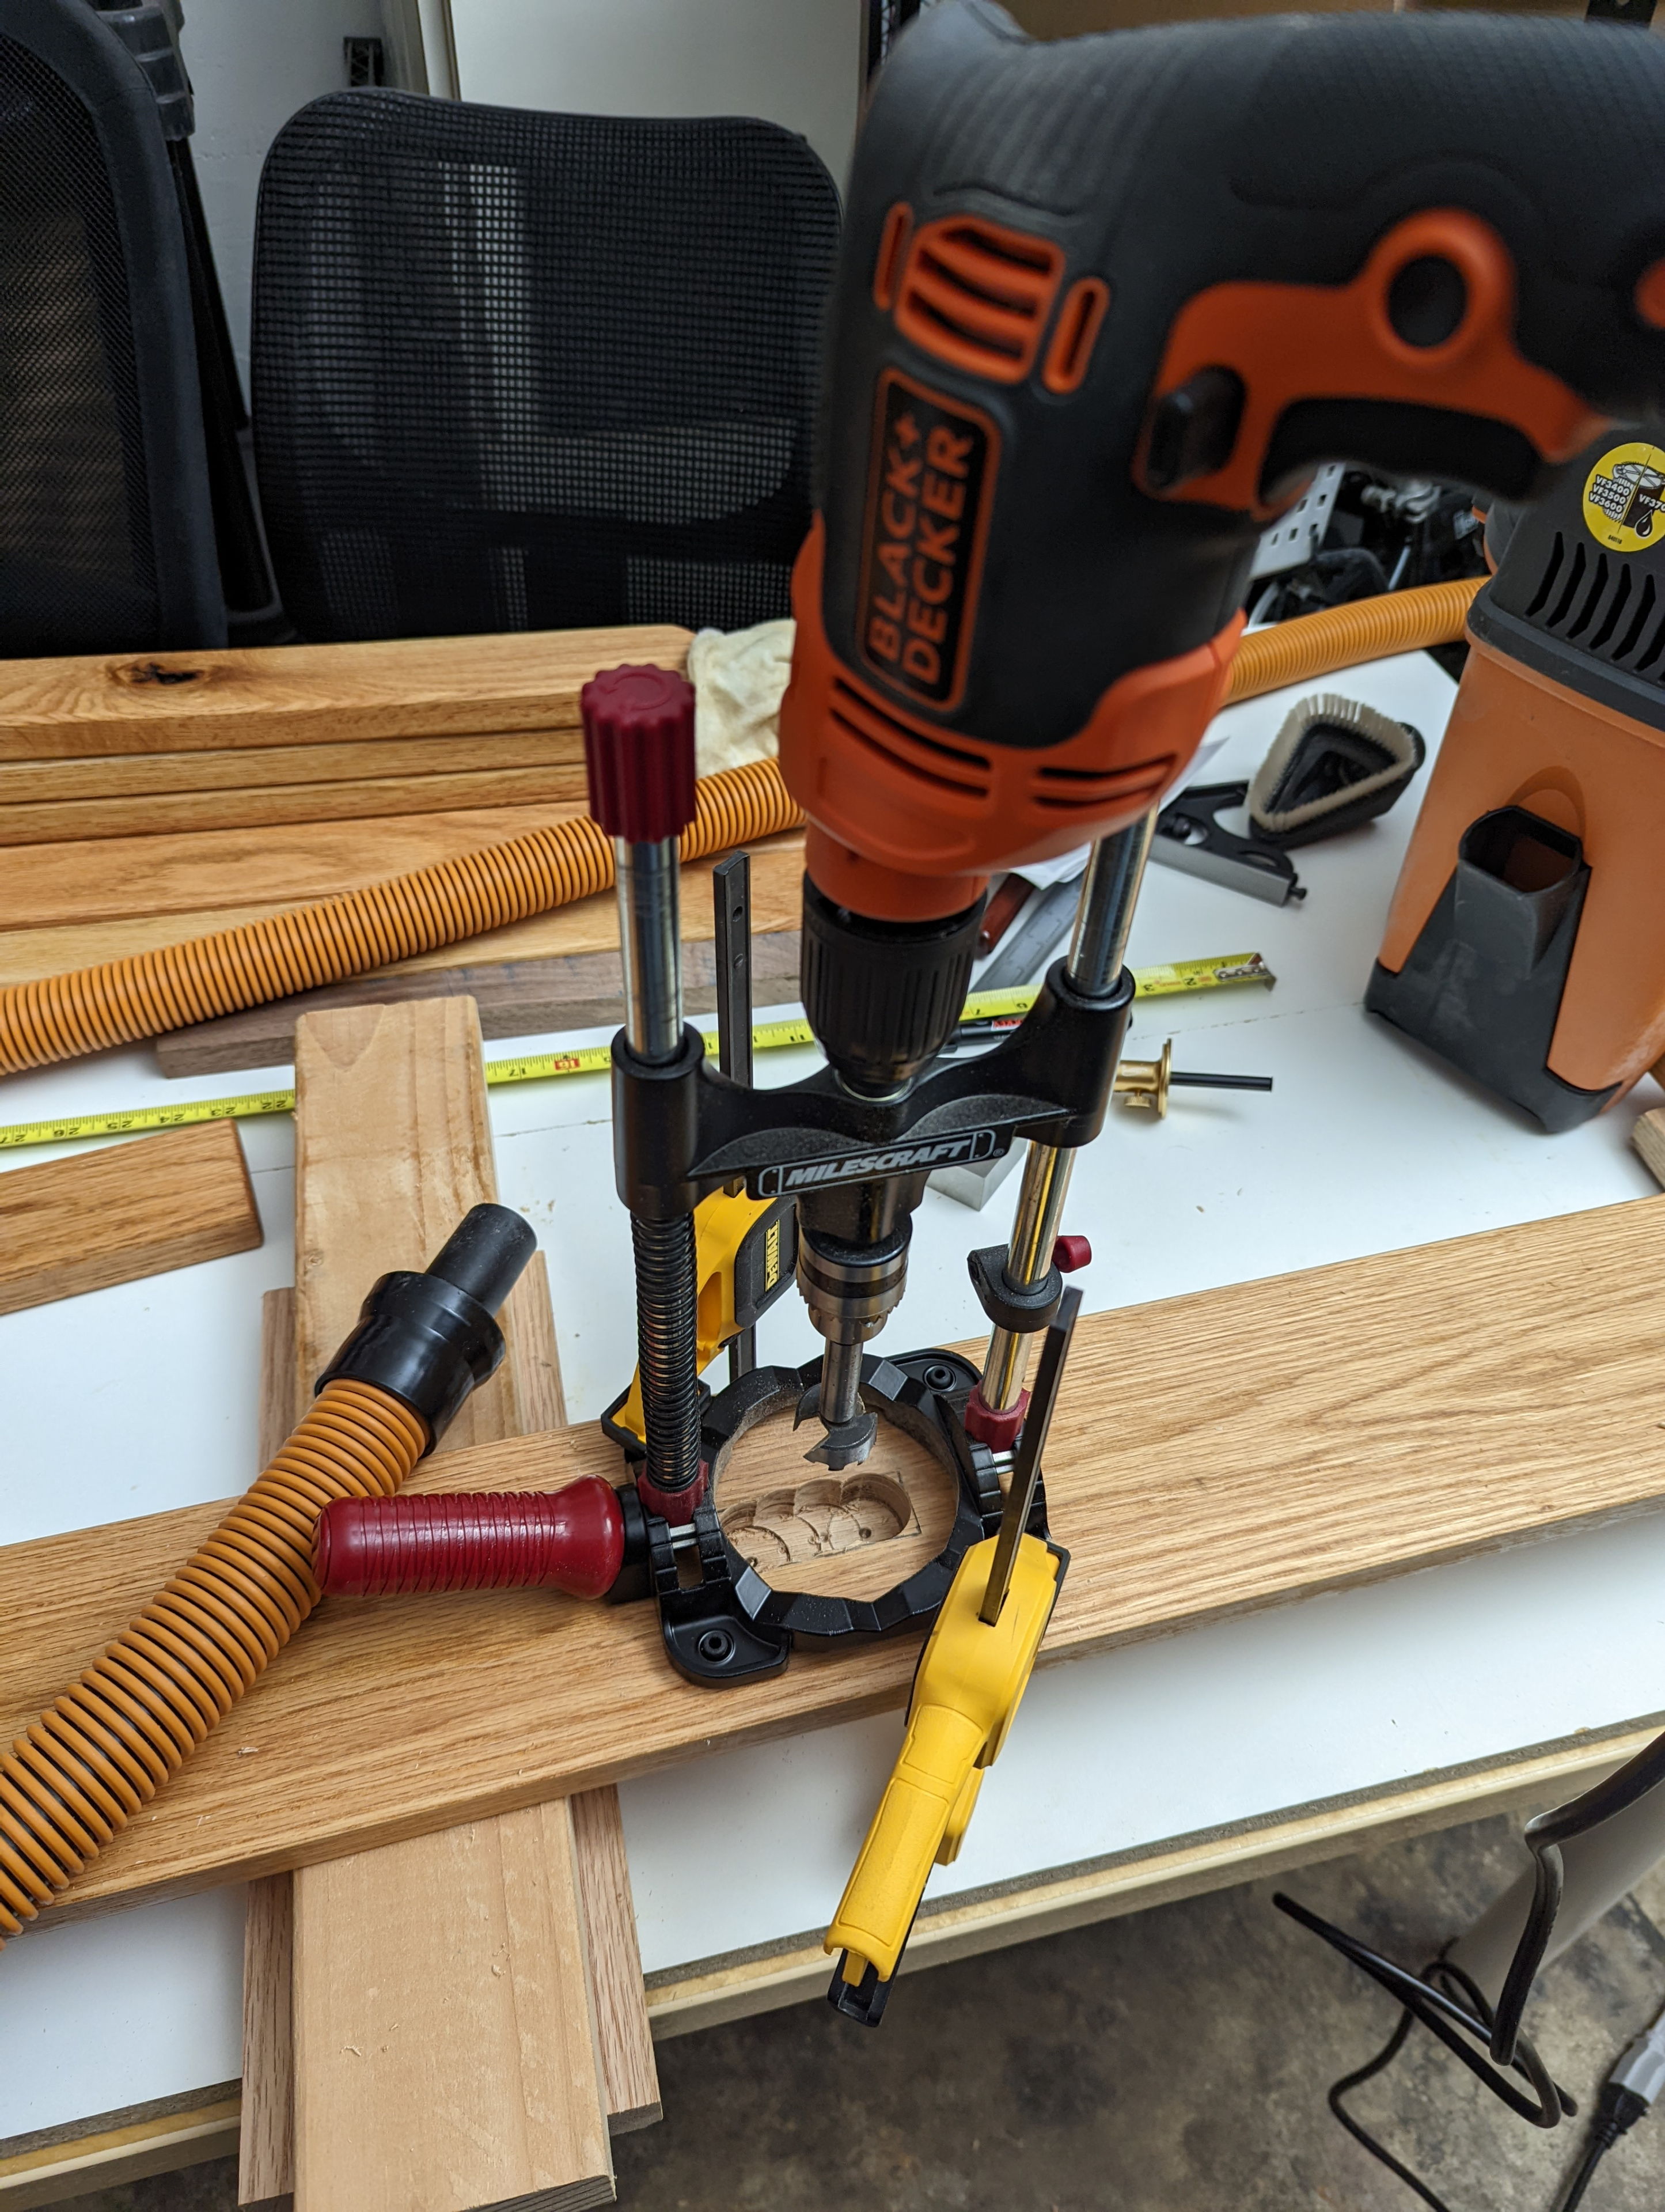
I used a Milescraft 1318 DrillMate portable drill guide to remove material for three rectangular holes I needed to make.
I hadn't thought much about the headboard till this point, but decided to attach the three supports for it now and then mark out on the five thin cross boards where I'll be cutting them. I forgot to take a photo of this.
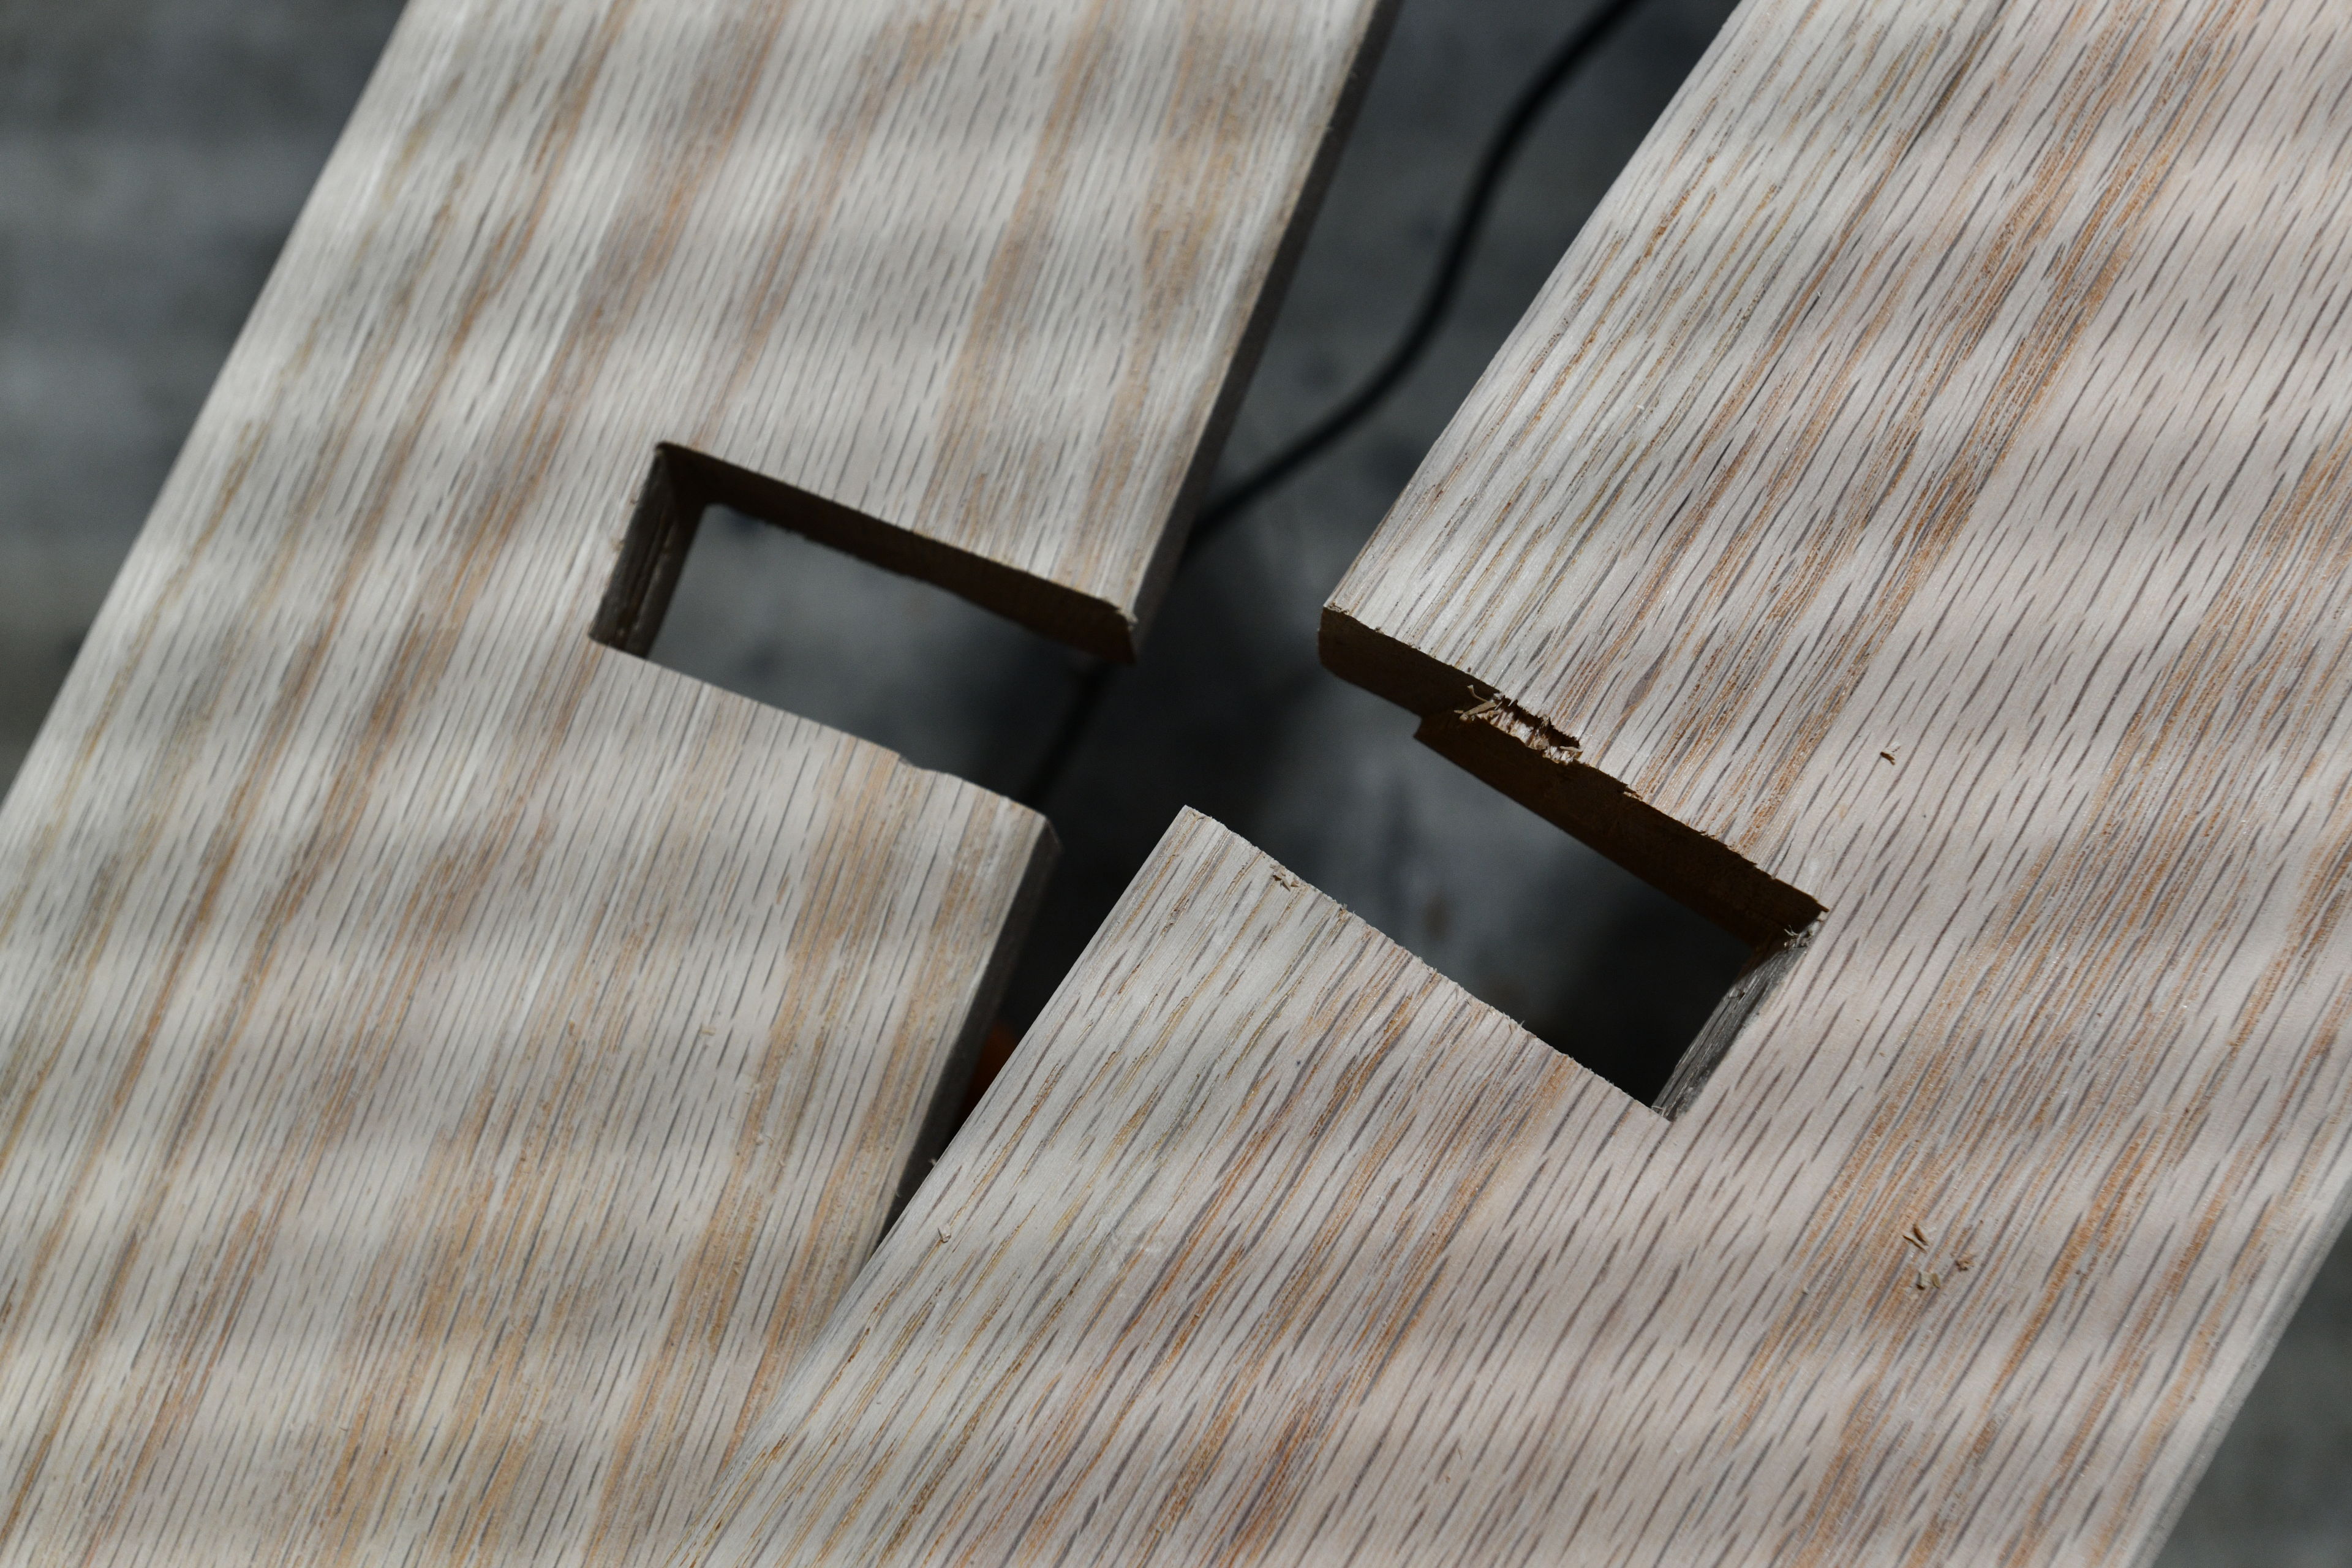
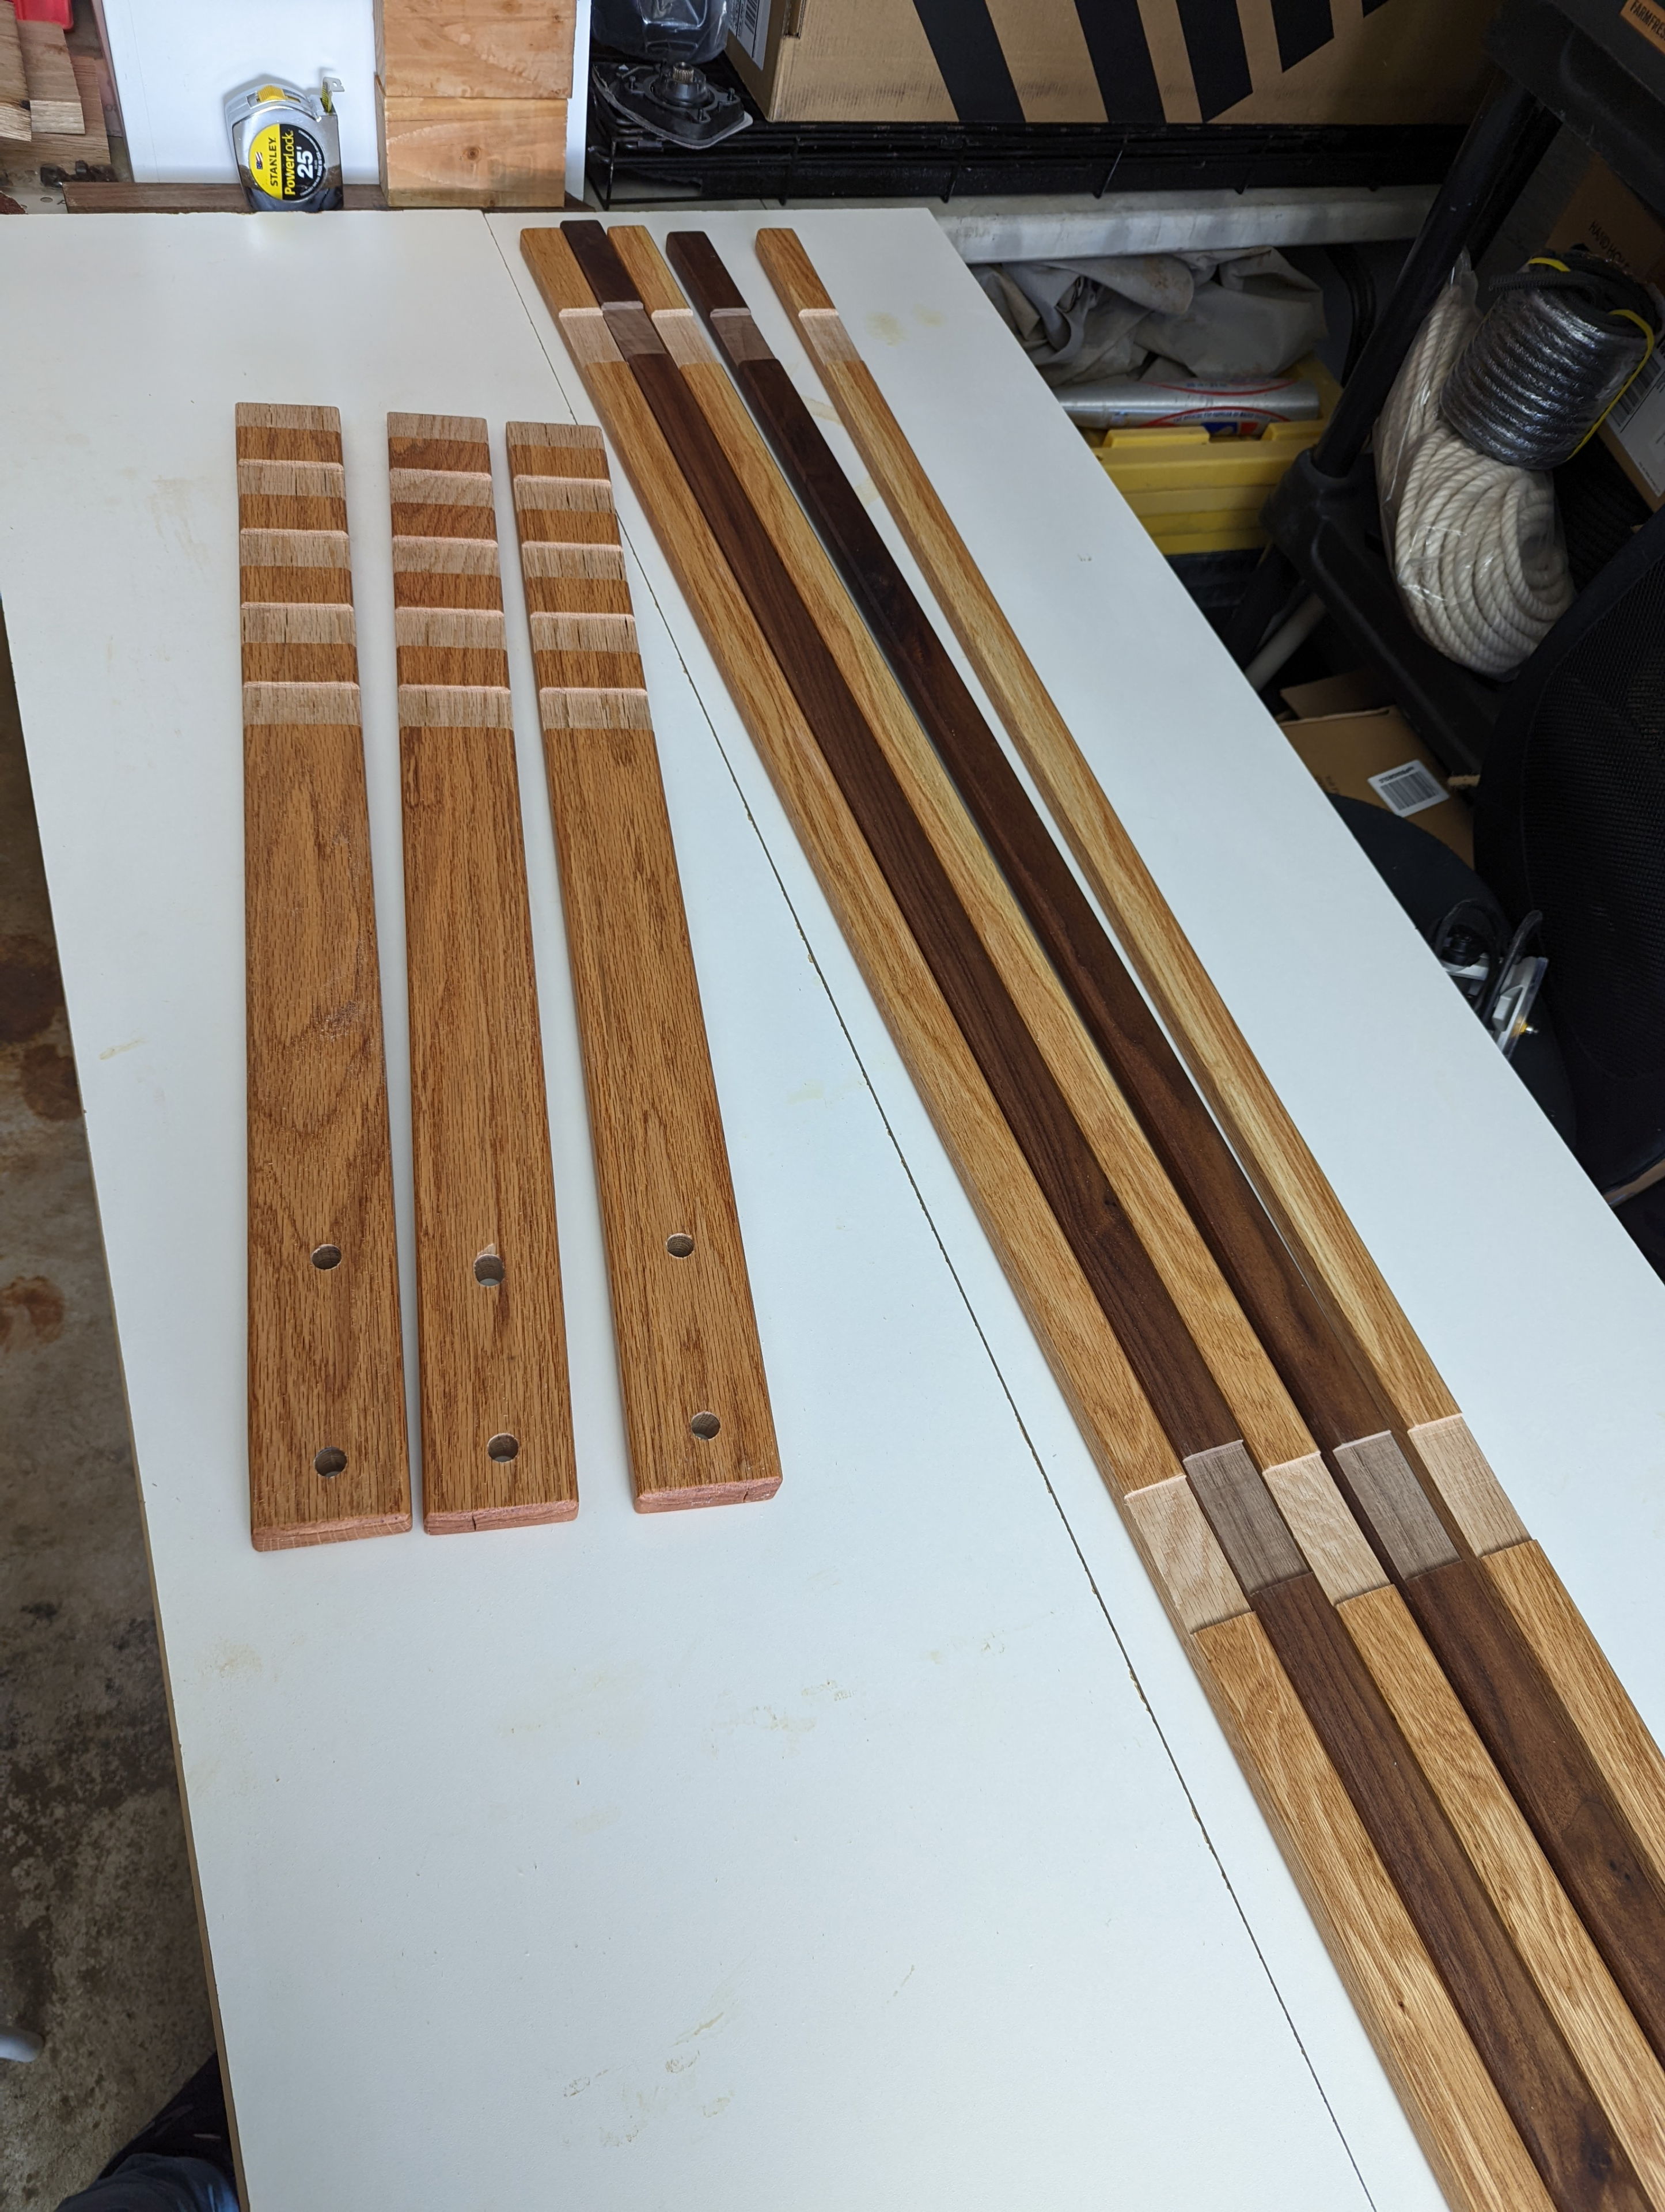
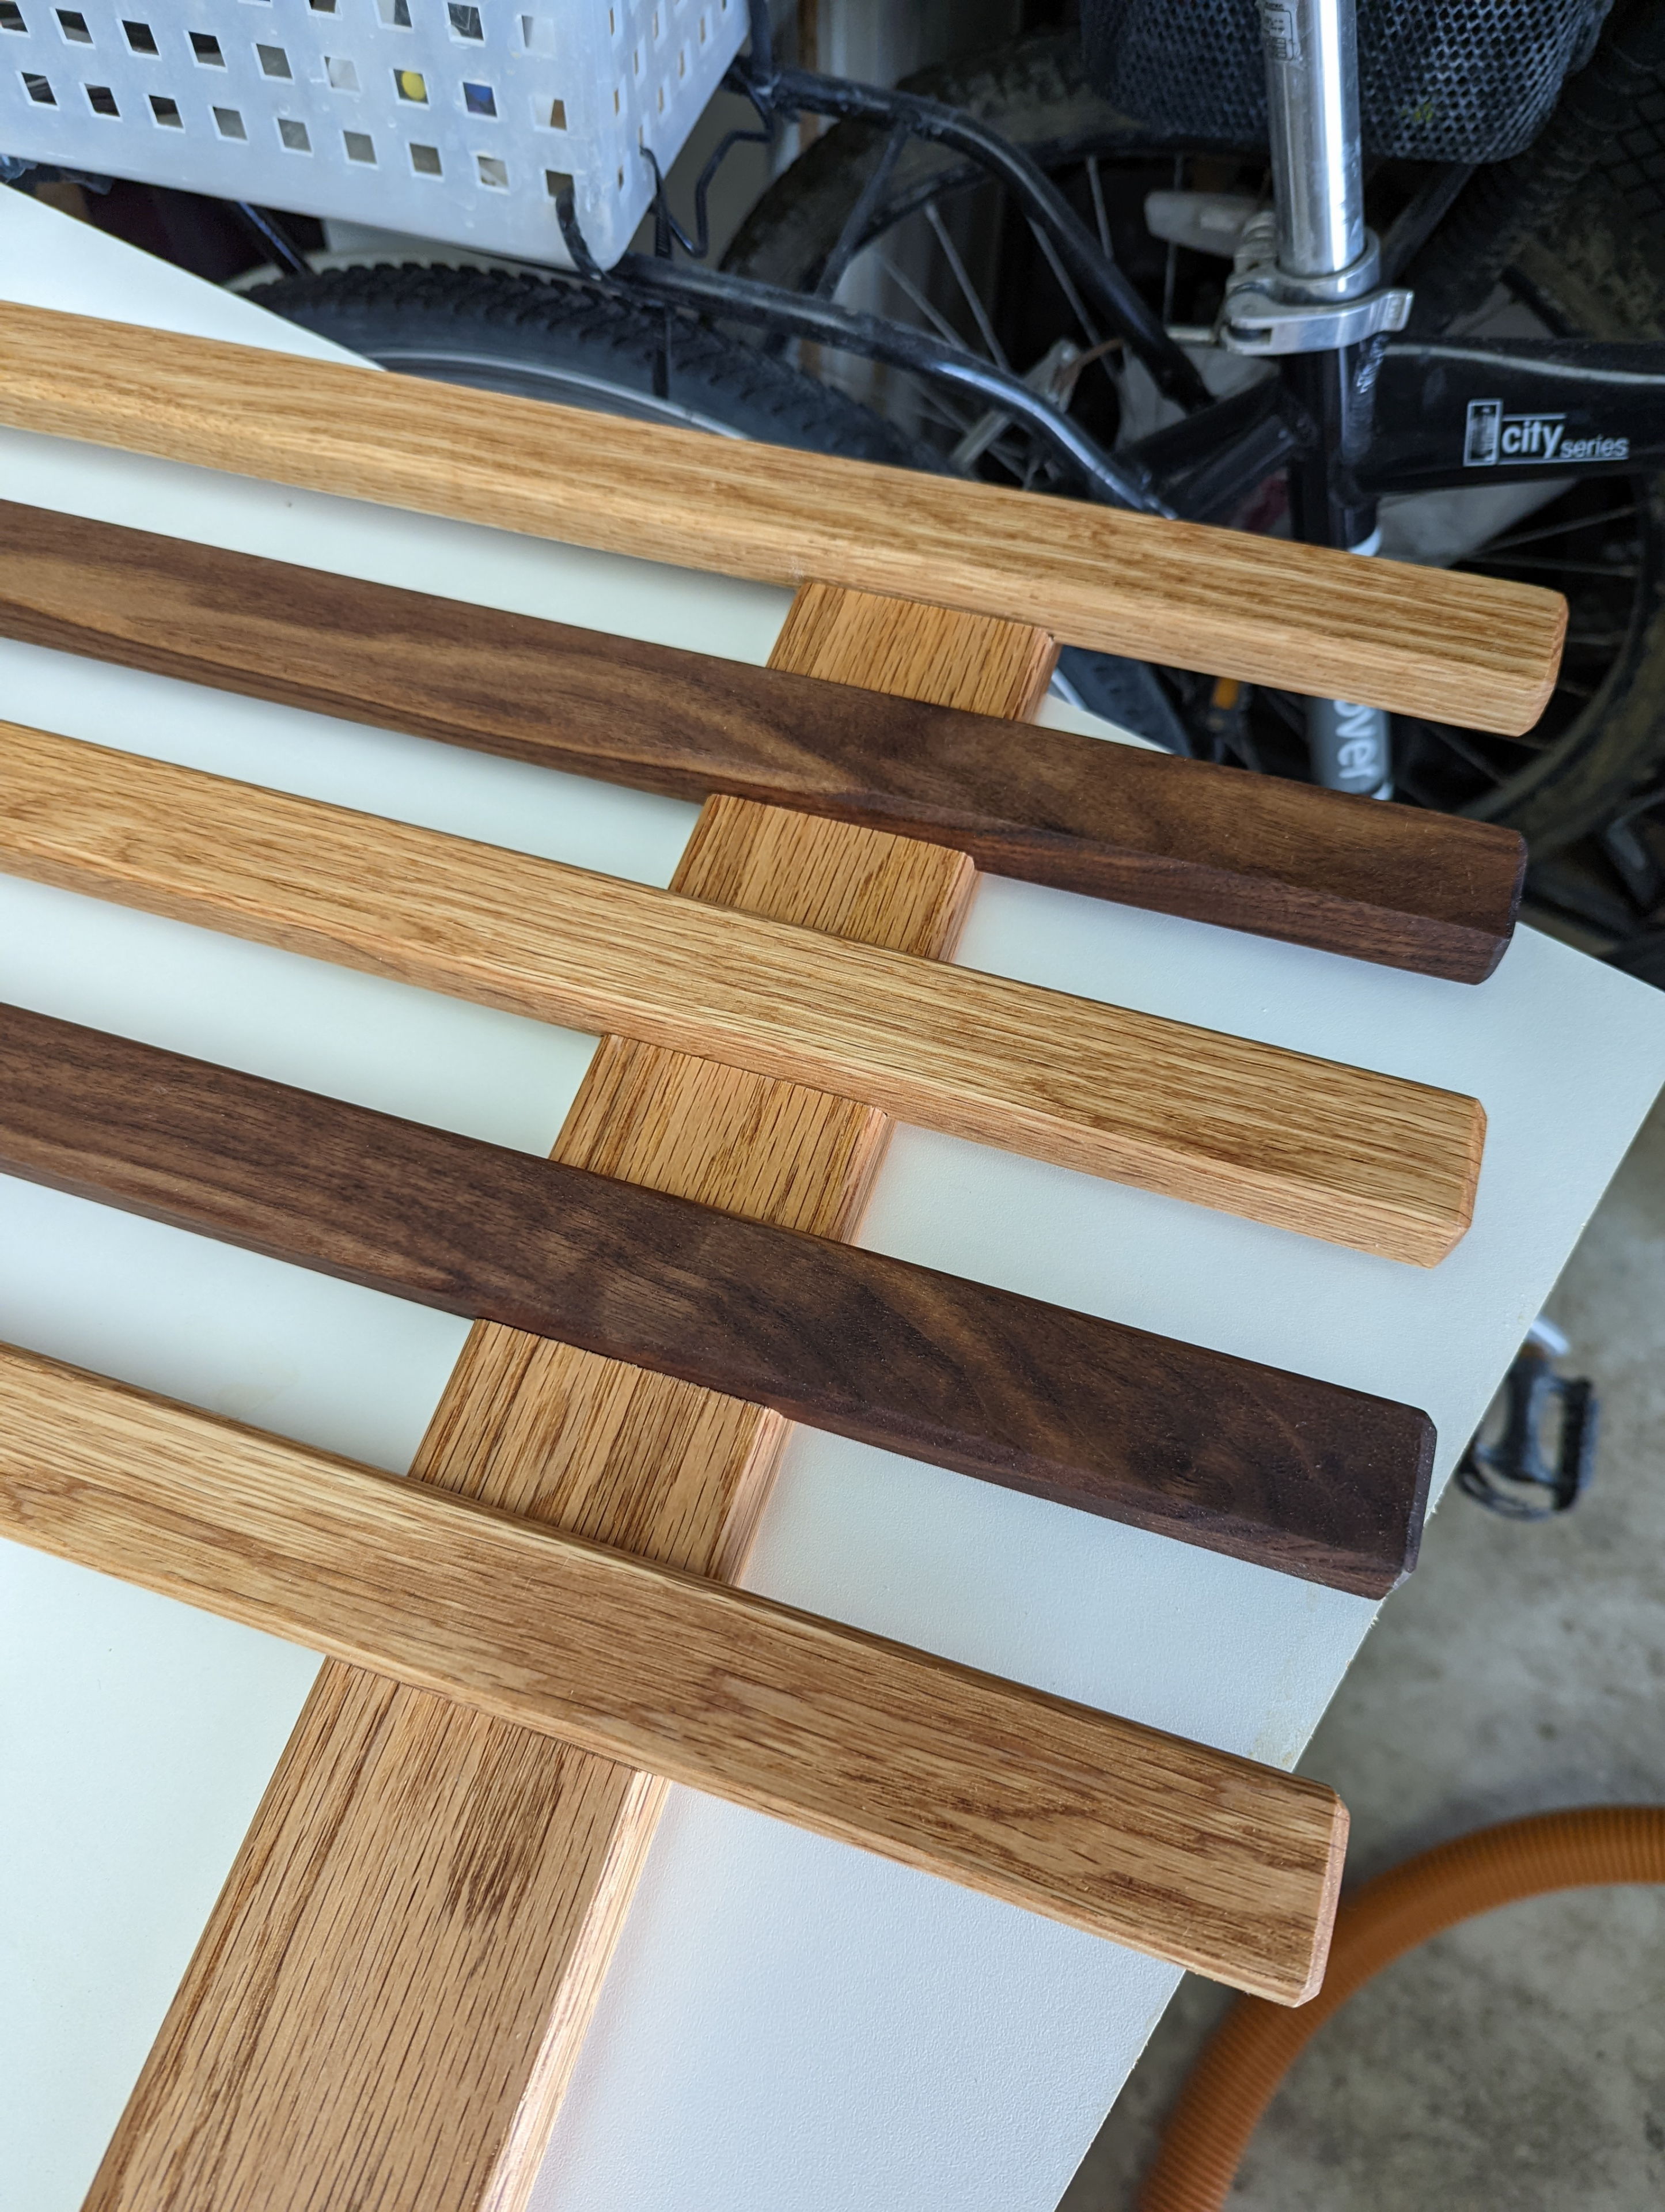
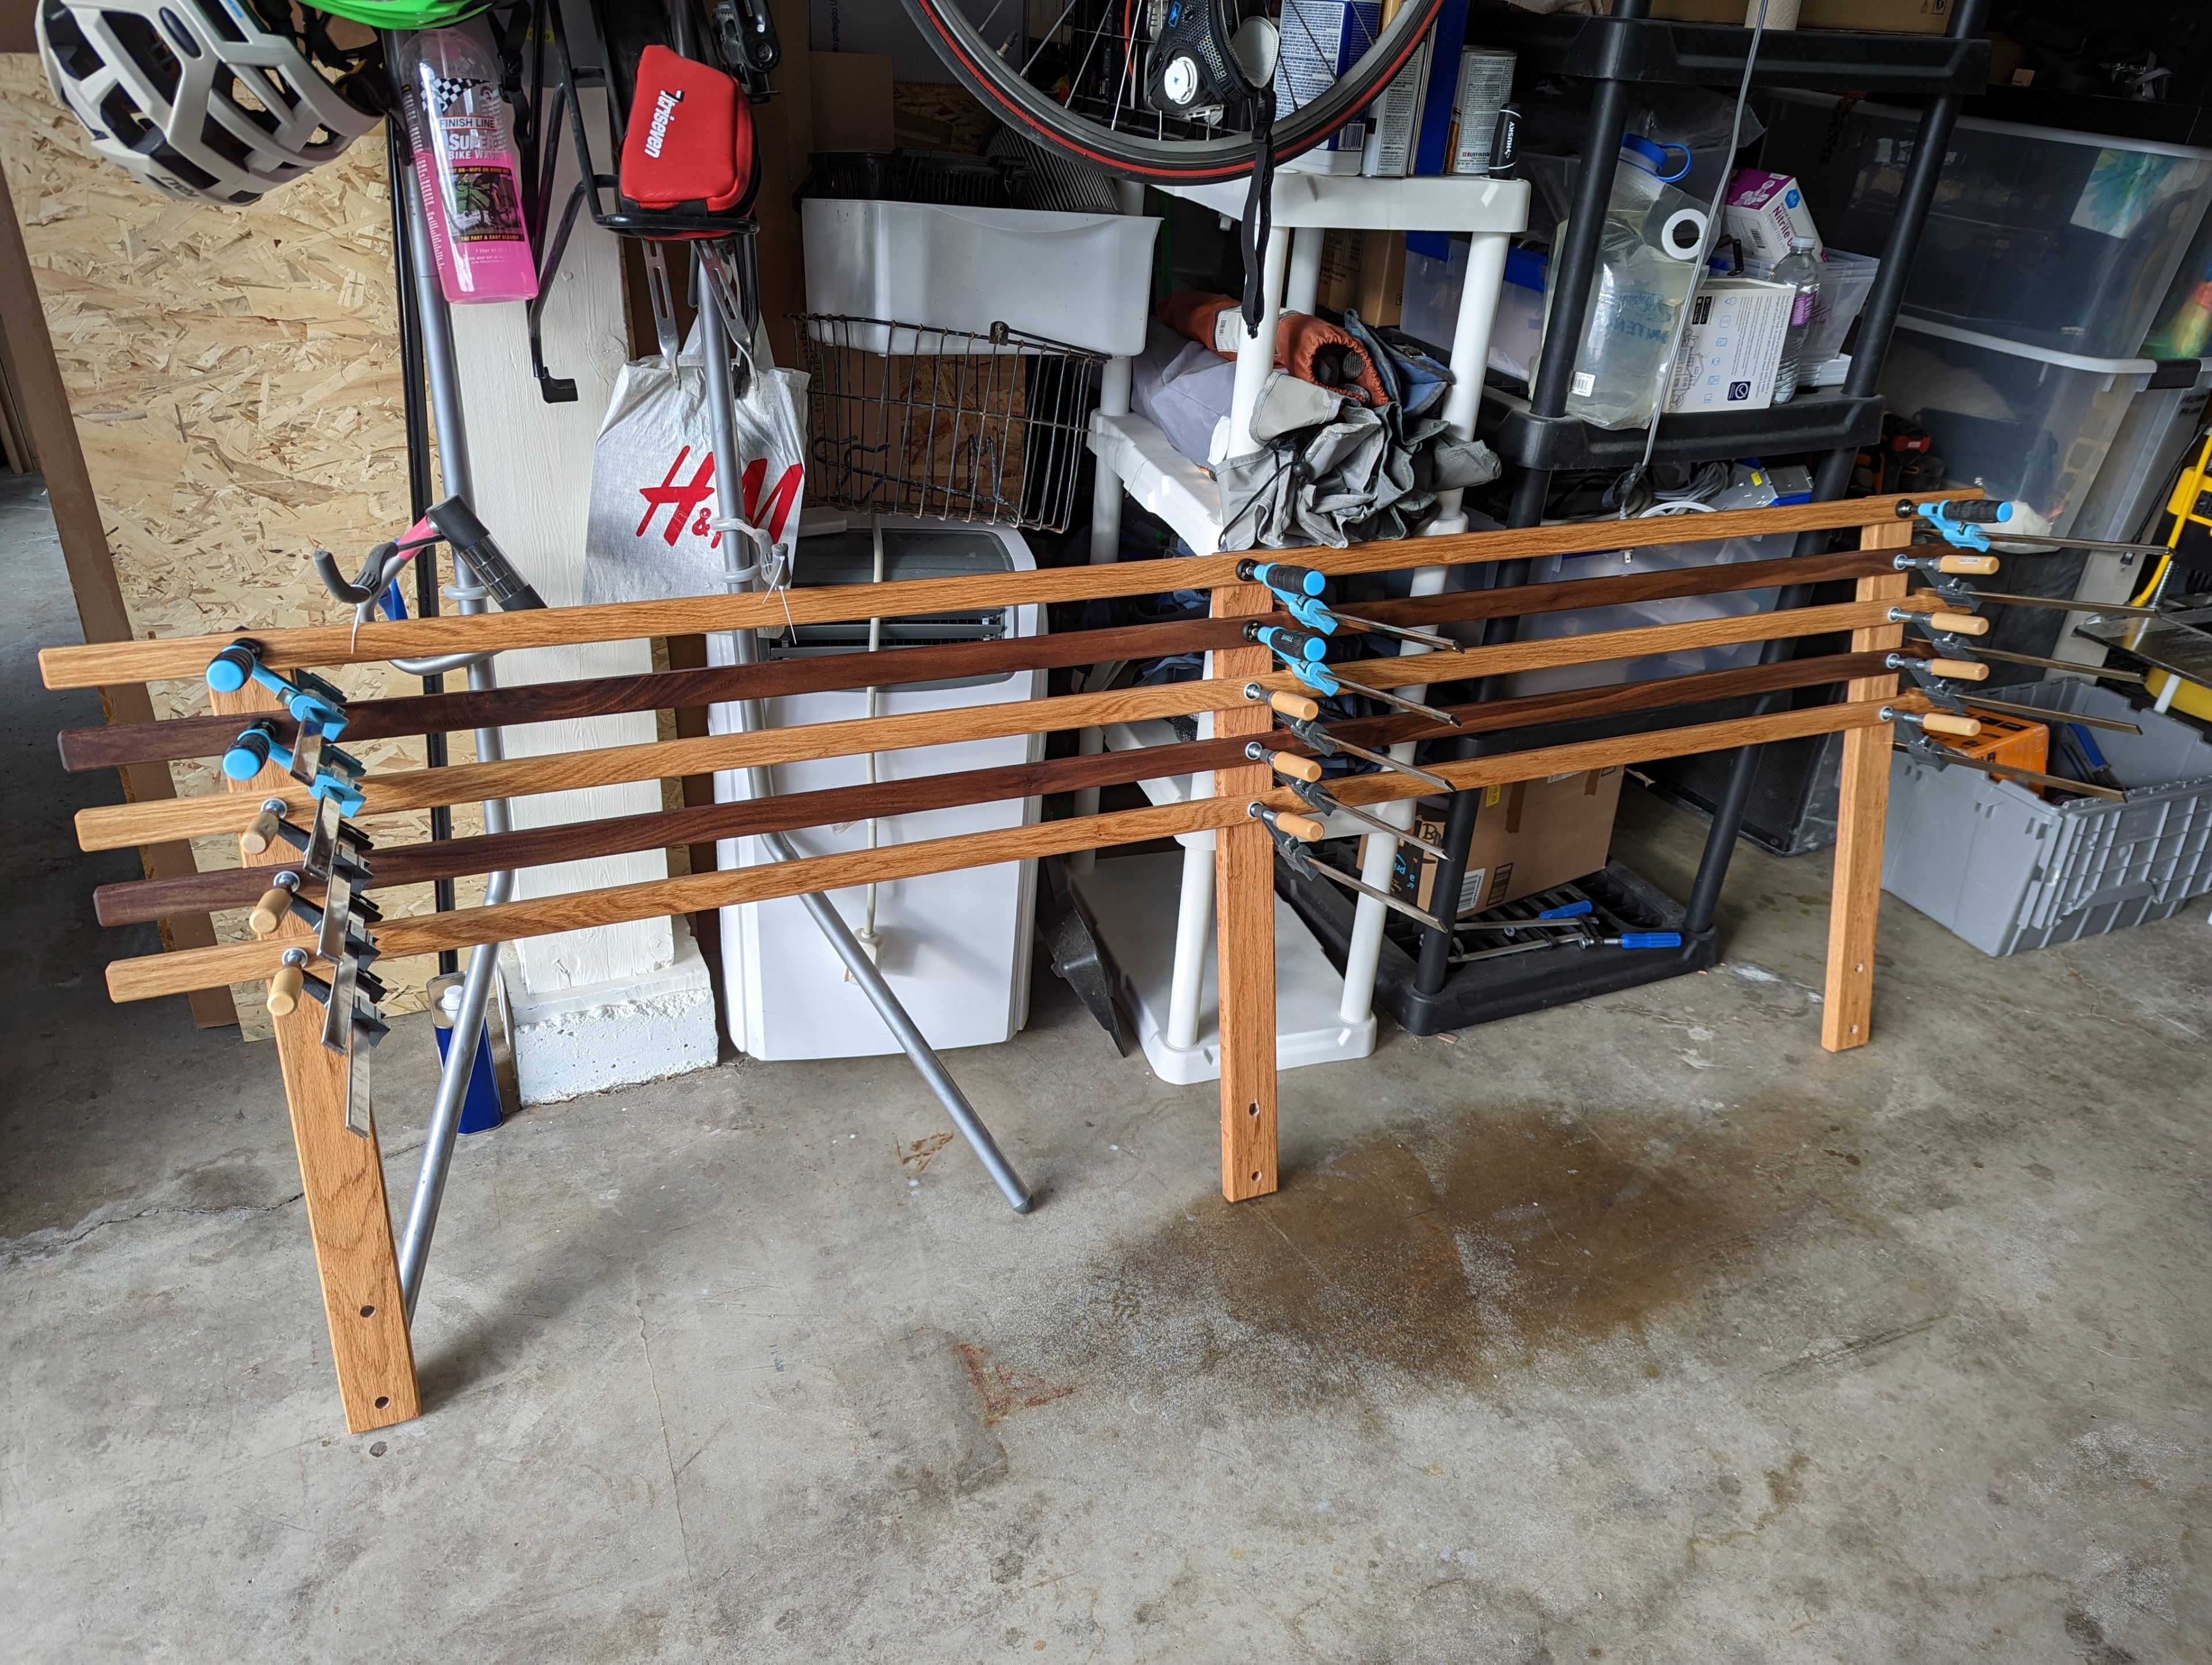
I thought I might just screw and glue five thin boards across these columns, but then got inspired to make a cross cut sled and cut some recessed slots that could let me glue these together without screws and provide a little more downward support if anyway grabbed onto them and pushed down. It took all afternoon to figure out, but it was worth it. I started by clamping each board in place on the test setup, marking with a knife where I wanted to cut, and making the cuts for each one.
My first cross cut sled

I built the headboard out of a grid of boards with interlocking recesses cut using a cross cut sled and many shallow passes on the table saw, then glued together. This ended up looking much better than my original plan to simply screw them together.
I built the headboard out of a grid of boards with interlocking recesses cut using a cross cut sled and many shallow passes on the table saw, then glued together. This ended up looking much better than my original plan to simply screw them together.
I built the headboard out of a grid of boards with interlocking recesses cut using a cross cut sled and many shallow passes on the table saw, then glued together. This ended up looking much better than my original plan to simply screw them together.
I built the headboard out of a grid of boards with interlocking recesses cut using a cross cut sled and many shallow passes on the table saw, then glued together. This ended up looking much better than my original plan to simply screw them together.
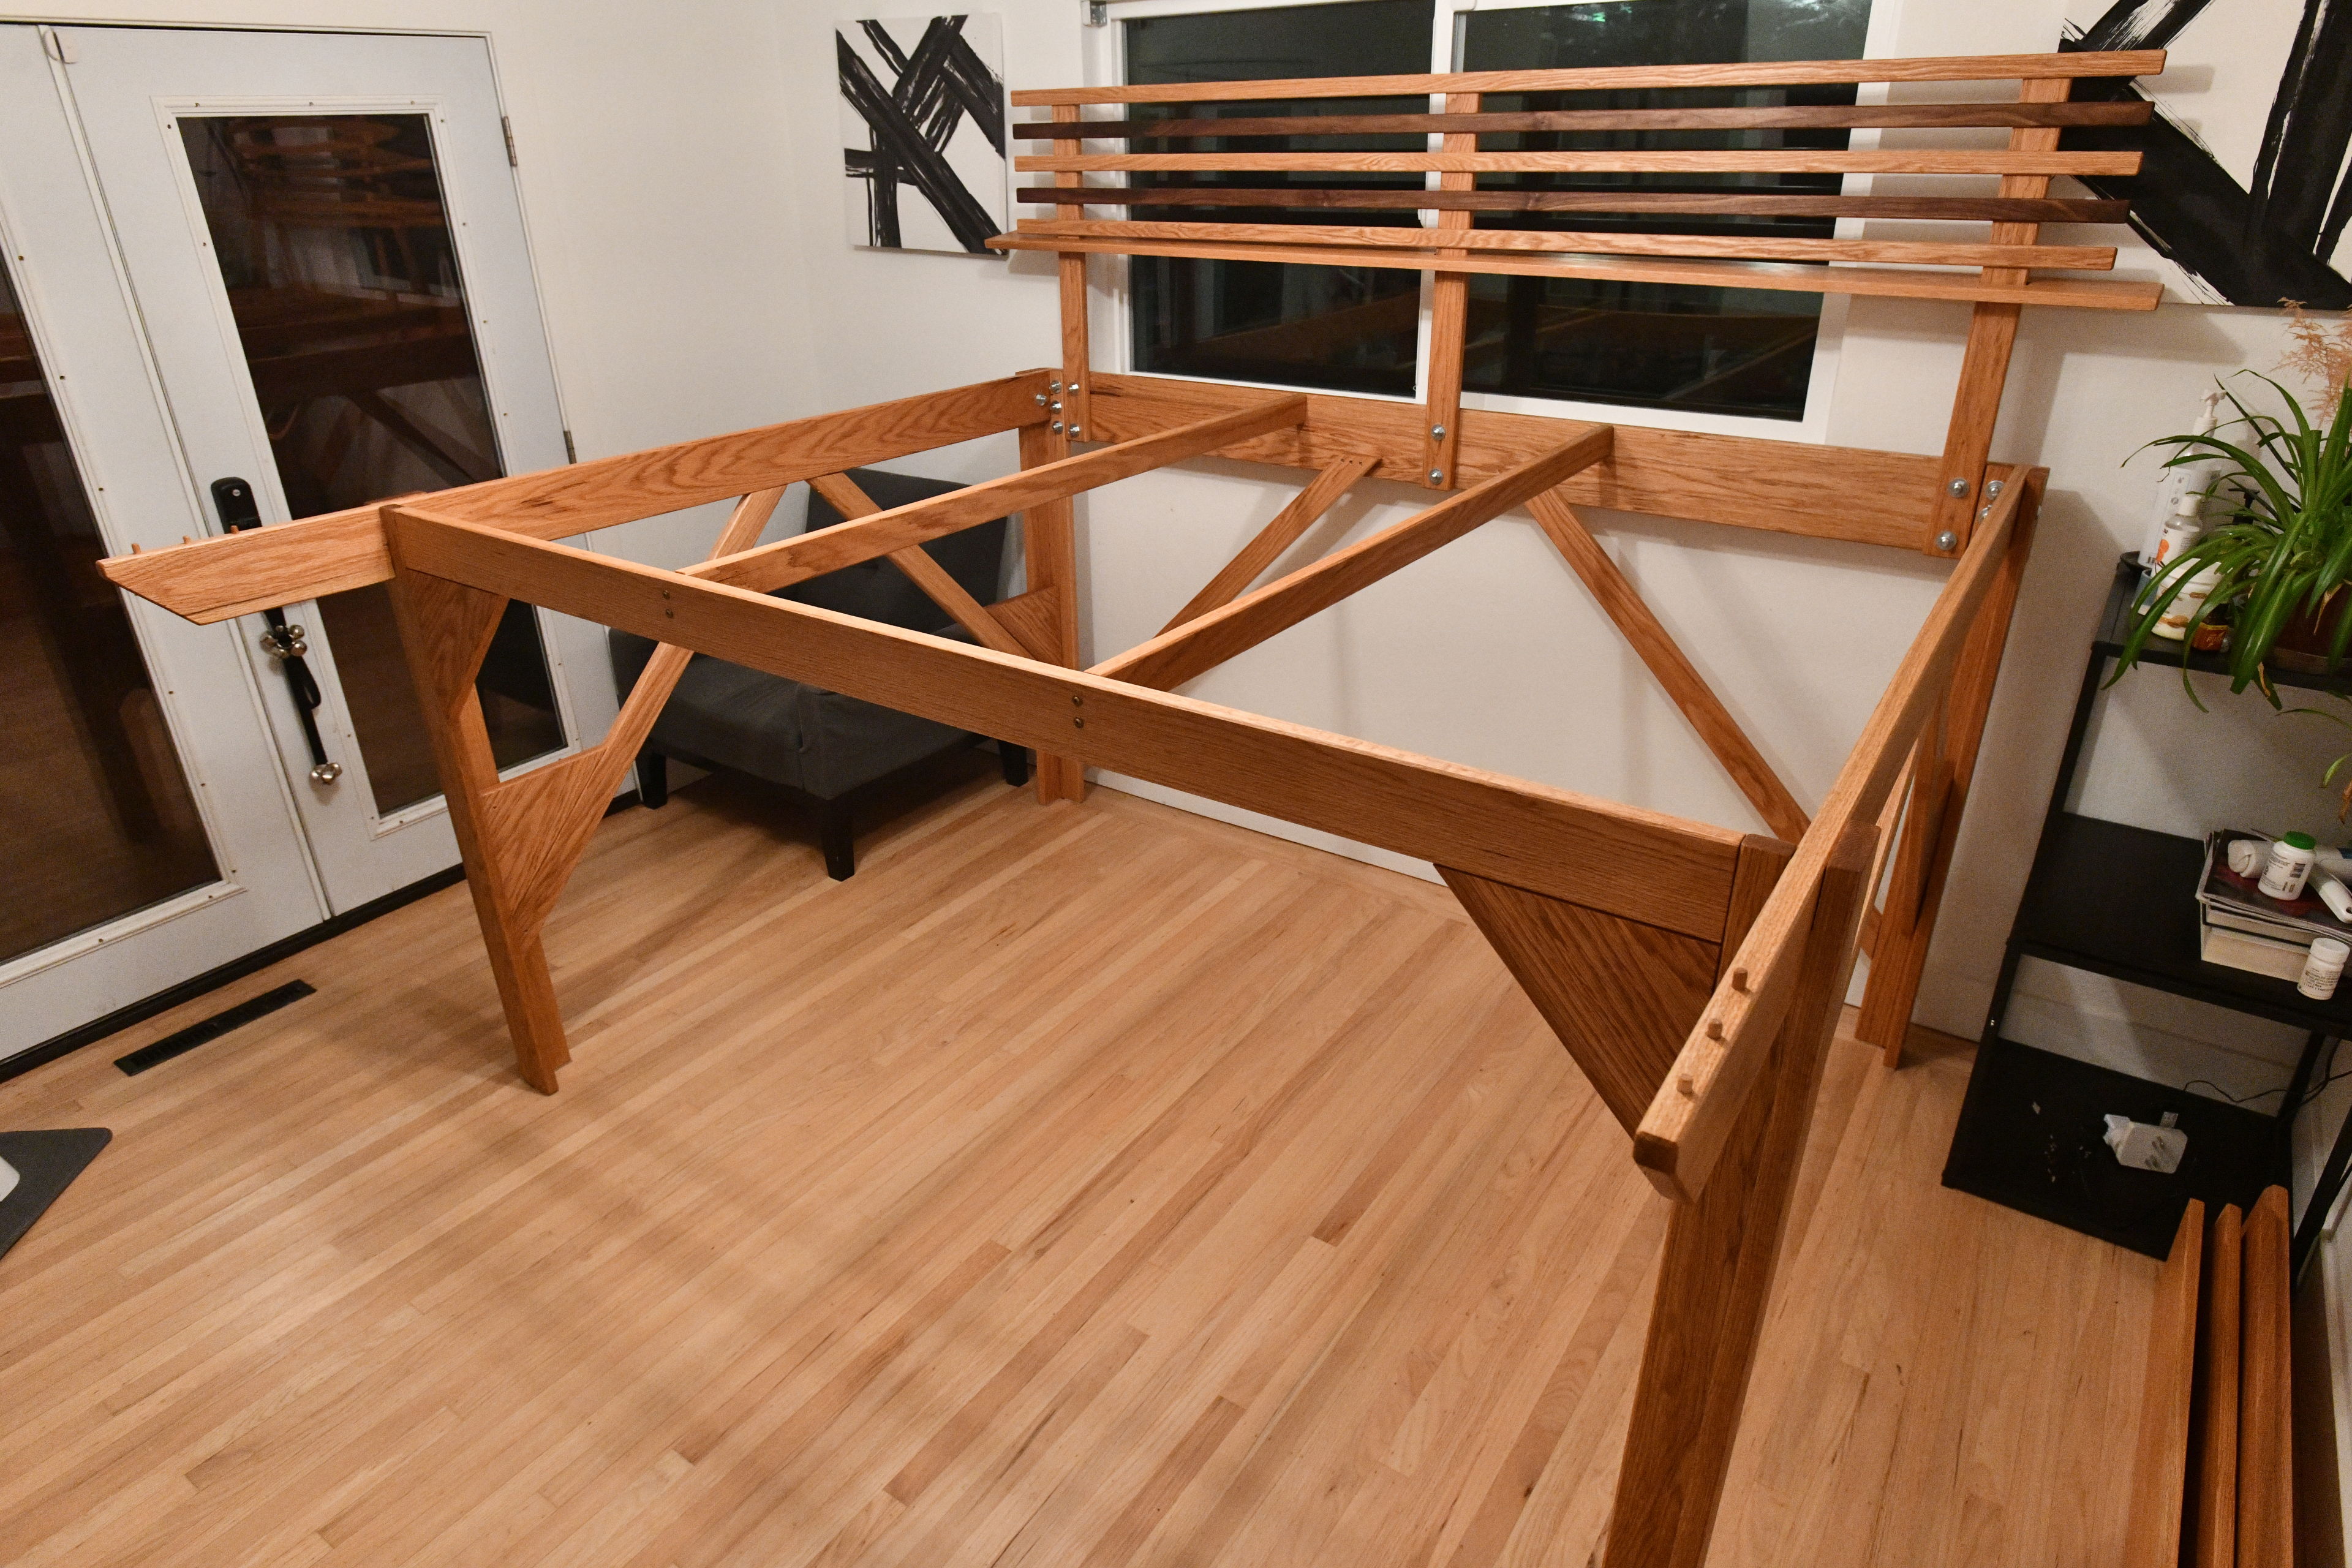
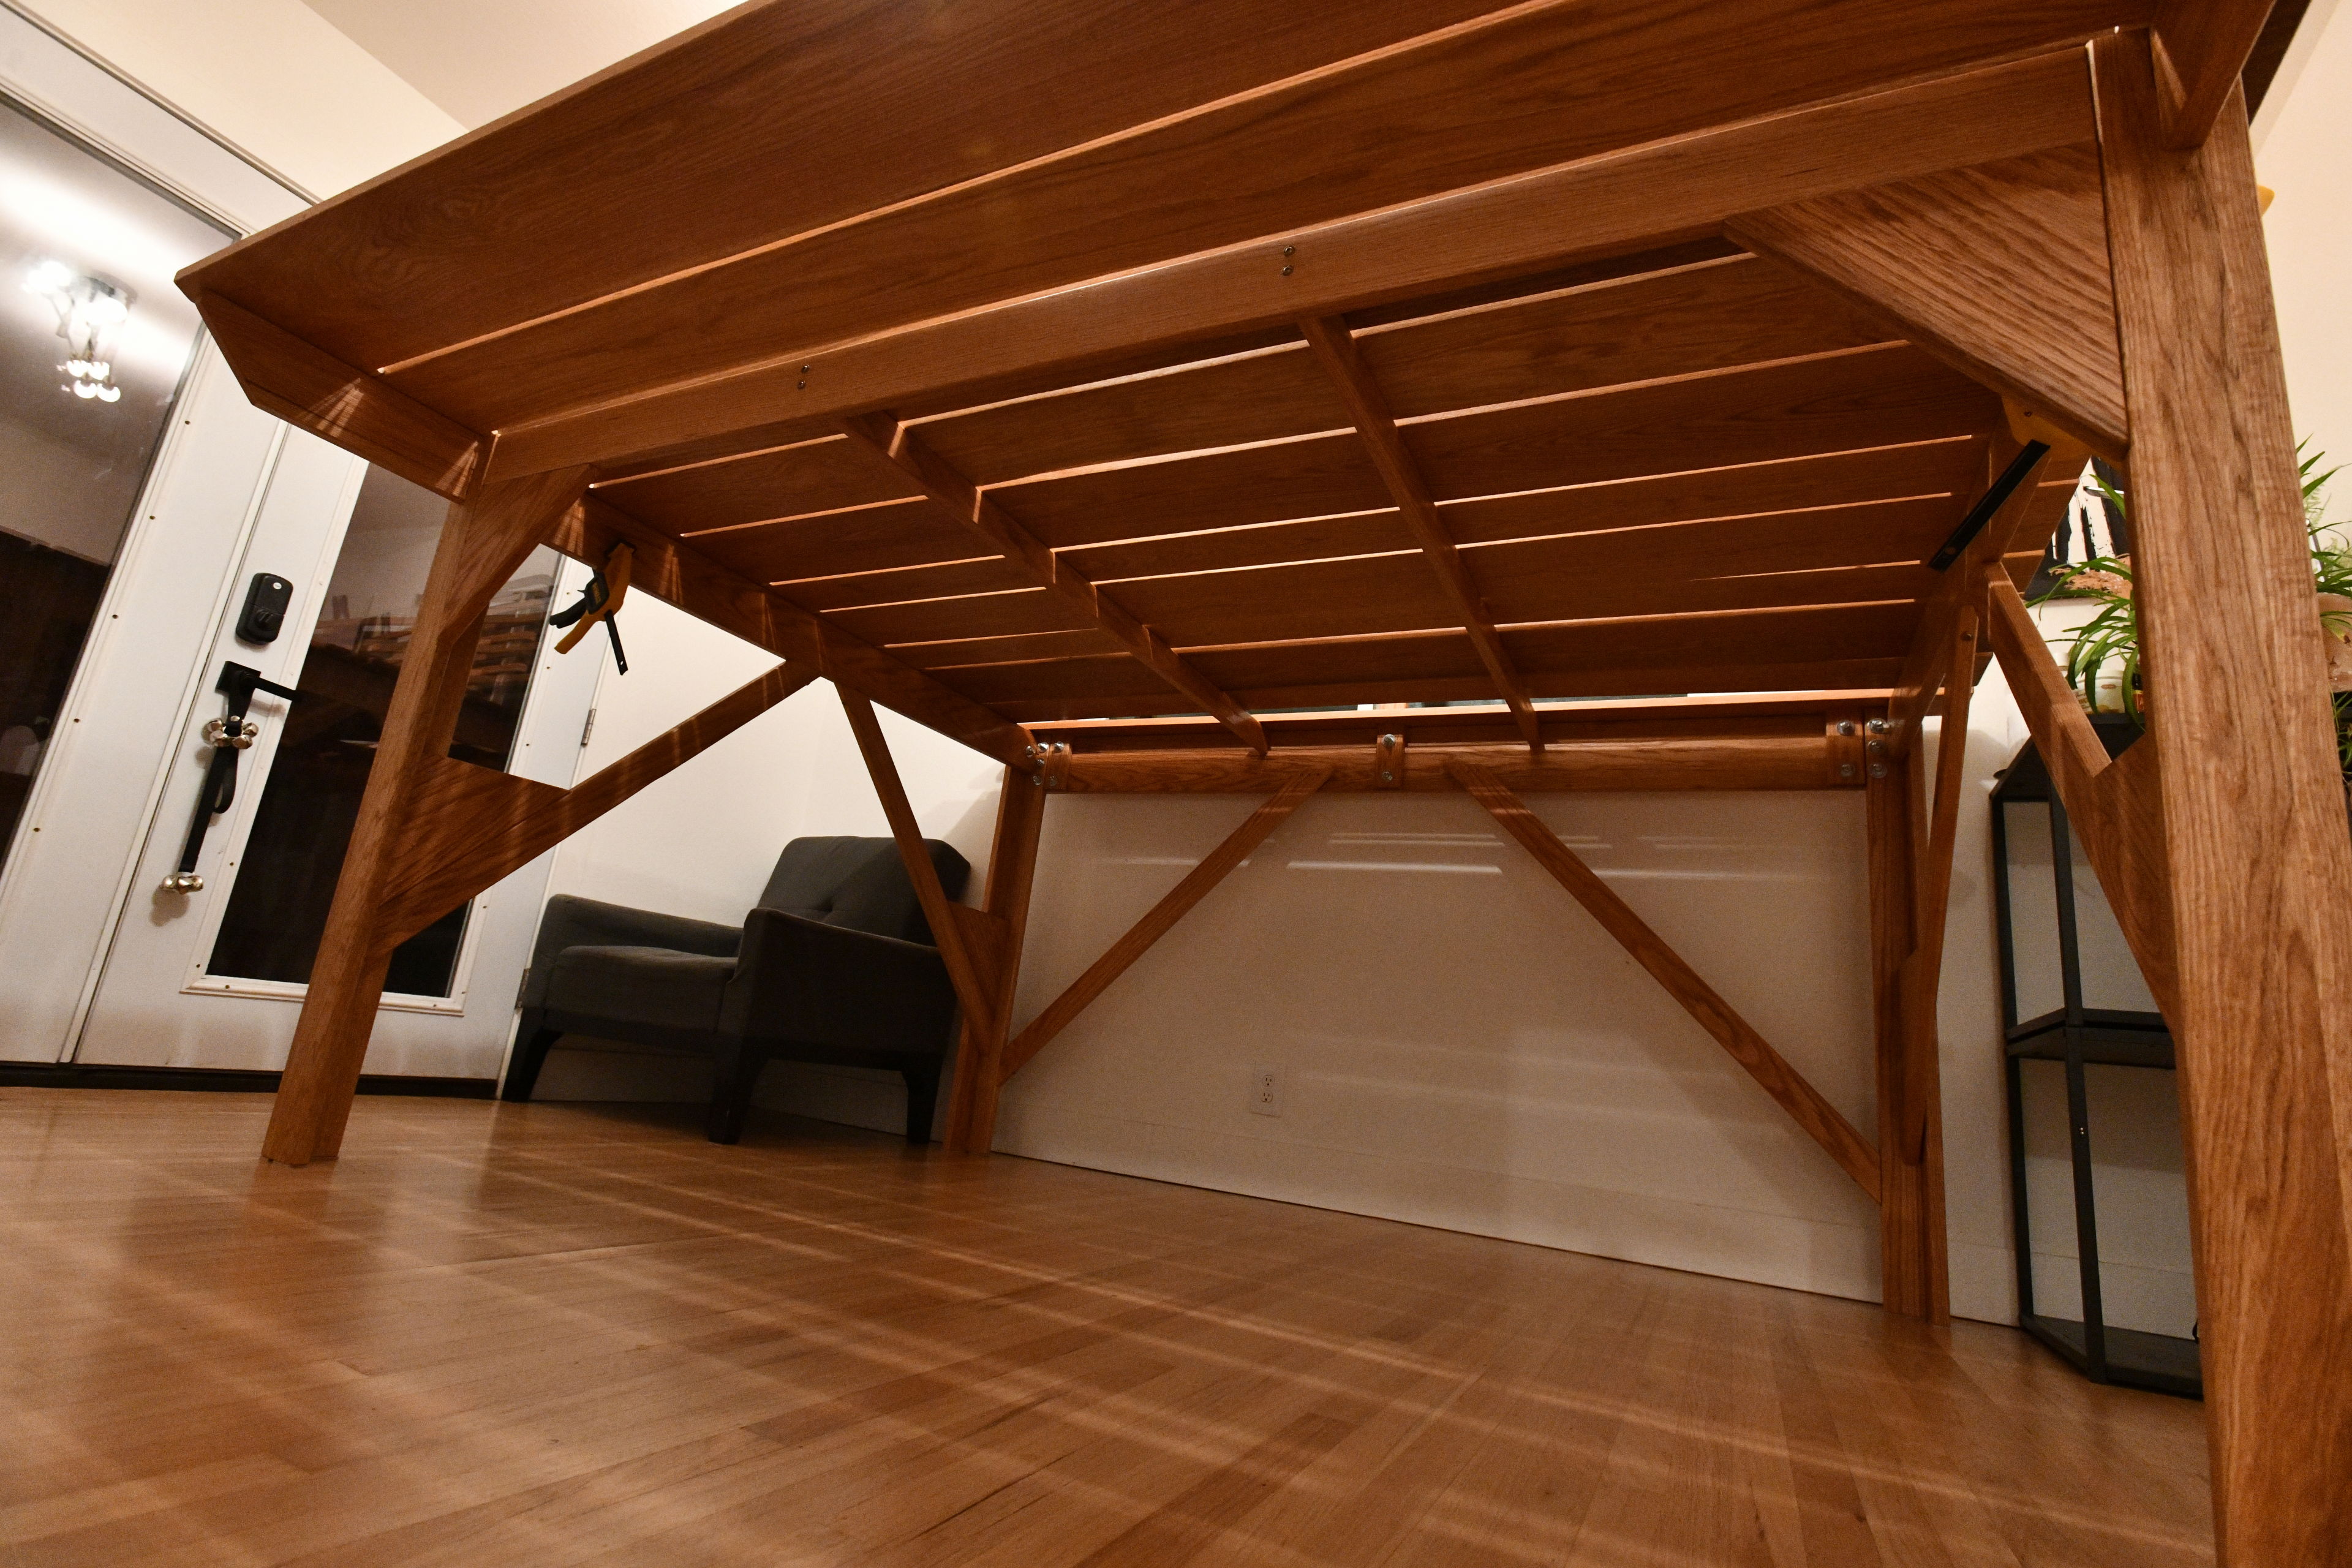
Final assembly
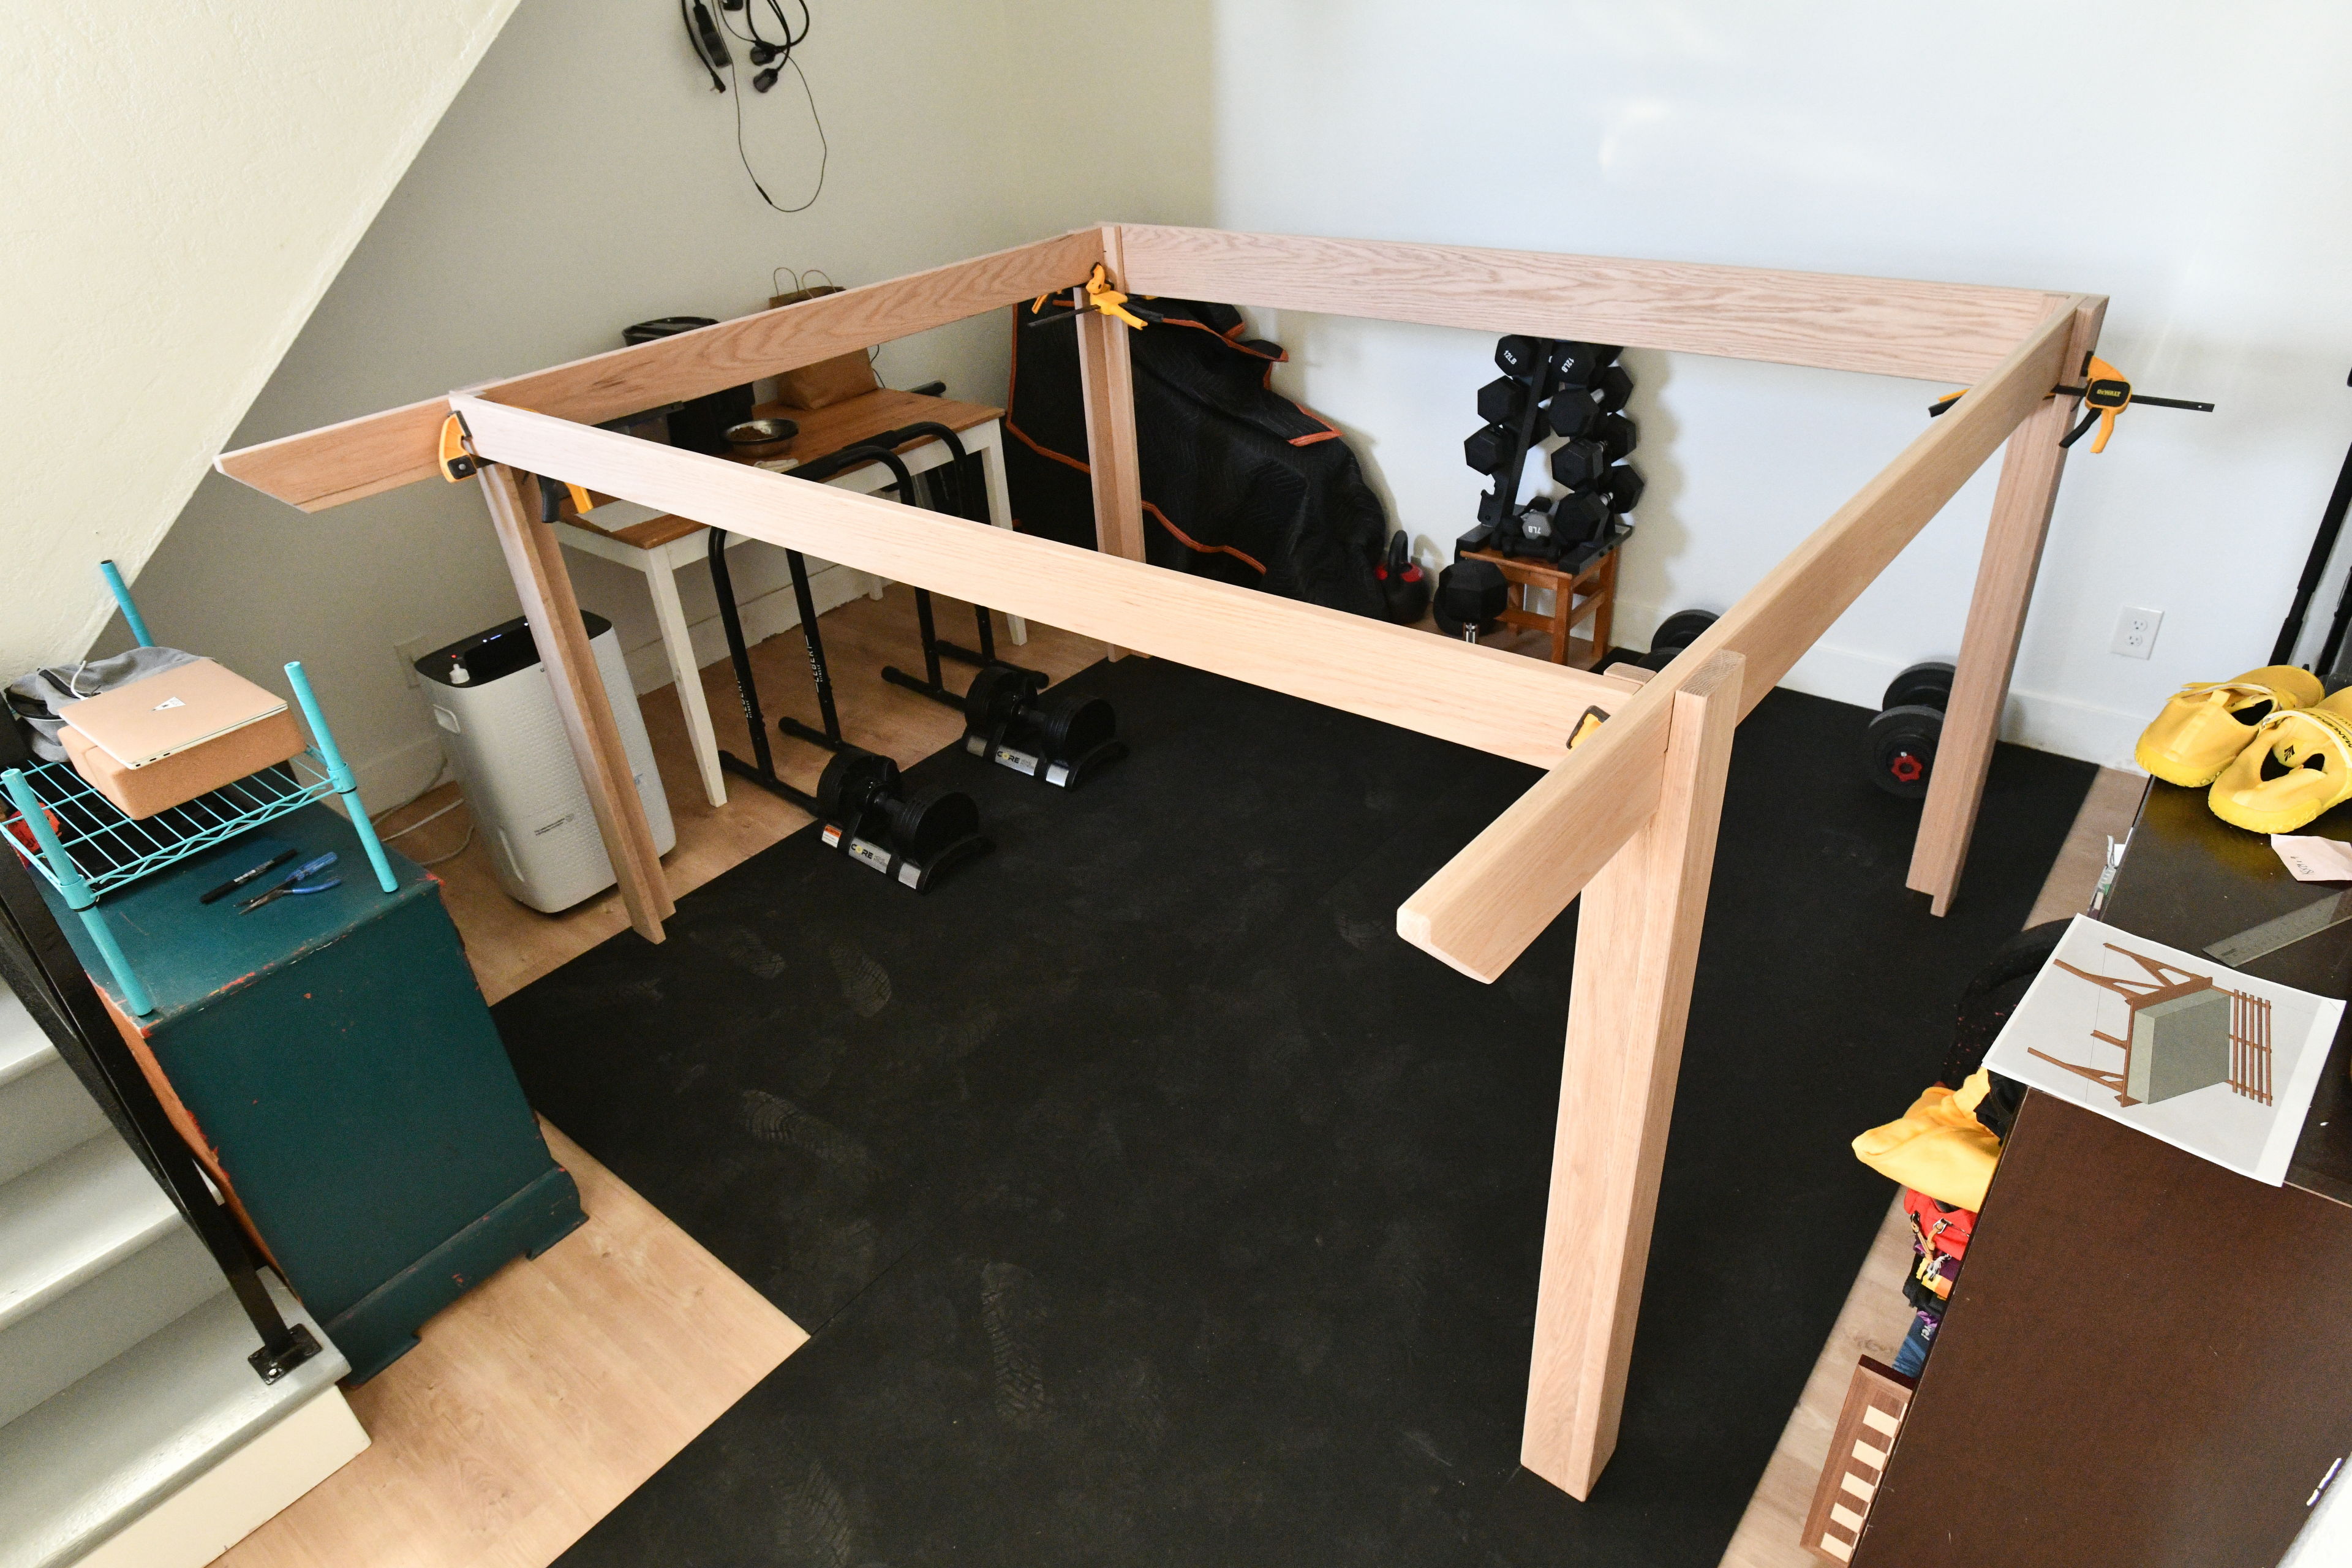
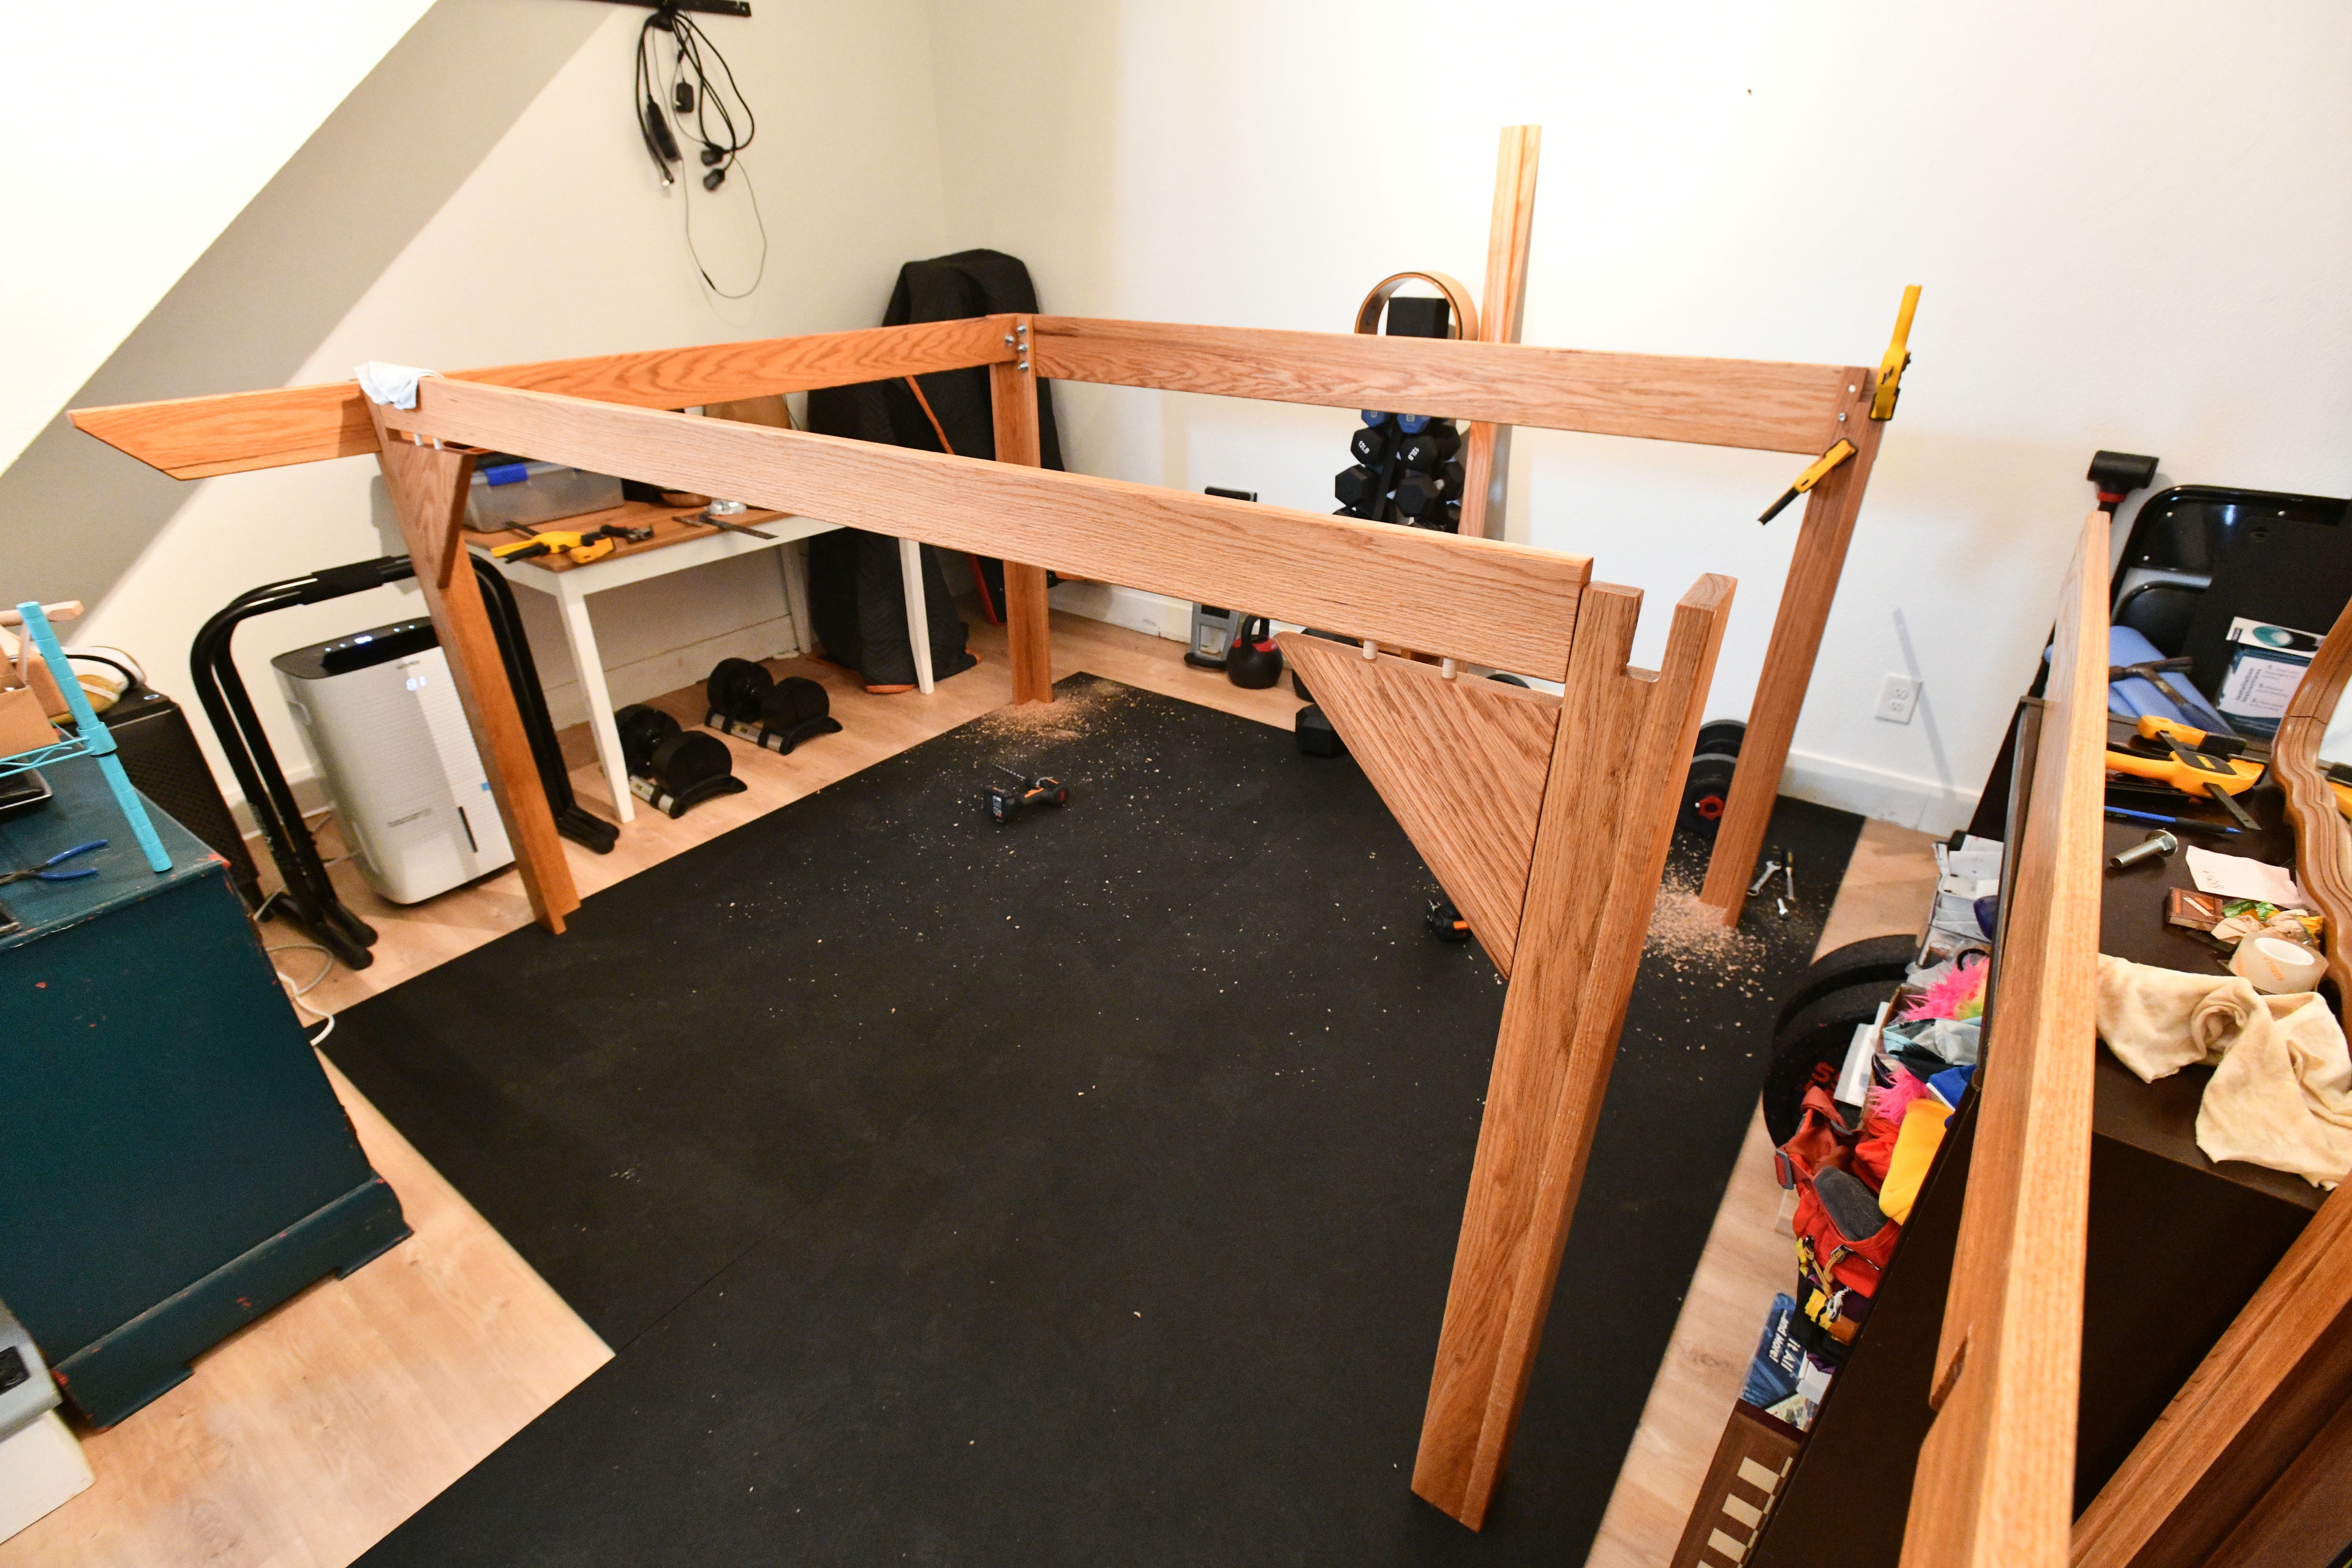
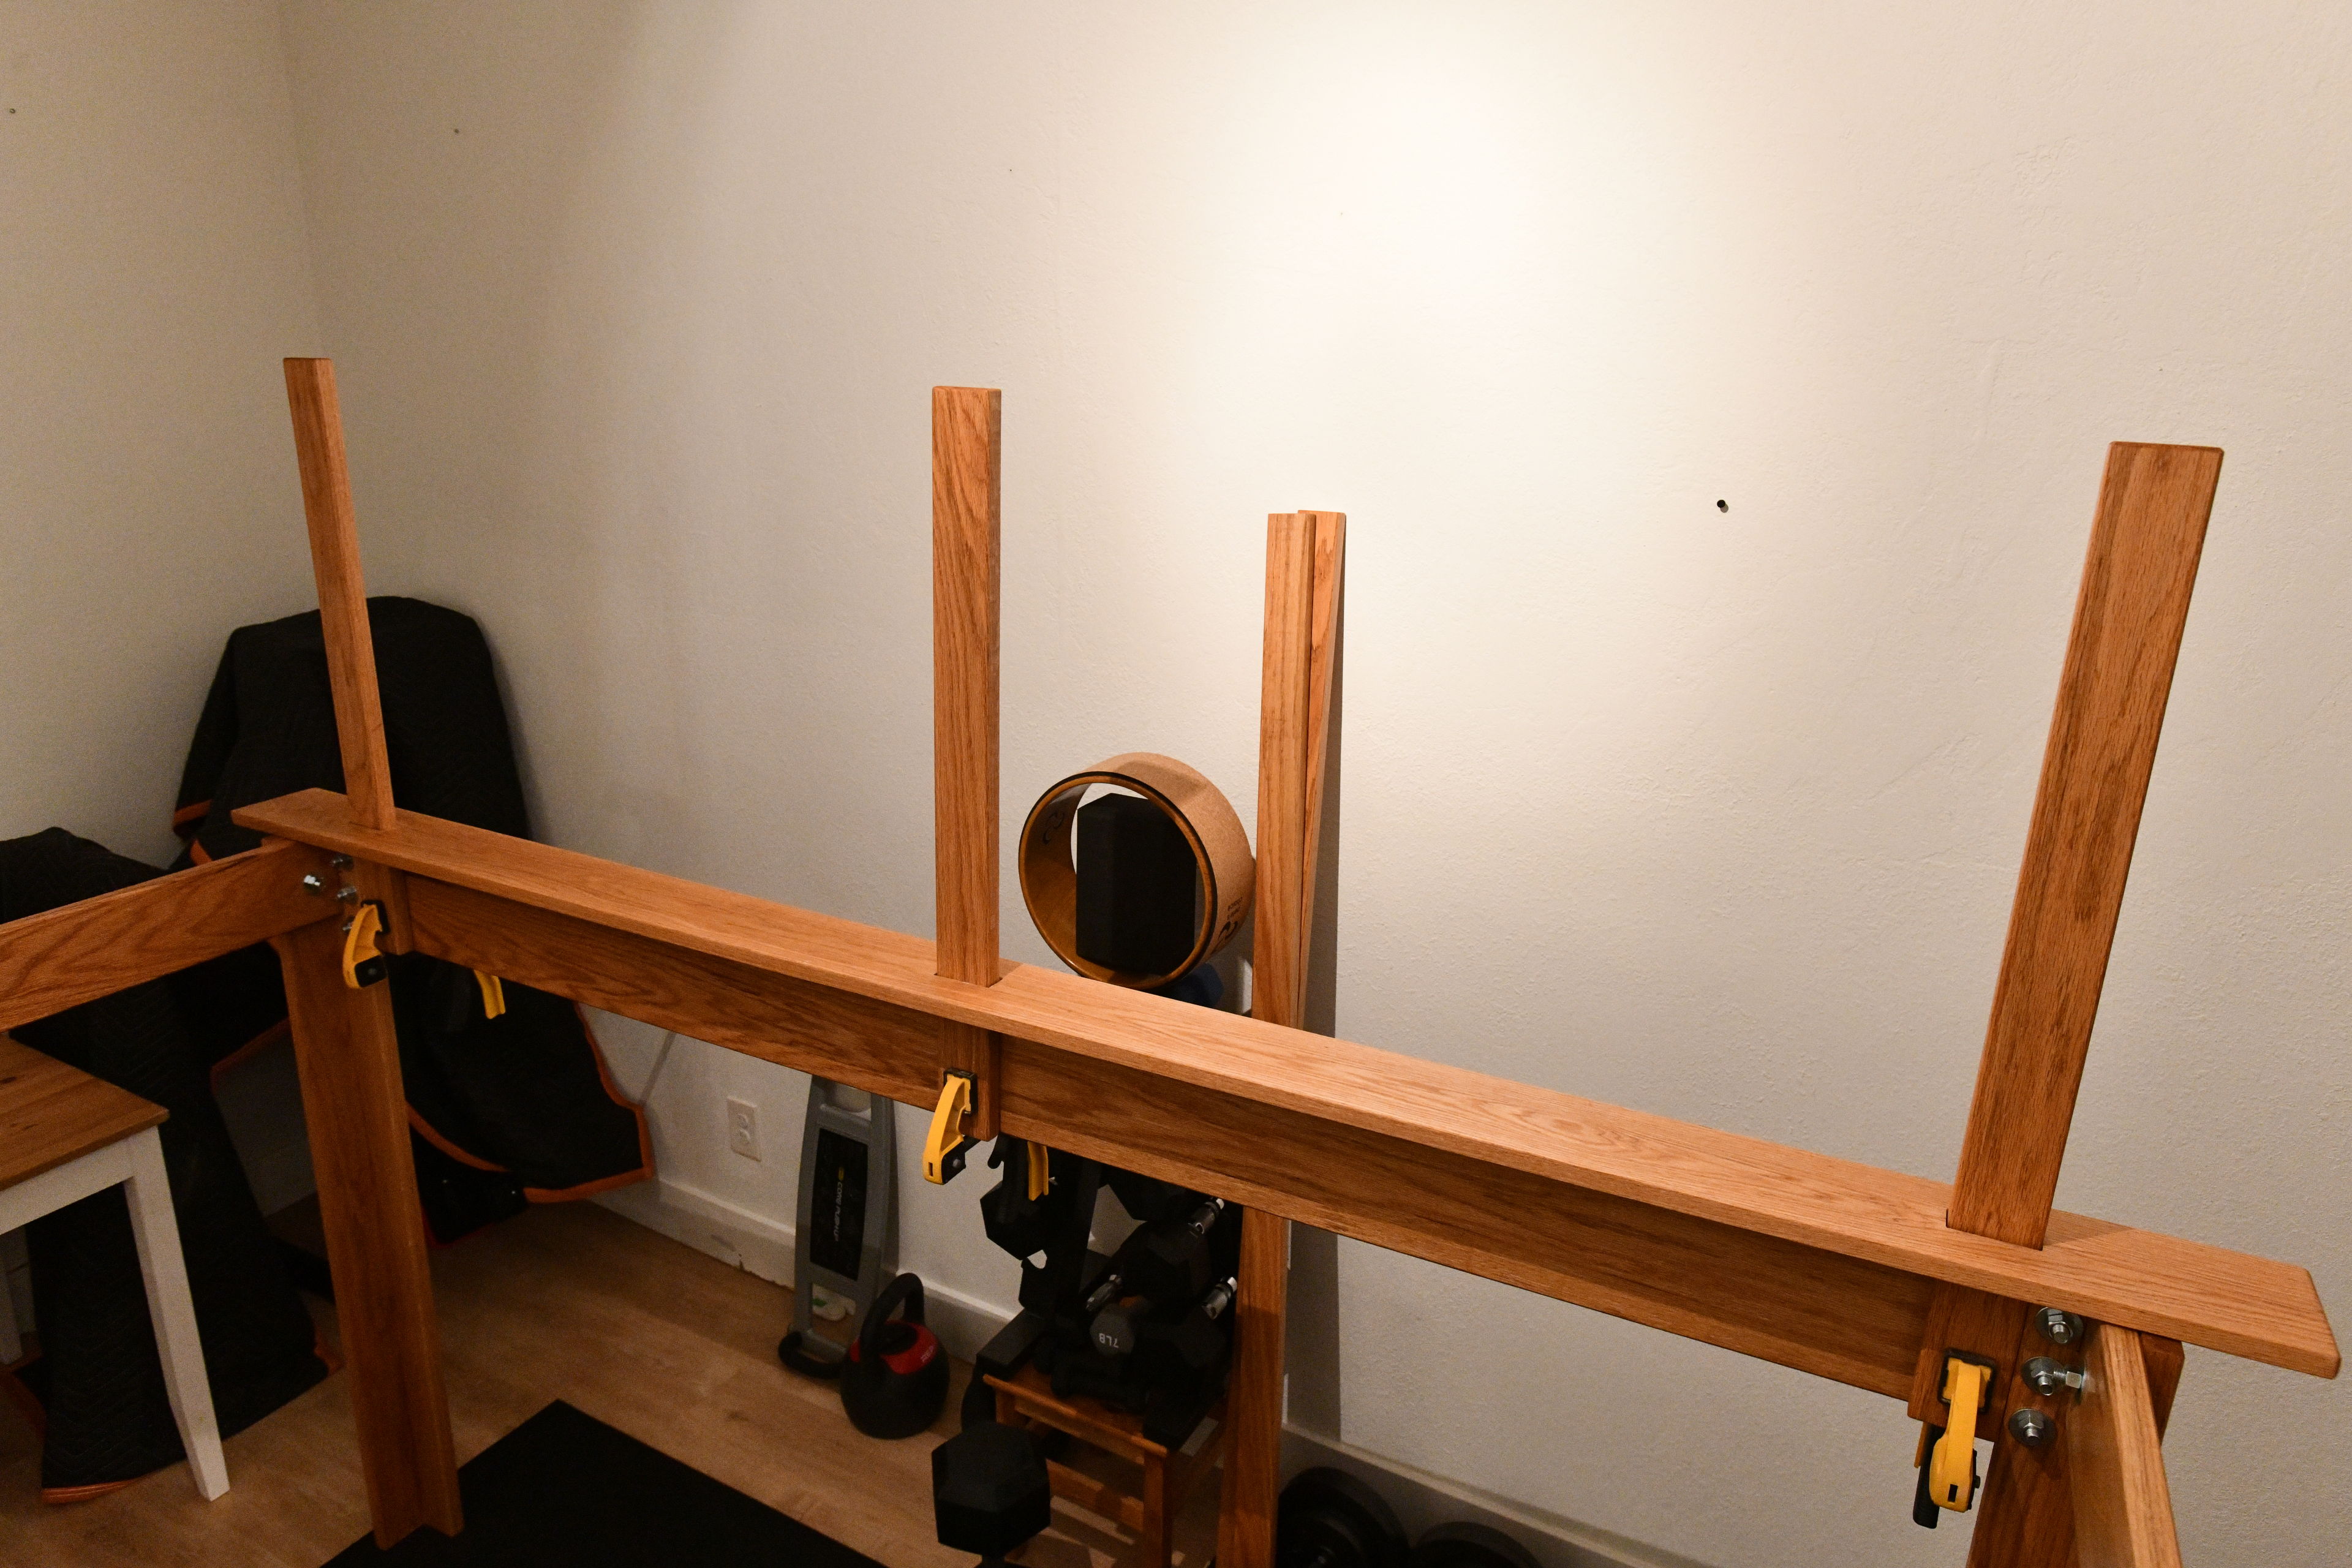
It took three weeks from the point of buying the wood, but I finally reached the point I could bring all the pieces upstairs and put it together! I started by fixing felt pads to the legs. Then I had a few things to work out still with how I wanted to attach the various braces. I added some more dowels for the parts I wanted to be able to use as a ladder rung, and for other parts I used GRK structural screws. I only had one small mishap with cracking one of my support beams, but it was a minor issue and not noticeable from outside. I also had a few minor issues with the triangular supports being out of square, but it was inconsequential. I was very pleased with the strength and rigidity of the whole thing.
I used more dowels to provide support for the cross supports that I suspected I might be stepping on like a ladder, and wanted to make sure they couldn't move inward away from the outer part of the leg.
This is the final assembly before adding the headboard columns.
I ended up using some heavy duty GRK screws in a few places that I originally was going to glue and dowel but ran out of patience.
I ended up using some heavy duty GRK screws in a few places that I originally was going to glue and dowel but ran out of patience.
I ended up using some heavy duty GRK screws in a few places that I originally was going to glue and dowel but ran out of patience.
Final assembly

Final assembly
Final assembly
Final assembly
I ended up using some heavy duty GRK screws in a few places that I originally was going to glue and dowel but ran out of patience.
I ended up using some heavy duty GRK screws in a few places that I originally was going to glue and dowel but ran out of patience.
I didn’t attach most of the slats aside from the first and last one. I want to see how easily they shift once the mattress is placed on top. I will likely add dowels to hold them in place once I confirm I want to keep them as long as they are. Currently they are pretty long and block the step up I imagined I would use. I’ll probably build a staircase shelf on one side at least.

And it's basically complete! The slats are still not secured aside from the one on the end, but I'm still thinking about how I want to do that.
And it's basically complete! The slats are still not secured aside from the one on the end, but I'm still thinking about how I want to do that.
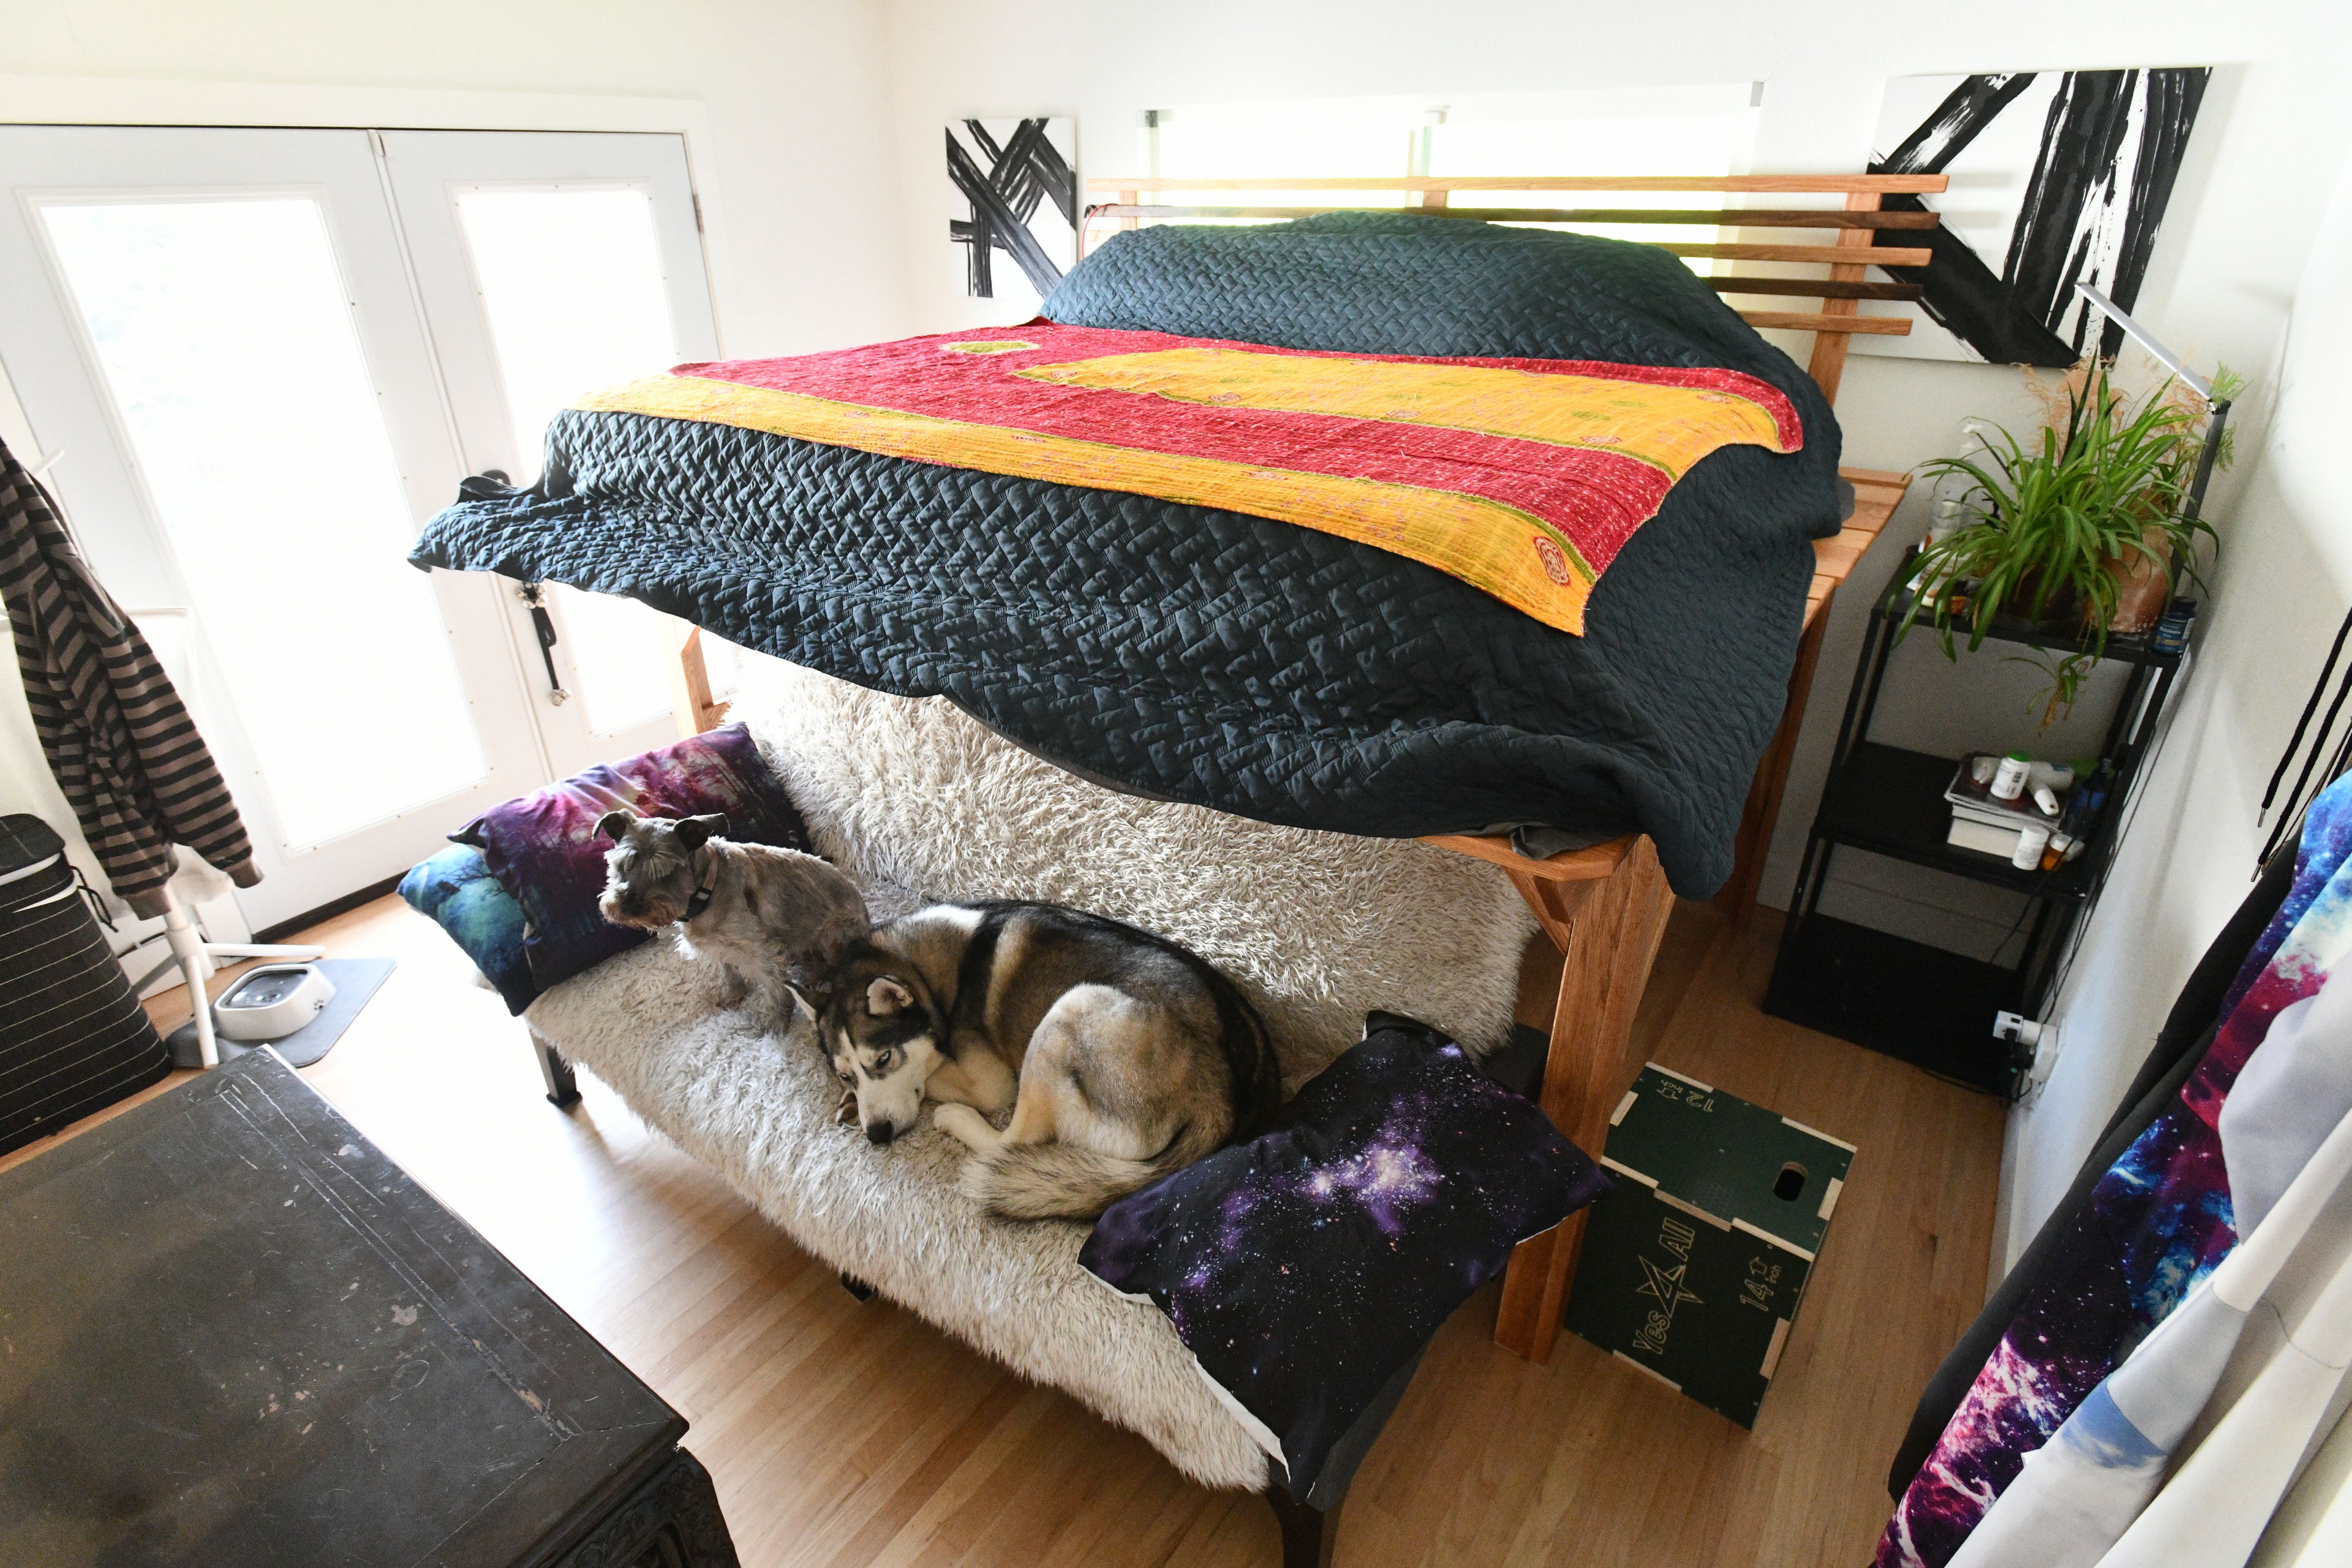
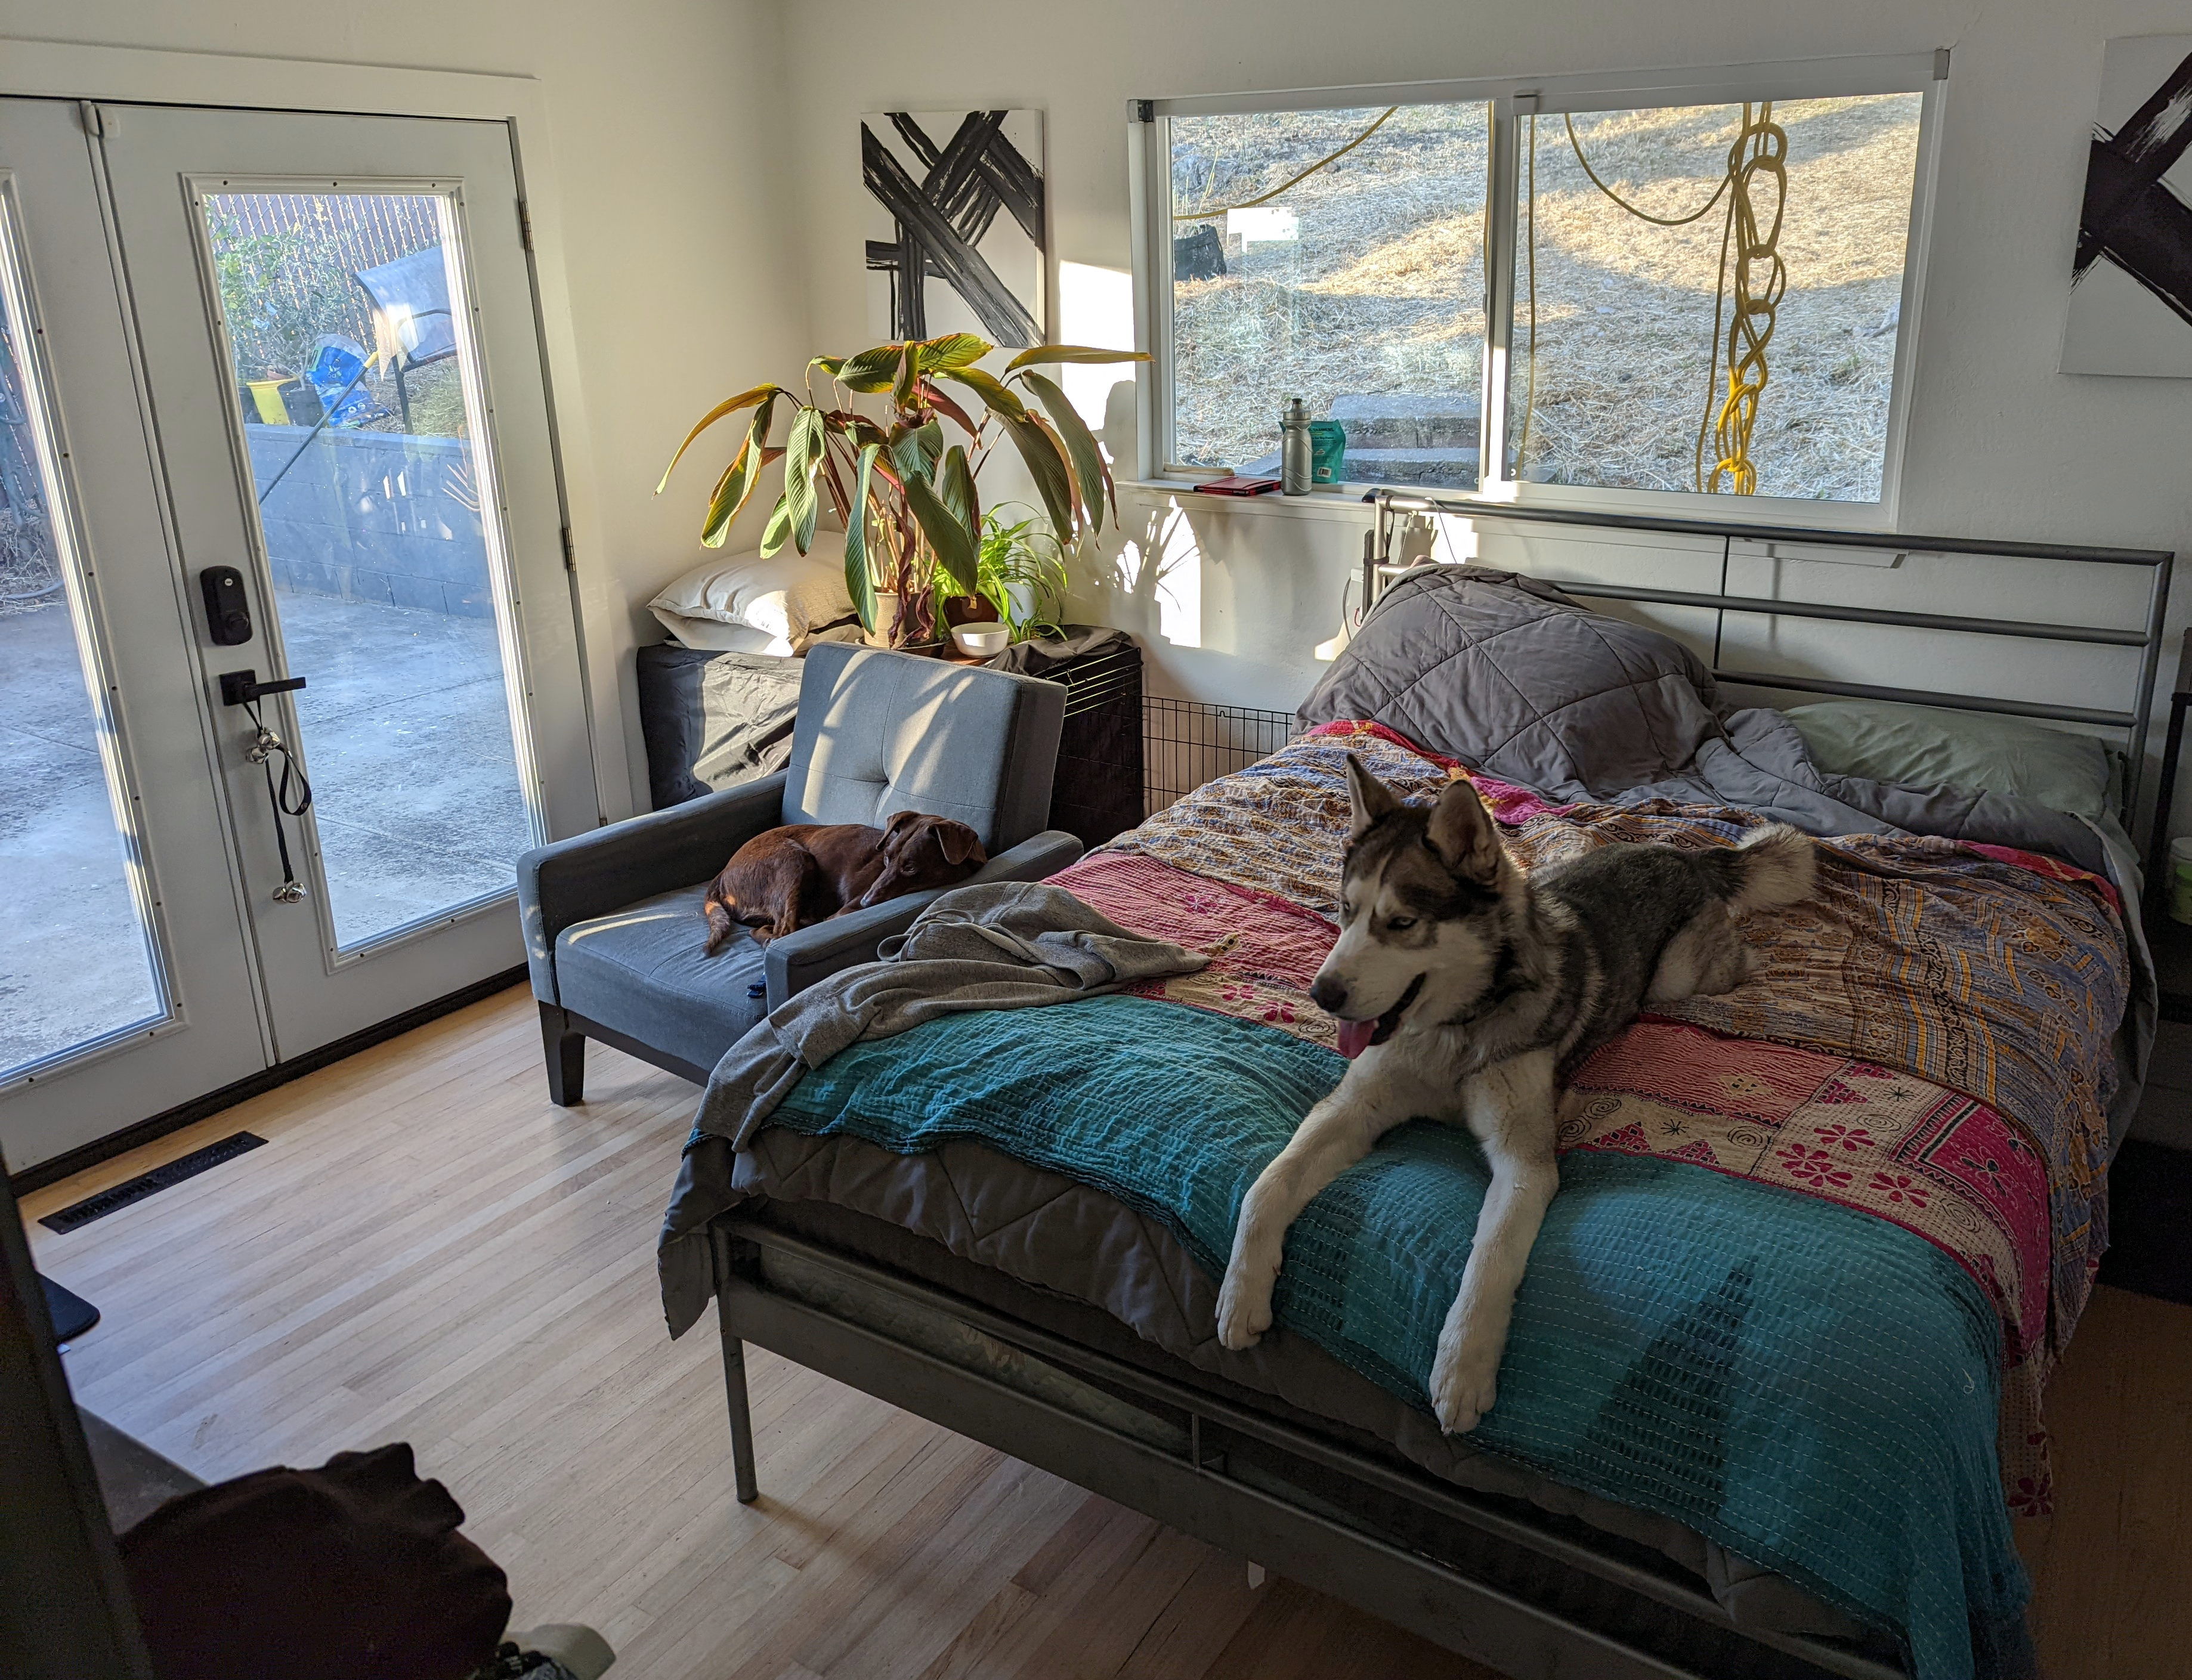
It was a bit of a struggle to carry the 135 pound mattress up from the garage by myself and get it hoisted onto the frame, but I got it figured out in the end. I also moved the couch from my office into the bedroom, which the dogs seemed to like.
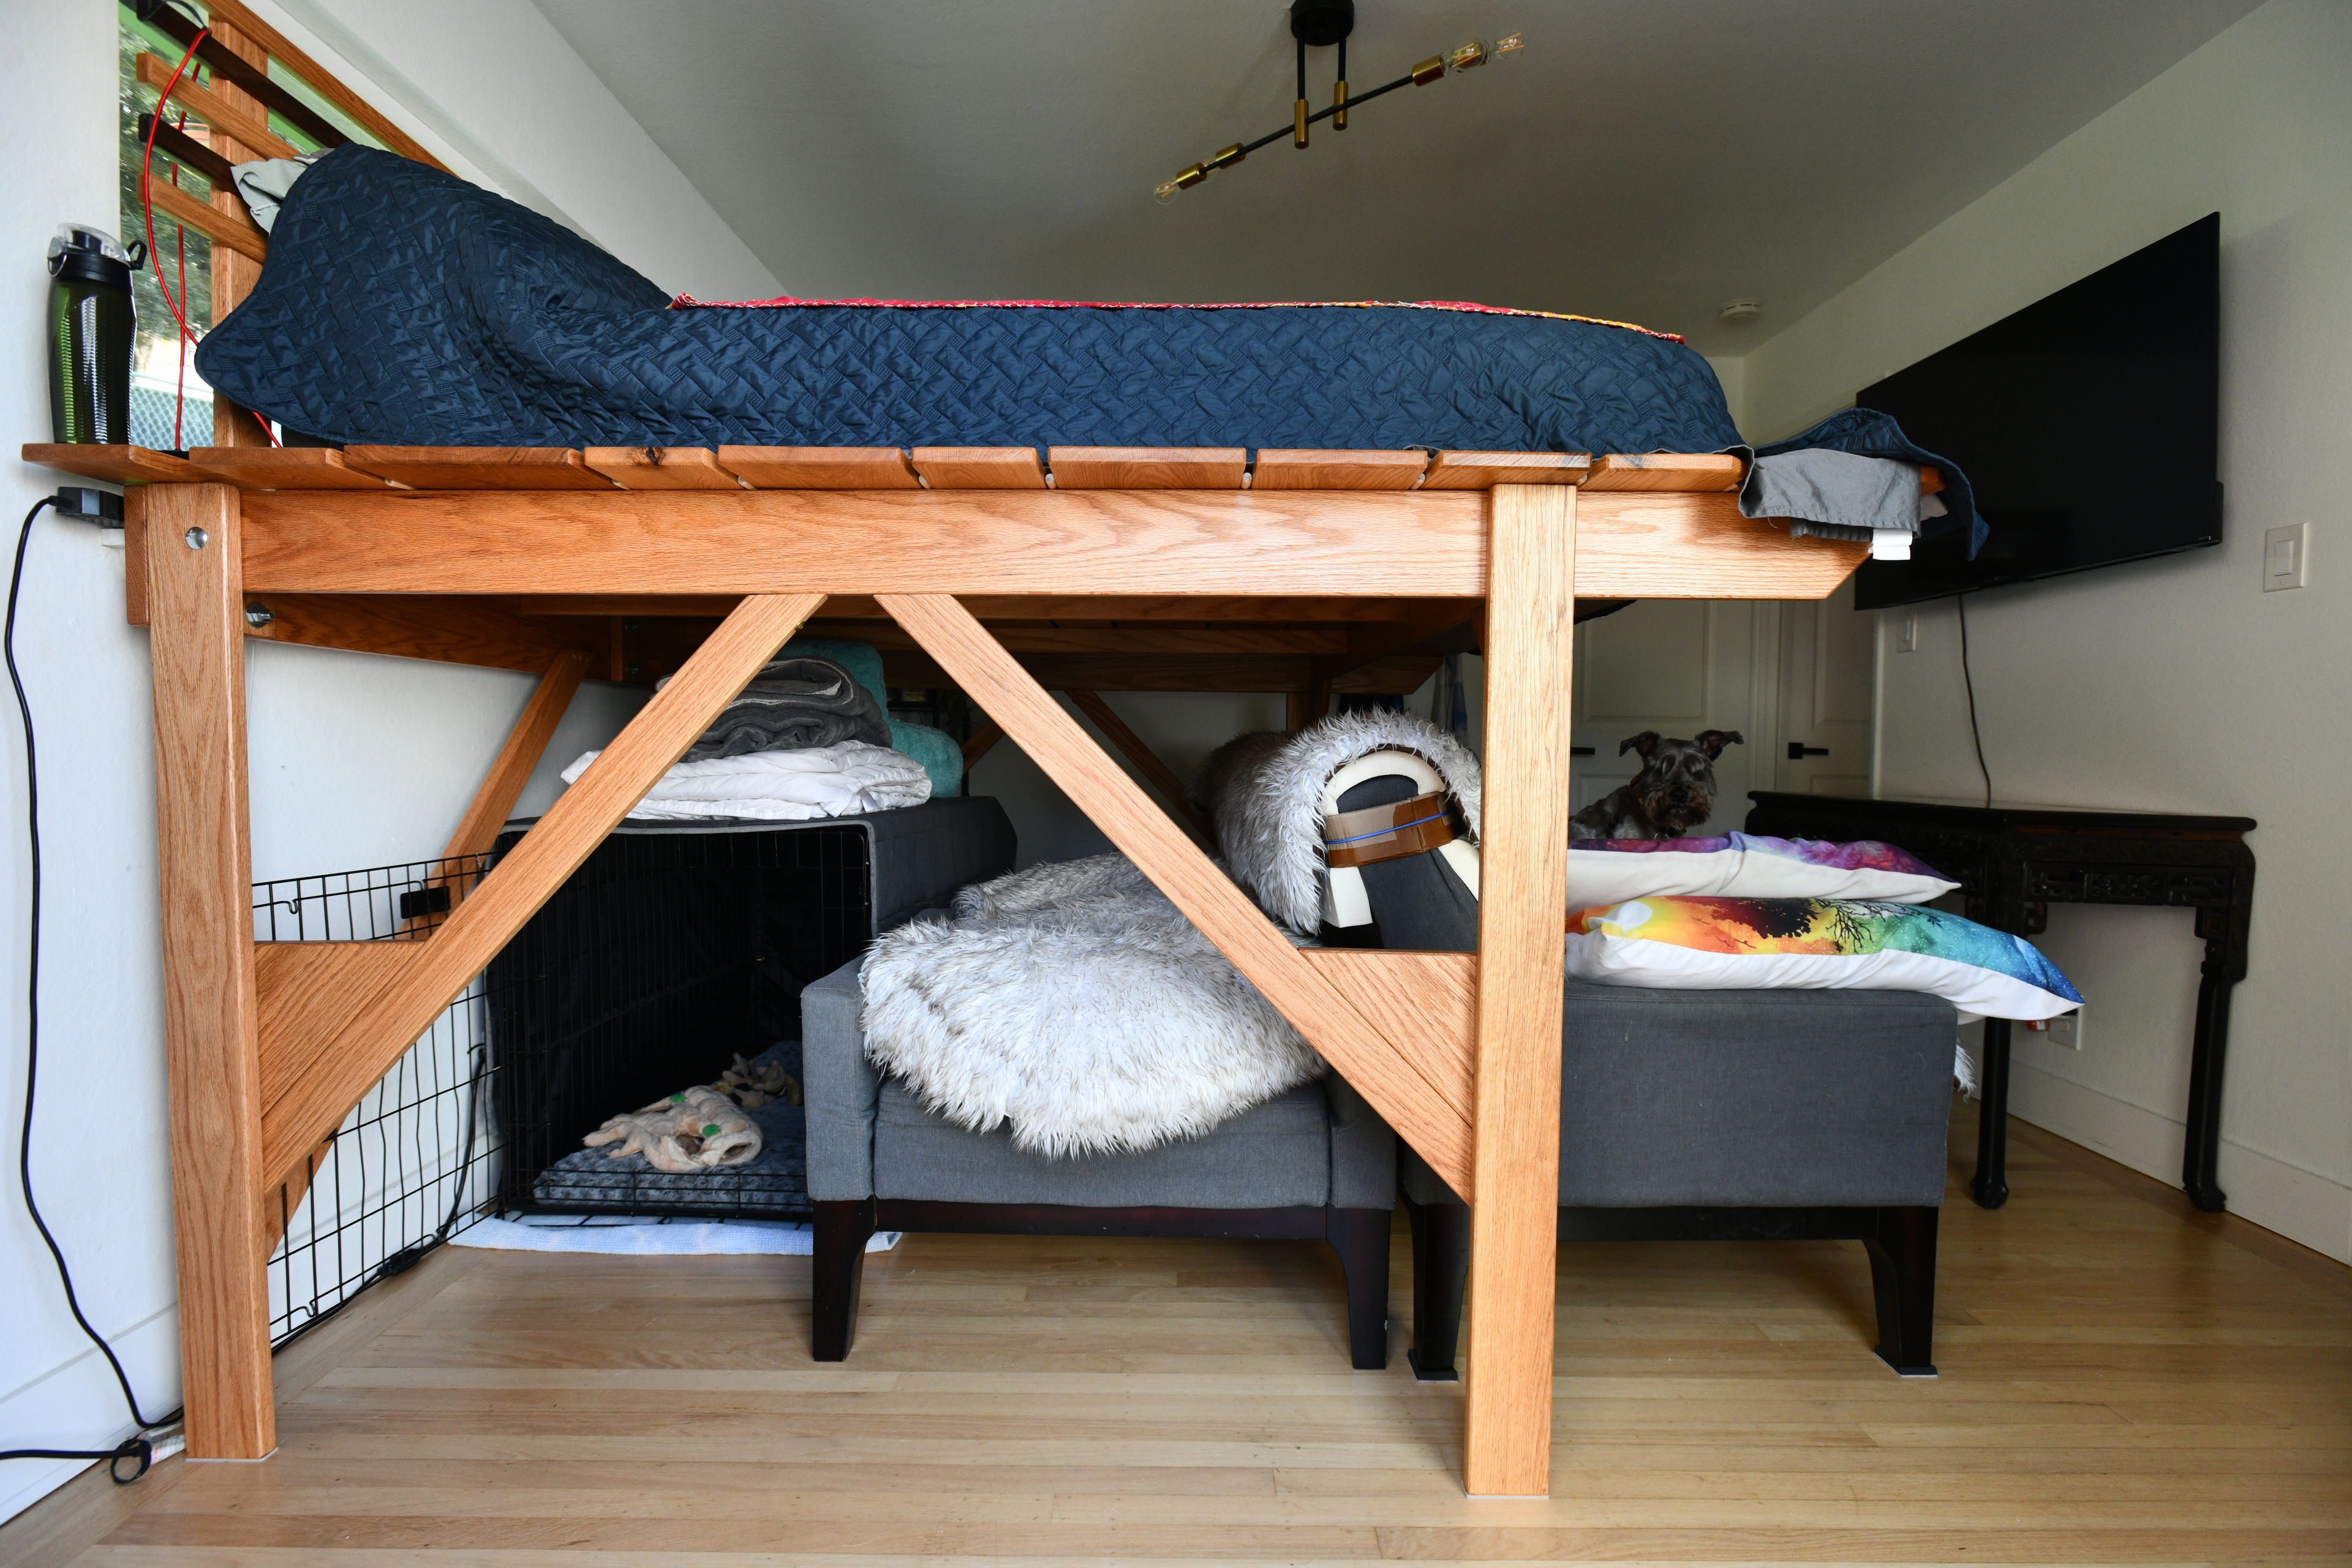
It was a bit of a struggle to carry the 135 pound mattress up from the garage by myself and get it hoisted onto the frame, but I got it figured out in the end. I also moved the couch from my office into the bedroom, which the dogs seemed to like.
And that’s a wrap! I am so happy this is finally mostly done!