Sound reactive fur coat
Two winters ago I bought a faux fur coat at a secondhand store The Retique in Milwaukee. I intended to take it to Burning Man in case it got cold. And it did, but I forgot the coat. This year I intend to not forget it, and I also managed to spend some time putting lights into it today. I hope to improve it, but I am documenting it now lest I never get back to this.
In January I wrote about my rainbow ‘spirit hood’, though I see now I didn’t post more details as I said I hoped to. Well, that hood was made with Adafrauit’s NeoPixels strips, and while I love the product, they did not hold up well to people twisting the hood. And they aren’t intended for such uses.
A few weeks ago I found an alternative product on Amazon, strings of 50 WS2811 LEDs made by Rextin. I bought the 10 pack for $106, which is quite cheaper for 500 pixels than any of the Adafruit strips. I could see the pixels themselves are quite bulky, and once I received them I saw the wire is also pretty heavy. Perhaps this is good for durability, but I knew I wouldn’t be able to put hundreds of lights in a hat as I hoped. Why am I such a volume addict?
Today I finally set out to make something for this year’s burn. I spent about an hour looking at the fur coat and studying the pixel strings to determine how I wanted to put it together. I tested a string of 200 lights, and after a few minutes, found one of them had a faulty connection. Good thing I bought 10 strings! But now I’m worried something else will break out in the desert.
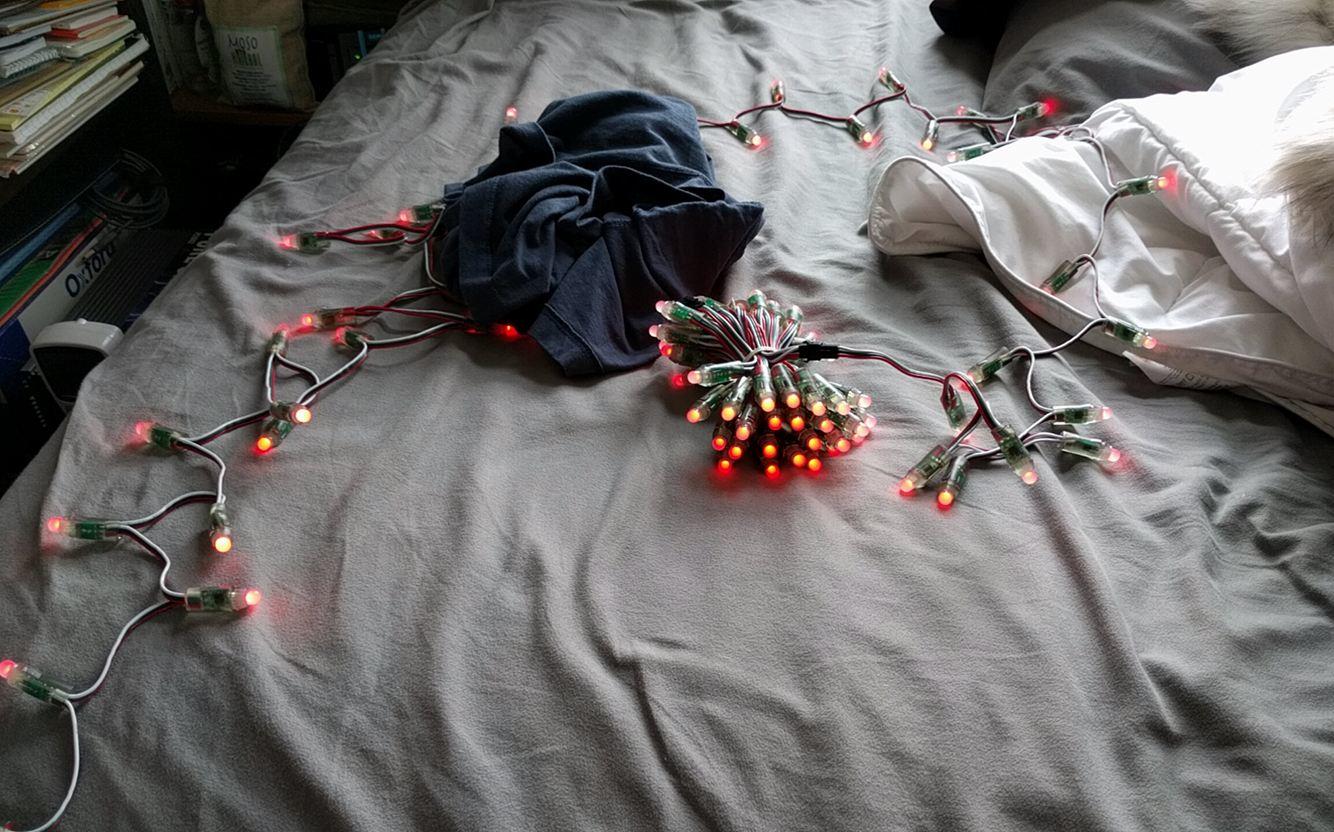
Testing the Rextin LED strings
Four hours later, I had sewn all the lights inside the coat, for which I probably should have asked for help as I’m sure I didn’t do it very efficiently. They seem secure enough at least.

Sewing individually addressable LED lights into a faux fur coat for Burning Man.

Sewing individually addressable LED lights into a faux fur coat for Burning Man.

Sewing individually addressable LED lights into a faux fur coat for Burning Man.

Sewing individually addressable LED lights into a faux fur coat for Burning Man.

Sewing individually addressable LED lights into a faux fur coat for Burning Man.

Sewing individually addressable LED lights into a faux fur coat for Burning Man.
Then I repaired and repurposed an Adafruit FLORA Arduino board I had previously soldered onto a PCB and attached two potentiometers, microphones and a button switch.

Soldering an Adafruit FLORA Arduino board onto a PCB with two potentiometers, microphones and a push button.

Soldering an Adafruit FLORA Arduino board onto a PCB with two potentiometers, microphones and a push button.

Soldering an Adafruit FLORA Arduino board onto a PCB with two potentiometers, microphones and a push button.

Soldering an Adafruit FLORA Arduino board onto a PCB with two potentiometers, microphones and a push button.
After another hour, I had repurposed my stick code into coat code, and the current version corresponding to the below videos is in my arduino-examples repository in the coat directory. The sound reactive portion is mostly the same as I use in my bedroom.
The initial tests look decent. Here’s a video of a basic color changing mode, and my attempt at spinning the controls while making a video. Then it switches into the rainbow mode.
Rainbow fur coat lying down
I’m never satisfied with the sound reactive code, but hopefully it works at least this well once I get out on the playa!
Sound reactive fur coat hanging up
Sound reactive fur coat lying down