Upgrading rooted Nexus 6P with Android 7
The last two times I upgraded, I used the app FlashFire, and it was a very simple process. So simple I figured I didn’t need to write it down. But by the time I needed to upgrade most recently, I forgot how simple it was, and I ended up down a rabbit hole pursuing a full backup before upgrading.
I stumbled on FlashFire thanks to the article How to Install an Android OTA Update Without Losing Root with FlashFire. With my hazy understanding of Android, I tended to avoid upgrades since I did not want to lose root and consequently need to reformat my device to get it back. It was not clear to me I could in fact upgrade the operating system without touching the data partition. Once I was pretty sure that was true, I still was not confident in the process, or even what process to use, so I wanted to be sure I had a recovery strategy. As with many things, I did not make time to figure that out, so upgrades rarely happened! I only have cared to upgrade the last two times because I started having weird hangs and other issues out of the blue, and I thought it might be due to app developers only testing against the latest Android. But who knows…
Anyway, all I needed to do was download the system image for my Nexus 6P to the phone and launch FlashFire. I canceled the initial screen about having found an OTA package, as I wanted to select the package myself to be confident what I was installing.
From the home screen, clicked the plus sign.
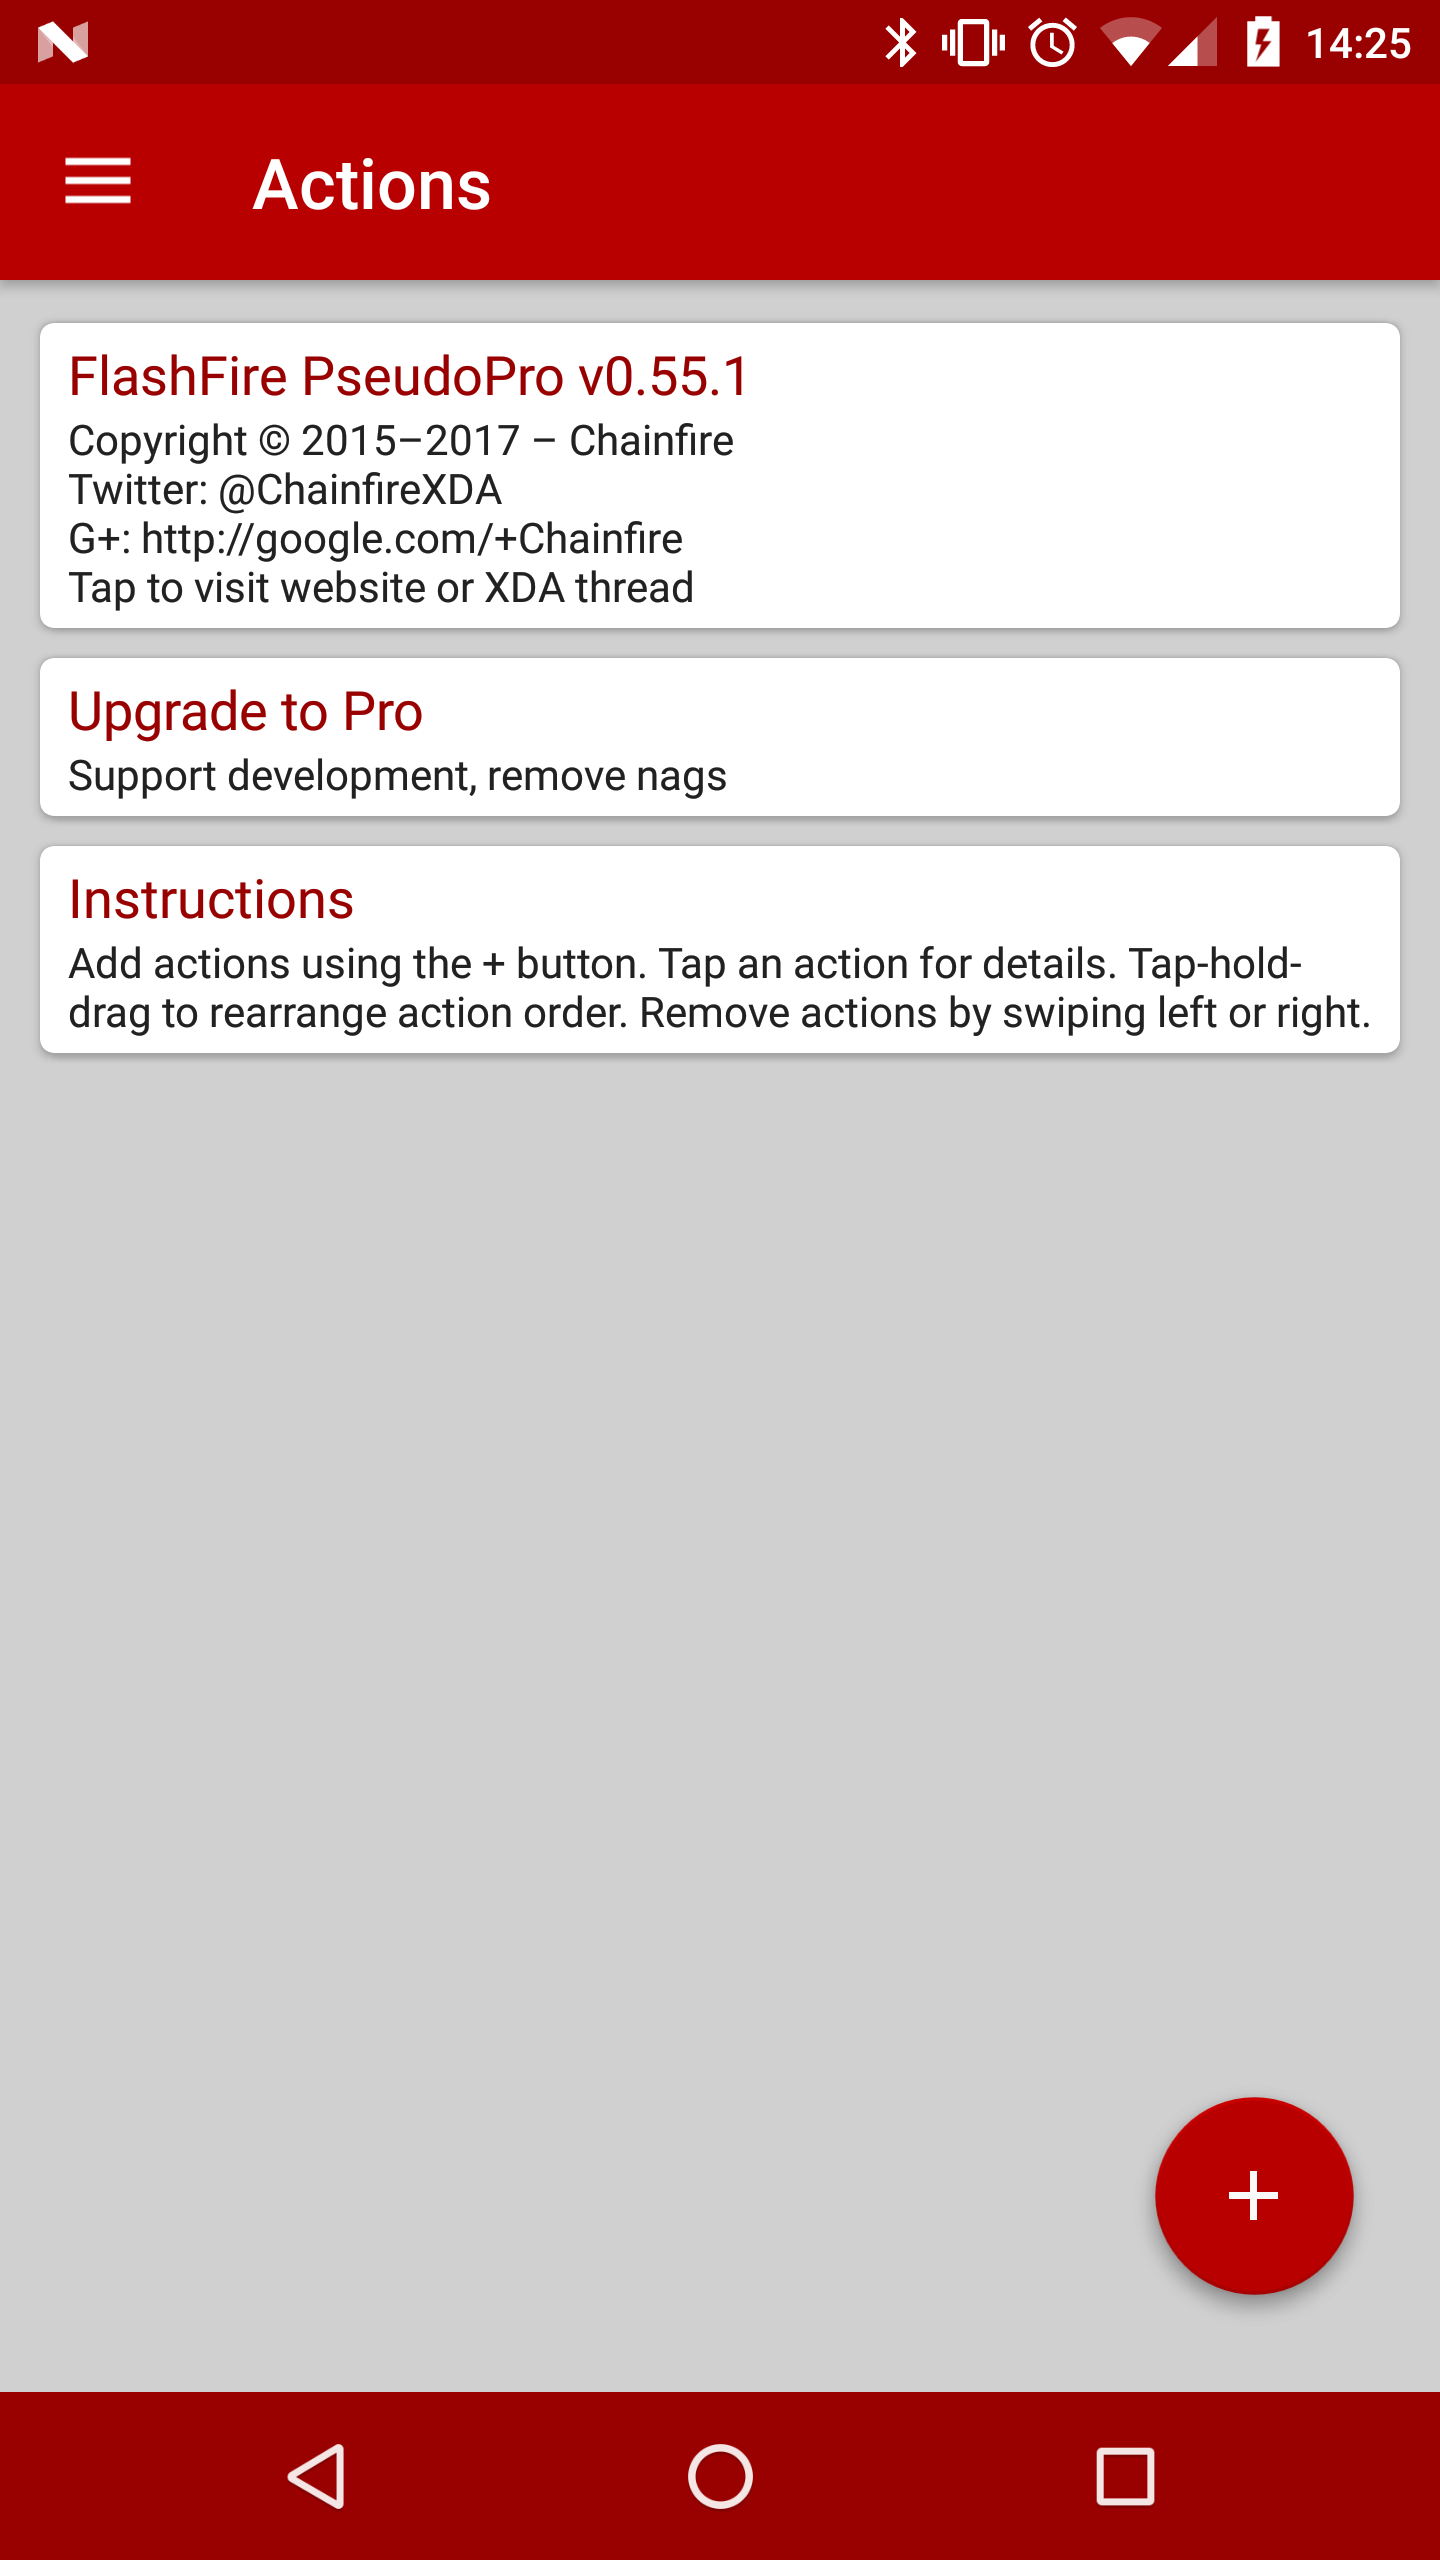
flashfire-01-start.png
Select Flash firmware package.
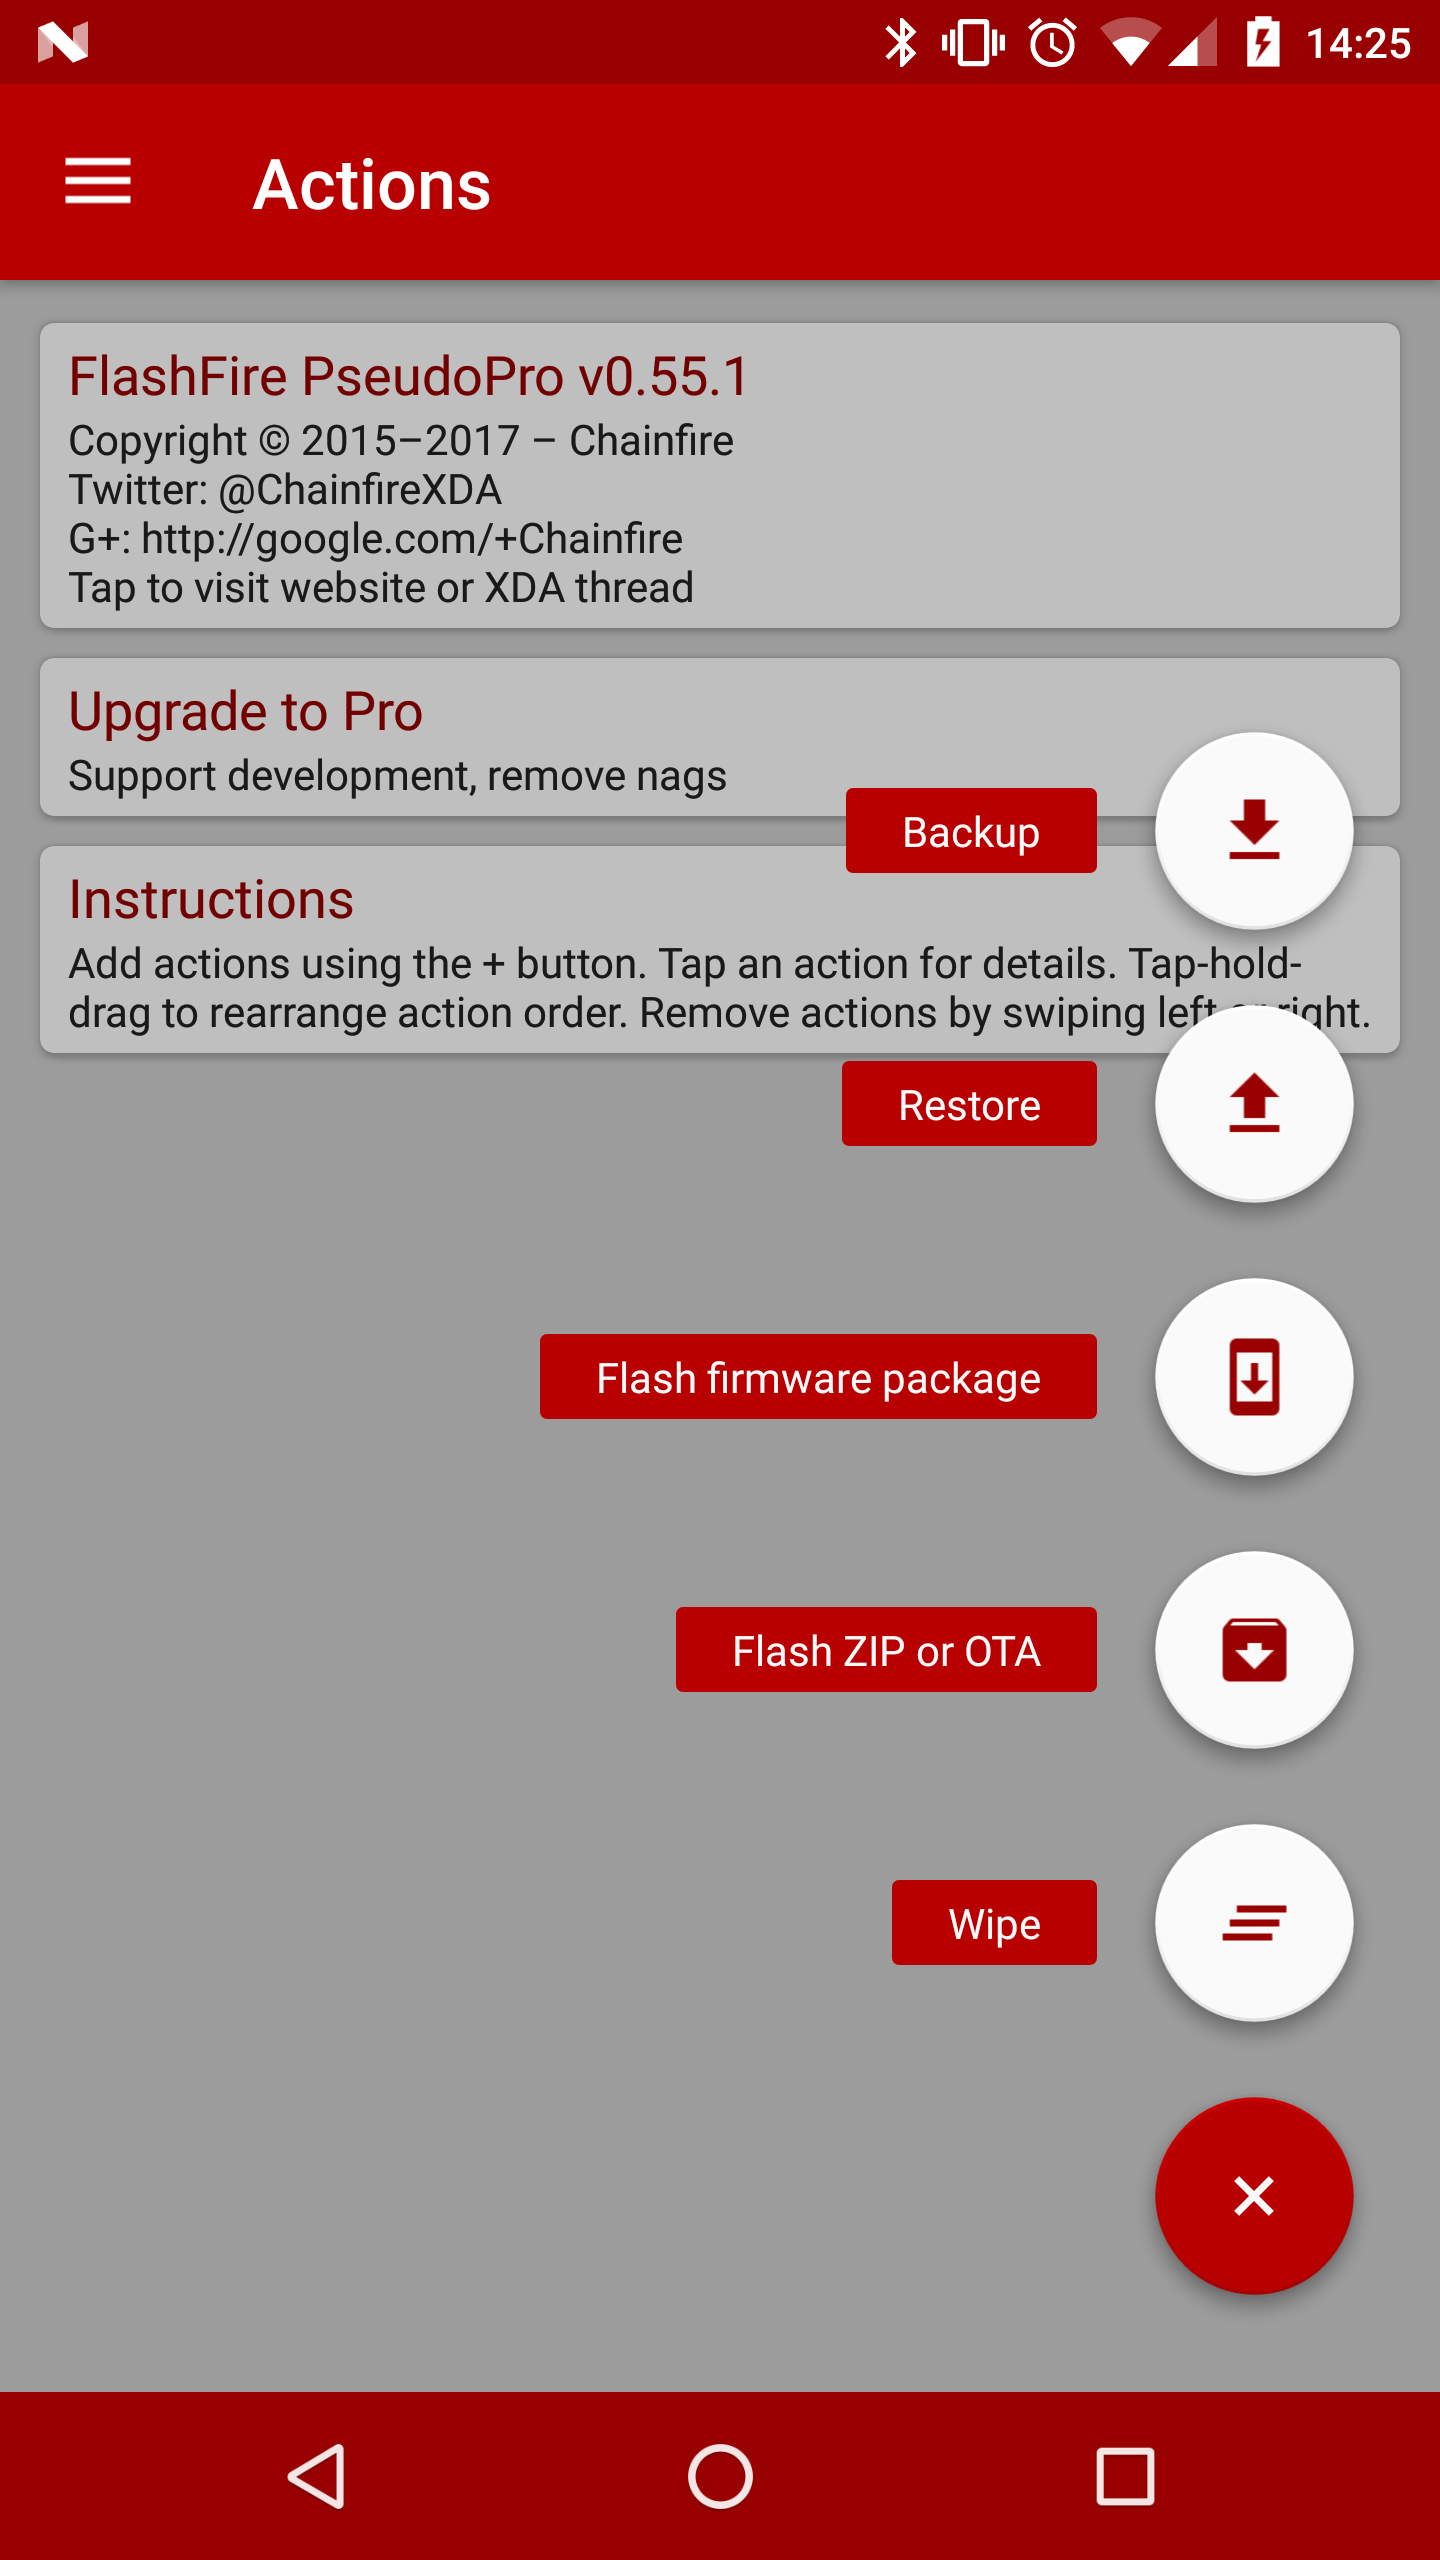
flashfire-02-menu.png
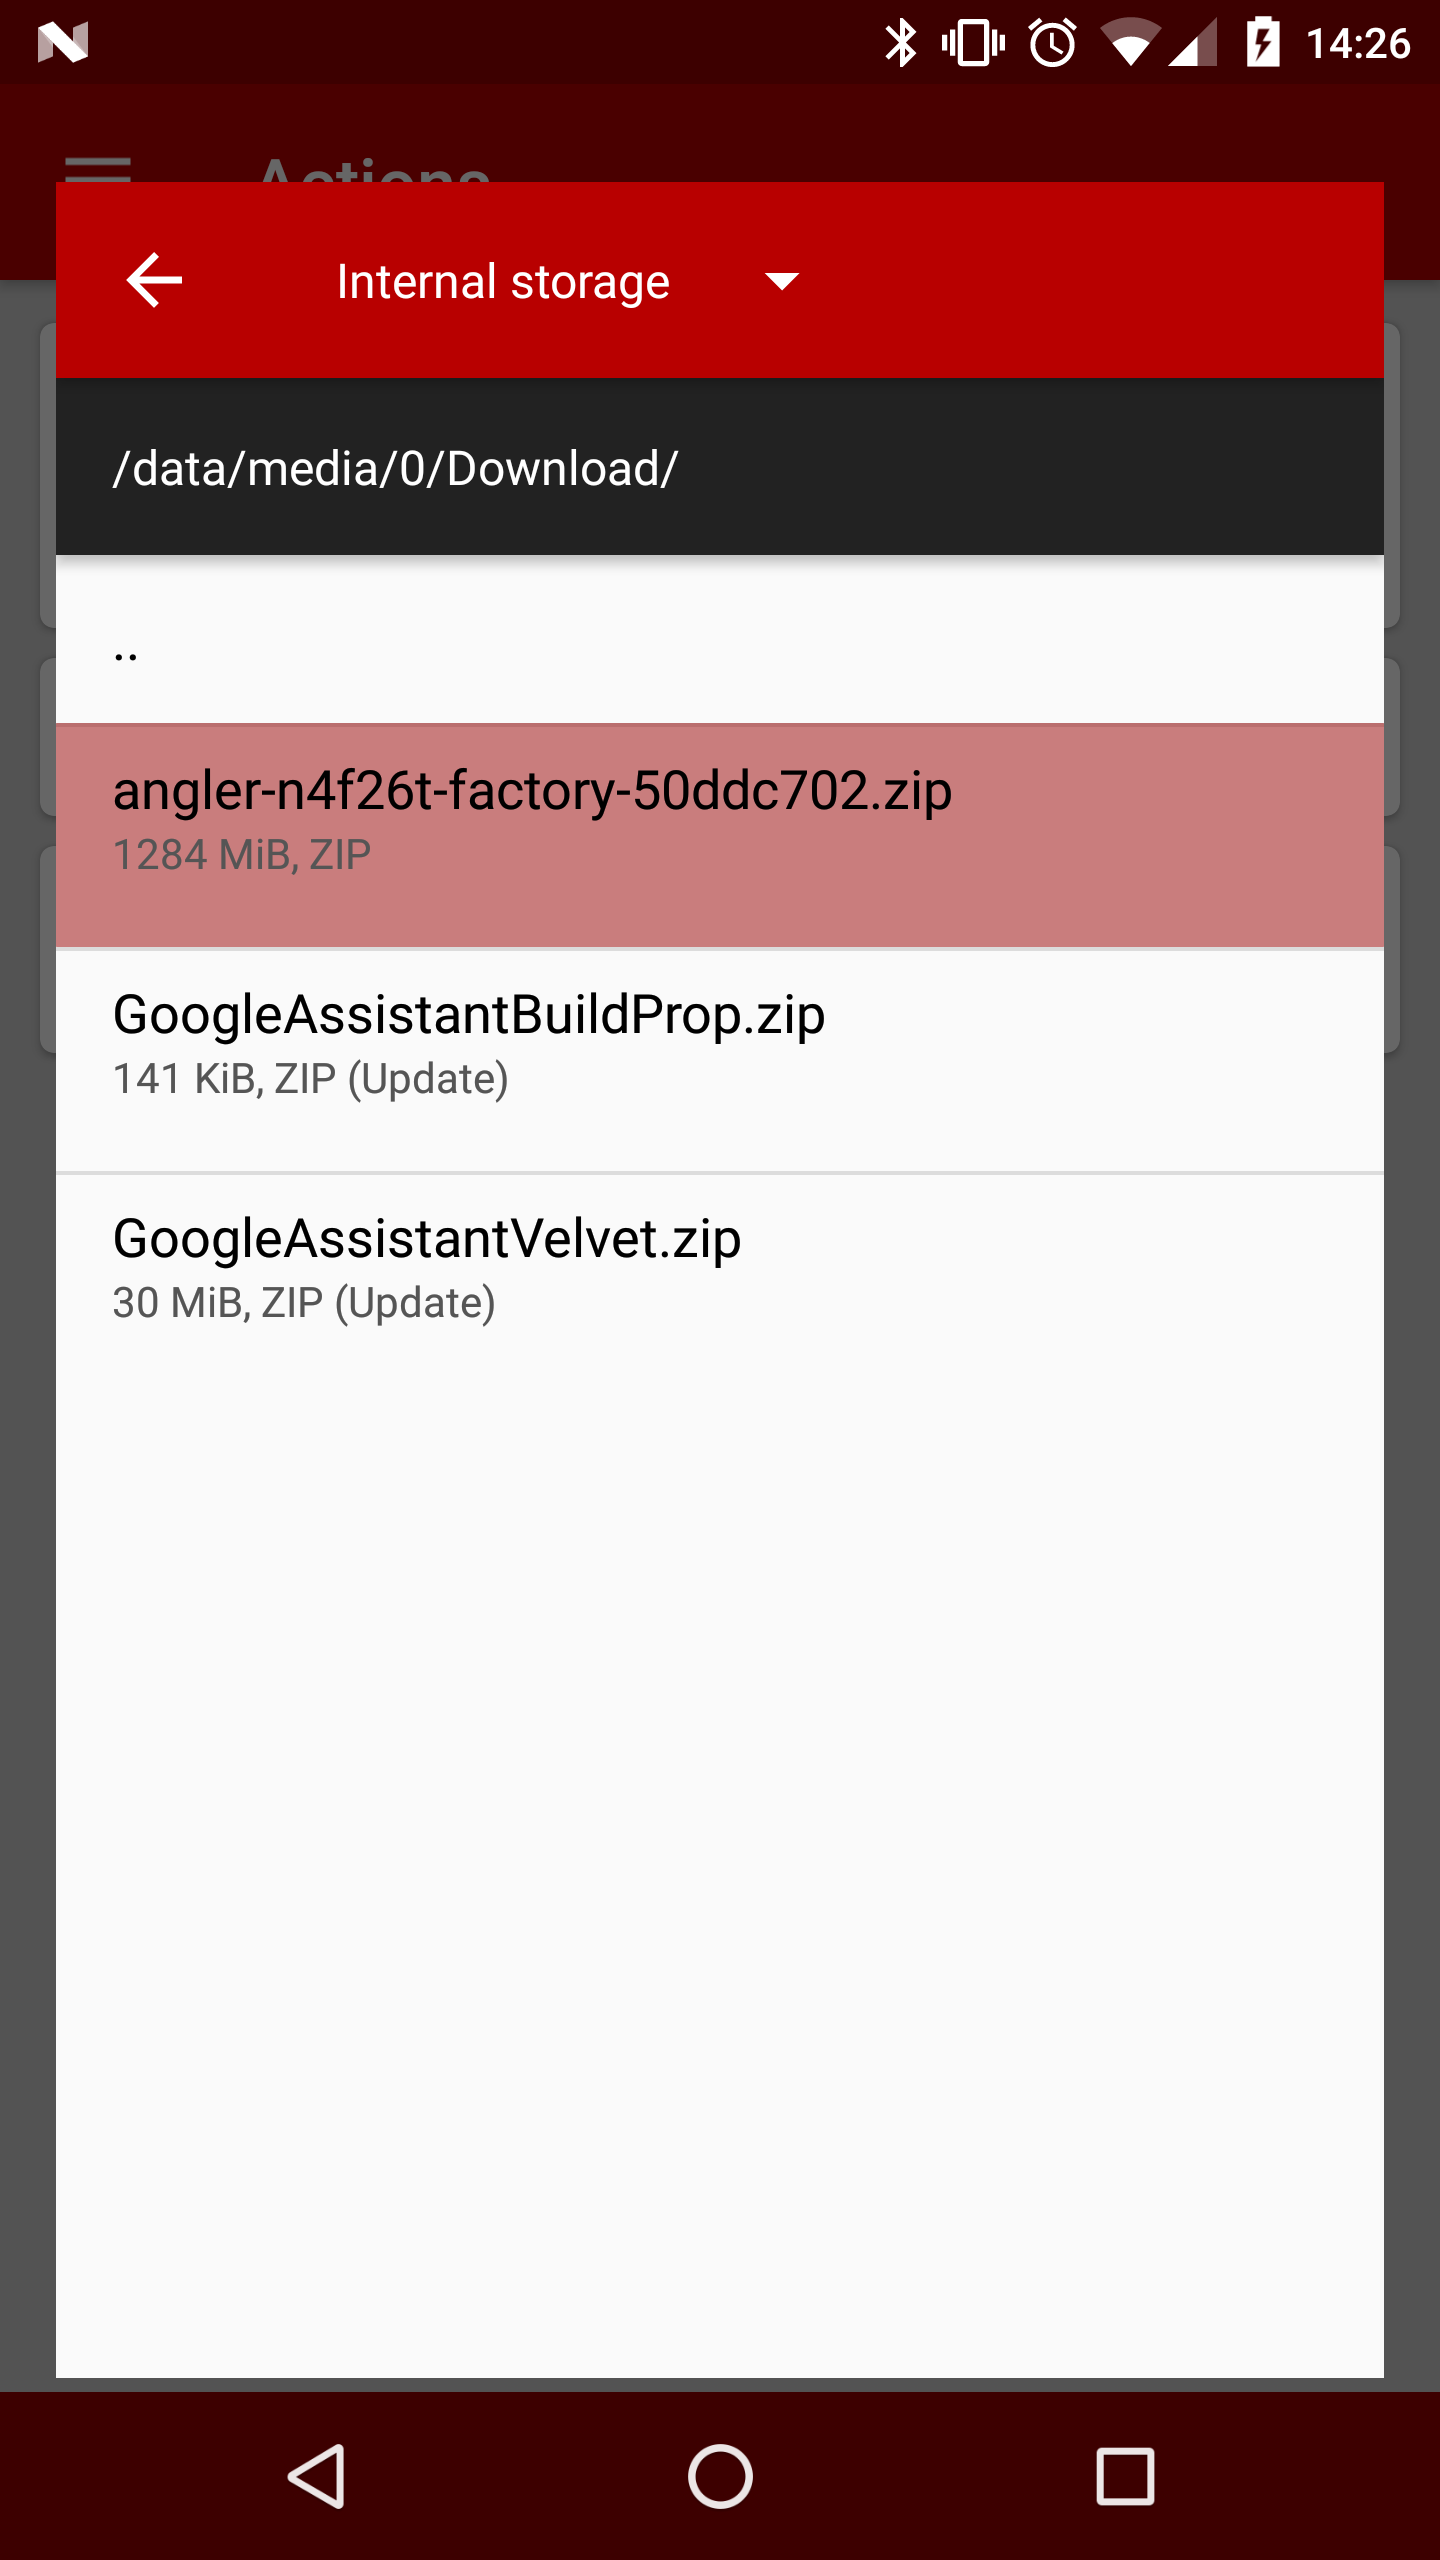
Navigate to and select the downloaded ZIP file.
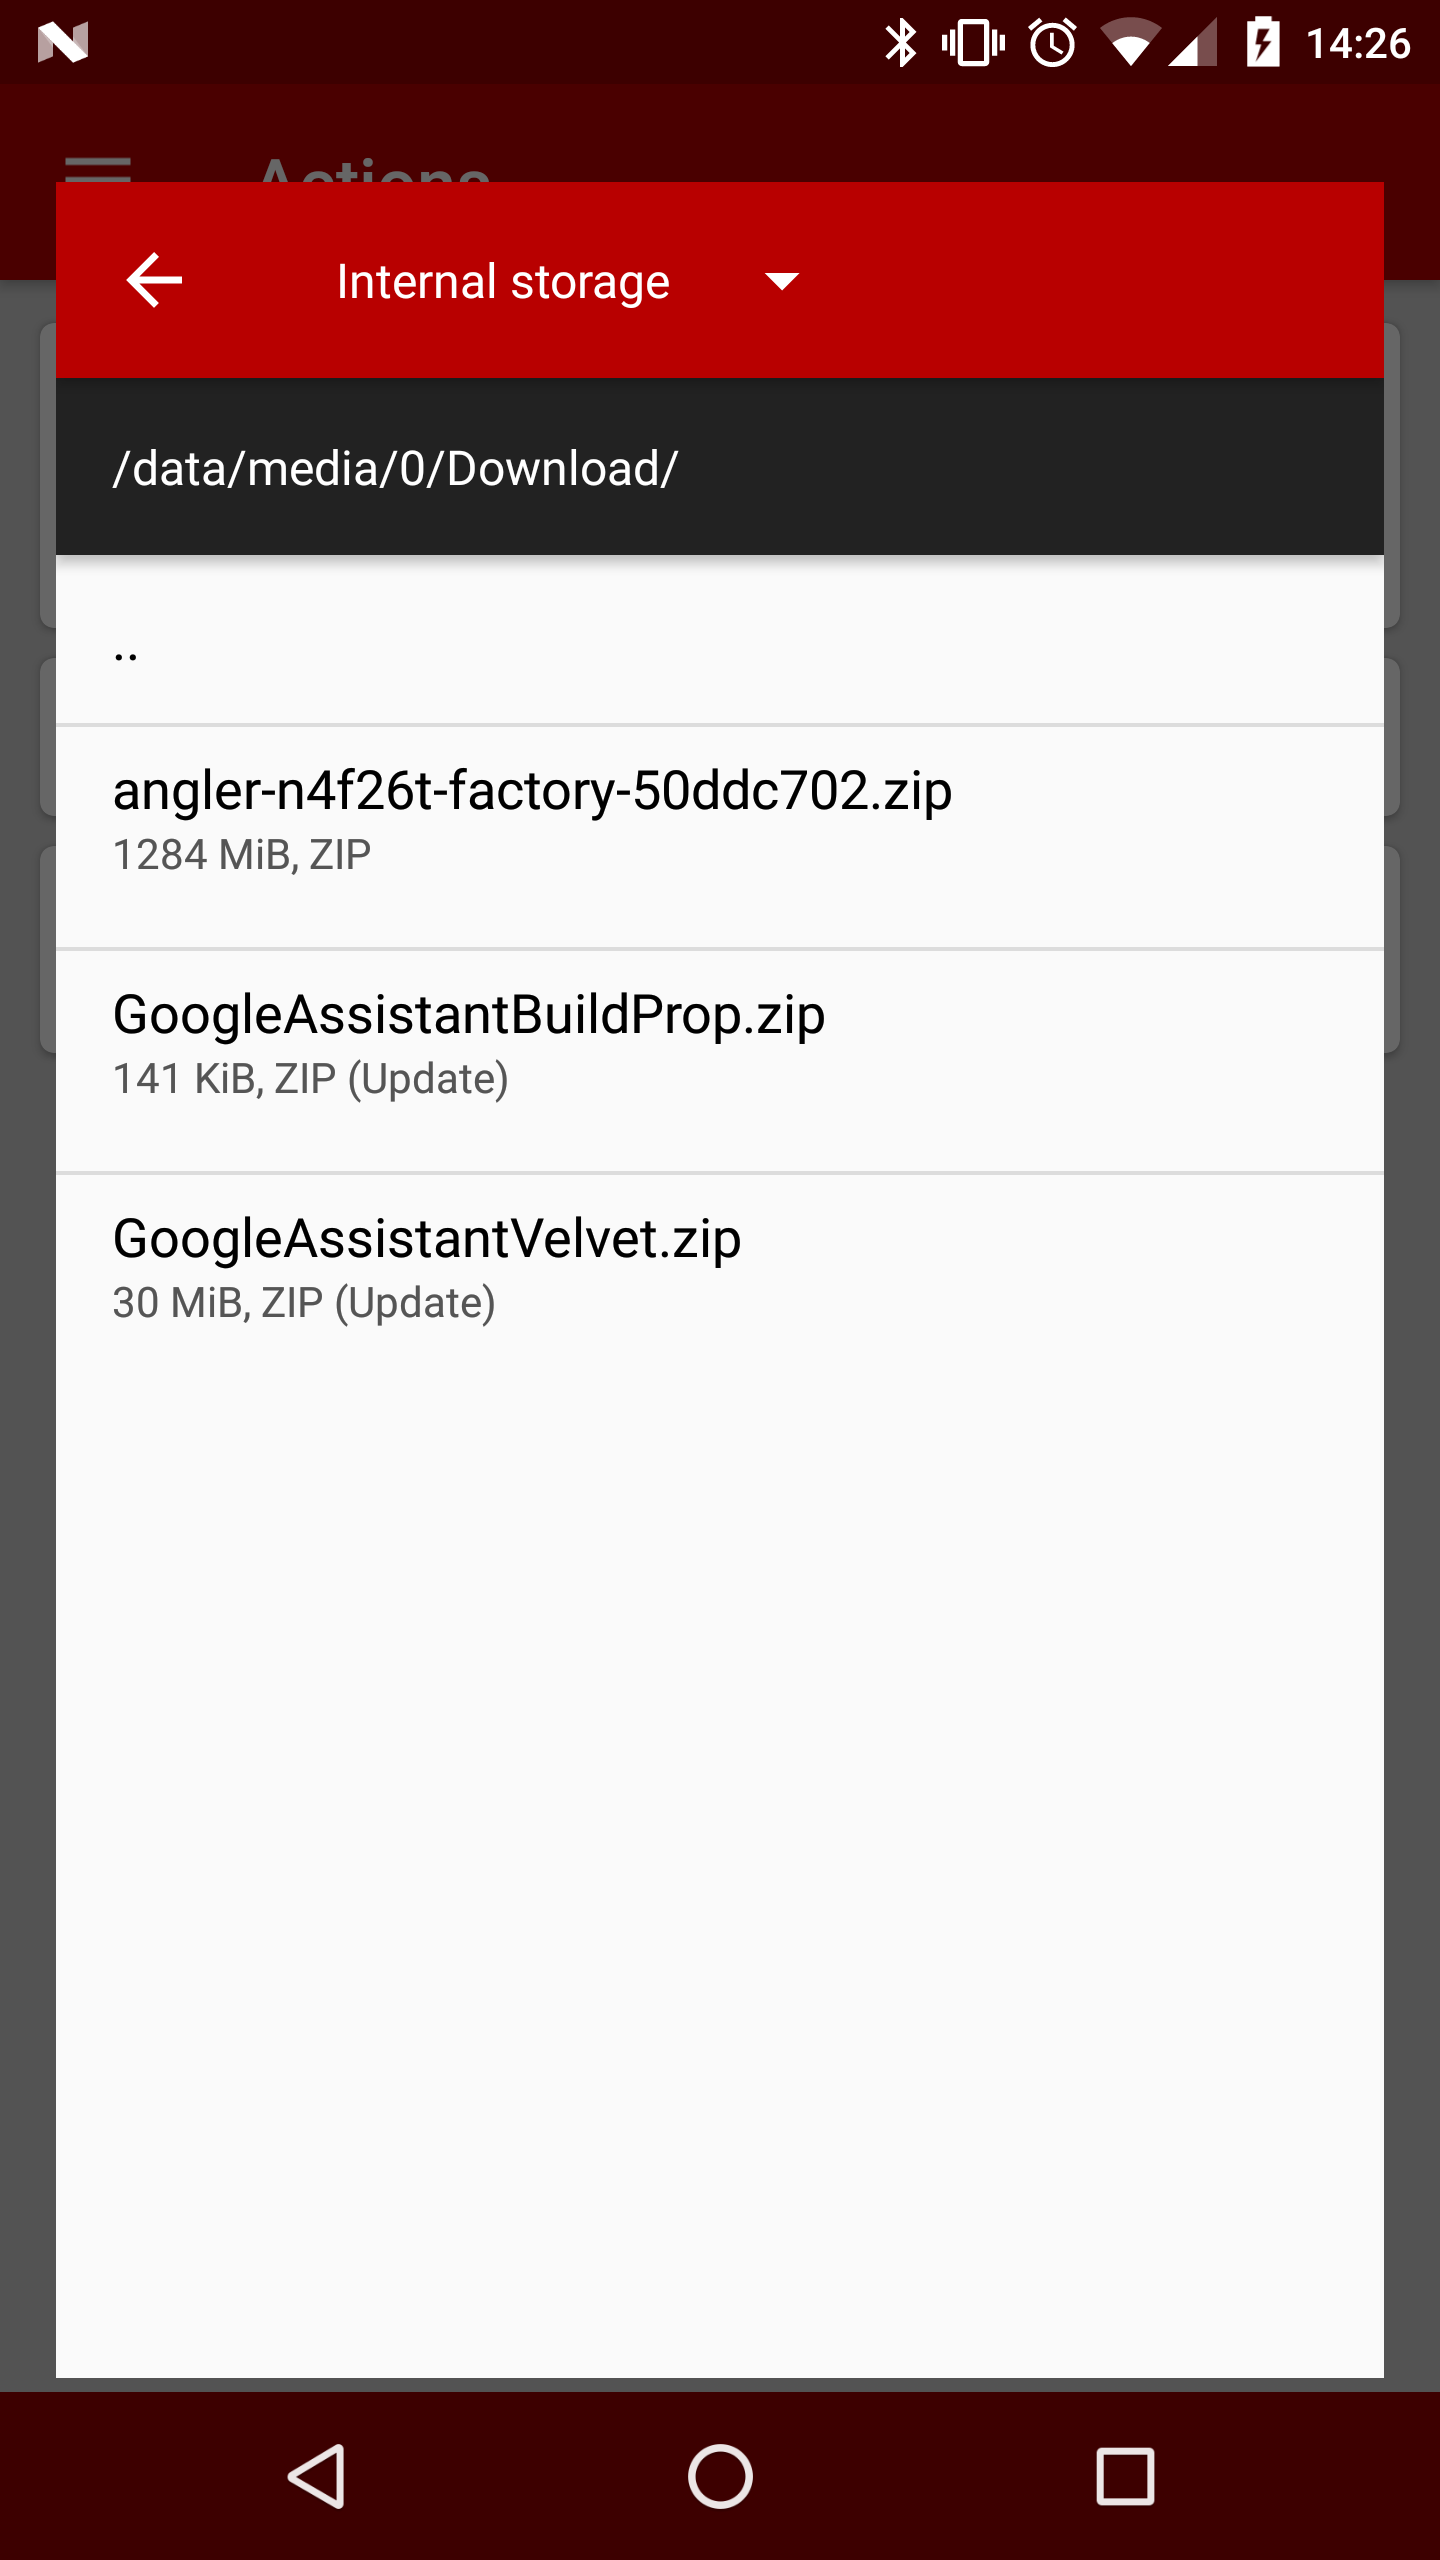
flashfire-03-flash-firmware-package.png
flashfire-04-flash-firmware-package.png
The defaults were fine for the most part, but I clicked Partitions to deselect Recovery, as I wanted to keep my TWRP installed. Then I clicked the checkmark to return to the main screen.
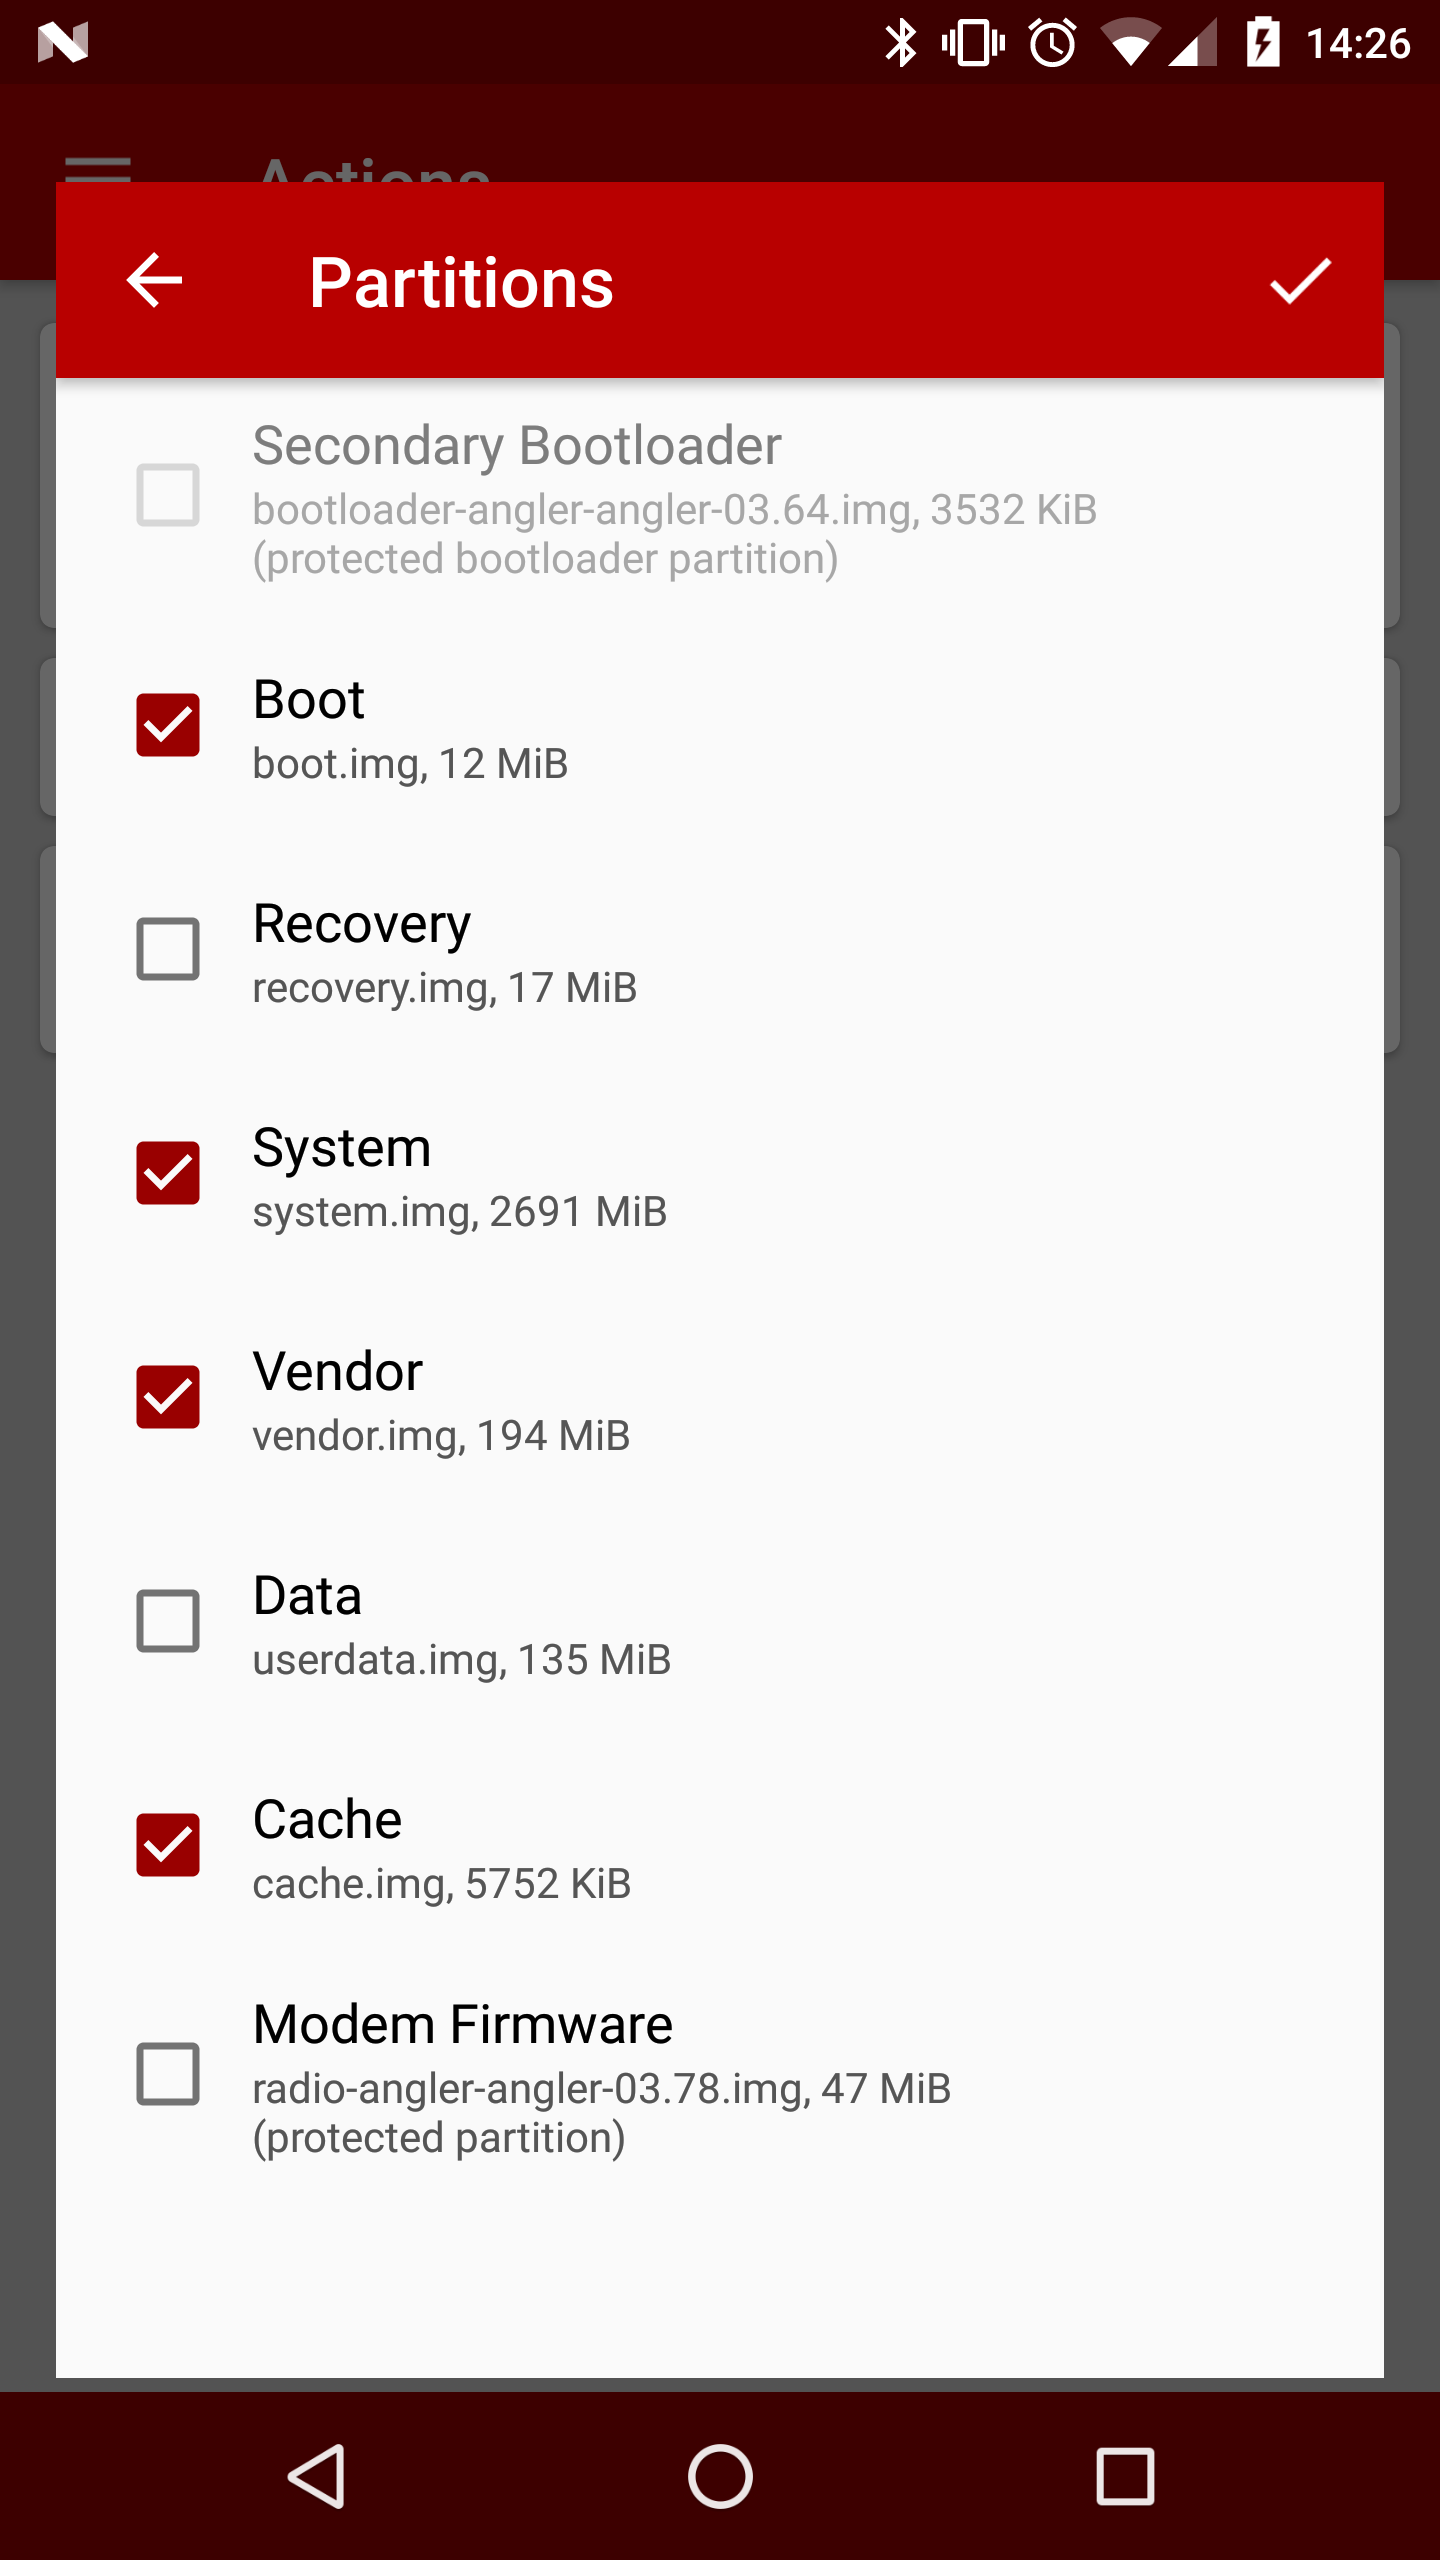
flashfire-05-unchecked-recovery.png
Next I clicked EverRoot and selected the Enable ADB and Preserve recovery options, in addition to the already selected Inject SuperSU.
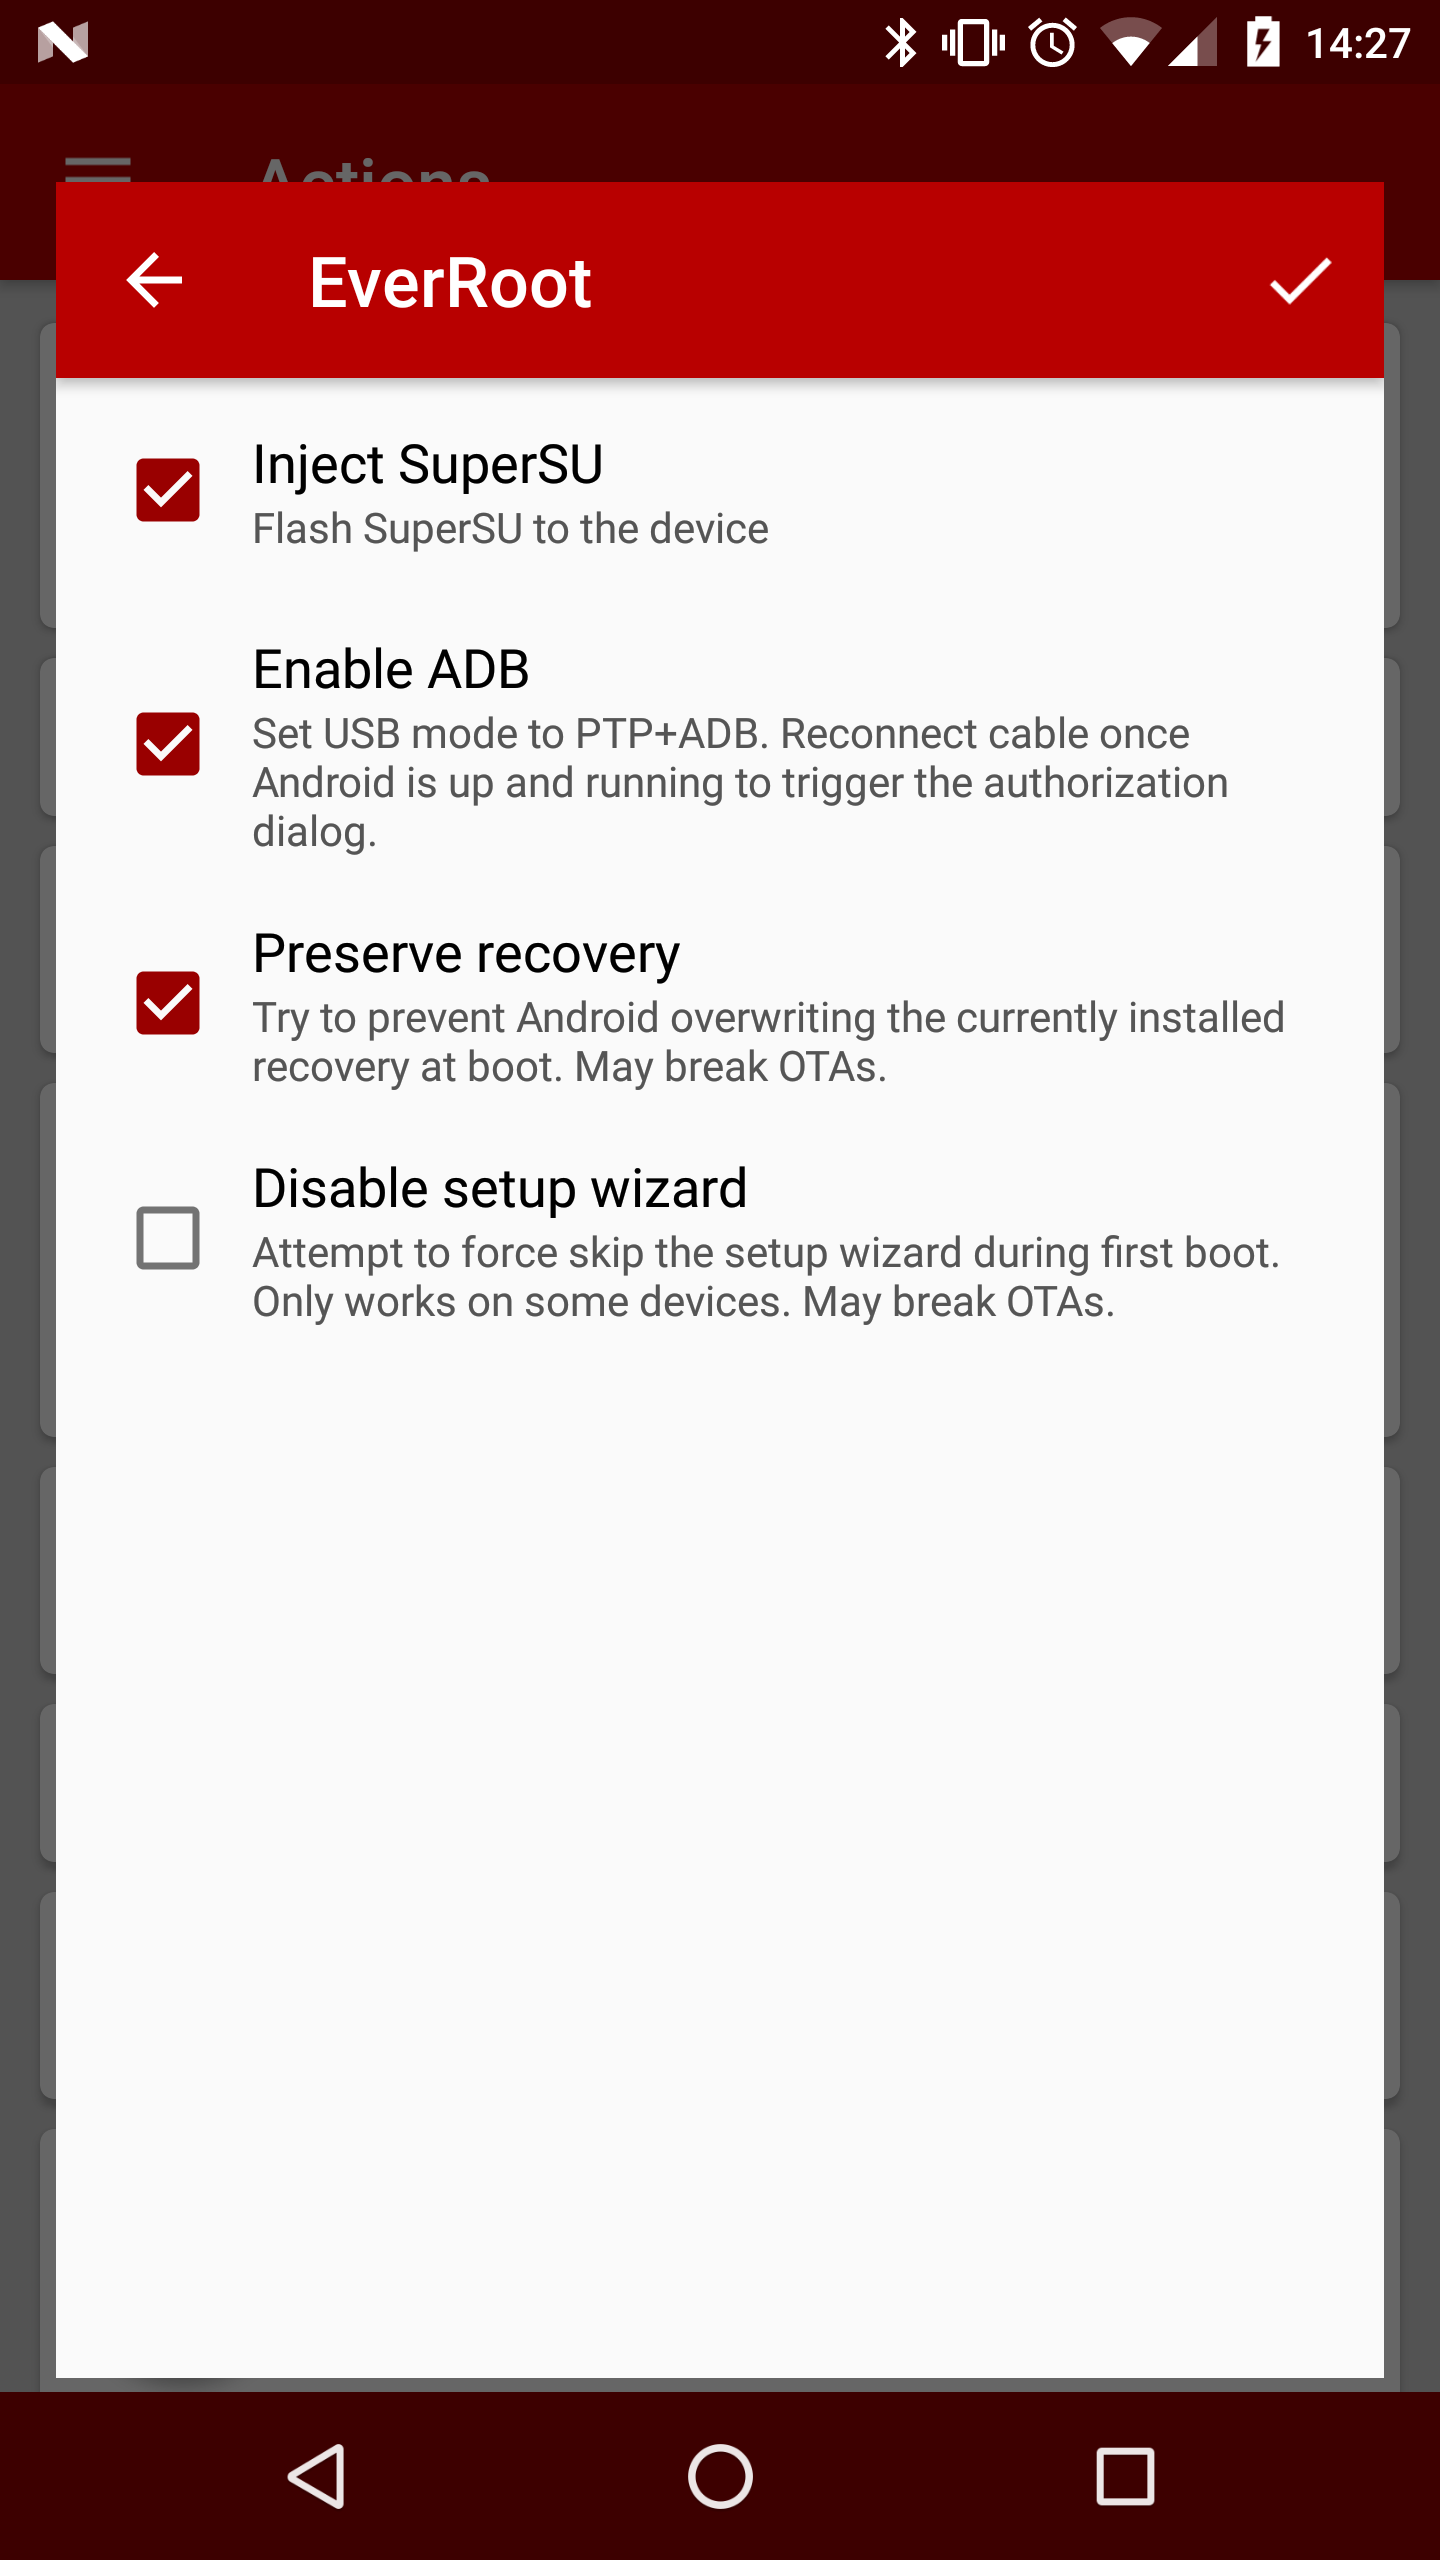
flashfire-06-everroot.png
Once back at the main screen, click the lightning bolt to flash.
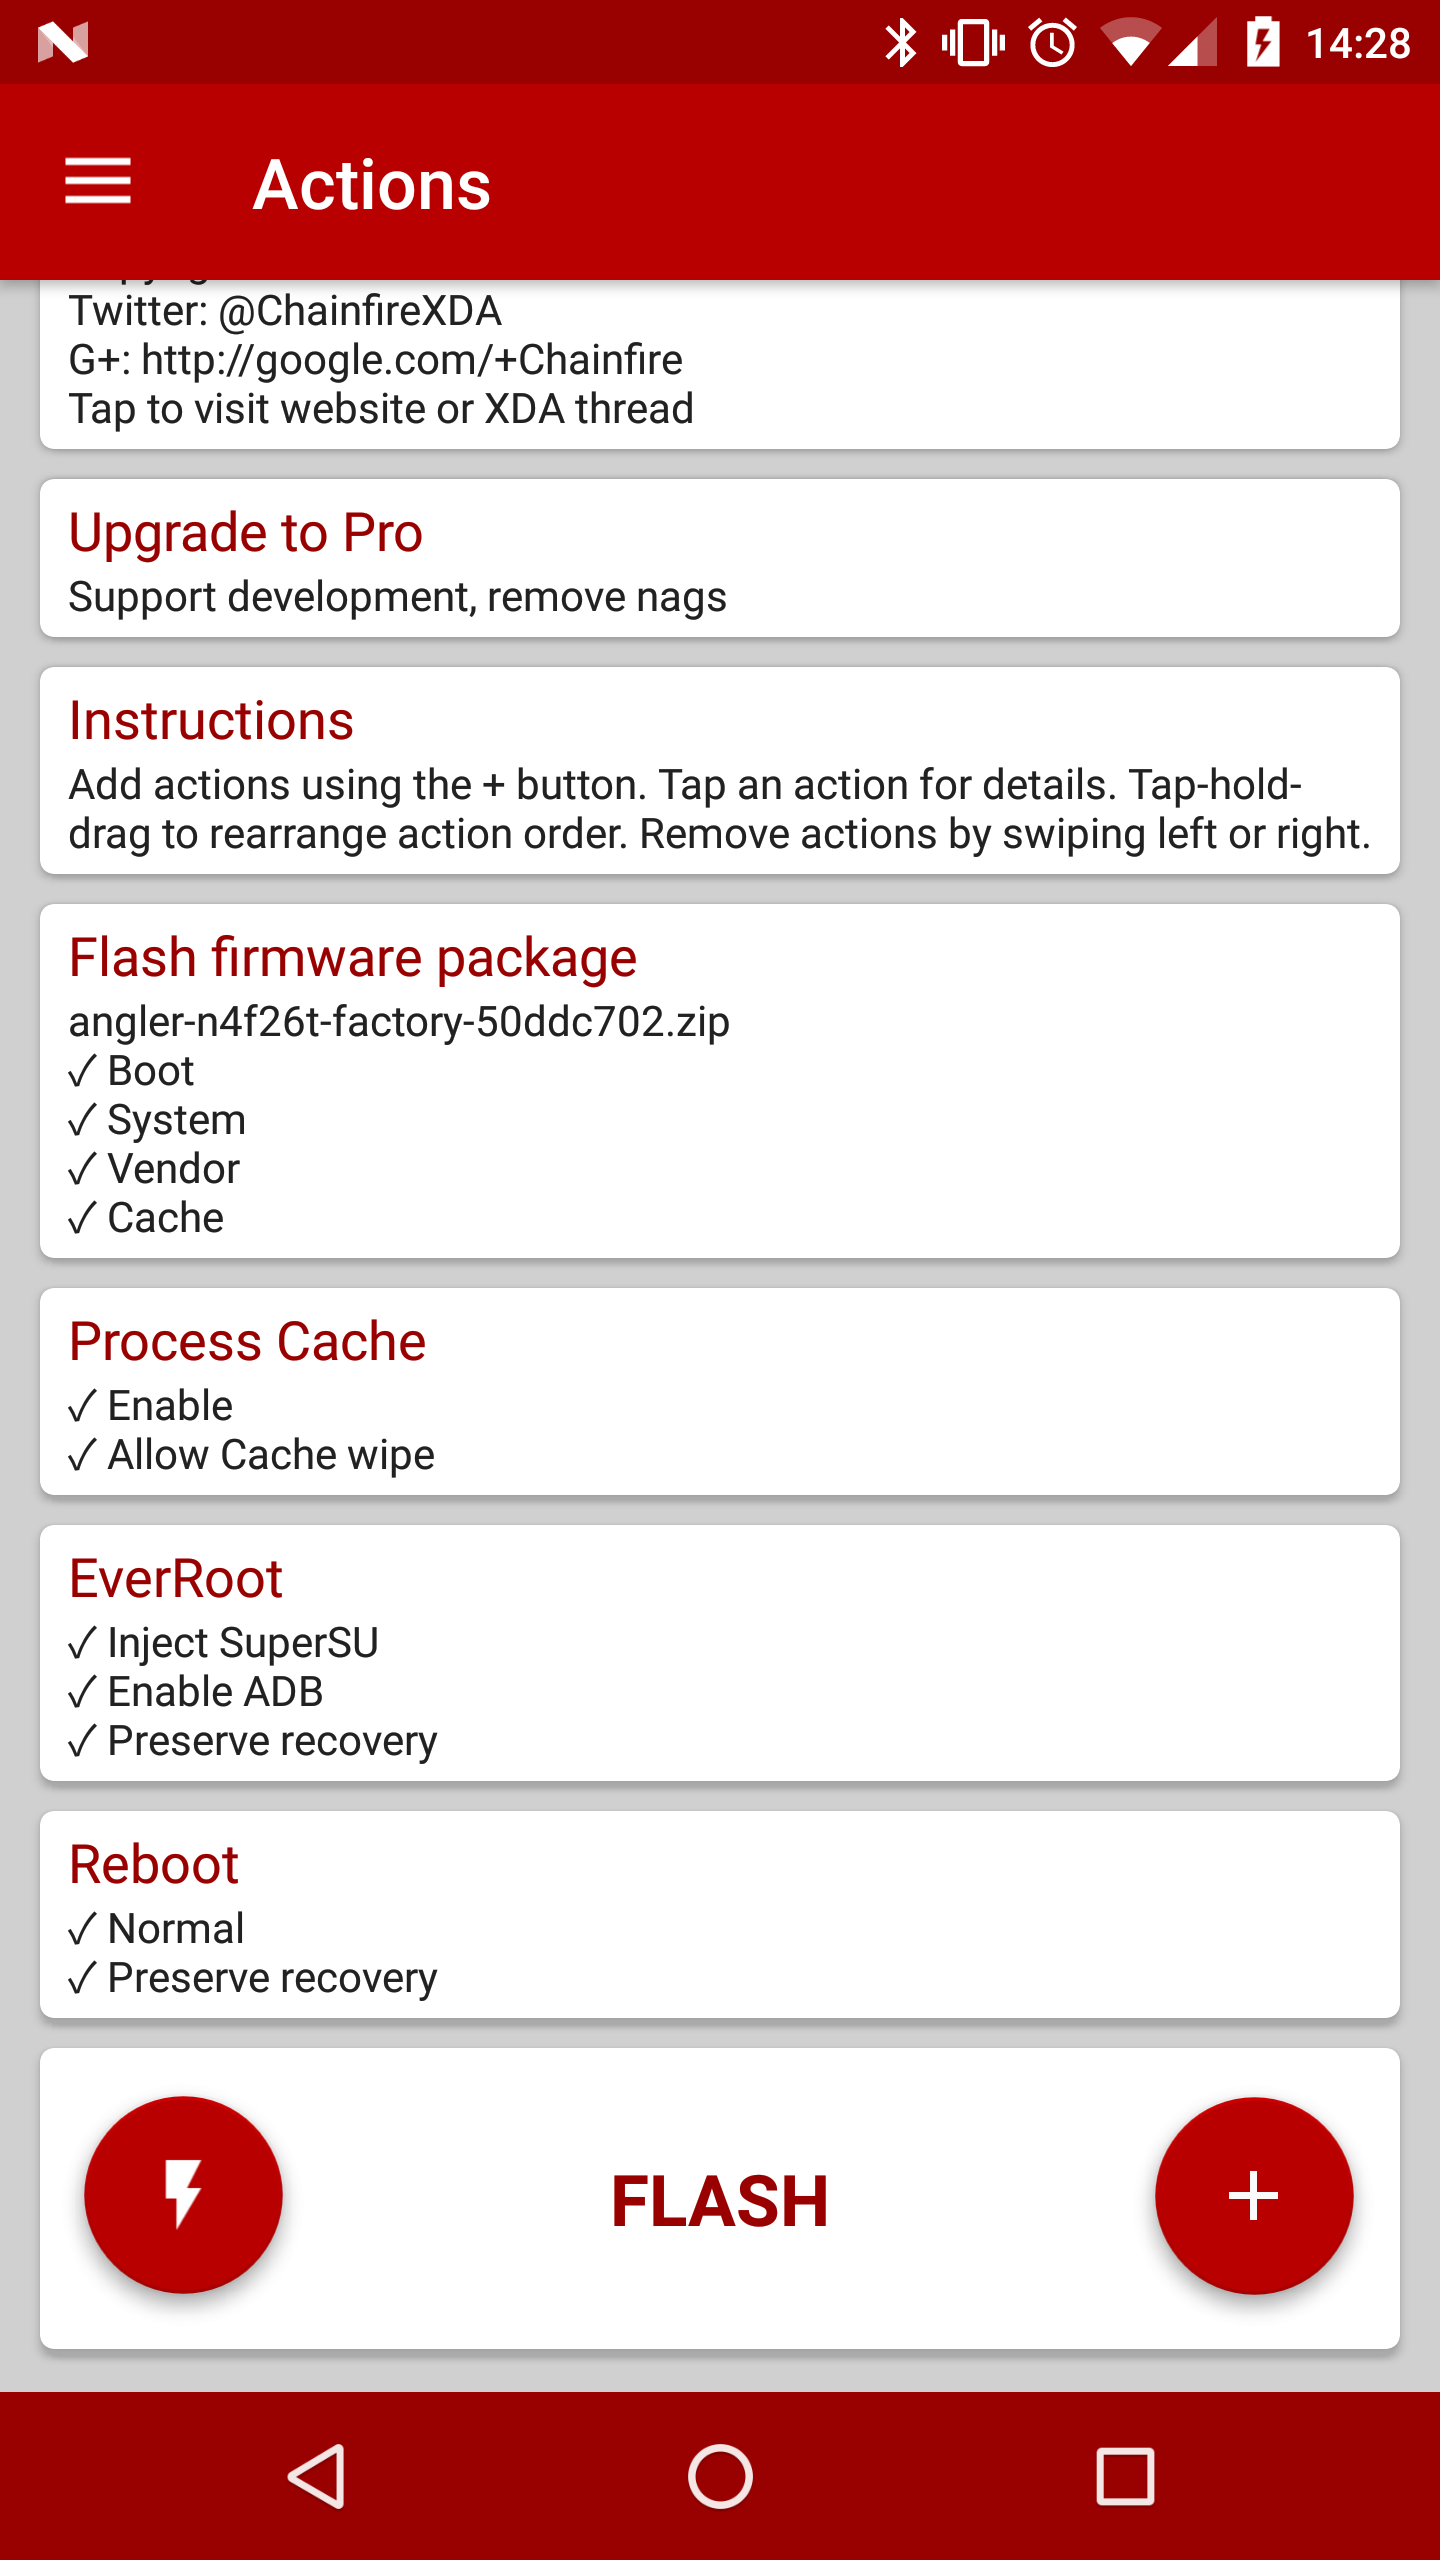
flashfire-07-ready.png
The flashing process took a few minutes, and once my phone rebooted, it took a long time, possibly about 10 minutes, to finally finish and present the lock screen.