Raspberry Pi and Smokeping network monitoring
We’ve had some network issues lately, so I dug out one of the Raspberry Pi Model Bs I got for free from Adafruit with my first couple of orders in September 2013. I then set it up to do network monitoring using Smokeping. Since it takes 10 or 20 seconds to generate the graphs, I switched to a master-slave setup where the graphs could be generated on my web server, but the measurements taken from the Raspberry Pi on my home network.
Since tech tutorials have a way of straying from reality for a number of reasons, and I haven’t worked with Raspberry Pi in years, I followed the most recent Smokeping-Raspberry Pi tutorial I could (quickly) find and its linked Pi setup directions.
For my future sanity, here’s a summary. I ended up wiping the Raspberry Pi to set up the slave later on, and may need to adjust the procedure. I’ll put some notes at the beginning as a heads up.
Supplies
Find a monitor, keyboard and mouse you can temporarily use to set up the Raspberry Pi. It’s possible to set up over SSH, but I haven’t tried it. If necessary, buy some cheap equipment:
- EagleTec K104 / KS04 2.4 GHz Wireless Combo Keyboard And Mouse
- ViewSonic VX2252MH 22-Inch LCD Monitor, Full HD 1080p, HDMI/DVI/VGA
- or Eleduino Raspberry Pi 7 Inch 800x480 Pixel Hdmi Input Capacitive TouchScreen Display
I used some older parts, but if I were buying new, I would get these:
- Raspberry Pi 3 Basic Starter Kit or maybe even the new, tiny Pi Zero
- SanDisk Ultra 32GB microSDHC UHS-I Card
- If all router Ethernet ports are in use:
- NETGEAR 5-Port Gigabit Ethernet 10/100/1000Mbps Switch (GS205)
- or NETGEAR 8-Port Gigabit Ethernet 10/100/1000Mbps Switch (GS208)
- or could make Pi Wi-Fi enabled, but that will add latency to network pings, detracting from the purpose of a network monitor. But for basic up/down testing, Wi-Fi would work. Edimax EW-7811Un 150Mbps 11n Wi-Fi USB Adapter
For more general introduction to Raspberry Pi, check out Adafruit’s Introducing the Raspberry Pi Model B+.
Install Raspbian
- Start downloading a Linux distro for Raspberry Pi, such as the NOOBS Offline and network install (torrent, ZIP).
Note: If any of the following steps don’t match your experience and you get stuck, perhaps there will be an update to the official NOOBS setup guide. - Download and install SD Formatter 4.0 for Mac. Released January 30, 2013. Direct link: SDFormatter_4.00B.pkg (implies agreement to terms)
- Insert 16GB SD card into eSecure All-in-1 USB Card Reader for all Digital Memory Cards, and if a drive mounts in OSX, confirm it is empty, note the name for next step, and eject it.
-
Format the SD card:
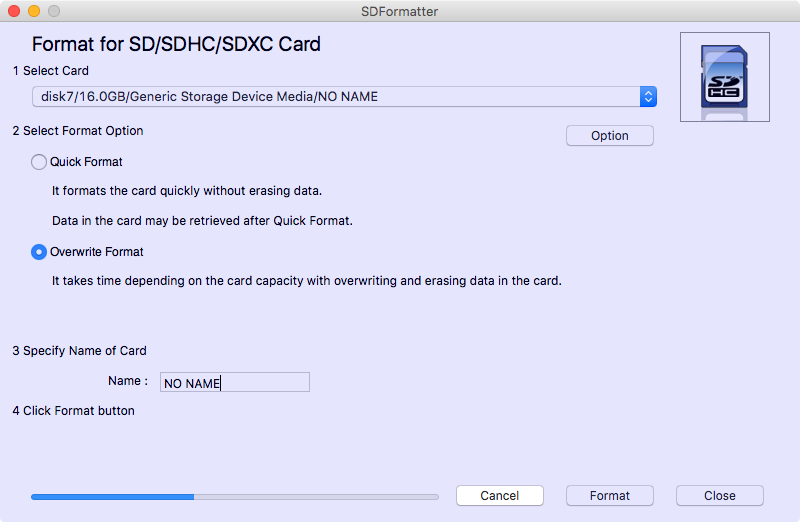
- Open SDFormatter.
- Select card with the name matching what you noted in the previous step. If nothing mounted, perhaps there was no partition on the card. It may be called “NO NAME” or something generic. If only one SD card is plugged into your computer, probably there will only be one item in the drop down menu, somewhat narrowing your chances of deleting data. ;-)
- Select format option “Overwrite Format”.
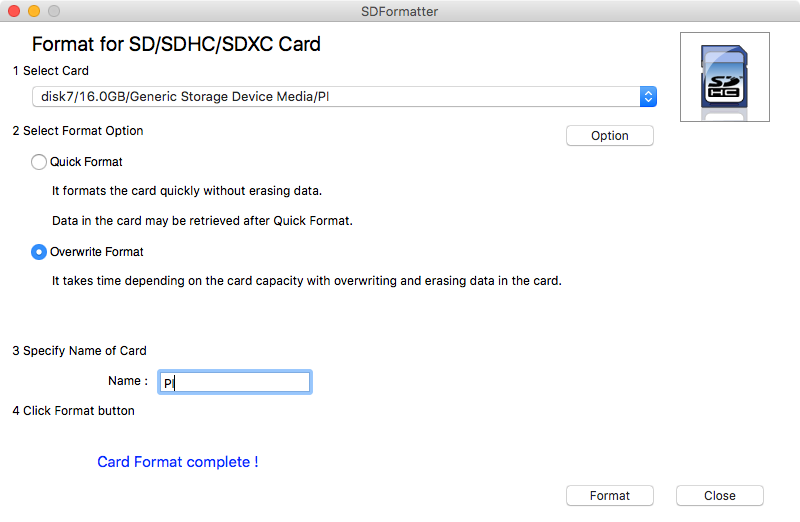
- If desired, give the card a name like
PI. - Click the “Format” button.
- Wait till the “Card Format complete !” message displays.
-
Copy all files from within extracted NOOBS folder to root of newly formatted SD card. Assuming you downloaded the ZIP file to your standard downloads folder:
-
Using graphical interface, go to your downloads folder and right click the file named something like
NOOBS_v1_9_0.zipand extract it. A new folder by the same name, likeNOOBS_v1_9_0, should appear. Open it. Select all the files (Command+A) and then drag them to the SD card, which you might have namedPI. -
Using Terminal:
cd ~/Downloads mkdir tempnoobs unzip NOOBS*.zip -d tempnoobs if [ -d "/Volumes/PI" ]; then; cp -a tempnoobs/* /Volumes/PI; rm -rf tempnoobs; else; echo "SD card is either not plugged in or not called PI"; fi; -
Eject the SD card and insert into Raspberry Pi.
- Plug in monitor via HDMI.
- Plug in keyboard and mouse via USB. If the keyboard and mouse are a wireless duo with a single USB dongle, just plug that little one guy in.
- Plug in the power, and wait for the Pi to boot.
- Once the operating system selection screen appears, select Raspbian (top option) and click the install icon at the upper left.
- Wait for the install to finish. I came back after an hour, but maybe the newer Pis are faster.
- Open the Raspberry Pi configuration menu if it doesn’t automatically open, and set your basic settings like time zone, etc., if desired. Most importantly, set a password. Otherwise the default will be
raspberry. (I’m wishing I wrote this as I was setting it up, and could be explicit about what I did. Perhaps I’ll give it another run through and update this!) - The next steps could be done via Terminal directly on the Raspberry Pi, but I preferred to do it over SSH from my main computer, which requires finding the Raspberry Pi’s IP address.
- Get the Pi’s IP address from your router’s LAN or similar page, where you might see a recent device in the DHCP list that says Raspberry Pi or similar. You could possibly also find the IP address by using the “LAN neighbors” tool in the Android app Wifi Analyzer.
- From a terminal session on your main computer, type
ssh pi@RASP_PI_IP_ADDRESSand hit enter. Enter the password you set, orraspberryif you didn’t set one. - Run the following commands:
sudo apt-get update
sudo apt-get upgrade -y
sudo rpi-update
sudo reboot
Install Smokeping
The rest assumes you know how to work with command line text editors. See RaspberryPi (rPi) - Smokeping Setup and Configuration for more key by key instructions. Note you’ll still have to adapt the config files to match what you want to monitor.
-
Install the packages for
smokepingandsendmail.sudo apt-get install -y smokeping sendmail- Set up the config files in
/etc/smokeping/config.d/similar to these:
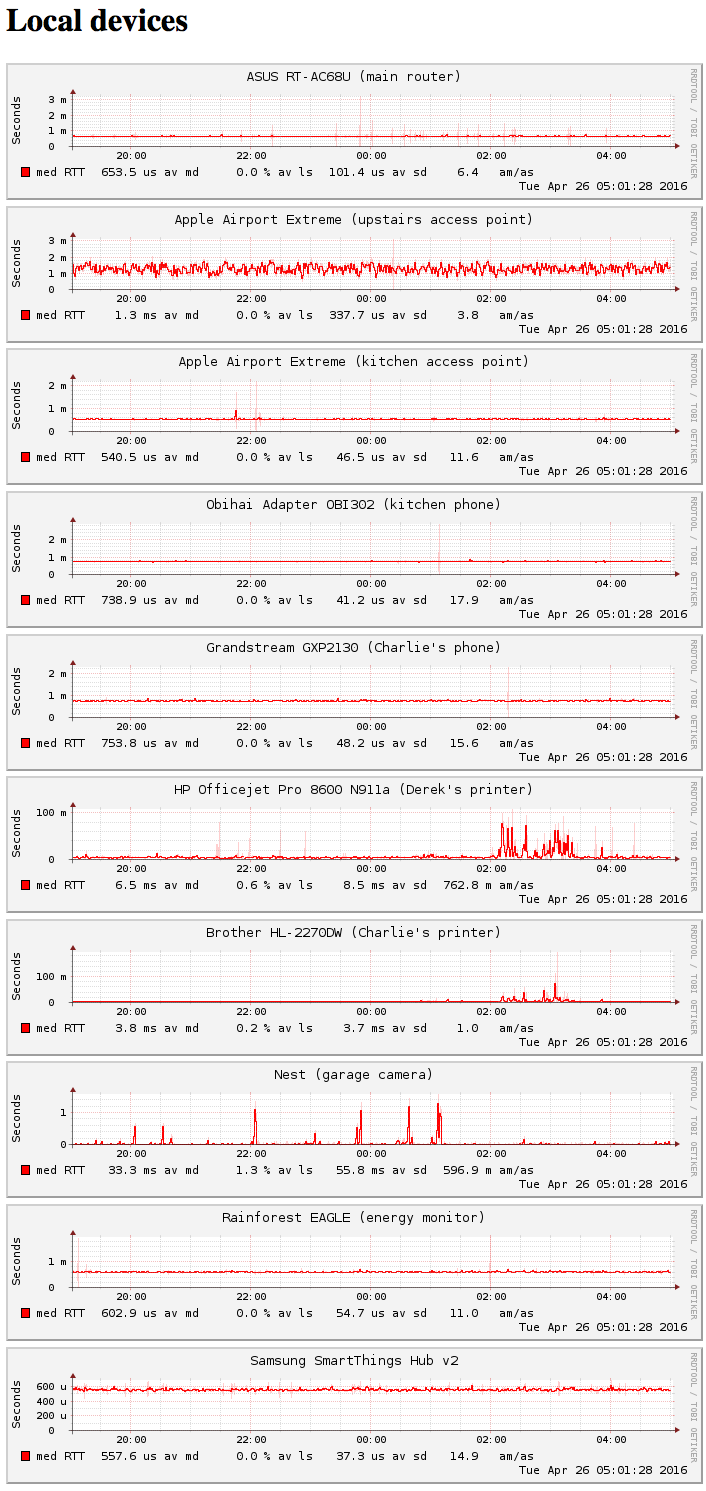
Probes:*** Probes *** + FPing binary = /usr/bin/fping blazemode = true ++ FPingLow step = 300 pings = 10 ++ FPingHigh step = 60 pings = 5 +EchoPingDNS binary = /usr/bin/echoping step = 120 pings = 5 +EchoPingHttp binary = /usr/bin/echoping step = 900 pings = 3General:*** General *** owner = Charlie Gorichanaz contact = charlie@gorichanaz.com #mailhost = # NOTE: do not put the Image Cache below cgi-bin # since all files under cgi-bin will be executed ... this is not # good for images. cgiurl = http://192.168.1.98/smokeping.cgi # specify this to get syslog logging syslogfacility = local0 # each probe is now run in its own process # disable this to revert to the old behaviour # concurrentprobes = no @include /etc/smokeping/config.d/pathnamesAlerts:*** Alerts *** to = charlie@gorichanaz.com from = charlie@gorichanaz.com +hostdown type = loss pattern = >60% edgetrigger = yes comment = Host is OFFLINE +someloss type = loss # in percent pattern = >0%,*12*,>0%,*12*,>0% comment = loss 3 times in a rowTargets:*** Targets *** menu = Top title = Raspberry Pi Internet Access Monitor remark = Latency to a few select sites and services in the Internet. probe = FPingHigh + Local menu = Local devices title = Local devices ++ Router menu = Router title = ASUS RT-AC68U (main router) host = 192.168.1.1 alerts = hostdown + Internet menu = Internet title = Internet Access (Ping) ++ gdns title = Google public DNS menu = Google public DNS probe = EchoPingDNS dns_request = www.google.com host = 8.8.8.8 ++ comcast title = Comcast DNS menu = Comcast probe = EchoPingDNS dns_request = www.google.com host = 75.75.75.75 ++ Google title = Google menu = Google probe = FPingLow host = www.google.com ++ FB title = Facebook menu = Facebook probe = FPingLow host = www.facebook.com ++ Yahoo title = Yahoo menu = Yahoo probe = FPingLow host = www.yahoo.comYou can add any number of sections or items in a section, but I thought it made sense to group the local devices and the outside Internet stuff so I could see all the relevant graphs on one page.
- The names next to
++can’t have spaces or special characters, it seems. (Need to confirm in docs.) menuis what the text link will say in the left sidebar of the web page.titleis what gets embedded in the graph images themselves.- Since I configured a
FPingHighandFPingLowprobe, you can choose which gets used by adding aprobe =line in each option. Otherwise the one defined at the top of the file is the default. (Or at least is the default until another is defined. Strictly speaking, I haven’t confirmed if specifying a different one is for that item only or until a new one is specified and would affect all following.) - Change the
comcastsection to match your ISP, or just remove the section entirely. alertsmatches something set up in theAlertsfile. If you don’t care for alerts, just remove those lines and don’t worry about theAlertsfile.- Confirm the config is valid by running
sudo smokeping --check, which should return:
Configuration file '/etc/smokeping/config' syntax OK.1. Reboot:sudo reboot - Set up the config files in
According to the guide I used, it should be working now and accessible at http://RASP_PI_IP_ADDRESS/cgi-bin/smokeping.cgi, but mine wasn’t. Perhaps the default Apache web server configuration is different now compared to when my source guide was written. I had to do the following:
- Edit as root
/etc/apache2/sites-enabled/000-default.conf. Just after theDocumentRootline in the<VirtualHost *:80>block, add these lines:Alias /smokeping/ /var/cache/smokeping/ <Directory "/var/cache/smokeping/"> Require all granted </Directory>-
Run these commands:
sudo a2enmod cgi sudo service apache2 restart
-
Then I was able to view the Smokeping web page just fine.
To confirm Smokeping is set up to run automatically after booting, run the command sudo systemctl status smokeping.service and you should see some lines like this, followed by 10 lines of log messages:
    ● smokeping.service - LSB: Start or stop the smokeping latency logging system daemon
       Loaded: loaded (/etc/init.d/smokeping)
       Active: active (running) since Sun 2016-04-24 01:41:08 PDT; 16h ago
      Process: 433 ExecStart=/etc/init.d/smokeping start (code=exited, status=0/SUCCESS)
       CGroup: /system.slice/smokeping.service
               ├─ 708 /usr/bin/perl /usr/sbin/smokeping --config=/etc/smokeping/config
               ├─3386 /usr/sbin/smokeping [EchoPingDNS]
               └─3387 /usr/sbin/smokeping [FPing]
Make sure it shows Active: active (running).
Configuring master-slave Smokeping
Warning: See section at bottom for additional info about master-slave mode. I ended up redoing a bunch of this while troubleshooting, and haven’t the energy to fix it from the beginning. Hopefully the notes will help.
As mentioned at the top, I wanted the Smokeping webpages to load more quickly, so I installed Smokeping on my web server and set it up as the master to control a slave instance that is my Raspberry Pi, which was previously it’s own master. (This way I won’t be able to view the graph updates if my home Internet is down, but generally that’s fine.)
See the smokeping_master_slave documentation for an overview.
You’ll need the Pi’s hostname, which you can get by running cat /etc/hostname from the Pi. I set mine to charlie_pi during the setup phase. Use this in place of PI_HOSTNAME below. Possibly you can skip this and set the name manually on the Pi in /etc/default/smokeping by uncommenting the SLAVE_NAME line, but I haven’t checked this.
You’ll also need to set a secret string and put it on both servers. Use it in place of RANDOM_STRING_A below. I typically generate a random one.
On my web server running Ubuntu 14.04.3 LTS, I did:
sudo apt-get update
sudo apt-get install -y smokeping
Copy the configuration files Targets, Probes, Alerts and General from the Pi’s /etc/smokeping/config.d/ directory, or set them up identically, and then make the following files match this:
/etc/smokeping/config.d/Slaves:
*** Slaves ***
secrets=/etc/smokeping/smokeping_secrets

+charlie_pi
display_name=Haight Network Monitor
color=ff0000
/etc/smokeping/smokeping_secrets:
PI_HOSTNAME:RANDOM_STRING_A
Make sure smokeping_secrets will be readable by whatever user executes the CGI. This might be www-data, but for me it’s charlie since I use Suexec to execute each user’s scripts as themselves. So I had to run:
chown charlie:charlie /etc/smokeping/smokeping_secrets
If you don’t do that, you might get errors like:
WARNING: Opening secrets file /etc/smokeping/smokeping_secrets: Permission denied
Then edit /etc/smokeping/config.d/Targets to add this line just below *** Targets ***:
slaves = PI_HOSTNAME
Set up the CGI bin such that you can view smokeping.cgi. Since I already have a CGI setup, I just copied the /usr/lib/cgi-bin/smokeping.cgi file to an existing CGI folder. If you’re using default Apache and haven’t enabled CGI before, you may just need to run these commands:
    sudo a2enconf serve-cgi-bin.conf
    sudo ln -s /etc/smokeping/apache2.conf /etc/apache2/conf-enabled/smokeping.conf
    sudo service apache2 reload
If that doesn’t work, search for a guide to enabling CGI specific to your setup and review the contents of /etc/smokeping/apache2.conf to see what you might need to include in your Apache configuration.
Copy that secret string to the Pi so it can act as the slave. From within a Pi shell prompt:
    sudo su
    cd /etc/smokeping/
    echo "RANDOM_STRING_A" >> slavesecrets.conf
    chmod 600 slavesecrets.conf
    chown smokeping:smokeping slavesecrets.conf
Then edit /etc/default/smokeping.
- Change
MODE=mastertoMODE=slave - Uncomment
MASTER_URLand adjust to match your web server. - Uncomment
SHARED_SECRET=/etc/smokeping/slavesecrets.conf
Then restart Smokeping and confirm there are no errors:
sudo service smokeping restart
systemctl status smokeping.service
More notes on master-slave mode
Part of my setup was made more complicated because my web server uses suexec to run each user’s scripts as their own user, but here are some things to look out for:
Default Apache config comes with Smokeping
The default Smokeping package installation includes a bunch of files I didn’t realize were there, thanks mostly to my not noticing the apache2.conf file in /etc/smokeping.
ScriptAlias /smokeping/smokeping.cgi /usr/lib/cgi-bin/smokeping.cgi
Alias /smokeping /usr/share/smokeping/www

<Directory "/usr/share/smokeping/www">
    Options FollowSymLinks
</Directory>
This brought to my attention a number of directories required for the front end to get at some static files. When I checked /usr/share/smokeping/www, I found:
root@charlie_pi:/usr/share/smokeping/www# ls -halt
total 16K
drwxr-xr-x 2 root root 4.0K Apr 24 21:17 .
drwxr-xr-x 3 root root 4.0K Apr 24 21:17 ..
lrwxrwxrwx 1 root root   24 Nov 25 10:08 cropper -> ../../javascript/cropper
lrwxrwxrwx 1 root root   27 Nov 25 10:08 images -> /var/cache/smokeping/images
lrwxrwxrwx 1 root root   26 Nov 25 10:08 prototype -> ../../javascript/prototype
lrwxrwxrwx 1 root root   30 Nov 25 10:08 scriptaculous -> ../../javascript/scriptaculous
-rw-r--r-- 1 root root 2.8K Nov 25 10:08 smokeping-zoom.js
-rwxr-xr-x 1 root root   60 Nov 25 10:08 smokeping.fcgi.dist
I still had to copy the smokeping.cgi file into my web root due to restrictions I have in place to prevent executing scripts outside the web root, but I was able to just modify my Apache config to point to those other static files more cleanly. Since Smokeping seems to build /smokeping/ into URLs for resources, but I didn’t want Internet bots to detect I am running Smokeping on my server (or at least be able to find the CGI script), I decided to put the script in a different directory, but allow the static resources to be found through the default directory. So my Apache config looks like this (within only the virtualhost I want this accessible via):
ScriptAlias /SECRET/SECRET2.cgi /var/www/votecharlie.com/SECRET/SECRET2.cgi
Alias /smokeping /usr/share/smokeping/www
<Directory "/usr/share/smokeping/www">
  Options FollowSymLinks
</Directory>
Data files and graphs must be editable by the user the Smokeping script runs as, which is probably the web server user, or individual users in my case under suexec.
The image files get generated by the CGI script into the directory /var/cache/smokeping. The data gets stored in /var/lib/smokeping, and the static web files are in /usr/share/smokeping. I made all these owned by my own user, since my web server runs as that user for scripts in my folder. You may need to replace charlie with apache or www-data or whatever user is appropriate.
sudo chown -R charlie:charlie /var/lib/smokeping
sudo chown -R charlie:charlie /var/cache/smokeping
sudo chown -R charlie:charlie /usr/share/smokeping
As a further complication, the Smokeping daemon is run by a different user, likely smokeping. This is configurable in /etc/init.d/smokeping, though there might be a more official way to change it via /etc/default/smokeping, but I’m not sure. Anyway, when that daemon processes the configuration files, it seems to create a new folder for each grouping and an RRD file for each target within those groupings, all within /var/lib/smokeping. You’ll therefore need to let that happen first, and then change the permissions of those files to make them editable by the web server. What I ended up doing was running smokeping --config /etc/smokeping/config --debug as root, which would get those files created per the configuration file, and then I changed the permissions to let the web server write them. If you edit the configuration files in the future, you’ll have to repeat this.
Config change update
I’m putting this here for my reference, and perhaps I’ll integrate it with above later.
I moved some of the directories to within my web root so creating new targets doesn’t require any permissions silliness.
In /etc/smokeping/config.d/pathnames, I changed these lines:
imgcache = /var/cache/smokeping/images
imgurl   = ../smokeping/images
datadir  = /var/lib/smokeping
To these lines:
imgcache = /var/www/votecharlie.com/network/images
imgurl   = images
datadir  = /var/www/votecharlie.com/network/data
pagedir  = /var/www/votecharlie.com/network/pagedir
And then I ran these commands:
sudo cp -a /var/cache/smokeping/images /var/www/votecharlie.com/network
sudo mkdir -p /var/www/votecharlie.com/network/data
sudo mkdir -p /var/www/votecharlie.com/network/pagedir
sudo cp -a /var/lib/smokeping/* /var/www/votecharlie.com/network/data
sudo chown -R charlie:charlie /var/www/votecharlie.com/network
sudo service smokeping restart
Also in debugging why I couldn’t find the logs anywhere, I added this line to /etc/smokeping/config.d/General:
syslogpriority = debug
The latest mystery is I apparently need to run smokeping --config /etc/smokeping/config --debug-daemon to get the logging to work or to get new targets to work. I’m not sure why sudo service smokeping restart or service smokeping restart doesn’t seem to get the data processed for the target I tried adding after the initial setup. I also can’t be sure if logging would have been working before adding that debug line to General config, but I searched syslog and found no Smokeping messages till after these changes.
I assume if I reboot the server, I may need to run smokeping --config /etc/smokeping/config --debug-daemon again.
Thanks to:
- RaspberryPi (rPi) - Smokeping Setup and Configuration by JakeBar on Oct 17, 2014 at 12:30pm
- Initial Setup of a RaspBerryPi by JakeBar on Sep 19, 2014 at 8:04am
- Raspberry Pi Internet Access Monitor by Bernhard Suter on Saturday, May 25, 2013

