Hackintosh: ASUS Z97-A USB 3.1, EVGA GT 740 4GB
As explained in my journal, I built my first hackintosh this week. While it’s functional enough, I hope, I still have some potentially major problems with the USB ports, lowering my confidence about using an external drive to store all my data.
To start, I reviewed the Lifehacker hackintosh article by tonymacx86 as an introduction, and then looked at some of the buyer’s guides on his website to decide on parts. I picked parts that were on the lists, hoping for a frictionless install. What I ended up with was closest to the “CustoMac mATX” list. I apologize in advance I am not providing a step by step, totally detailed guide here. I didn’t realize the extent of the trial and error I was going to have to go through, so figured I would be able to recall what I did after. Little by little, I realized I should have been keeping detailed notes, but my dwindling patience led me to chug ahead and hopefully start from scratch later once I was refreshed and once I learned more. I haven’t done that yet, though, so hopefully this suffices in the interim.
Parts
I knew the motherboard and graphics card would cause me the most grief if I went off list, so I made sure to pick ones that were supposedly tested. After viewing motherboard options on Newegg, I decided I liked the ASUS z97-A/USB 3.1, and was pleased to see it on the list. I also found a guide by tonymacx86.com user whitesaab that claimed to have that motherboard mostly working. Then I picked an ATX case to fit the motherboard, chose the recommended RAM, and picked a video card also from the list. I considered not getting a video card since I don’t do any gaming, but I also thought it might be interesting to have a GPU available for any machine learning work I do in the coming months. It ended up being a good thing I got the card, as I wasn’t able to drive my 4K display at 3840x2160 without it.
- Dell Ultra HD 24 Inch 4K Monitor P2415Q
- Corsair Carbide Series Black 500R Mid Tower Computer Case (CC-9011012-WW)
- Corsair Professional Series 760 Watt ATX/EPS Modular 80 PLUS Platinum Power Supply AX760
- Thermaltake Water 3.0 Extreme S 240mm AIO Liquid Cooling System CPU Cooler CLW0224-B
- ASUS ATX DDR3 2600 LGA 1150 Motherboard Z97-A/USB 3.1 (running BIOS 2601, not quite the latest, but I can’t upgrade it yet without Windows)
- Crucial Ballistix Tactical 32GB Kit DDR3 1600 PC3-12800) UDIMM
- Intel 8M Cache Core i7-4790K Processor BX80646I74790K
- EVGA GeForce GT 740 4GB GDDR5 Dual DVI mHDMI Graphics Cards 04G-P4-3748-KR
- Crucial BX200 960GB SATA 2.5 Inch Solid State Drive - CT960BX200SSD1 (for OS X)
- Crucial BX200 240GB SATA 2.5 Inch Solid State Drive - CT240BX200SSD1 (for Windows)
- IOGEAR Bluetooth 4.0 USB Micro Adapter GBU521
- ASUS ThunderboltEX II Thunderbolt 2 Expansion Card
- Apple Thunderbolt Cable
- Mini-HDMI to HDMI Cable
Installation
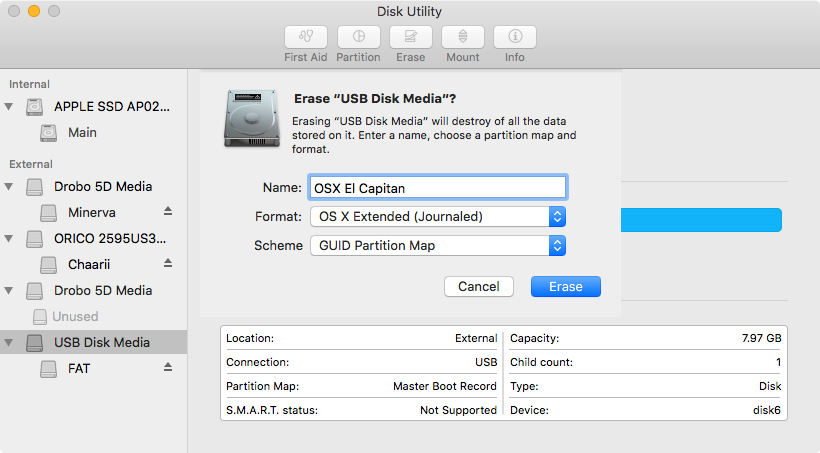
I began by following the Lifehacker article for setting up an OS X El Capitan hackintosh. Clearly the article was adapted from Mavericks or earlier, as the wrong OS name appeared in places, and some of the steps appeared twice or out of order. The Disk Utility steps would also be difficult to follow for someone already using El Capitan, as the application got a makeover (and feature reduction… “Hey RAID, baiiii!!!”). I do wish this stuff were more rigorously tested if they expect thousands of people to follow the guide…
Create installer
- On existing Mac (I used my 2015 12” MacBook), search for “El Capitan” and download. Confirm it appears in the
/Applicationsfolder, asInstall OS X El Capitan.app. - Insert 16GB (or greater) USB drive into available USB port.
- Open “Disk Utility”.
-
Lifehacker says this, but I think it is meant for Yosemite or earlier:
Highlight the USB drive in the left column and click on the Partition tab. Click Current and choose “1 partition”. Under Format choose “Mac OS Extended (Journaled)“. When it’s finished, close Disk Utility…
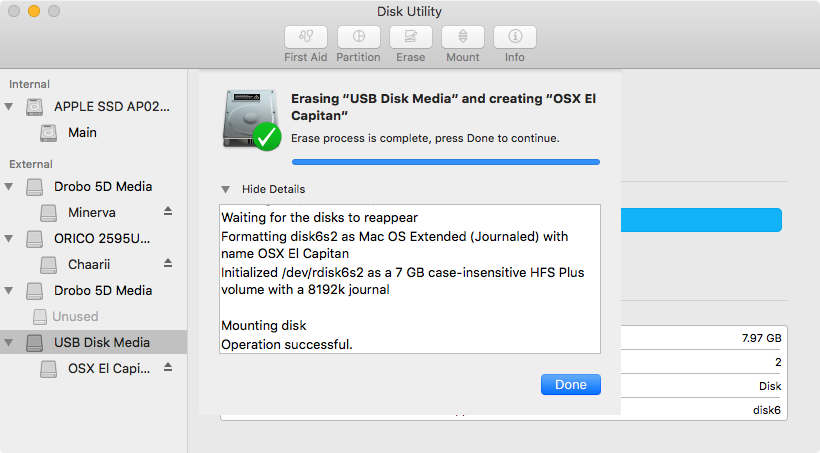
Since I have the new El Capitan Disk Utility, my instructions should have been:
- Click the USB drive in the left column.
- Click Erase.
- Enter a name like “USB” and leave the defaults for Format and Scheme. Note I used a different name, but the instructions on tonymacx86.com say to use “USB”.
- Click Erase.
- Next, run UniBeast. I used the latest,
UniBeast-6.1.1.zip.
The rest of the steps roughly matched the Lifehacker guide, but I’ll list them here for completeness.
-
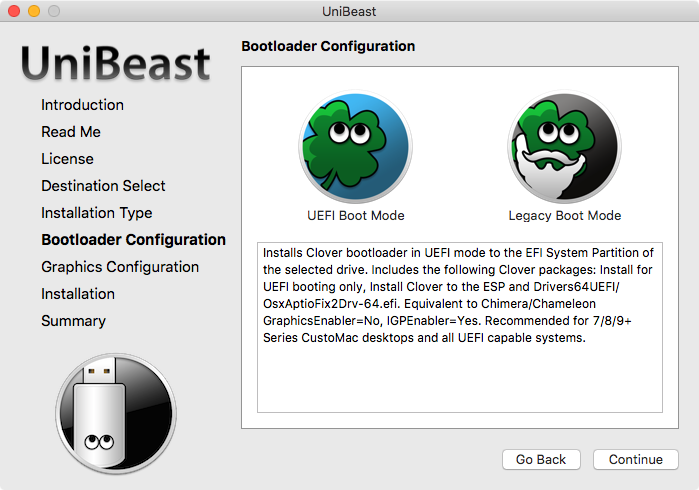
Follow the wizard on screen, choosing your USB drive when prompted, and selecting El Capitan when asked what version of OS X you are installing. Finish clicking through the wizard to create your USB drive. This should take about 10-15 minutes.
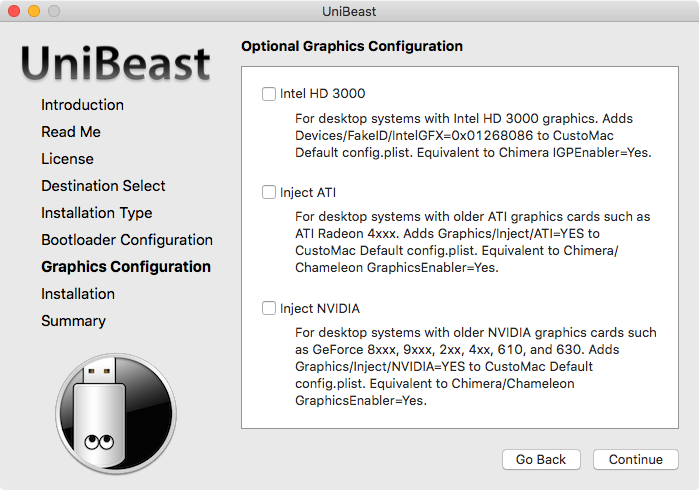
Note: I selected “UEFI Boot Mode” on the “Bootloader Configuration” screen and did not select anything on the “Optional Graphics Configuration” screen.
- Drag MultiBeast to your new flash drive so you have it for later. I used the latest,
MultiBeast-El-Capitan-Edition-8.0.1.zip, and extracted the files to a folder within the new USB drive.
Configure UEFI before installing
When I first powered on the computer, I couldn’t get anything to display on screen using any of the display ports on the motherboard, and I couldn’t find a proper cable for the video card and my display, so I first unplugged the video card and proceeded as if I didn’t have one. Perhaps the steps about switching to CPU graphics wouldn’t be necessary with the proper cables from the start. There’s also a nv_disable=1 Clover boot option that might help boot before the drivers are installed, if they are needed, which I am not certain of in my case.
- Power on system and hit DEL or F2 a few times to enter configuration, which is now called “UEFI” instead of “BIOS” as in the past, even though the ASUS downloads page says “BIOS”, so I’m a little unsure.
- Hit F7 to enter advanced mode, navigate to Exit tab, select Load Optimized Defaults and confirm.
-
Navigate to Boot tab, and enter the Secure Boot submenu. Change the OS Type from “Windows UEFI mode” to “Other OS”. If Secure Boot state is “Enabled”, enter the Key Management submenu and clear the default keys. (This is not modified or restored apparently when running the Load Enhanced Defaults function.)
Note VT-d and CFG-Lock should be already disabled, but mentioning this here because guides explicitly said to disable these, and I want to be clear they were disabled.
-
Navigate to the Advanced tab, enter the System Agent Configuration submenu, enter the Graphics Configuration submenu, and set Primary Display to “CPU Graphics”.
- Exit and save, and then power off the computer.
- Replace the graphics card that was previously unplugged. Now it can be plugged in but the system will still use the integrated graphics. Maybe the graphics card could be used with appropriate flags, but it would need more testing. I didn’t have the proper cable at this point.
Install OS X El Capitan
- Insert installer USB drive into hackintosh and power on. I used the USB 3.0 port closest to the power button on the case front.
- The Clover boot screen appears, and automatically boots into the “External” disk, which is the USB installer. The SSD probably showed up also, but wasn’t selected by default.
- Select “English”, then open the Utilities menu at the top and select Disk Utility. Follow the same process used for the USB drive, but for the SSD to install OS X onto. Again, Lifehacker doesn’t say a specific name is necessary, but tonymacx86.com says to call it “El Capitan”. I think I accidentally called mine “Main”.
- Close Disk Utility, and continue the installation.
Install drivers
- Once booted into OS X El Capitan, open MultiBeast from the USB drive.
- Click the Quick Start tab and click UEFI Boot Mode.
- Click the Drivers tab.
- Click Audio, then click the arrow byRealtek ALCxxx, select “ALC892”. I may have also selected “Optional HD 4600 HDMI Audio”, but I’m not sure now.
- One time I selected all three in the Disk section (“3rd Party SATA”, “3rd Party eSATA” and “Intel Generic AHCI SATA”), but I’m not sure if I did on my latest build.
- Click Misc, then select both “FakeSMC Plugins v6.18.1394” and “FakeSMC HWMonitor Application v6.18.1394”. I’m not sure these are necessary, but I think they put a fancy hardware monitor app in the applications folder.
- Click Network, then select both items under Intel, “AppleIntelE1000e v3.2.4.2” and “AppleIGB v5.2.9.4”. Again, I’m not sure if these are necessary.
- Click the Bootloaders tab and select “Clover v2.3k r3320 UEFI Boot Mode”. Note I later upgraded to 3330 via the Clover Configurator tool.
- Click the Build tab and click Install.
-
Regarding graphics drivers, it seemed like I shouldn’t need anything special based on the tonymacx86.com site stating: > All of the GeForce ‘Maxwell’ based graphics cards listed here besides the GeForce ‘Kepler’ based GT 740 require alternate NVIDIA graphics drivers to enable full acceleration. See here for details.
Elsewhere I found someone mention they needed to install the web drivers from NVIDIA even though they had one of the cards that didn’t need it, and after installing, they aren’t able to enable “NVIDIA Web Driver” from the NVIDIA Driver Manager under System Preferences, but rather after rebooting, “OS X Default Graphics Driver” is still selected. This is what I am seeing also, but I can’t confirm installing the web drivers was necessary in the first place. Perhaps I’ll have time to rebuild sometime and confirm… 8. Restart the computer. 9. Change Primary Display back to “Auto” in the UEFI Advanced tab under System Agent Configuration > Graphics Configuration.
Pull hair out over USB problems
This is where I started running into real trouble, just when I thought I was so close.
The keyboard and Bluetooth mice were working fine plugged into the Dell monitor USB hub, and some other devices such as my Samson Meteorite microphone and FiiO E10K digital audio converter were working fine plugged into a Anker USB 3.0. Both these hubs were plugged into the USB 3.0 ports on the motherboard adjacent to the Ethernet jack.
My Drobo, which stores all my data, was plugged into a USB 3.0 port just above where the hubs were plugged in. It was not showing up. Since some of my devices worked, I thought this was a problem with the Drobo, but then I tried some USB drives, and none showed up. After some more research, I found out people were having issues with specific ports. When I tried the Drobo plugged into the same port I had the installer USB key in, it eventually showed up. (Actually, it didn’t at first, but I later realized I had accidentally knocked two of the drives out and messed up my Drobo. It’s currently in the 80+ hour process of reshuffling data because of this screwup on my part.) Once it showed up, I couldn’t access it, and things were getting strange.
This is when I dove into the absurdly complicated world of troubleshooting USB on a hackintosh. Had I known I was going to have to go down this road at the beginning, I probably wouldn’t have started at all!
First, while trying to make sure I followed the one guide for my exact motherboard, I downloaded Clover Configurator and used that to mount my EFI and then update Clover from version 3320 to 3330, which gave my boot screen a lovely Christmas skin. After that update, I was not able to use the keyboard on the Clover screen, but luckily it can boot automatically to my SSD’s OS X installation.
I’m no longer sure on the sequence of modifications I tried in troubleshooting USB. I basically tried to follow the tonymacx86.com post by RehabMan called “[Guide] 10.11+ USB changes and solutions“. What I think I finally settled on was:
- Do the
EHCx->EH0xrename. - Install
FakePCIID_XHCIMux.kextandFakePCIID.kext. - Install
USBInjectAll.kextand use kernel flag-uia_exclude_xhc. This will enable the USBInjectAll port injectors for EH0x and the associated hubs, overriding the built-in hub port injectors, but keep DSDT control of XHC. - Did not try but might need to look into: > Your DSDT may be disabling USB3 due to improper Windows emulation. Apply the XOSI fix to address this.
I tried the port limit patch, but I am pretty sure that made my drives inaccessible, or at least it took an extremely long time for the system to recognize them. I was getting pretty frustrated at this point and just wanted to get one of the ports partially working, so I went back to the user submitted guide for my motherboard and applied only the changes he had, which is what I said above.
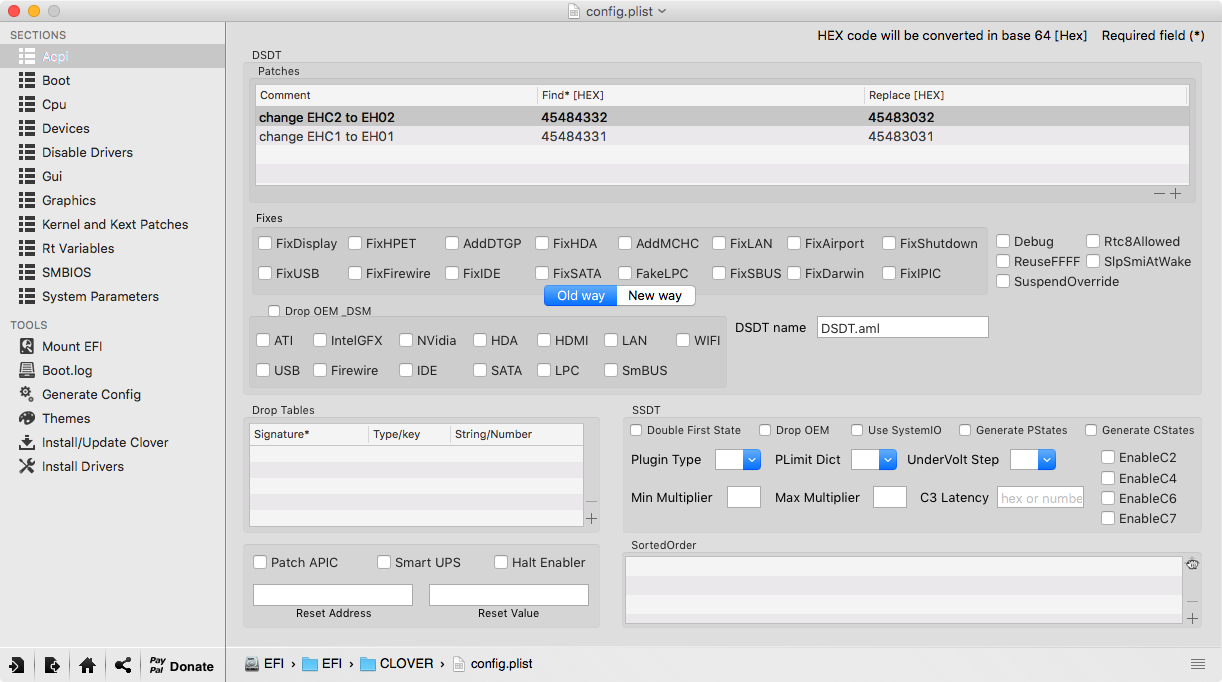
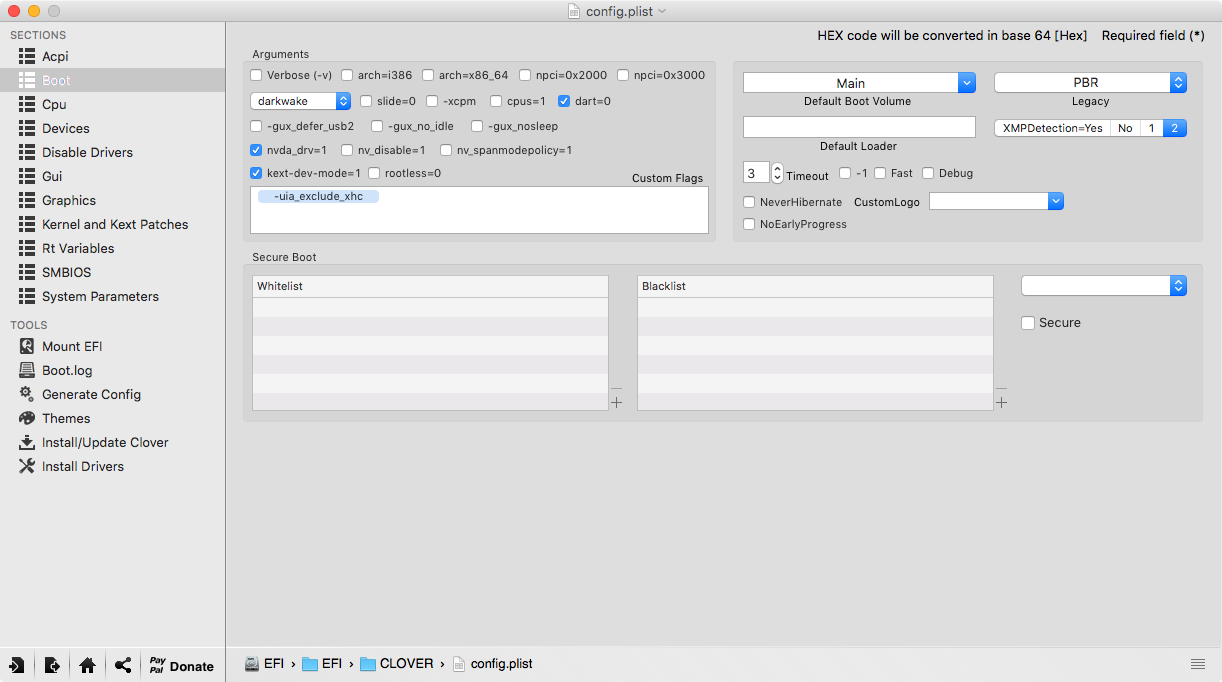
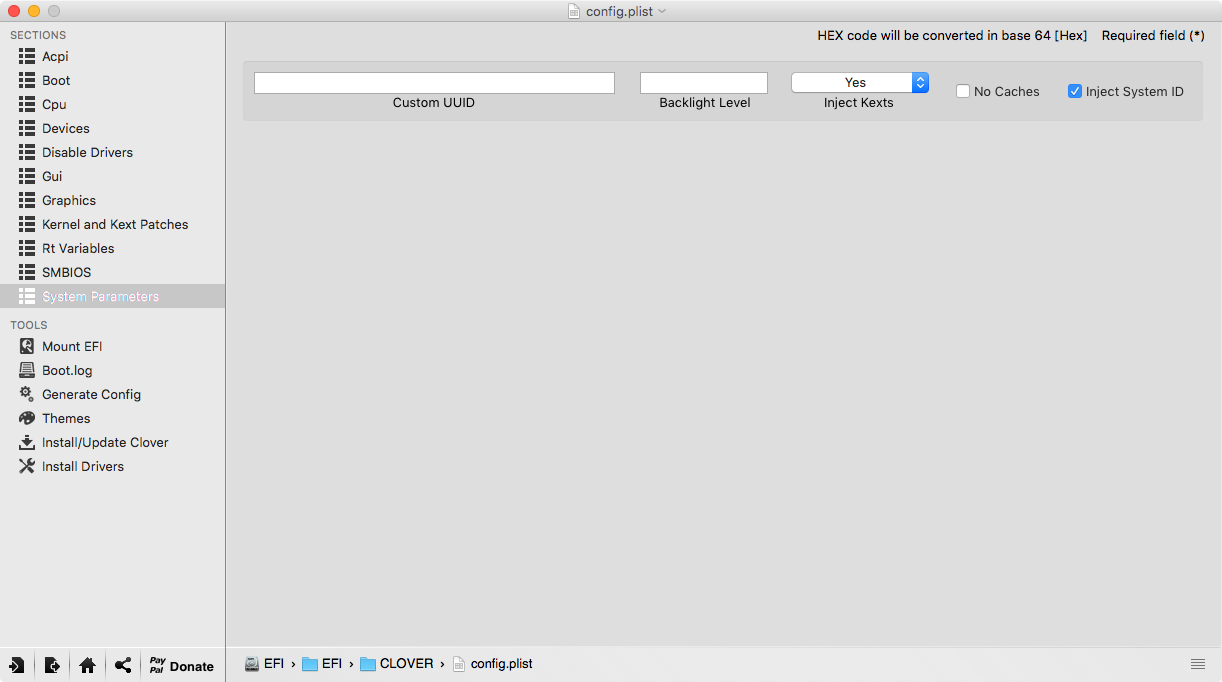
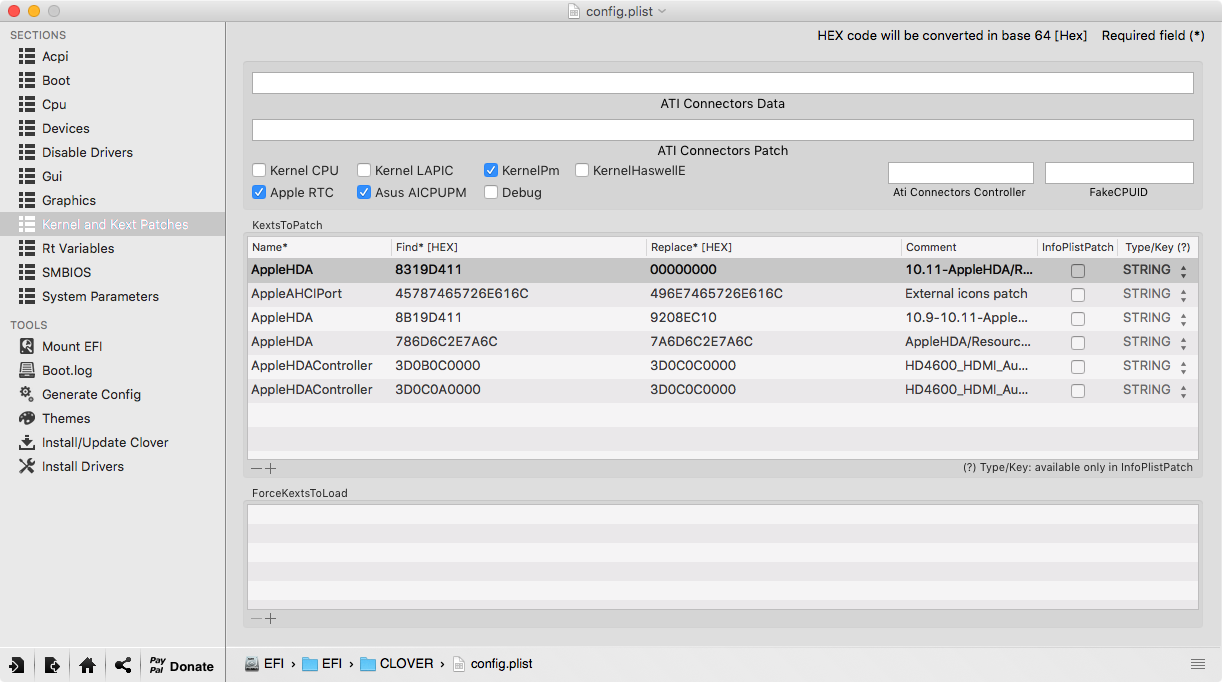
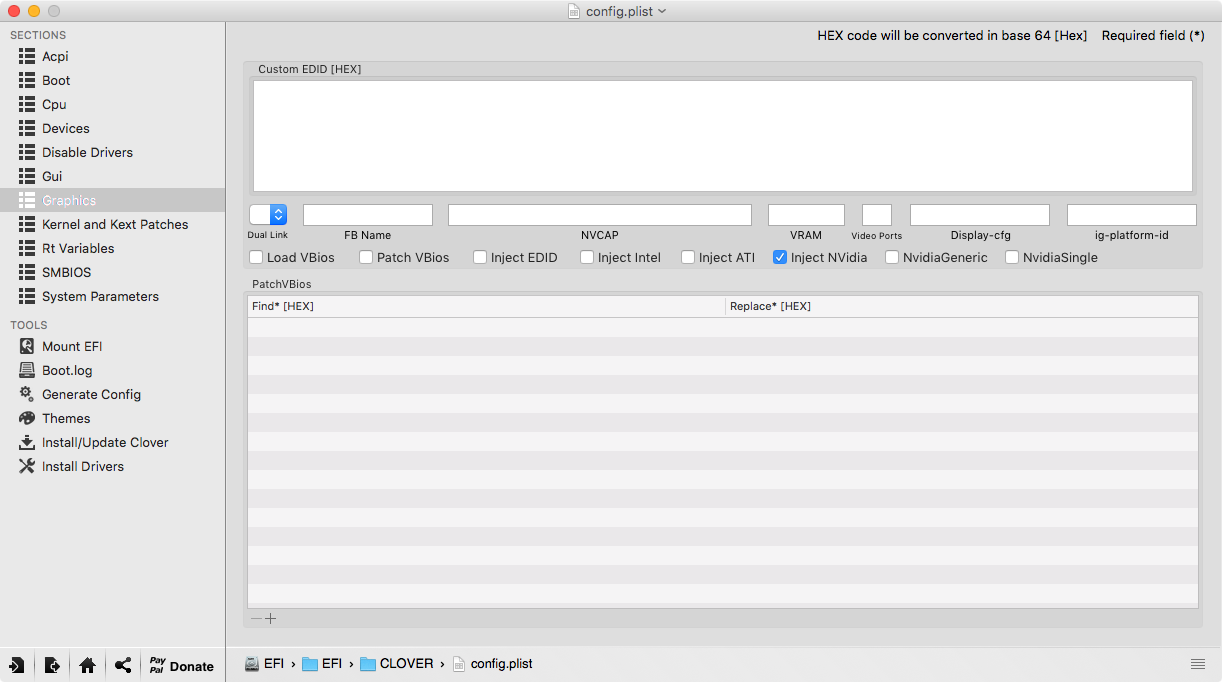
Here are screenshots of my current Clover configuration as displayed by Clover Configurator, ignoring some screens where I am pretty sure there are no relevant changes:

As I said at the top, the system seems to be functioning currently. I’ve had a couple issues so far, but I’m not sure they were due to OS X.
- One problem I had was enabling FileVault, which I didn’t know was not supported on hackintosh. I tried to solve it by command line, but the system wouldn’t boot for some reason, and I ended up needing to start over, hence some of my confusion above about which options I used.
- Another problem occurred when I tried to use Parallels 9 to boot my Windows 7 image. That might have been because Parallels claims El Capitan is not compatible with Parallels 9 and I have to pay them $50-100 to upgrade to version 11.
- In Adobe Lightroom, I can’t seem to use the Athentech PerfectlyClear plugin without crashing, so I just have to edit in Photoshop.
My biggest concern right now is the USB situation. I could survive if certain ports don’t work, but even with the ports I have working, my Drobo is acting strange. It is still doing the internal data reshuffling due to my accidentally dislodging two of the hard drives, so that could be part of this. But generally I have weirdness in Finder, even when opening local folders. Sometimes it takes a few seconds for the contents to show up. When I view the USB devices in the System Information utility, sometimes the Drobo appears under USB 3.0 Bus and sometimes under USB 2.0 Bus. I thought these corresponded to different headers on the motherboard, so I’m not sure why it would change sometimes when the Drobo is plugged into the same USB port on the case.
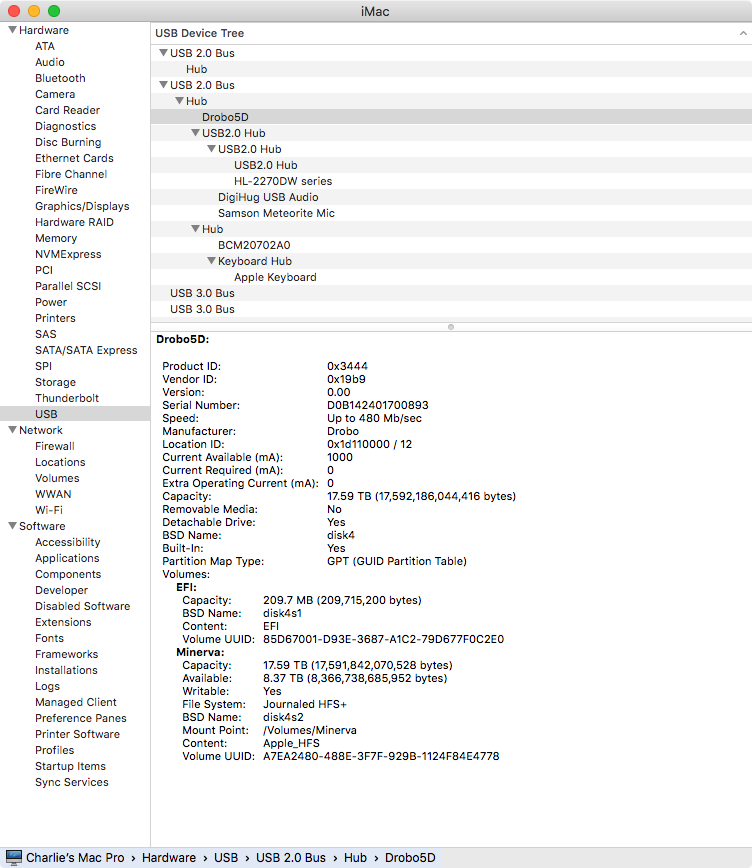
System Information: USB" class="mt-image-none" height="868
For good measure, this is my “About This Mac” screen. I’m not sure why the graphics card lists “0MB”, or why the System Information screen above says “iMac” in the title bar, but the screen below shows “Mac Pro”. I may have inadvertently screwed up some Clover settings upon install.
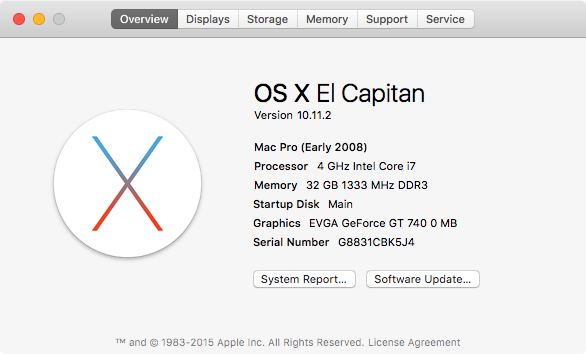
About This Mac" class="mt-image-none" height="354
Update: I may have all the ports working now (except the USB 3.1 ports on the back?) but I need to do more thorough testing. It seems the missing piece for me was mentioned at [SUCCESS] lewys’s build: El Capitan - GA-Z97X-UD3H - i5 4690K - 16GB RAM - GTX 970 - 256Gb SSD - BCM94360CD WiFi/Bluetooth:
- Open Clover Configurator (Mount EFI and open your
config.plist)- Go to Kernel and Kext Patches
- Add patch:
Name:
AppleUSBXHCIPCI
Find:83BD8CFEFFFF10
Replace:83BD8CFEFFFF16